How to Remove Water Stains From Brushed Nickel Faucets Quickly and Safely
To quickly and safely remove water stains from brushed nickel faucets, use a soft microfiber cloth with mild soap and water or a 50/50 mixture of white vinegar and water. Apply the solution briefly, then rinse and dry following the grain of the finish. For stubborn spots, a gentle baking soda paste and a soft brush can be effective. Avoid using abrasives, acids, ammonia, or prolonged contact with cleaning agents to protect the faucet’s finish. For additional practical tips and deep-cleaning steps, continue reading.
What Causes Water Stains on Brushed Nickel Faucets
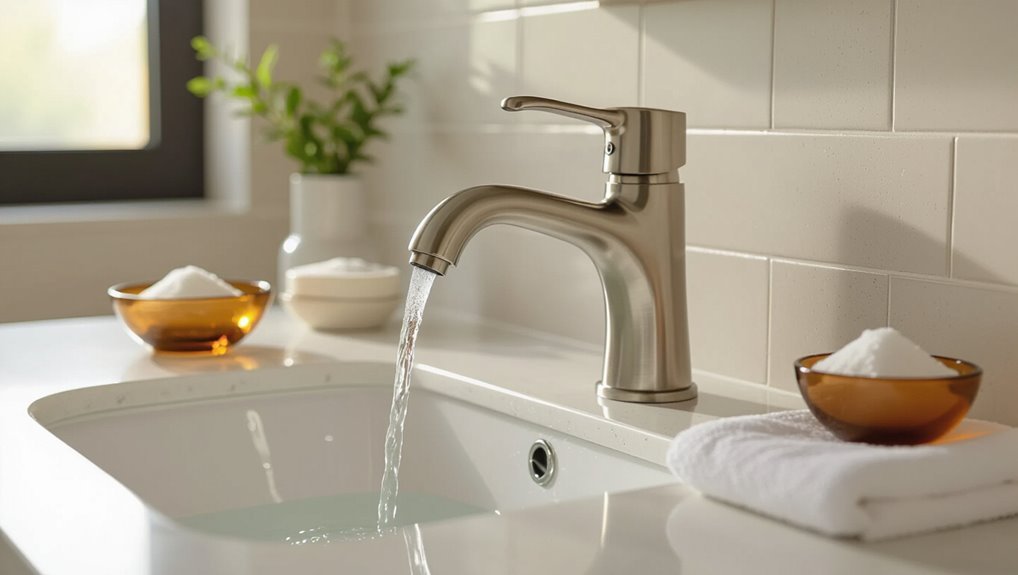
Brushed nickel often shows water marks that are either mineral deposits or soap scum, which can be distinguished because minerals leave chalky white rings while soap scum appears filmy and streaky.
The satin texture of brushed nickel masks scratches but can trap deposits, making spots more noticeable than on polished finishes.
Factors such as hard water, poor ventilation, and irregular cleaning routines accelerate buildup and worsen staining.
Mineral deposits vs. soap scum: how to tell the difference
How can one distinguish mineral deposits from soap scum on a brushed nickel faucet?
Mineral deposits appear as chalky, white or cloudy buildup that resists simple wiping; soap scum is filmy, often grayish and slippery.
A vinegar test dissolves minerals quickly, while soap scum needs detergent or scrubbing.
Proper diagnosis guides how to remove water stains from brushed nickel faucets safely and effectively.
Why brushed nickel shows spots differently than polished finishes
Highlighting microscopic texture and protective coatings, brushed nickel reacts with water and mineral residues in ways that polished finishes do not.
Its fine directional grain traps thin mineral films and diffuses light, making dull spots more visible while minimizing mirror-like streaks.
Protective lacquers can wear unevenly, altering wetting and promoting localized discoloration that appears different from uniform polishing marks.
Common household factors that accelerate staining (water hardness, ventilation, cleaning habits)
Although largely aesthetic, water stains on brushed nickel are driven by a handful of household conditions: mineral-rich water deposits more quickly in hard-water areas, poor ventilation prolongs surface dampness and allows residues to concentrate, and inconsistent or inappropriate cleaning leaves films and soaps that react with the finish.
Faucets in low-traffic bathrooms accumulate deposits faster; acidic cleaners or abrasive pads worsen etching, accelerating visible staining.
Quick Safe Methods to Remove Water Stains from Brushed Nickel
For quick, safe removal of water stains from brushed nickel, start with an immediate wipe-down using a soft cloth to prevent mineral buildup.
For fresh or light stains, a mild soap-and-water wash or a simple vinegar solution (dilute equal parts vinegar and water, applied briefly and rinsed) works well, while stubborn spots respond to a gentle baking soda paste rubbed with a soft cloth.
All treatments should be rinsed thoroughly and dried to protect the finish.
Immediate wipe-down technique for fresh spots
Acting quickly prevents mineral deposits from setting into brushed nickel, so an immediate wipe-down with a soft, lint-free cloth is the safest first response to fresh water spots.
The technique involves gentle strokes, following the grain, and drying thoroughly to avoid streaks.
- Use clean, lint-free cloth
- Wipe along finish grain
- Apply light pressure only
- Finish by buffing dry
Vinegar-based quick solution: recipe and
Mix a gentle, effective solution by combining equal parts white vinegar and water in a spray bottle; the mild acidity breaks down mineral deposits on brushed nickel without harming the finish when used sparingly.
Lightly mist stains, wait 1–2 minutes, wipe with a microfiber cloth, then rinse and dry thoroughly to prevent residue.
- Spray
- Wait
- Wipe
- Rinse and dry
Mild soap and water method for everyday maintenance
After using a vinegar spray for occasional mineral buildup, a gentler routine of mild soap and water prevents new stains without risking the finish.
The method involves soft cloths, diluted dish soap, lukewarm water, and gentle drying to avoid spots.
- Mix a few drops of mild soap with warm water.
- Wipe with a soft microfiber cloth.
- Rinse with clean water.
- Dry thoroughly with a lint-free towel.
Using baking soda paste for stubborn spots: safe application
For stubborn water stains on brushed nickel, a gentle baking soda paste offers effective, nonabrasive cleaning when applied carefully.
- Mix baking soda with water into a soft paste.
- Apply with a soft cloth or sponge; avoid scrubbing harshly.
- Let sit 5–10 minutes, then rinse thoroughly with warm water.
- Dry and buff with a microfiber cloth to restore the brushed finish.
Step-by-Step Deep-Clean Process for Stubborn Stains
Before any aggressive cleaning begins, the finish should be assessed and a small, inconspicuous spot tested to confirm compatibility with chosen products.
A concise list of materials and tools will follow, then a clear, sequential procedure that tackles buildup without harming metal or coatings.
The section closes with precise rinsing and drying instructions to remove residue and prevent repeat staining.
Assessing finish and spot-testing before treatment
While evaluating a faucet’s finish and spot-testing products, the cleaner should identify the metal type and any paint, plating, or protective coating.
Then choose a mild, nonabrasive cleaner compatible with that finish.
Next, test the chosen product on an inconspicuous area, wait recommended dwell time, inspect for discoloration or texture change, and proceed only if the finish remains intact.
Materials and tools needed
One set of readily available supplies and a few specialty items will cover most stubborn faucet stains: soft microfiber cloths, nonabrasive sponges, cotton swabs, a soft-bristled toothbrush, mild liquid dish soap, white vinegar, baking soda, a spray bottle, rubber gloves, and a plastic putty knife or nylon scraper for mineral buildup; for plated or delicate finishes, include a pH-neutral metal polish and manufacturer-recommended cleaners.
- Microfiber cloths and sponges
- Toothbrushes and cotton swabs
- Vinegar, baking soda, soap, spray bottle
- Gloves, scraper, pH-neutral polish
Detailed step-by-step cleaning procedure
Begin by assembling the prepared supplies and testing the cleaning solution on an inconspicuous spot to verify compatibility with the faucet’s finish; this organized approach prevents damage and guarantees efficiency before tackling persistent mineral deposits.
Apply solution to affected areas, allow dwell time per instructions, agitate gently with a soft brush or cloth, repeat for remaining spots, then neutralize any residue with an appropriate mild agent.
Rinsing and drying correctly to prevent residue
After neutralizing and loosening mineral deposits, attention shifts to thoroughly rinsing and drying the faucet to remove cleaning residues that can cause streaks or new spots.
Rinse with warm running water, using a soft cloth to dislodge loosened particles.
Pat dry immediately with a microfiber cloth, following the grain of the finish.
Inspect for remaining residue and repeat spot-rinse if necessary.
Commercial Products and When to Use Them
When stains resist home remedies, commercially formulated cleaners can offer targeted solutions, with mild, pH-neutral or non-abrasive products generally safest for brushed nickel.
Labels should be read carefully to avoid harsh acids, bleach, or abrasive particles that can damage finish.
The article will compare ingredient lists and effectiveness against DIY options to help decide when a store-bought cleaner is worth using.
Types of cleaners safe for brushed nickel
Several commercial cleaners are formulated specifically for brushed nickel, offering effective stain removal while preserving the finish.
Suitable options include gentle, nonabrasive sprays, pH-neutral foams, polish wipes with protective agents, and mild gel cleaners for vertical surfaces.
Choose based on stain severity and accessibility; test inconspicuously first.
- Nonabrasive spray
- pH-neutral foam
- Protective polish wipes
- Mild gel cleaner
How to read labels: ingredients to avoid
Choosing a suitable commercial cleaner for brushed nickel is only part of the task; reading the label carefully prevents accidental damage.
Users should avoid acids (hydrochloric, sulfuric), strong alkalis, bleach, and ammonia, which strip finishes.
Watch for “abrasive” or “scrubbing” warnings and phosphates that etch metal.
Prefer nonionic surfactants and pH-neutral formulas, and follow dilution and contact-time instructions precisely.
Comparing DIY vs. store-bought effectiveness
Although both homemade remedies and commercial cleaners can remove mineral deposits, their effectiveness depends on stain severity, faucet finish, and user technique. DIY solutions suit light buildup and delicate finishes; commercial products work faster on heavy stains but require caution. Choose based on damage, time, and label safety.
| Option | Best for |
|---|---|
| DIY | Light stains, delicate finishes |
| Commercial | Heavy buildup, fast results |
| Hybrid | Spot treatment, follow-up care |
| Precaution | Test, ventilate, follow instructions |
Protecting the Finish: Aftercare and Prevention
After removing water stains, attention turns to protecting the faucet finish through consistent aftercare and a simple routine of drying and maintenance.
Consideration of protective coatings and sealants should weigh their durability and potential impact on appearance.
Choosing the right tools and cloths—soft, lint-free materials and nonabrasive applicators—helps preserve finishes while avoiding scratches.
Proper drying and routine maintenance schedule
Drying faucets promptly and following a simple maintenance schedule prevents mineral buildup and preserves finish integrity.
After each use, wipe with a soft microfiber; weekly, inspect for spots; monthly, clean gently with a mild soap solution; quarterly, check aerators and seals.
Consistent, gentle care extends lifespan and reduces need for aggressive stain removal.
- Wipe dry after use
- Weekly spot check
- Monthly mild cleaning
- Quarterly hardware check
Protective coatings and sealants: pros and cons
Several homeowners and maintenance professionals turn to protective coatings and sealants to guard faucets against water stains and mineral etching.
These products can extend finish life, repel water, and simplify cleaning.
Downsides include potential film buildup, altered appearance, limited lifespan, and compatibility issues with brushed nickel.
Proper selection and periodic reapplication balance benefits and drawbacks for preserving faucet aesthetics and function.
Best tools and cloths to use and avoid
Choose the right tools and cloths to prevent damage when cleaning and maintaining faucets: microfiber cloths, soft cotton towels, and non-abrasive sponges remove water spots without scratching finishes, while old rags, steel wool, scouring pads, and harsh brushes should be avoided because they abrade protective coatings and accelerate wear.
Recommended: soft-bristled toothbrushes for crevices, rubber squeegees for drying, and lint-free polishing cloths for final buffing.
Troubleshooting: When Stains Won’t Come Off
When stains persist despite cleaning, it is important to distinguish surface mineral deposits from actual damage such as pitting, dulling, or etching of the finish.
For mildly dulled or lightly etched surfaces, careful polishing with nonabrasive metal polish and a soft cloth can restore some luster without removing protective coatings.
If damage is extensive or polishing risks further harm, a professional refinisher should be consulted.
Identifying damage vs. surface staining
If stains persist after routine cleaning, determine whether they are superficial mineral deposits or actual damage to the faucet’s finish.
Superficial deposits appear as chalky white or cloudy films removable with vinegar or a mild cleaner.
Finish damage shows pitting, scratches, discoloration beneath the surface or flaking plating.
Document findings, avoid abrasive scrubbing, and consult manufacturer guidance before further action.
Safe polishing techniques for dull or etched finishes
After confirming that discoloration is not simply surface mineral buildup but actual dulling or etching of the finish, proceed with cautious polishing methods designed to restore luster without worsening damage.
Use a non-abrasive metal polish or a mild paste of baking soda and water, applied gently with a soft microfiber cloth.
Test in an inconspicuous area, work with grain, and rinse thoroughly.
When to call a professional refinisher
At what point should a homeowner accept that DIY methods have reached their limits and seek a professional refinisher?
When persistent staining, deep pitting, or finish damage resists safe cleaning and light polishing, a refinisher can assess plating loss, recoat, or professionally buff.
Call a pro if attempts risk further damage, warranty concerns exist, or aesthetic restoration and durable protection are priorities.
Common Mistakes That Damage Brushed Nickel
Readers should be warned about abrasive cleaners and rough tools that can strip the protective finish from brushed nickel.
They should also avoid popular DIY remedies that discolor or pit the metal, since such fixes often do more harm than good.
Ignoring water stains can lead to permanent etching and accelerated corrosion if not addressed promptly.
Abrasive cleaners and tools to never use
Avoid abrasive cleaners and harsh tools when cleaning brushed nickel, as they can quickly strip the finish and leave visible scratches.
The following should be avoided to prevent permanent damage and dulling of the surface:
- Steel wool or metal scouring pads
- Abrasive powdered cleaners
- Harsh chemical bleach or oven cleaners
- Stiff-bristled wire brushes
Harmful DIY remedies and why they fail
Besides abrasive cleaners and tools, many well-intentioned home remedies cause hidden or cumulative harm to brushed nickel finishes.
Vinegar-soaked cloths, undiluted lemon juice, baking soda pastes, and harsh bleach solutions strip protective coatings or etch metal over time.
Oils and waxes trap minerals, creating uneven discoloration.
Temporary improvement often masks progressive finish degradation, requiring professional refinishing rather than simple cleaning.
Long-term risks of neglecting water stains
Neglected water stains on brushed nickel evolve from cosmetic nuisances into structural threats: mineral deposits gradually etch the finish, creating microscopic pits that trap moisture and accelerate corrosion, while repeated moisture exposure beneath loosened protective coatings fosters tarnish and uneven patina.
Over time, functionality suffers—stiff valves, leaky seals, and irreversible finish damage—raising repair costs and risking replacement.
Quick Reference: Fast Solutions by Stain Type
A concise checklist helps identify fast treatments for common faucet stains and keeps finishes protected. Below is a rapid reference for daily, weekly, and monthly care that matches stain types with quick actions.
| Frequency | Quick Action |
|---|---|
| Daily | Wipe with a soft microfiber cloth and dry to prevent mineral spots |
| Weekly | Use a mild vinegar solution for light buildup; rinse and dry |
| Monthly | Apply a gentle polish or deeper vinegar soak for stubborn deposits |
Quick-action checklist for daily, weekly, and monthly care
When water spots appear, a short, targeted routine keeps faucets bright and prevents buildup. The checklist below groups fast fixes by stain type and frequency so maintenance is efficient and consistent.
- Daily: Wipe with microfiber and distilled water to prevent mineral rings.
- Weekly: Vinegar soak for light deposits; rinse thoroughly.
- Monthly: Mild baking soda paste for stubborn spots.
- As needed: Apply polish and sealant to slow future staining.
Conclusion
To sum up, the guide reassures readers that water stains on brushed nickel are rarely ruinous and can be banished with gentle, common methods; a soft cloth, mild cleaner, and a little patience work wonders. With proper aftercare and avoidance of abrasive errors, the finish can gleam like a lighthouse in a moonless night. If stubborn spots persist, targeted cleaners or professional help save the day, preserving both beauty and function.