How to Clean Water Filter Cartridge: Step-by-Step Guide for Fast, Safe Results
To effectively clean a reusable water filter cartridge, follow these steps for optimal results:
- Shut Off Water and Depressurize: Turn off the water supply and release any pressure in the system.
- Remove the Cartridge: Take out the cartridge for inspection.
- Rinse Loose Debris: Use water to rinse off any visible particles.
- Soak According to Material: For ceramic filters, soak in vinegar; for pleated filters, use a mild detergent.
- Scrub Gently: Clean the surface with a soft brush or cloth.
- Disinfect: Apply a recommended disinfecting solution, ensuring you follow the proper contact time.
- Rinse Thoroughly: Remove all cleaning agents by rinsing well.
- Dry Before Reinstalling: Allow the cartridge to dry completely before putting it back.
If you notice persistent discoloration or odors after cleaning, it’s time to replace the cartridge. For more detailed steps, contact times, and troubleshooting tips, please refer to the full guide.
What a Water Filter Cartridge Is and When It Needs Cleaning
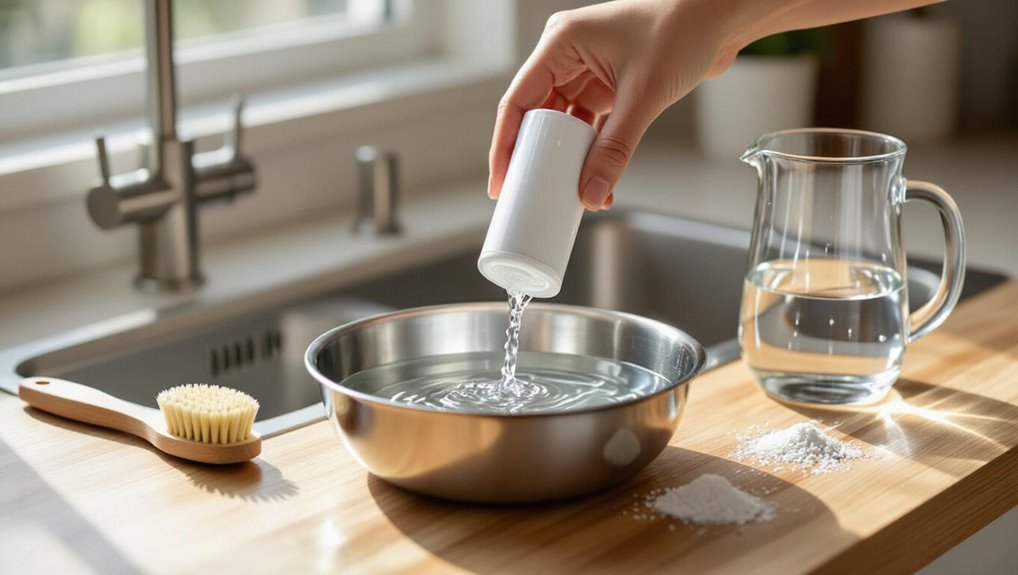
A water filter cartridge is a replaceable component that traps sediments and adsorbs contaminants in systems such as pitchers, under‑sink units, refrigerators, and inline filters.
Indicators that a cartridge requires attention include reduced flow, cloudy or off‑tasting water, visible fouling, or a change in indicator status.
Meanwhile, irreparable damage or persistent odor usually means replacement rather than cleaning.
Before handling a cartridge, the user should turn off water supply, depressurize the line if applicable, and wear gloves to avoid contamination and contact with trapped impurities.
How cartridges work in common filter systems (pitcher, under-sink, fridge, inline)
Water filter cartridges function as the core treatment element in common household systems—pitcher, under-sink, refrigerator, and inline—each designed to remove particulates, chlorine, and certain contaminants through adsorption, mechanical trapping, or ion exchange.
Pitcher filters rely on gravity; under-sink and inline units use pressure and larger media; fridge cartridges balance flow with space.
The guide explains how to clean water filter cartridge safely.
Signs your cartridge needs cleaning vs replacement
When flow slows noticeably or taste and odor degrade, these are clear indicators that a cartridge requires attention; distinguishing between cleaning and replacement depends on the filter type, age, and the nature of the buildup.
Visible sediment, slimy biofilm, or short-term clogging often respond to cleaning.
Persistent discoloration, foul odor after cleaning, physical damage, or expired lifespan warrant replacement to guarantee effective filtration.
Safety considerations before handling a cartridge
Handle the filter cartridge with care: before touching it, make certain the system is depressurized, power to any connected pumps or UV units is off, and the work area is well-ventilated.
Wear gloves and eye protection, avoid inhaling dust or biofilms, and use clean tools.
Dispose of contaminated media per local regulations.
Sanitize hands and surfaces after removal to prevent cross-contamination.
Quick Answer: Can You Clean a Water Filter Cartridge and Get Fast, Safe Results?
Some cartridge types—such as reusable ceramic or certain pleated filters—can be cleaned effectively, while carbon-block and most disposable cartridges require replacement.
Cleaning may restore flow and remove sediment, but it cannot fully remove embedded contaminants or restore chemical adsorption capacity, and improper cleaning risks bacterial growth or damage.
Consequently, users should follow manufacturer guidance and weigh the limited benefits of cleaning against the reliability of replacement.
Which cartridge types are cleanable and which need replacing
Determining whether a water filter cartridge can be cleaned or must be replaced depends on its material and filtration method: sediment and reusable ceramic cartridges often withstand cleaning, while most activated carbon, ion-exchange, and reverse-osmosis membranes require replacement once their capacity is exhausted.
Cleanable types: sediment, washable pre-filters, some ceramic and metal-mesh units.
Replace-only types: carbon blocks, resin cartridges, RO membranes, and specialty chemical filters.
Risks and limitations of cleaning vs replacing
After identifying which cartridge types tolerate cleaning and which require replacement, the next consideration is whether cleaning will deliver fast, safe, and satisfactory results.
Cleaning can restore flow and remove debris but may not remove biofilm, chemical contaminants, or microscopic clogging.
Replacing guarantees filter integrity and certified performance; cleaning risks reduced efficacy, voided warranties, and potential health hazards if done improperly.
Tools, Materials, and Preparation Checklist
Before starting, assemble cleaning materials such as a soft brush, mild detergent, white vinegar, baking soda, and verify any bleach concentration limits.
Gather tools and protective gear including gloves, a bucket, towels, and a timer.
Prepare the work area and shut off the water supply to prevent spills and guarantee safety.
Cleaning materials (soft brush, mild detergent, white vinegar, baking soda, bleach concentrations)
A concise selection of cleaning materials guarantees effective cartridge maintenance while protecting filter integrity.
Use a soft nylon brush to dislodge debris; avoid metal bristles.
Mild, phosphate-free detergent cleans without damaging media.
White vinegar (diluted 1:1) removes mineral buildup; baking soda paste neutralizes odors.
For disinfection, use household bleach at 50–200 ppm free chlorine (follow manufacturer guidance), rinse thoroughly before reinstalling.
Tools and protective gear (gloves, bucket, towel, timer)
Essential items for cartridge cleaning include chemical-resistant gloves, a sturdy bucket, absorbent towels, and a timer to track soak and disinfection intervals.
Additional useful tools: soft brush for scrubbing, a basin for rinsing, and a drainage tray to contain spills.
Protective eyewear and a face mask are recommended when handling bleach or concentrated solutions to prevent splashes and inhalation.
Preparing the area and turning off water supply
With gloves and splash protection ready, the workspace should be cleared and a drainage tray or towels placed under the filter housing to catch leaks.
Next, locate and shut off the cold-water supply valve, relieve pressure by opening a downstream faucet, and unplug any electrical components.
Gather tools nearby and guarantee adequate lighting.
Verify no active flow before proceeding to disassemble the filter.
Step-by-Step Cleaning Process for Reusable Cartridge Types
The procedure begins with removal of the cartridge and a careful visual inspection for cracks, excessive wear, or trapped debris.
Next, the cartridge is rinsed under cold water with gentle agitation, followed by material-specific soaking (activated carbon, ceramic, pleated sediment) as recommended.
Finally, approved disinfection, thorough rinsing, complete drying, reassembly, and system flushing are performed before returning the filter to service.
Step 1 Removal and initial inspection
Begin by shutting off the water supply and relieving pressure before loosening the housing to remove the reusable cartridge; this prevents spills and reduces the risk of damaging seals.
Once removed, inspect the cartridge for cracks, warping, or collapsed media and check O-rings and housing threads for wear.
Note discoloration or unusual odors and document findings before proceeding to cleaning.
Step 2 Rinsing and debris removal (cold water, gentle agitation)
Hold the cartridge under a steady stream of cold tap water and use gentle hand agitation to dislodge trapped particles without compressing the filter media.
Rotate and tap lightly to encourage release of debris. Continue until runoff appears clear.
Inspect for remaining sediment; repeat brief rinses as needed.
Avoid hot water, scrubbing, or chemical cleaners that could damage seals or media integrity.
Step 3 Soaking procedures by cartridge material (activated carbon, ceramic, pleated sediment)
The soaking step varies by cartridge material and targets specific contaminants and sensitivities.
For activated carbon, a brief rinse followed by a mild sanitizer soak is recommended to refresh adsorption sites without over-saturating the media.
Ceramic and pleated sediment cartridges require descaling or gentle scrubbing and a controlled soak to loosen mineral build-up and trapped particles, respectively.
Activated carbon cartridge cleaning guidance
For activated carbon cartridges, soaking is a targeted step to remove trapped particulates and adsorbed tastes or odors without degrading the media.
Different carbon types (granular, extruded, or block) and binders require specific soak durations and solutions to avoid leaching fines or weakening the structure.
Recommended: rinse flowing water, then brief soak in clean cool water; avoid strong solvents or bleach.
Inspect for channeling, odor persistence signals replacement.
Ceramic cartridge cleaning guidance (descaling and scrubbing)
Begin by removing loose debris with a gentle rinse.
Then address mineral buildup and surface fouling on ceramic cartridges through controlled descaling and careful scrubbing: soak in a mild acidic solution (diluted white vinegar or citric acid) long enough to dissolve limescale—typically 30–60 minutes depending on severity.
After soaking, use a soft brush or non-abrasive pad to sweep away loosened deposits.
Rinse thoroughly with clean water, and inspect the pore surface for restored flow and uniform appearance before returning the cartridge to service.
Pleated sediment cartridge cleaning guidance
Soak pleated sediment cartridges in a way that matches their material and construction to dislodge trapped particles without damaging fibers or adhesives.
Use lukewarm water with mild, non-foaming detergent for synthetic pleats; agitate gently and rinse until clear.
For bonded natural fibers, avoid detergents—soak in clean water and backflush intermittently.
Inspect for delamination; replace if integrity is compromised.
Step 4 Disinfecting safely (approved solutions, contact times, thorough rinsing)
Disinfect the cartridge using only approved solutions and precise contact times to eliminate pathogens without damaging filter materials.
Use bleach (50–200 ppm free chlorine) or manufacturer-recommended agents, following labeled contact times (typically 10–30 minutes).
Submerge fully, avoid concentration exceedances.
After disinfection, rinse thoroughly with potable water until residual disinfectant is undetectable.
Dispose of exhausted or compromised cartridges per guidelines.
Step 5 Drying, reassembly, and flushing the system before use
After rinsing away all disinfectant residues, allow the cartridge and housing to dry completely to prevent microbial regrowth and preserve seal integrity.
Once dry, inspect O-rings and seals, replace if cracked or compressed, then reassemble following manufacturer alignment marks. Hand-tighten housings to specified torque.
Finally, flush the system with recommended volume of potable water until clarity and normal taste resume before returning the filter to service.
Cleaning Procedures for Specific Filter Systems
Different filter systems require tailored cleaning steps based on size, access, and materials.
Procedures for pitcher and countertop cartridges differ from those for under-sink and whole-house units, while refrigerator/ice-maker and inline/RV filters each present unique constraints.
The following sections outline specific maintenance tips and precautions for each type.
Pitcher and countertop filter cartridges
Pitcher and countertop filter cartridges require gentle, system-specific cleaning to preserve their media and maintain flow rates; users should consult the manufacturer’s instructions before attempting any cleaning.
Remove cartridge only if reusable; rinse under cold water, agitate gently to dislodge debris, and avoid scrubbing media.
Sanitize housings per manufacturer, replace disposable cartridges on schedule, and record replacement dates to guarantee effective filtration.
Under-sink and whole-house cartridges
While pitcher and countertop cartridges are typically small and handled directly by users, under-sink and whole-house systems involve larger housings, higher flow rates, and plumbing connections that demand a more methodical cleaning approach.
Shut off water, relieve pressure, and separate housings using a wrench. Inspect and replace seals, scrub housings with mild detergent, sanitize with diluted bleach if specified, then reassemble and test for leaks.
Refrigerator and ice-maker cartridges
Begin by shutting off the water supply to the refrigerator and dispensing any remaining water and ice to relieve pressure and clear the lines.
Remove the cartridge per manufacturer instructions, rinse under cold running water, soak briefly in a mild bleach solution if recommended, then rinse thoroughly.
Inspect seals and O-rings, replace if worn, reinsert cartridge, restore water, and check for leaks and proper ice production.
Inline and RV water filter cartridges
Several common inline and RV water filter cartridges share similar maintenance steps that emphasize safety, cleanliness, and preserving flow rates.
Technicians should depressurize, shut off supply, and remove housing.
Rinse cartridges with clean water, scrub gently if washable, and sanitize housings with diluted bleach.
Replace non-washable or degraded cartridges.
Reassemble, purge air, and check for leaks and restored flow before regular use.
How to Know If Cleaning Worked or If Replacement Is Needed
After cleaning, the effectiveness is assessed with simple performance checks: measured flow rate, taste and odor evaluation, and observation of water clarity.
If flow remains restricted, odors persist, or sediment reappears, cleaning was only temporary and immediate replacement should be considered.
Guidance on expected lifespans and replacement intervals by cartridge type helps decide whether another cleaning is worthwhile or a new cartridge is needed.
Performance tests to run after cleaning (flow rate, taste/odor, water clarity)
Verify the filter’s effectiveness by running simple, measurable performance tests: measure flow rate against the baseline or manufacturer’s specification, assess taste and odor using a controlled sip test or sensory panel if available, and inspect water clarity visually or with a turbidity meter.
Record results, compare to pre-cleaning values, and repeat tests after several days of use to confirm sustained performance and detect gradual decline.
When cleaning is temporary: signs to replace immediately
If cleaning restores visible function but core performance metrics remain below specification, the cartridge should be replaced immediately.
Additional signs requiring replacement include persistent odors or tastes after treatment, recurring clogging within days, visible media breakdown, cracks, sealing or housing damage, and failed microbiological or chemical removal tests.
Temporary cleaning is insufficient when any safety or performance threshold is not reliably met.
Typical lifespan and replacement intervals by cartridge type
Having established the circumstances that demand immediate replacement, the next consideration is how long different cartridge types typically last and when replacement should be scheduled. Typically: carbon 3–6 months; sediment 6–12 months; reverse osmosis membranes 2–3 years; specialty media varies. Visual guide:
| Cartridge Type | Typical Lifespan |
|---|---|
| Carbon | 3–6 months |
| Sediment | 6–12 months |
| RO Membrane | 2–3 years |
Common Mistakes and How to Avoid Them
Common mistakes during cartridge cleaning include using harsh chemicals or incorrect concentrations, which can degrade filter material and leave harmful residues.
Excessive scrubbing can damage delicate filter media and reduce effectiveness.
Skipping proper disinfection or inadequate rinsing risks recontamination and should be avoided.
Using harsh chemicals or improper concentrations
Using concentrated bleach, undiluted disinfectants, or aggressive solvents can damage filter media, degrade seals, and leave harmful residues that compromise water quality.
Cleaners must be used at manufacturer-recommended dilutions and approved products. Rinse thoroughly after treatment, allow complete drying if specified, and document concentrations.
When unsure, consult the filter manual or supplier to prevent chemical damage and preserve filtration performance.
Over-scrubbing or damaging filter media
Scrub gently: abrasive brushing or excessive force can abrade media, tear pleats, and dislodge bonded layers, reducing filtration efficiency and shortening cartridge life.
Inspect visually, use soft brushes or low-pressure water, and follow manufacturer agitation guidance.
Apply minimal mechanical cleaning only when necessary; replace cartridges showing structural damage.
Document procedures and intervals to prevent repeated overcleaning that accelerates wear and compromises performance.
Skipping disinfection or inadequate rinsing
After warning against over-aggressive cleaning that can damage media, attention must turn to the opposite problem: failing to disinfect or to rinse thoroughly after maintenance.
Skipping sanitization or leaving cleaning residues invites bacterial regrowth and contamination.
Proper protocol requires a recommended disinfectant contact time, thorough multiple rinses until no odor or residue remains, and verification by visual inspection or test strips before returning the cartridge to service.
Maintenance Schedule and Best Practices for Long-Lasting Filters
A clear maintenance schedule helps extend filter life by recommending routine cleaning frequencies based on usage and water quality.
Proper storage and careful handling between uses prevent damage and microbial growth.
Simple record-keeping and reminder systems guarantee timely replacements and consistent performance.
Routine cleaning frequency recommendations
Typically, manufacturers recommend inspecting and cleaning filter cartridges on a regular schedule—commonly every 3–6 months for household systems and more frequently in high-sediment or heavy-use conditions—to maintain flow rate and contaminant removal efficiency.
Frequency adjustments depend on water quality, visible clogging, and pressure drops; monthly checks suit wells or murky sources.
Replace cartridges per manufacturer lifespan or when cleaning no longer restores performance.
Storage and handling tips between uses
Following recommended inspection and cleaning intervals, proper storage and handling between uses further preserve cartridge life and performance.
Store cartridges dry in a clean, sealed container away from direct sunlight, chemicals, and temperature extremes.
Handle with clean gloves to avoid contamination, avoid dropping or compressing media, and rotate stock on a first-in, first-out basis to use older cartridges promptly while unopened spares remain protected.
Record-keeping and reminders for replacements
Maintain concise records and set automated reminders to guarantee cartridges are replaced on time and filter performance remains consistent.
Logs should note installation date, usage hours, water quality changes, and cleaning actions. Use calendar alerts, apps, or smart filter indicators.
Regular audits prevent lapses and extend lifespan.
- Track dates
- Record capacity
- Schedule alerts
- Review quarterly
Environmental and Cost Considerations
The article compares the cost-effectiveness of cleaning cartridges against the expense of full replacements, noting when cleaning is a sensible saving.
It also outlines environmentally responsible disposal routes and available recycling programs for spent cartridges.
Readers are encouraged to weigh short-term savings against long-term performance and environmental impact.
When cleaning saves money versus buying replacements
Although cleaning a water filter cartridge can extend service life and reduce waste, cost-effectiveness depends on filter type, contaminant load, and labor time.
Cleaning typically saves money for washable sediment or pre-filters with light fouling and low labor costs.
Disposable, chemically saturated, or heavily biofouled cartridges are usually cheaper replaced.
Evaluate material longevity, replacement price, and frequency before deciding.
Proper disposal and recycling options for spent cartridges
Consider proper end-of-life handling for spent water filter cartridges to minimize environmental impact and manage costs.
Users should check manufacturer take-back programs, local recycling centers, and household hazardous waste facilities for appropriate disposal.
Some cartridges contain plastic, activated carbon, or resin requiring specialized processing.
Balance recycling options against replacement frequency and potential fees to choose the most eco‑efficient, cost-effective route.
Troubleshooting: Common Problems After Cleaning and How to Fix Them
After cleaning a water filter cartridge, common issues can still arise and require targeted fixes.
Persistent taste or odor often indicates incomplete cleaning or a spent media that needs replacement.
Reduced flow or clogging and leaks or poor seals after reassembly are usually resolved by inspecting for trapped debris, re-seating or replacing O-rings, and confirming correct assembly.
Persistent taste or odor
Persistent taste or odor often signals residual contaminants, trapped biofilm, or incomplete rinsing of the filter cartridge after cleaning.
The guide recommends flushing the cartridge with several volumes of clean water, sanitizing per manufacturer instructions, and replacing worn media or seals.
If smell or taste persists after repeat rinsing and sanitation, install a new cartridge to guarantee safe, neutral-tasting water.
Reduced flow or clogging
If taste or odor issues have been ruled out, the next common problem to address is reduced flow or outright clogging of the cartridge.
Inspect for visible debris, biofilm, or mineral buildup; backflush if design allows. Replace media if cleaning fails.
Confirm inlet pressure and pre-filter condition.
Always follow manufacturer’s recommended replacement interval to prevent recurrent blockage and maintain performance.
Leaks or poor seal after reassembly
Check for misaligned components, damaged O-rings, or debris in sealing surfaces when a filter leaks or fails to seal after reassembly.
Inspect and reposition housing parts, replace cracked or flattened O-rings, and clean grooves with a lint-free cloth.
Lightly lubricate O-rings with manufacturer-approved silicone grease, torque fittings evenly, and perform a pressure test.
Repeat adjustments until no leaks appear.
Quick Reference: Safe Cleaning Timelines and Solutions
A concise fast-clean checklist outlines steps for immediate cartridge rinsing, brushing, and drying to restore basic function.
Recommended disinfectant types, their safe concentrations, and required contact times are listed for effective microbial control without damaging filter media.
Readers are directed to follow those specific timelines and solution strengths to balance efficacy and cartridge longevity.
Fast-clean checklist for immediate results
Begin with surface rinses and timing: perform a quick visual inspection, rinse the cartridge housing with clean water, and note the cartridge’s age before choosing a cleaning method.
Then follow a concise fast-clean checklist:
- Flush with low-pressure water for 60–90 seconds.
- Tap gently to dislodge debris.
- Inspect seals and O-rings; replace if damaged.
- Reassemble, run purge cycle, and check for leaks.
Approved disinfectant concentrations and contact times
After the quick-clean steps and a leak check, attention shifts to proper disinfection: approved disinfectant types, concentrations, and minimum contact times must be followed to guarantee microbial inactivation without damaging cartridge materials. Recommended options balance efficacy and compatibility.
| Disinfectant | Concentration | Contact Time |
|---|---|---|
| Sodium hypochlorite | 50–200 ppm | 10 minutes |
| Chlorine dioxide | 0.2–2 mg/L | 5–10 minutes |
| Hydrogen peroxide | 3% | 10 minutes |
| Iodine | 25 ppm | 5 minutes |
Conclusion
After carefully following all the careful instructions about cleaning a water filter cartridge, one might be surprised to discover it doesn’t magically purify bad habits. The cartridge will be cleaner, flow restored, and bacteria reduced — provided the person actually replaced damaged parts and stopped procrastinating. Ironically, the humble act of scrubbing plastic proves more effective than most sudden bursts of environmental concern, rewarding consistent care with safe water and a quiet conscience.