How to Enclose a Clawfoot Tub: Step-by-Step Guide for a Stylish, Waterproof Surround
Enclosing a clawfoot tub creates a stylish, waterproof surround that enhances aesthetics and conceals plumbing. To start, measure your tub and decide on a design—options include a full surround, partial skirt, or alcove. Use moisture-resistant lumber for framing and incorporate removable access panels for maintenance. Next, install cement backer board or Wedi, apply a waterproof membrane, and finish with your choice of tile, solid surface, or sealed wood. Finally, test for leaks, maintain seals, and perform annual inspections. Follow these steps for a functional and attractive tub enclosure.
How to Enclose a Clawfoot Tub: Overview and Quick Recommendation
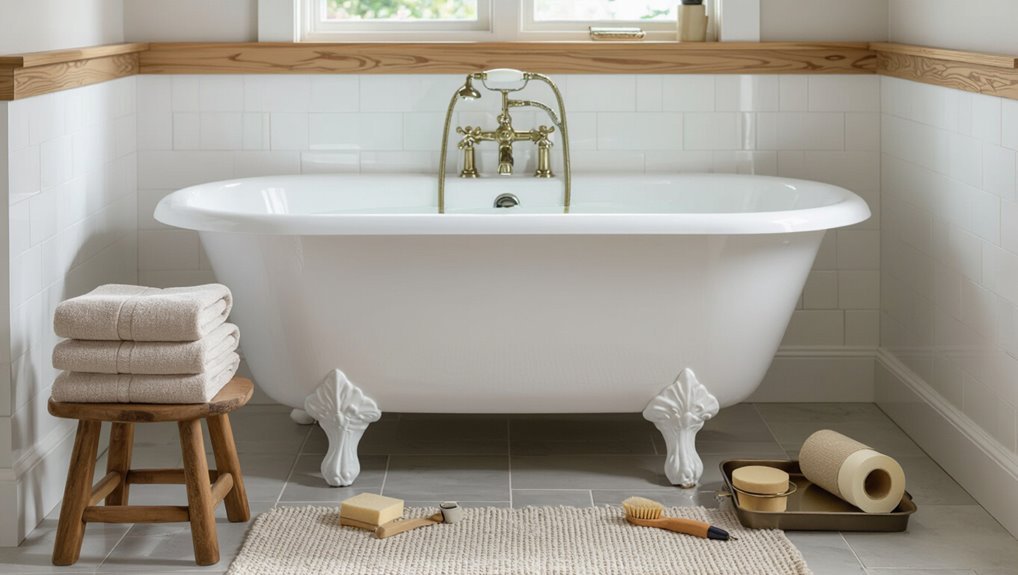
Enclosing a clawfoot tub involves building a watertight surround that conceals plumbing and creates a finished look, a choice many homeowners make for style and ease of maintenance.
The best overall approach combines a sturdy framed box, cement backer board or marine-grade plywood, and a solid waterproof surface such as tile or acrylic panels.
A quick materials and tools checklist includes framing lumber, backer board, waterproof membrane, finish panels or tile, screws, sealant, a wet saw or jigsaw, level, and basic carpentry tools.
What enclosing a clawfoot tub means and why homeowners do it
A clad or skirted surround converts the exposed sides of a clawfoot tub into a finished, accessible enclosure that conceals plumbing, provides moisture protection, and creates a cohesive bathroom aesthetic.
Homeowners choose enclosure for practicality and style: easier cleaning, concealed plumbing access panels, improved water resistance, and visual integration with cabinetry or tile.
Guides on how to enclose a clawfoot tub focus on fit, materials, and serviceability.
Best overall approach for a stylish, waterproof surround
When prioritizing style and waterproofing, the best overall approach combines a framed, tiled knee wall with a removable access panel to balance durability, aesthetics, and serviceability.
This method uses cement backerboard, waterproof membrane, and tile to resist moisture while keeping plumbing reachable.
Design choices—tile size, grout color, cap molding—define style without compromising function, and professionally sealed joints guarantee long-term performance.
Quick materials and tools checklist for a typical project
Checklist: essential materials and tools are listed to prepare for a typical clawfoot tub surround project, covering structural, waterproofing, and finishing needs so work proceeds efficiently and without surprises.
A concise inventory helps avoid delays and guarantees compatibility.
- Cement backerboard, waterproof membrane, thinset, tile or paneling
- Framing lumber, screws, shims, level, jigsaw
- Caulk, primer, paint, grout float, safety gear
Planning Your Enclosure: Measurements, Codes, and Design Choices
The homeowner measures the tub, available floor space, and required clearances to guarantee the enclosure fits and allows access.
They also verify plumbing locations, plan access panels, and confirm local building and waterproofing codes.
Finally, they decide between a full surround, partial skirt, or built-in alcove and select moisture-resistant framing, backer board, and finish materials such as tile, acrylic, or wood-look panels.
Measuring the tub, floor space, and clearances
Before any framing or finishing touches begin, accurate measurements of the clawfoot tub, surrounding floor space, and required clearances must be established to guarantee fit, function, and code compliance.
Measure tub length, width, height, and drain location. Record floor dimensions, slope, and obstacle positions.
Note clearances for access, trim, and splash protection. Double-check all figures before ordering materials.
Checking plumbing, access panels, and local building codes
Following measurement verification, attention turns to plumbing, access panels, and local building codes to guarantee the enclosure will function, be serviceable, and meet legal requirements.
Inspect supply and drain locations, confirm shutoff accessibility, and plan removable access panels aligned with valves and trap.
Review local permit requirements, venting, waterproofing standards, and clearances.
Document findings before construction to avoid costly alterations.
Choosing a style: full surround, partial skirt, or built-in alcove
When selecting an enclosure style for a clawfoot tub, homeowners should weigh aesthetics, access, and structural constraints to match function with design.
A full surround offers seamless waterproofing and hidden plumbing but demands framing and clearance.
A partial skirt preserves the legs and vintage look while adding modest storage.
A built-in alcove maximizes space efficiency and can mimic recessed cabinetry without obscuring key maintenance access.
Selecting materials: moisture-resistant framing, backer board, tile, acrylic, wood-look panels
Although aesthetic preference guides the final look, material selection for a clawfoot tub enclosure must prioritize moisture resistance, structural support, and compatibility with plumbing access.
Contractors typically recommend durable framing and suitable finishes:
- Moisture-resistant framing and cement backer board for wet zones.
- Porcelain, ceramic, or acrylic panels for easy maintenance.
- Water-resistant wood-look panels or sealed trim where splash is minimal.
Preparing the Workspace and Existing Tub
Before construction begins, the area is cleared by removing trim, isolating water and power, and protecting floors and fixtures to prevent damage.
The clawfoot tub is then stabilized and leveled to guarantee a secure, plumb base for the enclosure.
Finally, anchor points are marked and a mock-up layout is taped out to verify fit and attachment locations.
Removing trim, isolating water and power, and protecting surfaces
Begin by clearing the immediate area around the clawfoot tub and tracing the locations of trim, fixtures, and utilities to create an orderly plan of attack.
Carefully remove trim and escutcheons, cap and label water lines, and switch off and lock out electrical circuits serving nearby outlets or heaters.
Protect floors, walls, and tub with thick drop cloths and rigid panels to prevent damage.
Stabilizing and leveling the clawfoot tub
Level and secure the clawfoot tub on a stable subfloor before building an enclosure: check that the feet sit evenly, measure corner-to-corner diagonals to confirm squareness, and shim or adjust each leg so the tub neither rocks nor tilts.
Verify plumbing connections clear beneath, protect exposed finishes, and use a spirit level across rim and lengthwise to guarantee true horizontal alignment prior to permanent fastening.
Marking anchor points and mock-up layout
With the tub stabilized, the installer marks precise anchor points and lays out a full-size mock-up to confirm fit and access.
Measurements are transferred to floor and wall with a level and square. Mock-up panels simulate surround thickness, clearances for fixtures, and toe-kick location.
Anchor locations avoid plumbing and flooring seams. Adjustments are noted before drilling or fastener installation.
Framing the Enclosure
Framing choices range from a freestanding skirt to a full floor-to-ceiling stud wall or a lower half wall, each affecting access, aesthetics, and structural attachment.
Moisture-resistant lumber and corrosion-resistant fasteners are recommended, with an access panel planned for the drain and plumbing.
Consider adding insulation and soundproofing within the framing to control noise and thermal transfer.
Framing options: freestanding skirt, floor-to-ceiling stud wall, or half wall
Choices for enclosing a clawfoot tub fall into three practical categories: a freestanding skirt, a floor-to-ceiling stud wall, or a half wall.
A skirt offers removable access and decorative finishes.
A full stud wall creates complete privacy and supports tile or niche installations.
A half wall balances openness with splash protection, often integrating shelving or a ledge while preserving room visual flow.
Using moisture-resistant lumber and fasteners
After selecting a skirt, full stud wall, or half wall, attention turns to the materials that will face constant humidity and occasional splashes.
Moisture-resistant lumber—treated pine, cedar, or marine-grade plywood—reduces rot. Use stainless steel or hot-dip galvanized fasteners, corrosion-resistant screws, and construction adhesive rated for wet areas.
Seal cut edges and joints with marine sealant or waterproof primer before finishing to guarantee longevity.
Building an access panel for the drain and plumbing
Begin by laying out a straightforward rectangular opening that provides full access to the tub’s drain, trap, and supply lines without disturbing finished surfaces.
Frame the opening with treated studs and blocking for rigidity, ensuring edges align with finished wall planes.
Reinforce header and sill, allow clearance for plumbing fittings, and fasten with corrosion-resistant screws.
Size to accept a removable, finished access panel.
Soundproofing and insulation considerations
With the access opening framed and reinforced to fit a removable panel, attention shifts to controlling sound and heat within the enclosure.
Install moisture-resistant insulation—closed-cell spray foam or foil-faced rigid board—around tub feet and between studs.
Add acoustic mineral wool or fiberglass batts where plumbing vibrates.
Seal all seams and penetrations with waterproof acoustic sealant to prevent drafts, noise transfer, and mold.
Installing Substrate and Waterproofing
Selection of a suitable backer board—cement board, glass-mat gypsum, or Wedi—sets the substrate foundation for a durable enclosure.
The chosen substrate should be covered with an appropriate waterproof membrane, weighing the pros and cons of liquid versus sheet systems.
All seams, corners, and penetrations must be meticulously sealed.
Before finishing, the assembly should be pressure- or flood-tested to confirm watertight integrity.
Choosing backer boards: cement board, glass-mat gypsum, or Wedi boards
Several common backer-board options—cement board, glass-mat gypsum, and Wedi—offer distinct performance profiles for enclosing a clawfoot tub and forming a waterproof substrate.
Cement board provides durability and tile-fastening strength but requires corrosion-resistant fasteners.
Glass-mat gypsum is lighter, easier to cut, and suitable for low-moisture zones.
Wedi is lightweight, fully water-resistant, and ideal where integrated sealing and rapid installation are priorities.
Applying waterproof membrane: liquid membrane vs. sheet membrane
Decide between liquid and sheet waterproof membranes based on site conditions, skill level, and the chosen backer board: liquid membranes offer seamless coverage and easy detailing around curves and trim, while sheet membranes provide a factory-controlled barrier with predictable thickness and faster coverage of flat areas.
Liquid options require curing time and careful application; sheets need precise bonding and careful edge alignment to prevent bubbles.
Sealing seams, corners, and penetrations
Begin by preparing all seams, inside corners, and any penetrations (pipes, drain assemblies, faucet posts) to guarantee a continuous waterproof barrier: clean and dry surfaces, remove debris, and bevel or back-cut rigid board joints if required to allow membrane bedding.
Apply preformed corner pieces or fabric tape with sealant, bed membranes into corners, and use appropriate gaskets and sealants around penetrations for a watertight finish.
Testing for leaks before finishing
After sealing seams, corners, and penetrations, the installer must verify watertight integrity before finishing the substrate and applying final waterproofing layers.
Perform a controlled water test: plug drains, fill tub to a marked level, maintain for recommended duration while inspecting joints, fittings, and substrate for moisture.
Repair any leaks, retest, and only proceed once no seepage is observed.
Finishing Options for a Stylish Surround
Finishing choices define the tub surround’s look and durability, with tiled installations requiring careful layout, appropriate tile selection, grout choices, and thorough sealing.
Alternatives include solid-surface or acrylic panels, which demand precise cutting, correct adhesive application, and properly treated joints, or decorative wood and faux-wood panels that must receive waterproofing treatments.
Thoughtful painting and trim details complete the ensemble, tying materials together for a polished result.
Tiled surround: layout, tile selection, grout, and sealing
A tiled surround combines function and style, defining the tub area with careful layout, tile choice, and durable grout and sealants to resist moisture and staining.
Layout planning guarantees proper slope, access panels, and balanced seams.
Porcelain or ceramic tiles and natural stone offer varied aesthetics; pick slip-resistant finishes.
Use epoxy or high-quality sanded grout, then seal grout and porous stone to prevent mold and water intrusion.
Solid-surface and acrylic panels: cutting, adhesive application, and joints
Cut solid-surface or acrylic panels with a fine-toothed blade and steady support to guarantee clean edges and accurate fits around pipes and ledges.
Apply manufacturer-recommended adhesive evenly, avoiding gaps; press panels into place with temporary clamps.
Joint seams should use compatible solvent or color-matched sealant, taped and smoothed for nearly invisible joins.
Allow full cure before plumbing reattachment and final sealing.
Decorative wood or faux wood panels with waterproofing treatments
After addressing solid-surface and acrylic surrounds, attention can shift to decorative wood or faux wood panels treated for water resistance.
Panels should be sealed with marine-grade varnish, epoxy, or penetrating oil, and joints taped with waterproof membrane.
Install on a stable, moisture-resistant substrate with corrosion-resistant fasteners.
Choose rot-resistant species or composite alternatives; allow expansion gaps and maintain accessible seams for future maintenance.
Painting and trim details for a polished look
Several finishing touches transform a functional surround into a polished focal point: paint selection, trim profiles, and hardware choices must be coordinated for scale, moisture resistance, and long-term durability.
- Choose semi-gloss or satin paints for easy cleaning and mold resistance.
- Match trim scale to tub and room; use PVC or sealed wood for bathrooms.
- Select corrosion-resistant hardware and contrast or blend finishes for cohesion.
Plumbing and Fixture Integration
Plumbing and fixture integration requires planning for routing the faucet, spout, and any shower supply lines through the enclosure without impeding the tub’s aesthetic.
Proper placement of escutcheons, access plates, and trim pieces guarantees both a finished look and serviceability.
Attention to slope and drain accessibility prevents slow drainage and allows future maintenance.
Routing faucet, spout, and shower plumbing through the enclosure
Plan the routing of faucet, spout, and shower lines before closing the enclosure to guarantee access, proper slope, and code compliance.
Map supply and drain paths, locate shutoffs, and reserve service chases.
Maintain recommended slope for drains, secure piping to prevent movement, and use appropriate materials and fittings per local codes.
Test for leaks and pressure before finishing the surround.
Installing escutcheons, access plates, and trim pieces
Install escutcheons, access plates, and trim pieces with attention to alignment, sealing, and serviceability to guarantee a finished appearance and reliable access to valves and connections.
Measure and mark locations, fit escutcheons snugly against finished surfaces, apply appropriate gaskets or silicone, fasten access plates for easy removal, and install trim to conceal gaps.
Verify flush fit and unobstructed access to controls.
Ensuring proper slope and drain accessibility
When enclosing a clawfoot tub, ensuring the waste line maintains a consistent slope and remains accessible is critical for reliable drainage and future service.
The enclosure design should accommodate the trap arm’s fall, provide clear access to the drain and overflow connections, and prevent any enclosure elements from compressing or kinking supply and waste lines.
The installer verifies slope (1/4″ per foot), locates access panels, and secures piping without stress.
Common Problems and How to Avoid Them
Common problems when enclosing a clawfoot tub include water intrusion at seams and joints, substrate movement that leads to tile cracking, and mold or mildew growth behind panels.
Proper sealing, flexible joints, and moisture‑resistant materials help prevent these issues, while accessible panels and clear routing of plumbing simplify troubleshooting.
The following section outlines practical steps to avoid leaks and maintain long‑term access for repairs.
Preventing water intrusion at seams and joints
Because seams and joints are the most vulnerable points for leaks, careful preparation and the right sealing materials are essential to prevent water intrusion around a clawfoot tub.
Clean, dry surfaces; use waterproof backing board; apply high-quality silicone or polyurethane sealant in continuous beads; reinforce corners with waterproof tape or preformed coving; allow full cure before exposing to water; inspect and maintain seals periodically.
Addressing substrate movement and tile cracking
Many instances of tile cracking around clawfoot tubs stem from movement in the substrate beneath the tile, which transmits stress to rigid grout and tiles and causes hairline fractures or full breaks.
To prevent this, installers should use a decoupling membrane, flexible thinset, and movement joints at junctions.
Verify a rigid, well-supported substrate, control deflection, and follow tile manufacturer L/360 limits to minimize stress.
Avoiding mold and mildew behind panels
Moisture trapped behind enclosure panels creates an ideal environment for mold and mildew, so proper planning and materials are essential to prevent growth.
Use waterproof backer board, closed-cell foam, or marine-grade plywood with a vapor barrier. Guarantee ventilation gaps and breathable trim, install mildew-resistant sealants at joints, and allow serviceable access panels for inspection.
Regular drying and prompt remediation keep conditions inhospitable to spores.
Troubleshooting leaks and access issues
Inspecting for leaks and maintaining access are critical to long-term performance of a clawfoot tub enclosure; small failures in seals, fittings, or panel joins can lead to hidden water damage and costly repairs.
Periodic inspections, moisture sensors, and removable access panels minimize risk.
Tighten fittings, reseal joints with appropriate caulk, and replace corroded components promptly.
Document findings and schedule routine checks to prevent escalation.
Tools, Materials, and Cost Breakdown
Next, the article lists the essential tools for a DIY enclosure and contrasts them with the specialized equipment a professional might use.
It then outlines typical material quantities and cost ranges for common finishes such as tile, beadboard, and drywall.
Finally, it identifies clear signs—complex plumbing, structural alterations, or code compliance issues—when hiring a contractor is advisable.
Essential tools list for DIY vs. pro installation
A clear comparison of tools and materials helps determine whether a homeowner can handle enclosing a clawfoot tub or should hire a professional.
The DIY list focuses on basic carpentry and waterproofing; professionals add specialized equipment and expertise.
Consider safety, time, and finish quality when deciding.
- Circular saw, drill, level
- Waterproof backer board, sealant, screws
- Tile cutter, wet saw, scaffold
Typical material quantities and cost ranges for different finishes
Having weighed the tool differences between a DIYer and a pro, attention shifts to how materials and finish choices affect quantities and costs. Typical estimates: tile and waterproof backing for a three-sided surround, painted MDF, or beadboard vary by price per square foot and labor. Quick reference:
| Finish | Materials | Typical Cost/sq ft |
|---|---|---|
| Tile | Backer, thinset, grout | $8–$25 |
| Painted MDF | Primer, paint, sealant | $4–$10 |
| Beadboard | Panels, trim, seal | $3–$12 |
When to hire a professional: signs you need a contractor
When should a homeowner call in a contractor? A professional is advised for structural changes, plumbing or electrical relocations, uneven floors, complex waterproofing, permit requirements, or visible mold/mildew infestations.
Contractors guarantee code compliance, durable substrate installation, and reliable tile/wall finish. They also provide accurate cost estimates, timelines, and warranties—worthwhile when skill, time, or risk exceed DIY capabilities.
Maintenance and Long-Term Care for the Enclosed Tub
Routine maintenance preserves both appearance and function: use pH-neutral cleaners for tile and grout, wipe panels dry after use, and address grout stains promptly.
Annual inspections should confirm seals, access panels, and plumbing remain watertight and readily accessible.
For minor damage, repair chips or loose tiles quickly and reseal joints with appropriate caulk to prevent water intrusion.
Cleaning recommendations for tile, grout, and panels
Maintain tile, grout, and enclosure panels with a consistent, gentle cleaning regimen to preserve appearance and prevent moisture damage.
Use pH-neutral cleaners or mild soap, soft brushes for grout, and nonabrasive cloths for panels. Rinse thoroughly and dry surfaces after cleaning.
For mildew, apply diluted bleach or specialized mildew remover sparingly, then ventilate until fully dry to prevent recurrence.
Inspecting seals, access panels, and plumbing yearly
At least once a year, a thorough inspection of seals, access panels, and exposed plumbing helps catch deterioration and leaks before they cause water damage.
The owner should check sealant integrity, panel fasteners, and visible pipe joints for corrosion, looseness, or moisture. Confirm access panels open freely and that drain and supply connections show no seepage.
Document findings and schedule professional service if concerns arise.
Repair tips for minor damage and resealing
After documenting any issues found during the yearly inspection, homeowners can address minor chips, loose trim, and failing sealant themselves before they worsen.
Clean surfaces, sand glossy spots, apply matching filler or touch-up paint, and tighten or reattach trim with corrosion-resistant screws.
Remove old caulk, dry thoroughly, use mildew-resistant silicone, tool the bead smoothly, and allow full cure before testing to guarantee a watertight surround.
Before-and-After Examples and Design Inspirations
The section presents before-and-after examples highlighting small-bathroom enclosure ideas that maximize space without compromising access.
It also showcases luxurious surrounds and accent treatments that elevate the clawfoot’s presence.
Examples emphasize practical solutions that marry modern functionality with vintage clawfoot aesthetics.
Small-bathroom enclosure ideas to save space
Many small bathrooms transform by rethinking the clawfoot tub enclosure, shaving inches without sacrificing style or function.
Practical, compact strategies optimize layout and waterproofing while preserving vintage charm.
- Install a slim half-wall with integrated shelving to tuck plumbing and toiletries.
- Use clear glass or minimal curtain tracks to maintain sightlines.
- Choose shallow alcove surrounds and vertical storage to maximize floor space.
Luxurious surrounds and accent treatments
Small bathrooms that prioritize space-saving enclosures can also embrace high-end finishes; by scaling materials and accents thoughtfully, a compact clawfoot tub becomes a focal point rather than a compromise.
Before-and-after examples highlight marble paneling, brass trim, and inset niches that elevate visual richness.
Strategic lighting and minimal hardware maintain serenity while textured tiles or accent paint create depth without overwhelming limited square footage.
Combining functionality with vintage clawfoot aesthetics
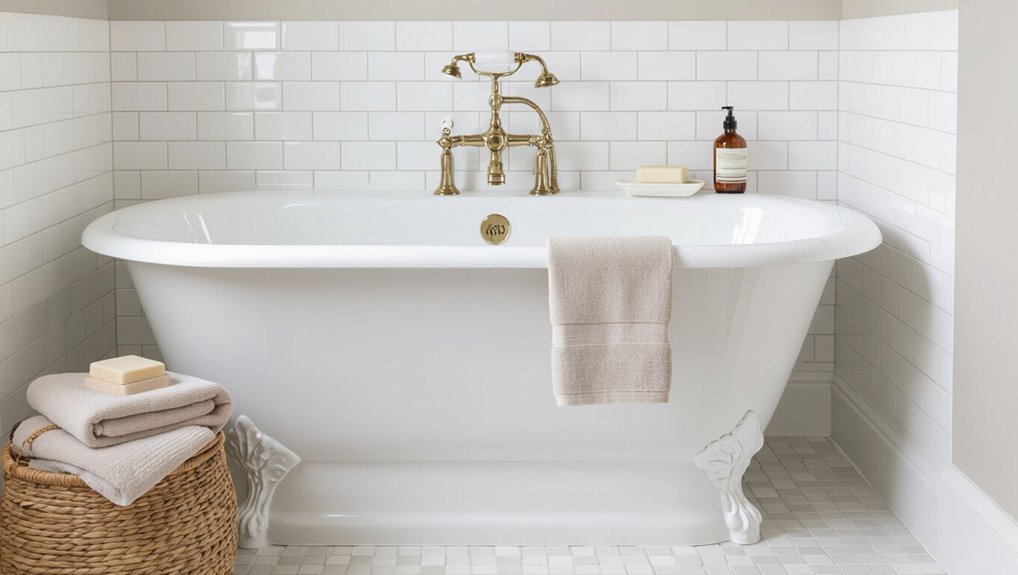
Several thoughtful interventions can marry period charm with modern utility, turning a vintage clawfoot tub into both a style statement and a practical bathing solution.
Before-and-after examples show added waterproof surrounds, discreet storage, and updated plumbing preserving original legs and enamel.
Design inspiration pairs restored fixtures, neutral tile, and subtle lighting to enhance authenticity while improving accessibility, maintenance, and overall functionality without compromising historic character.
Conclusion
In closing, the craftsman calmly completes the classic clawfoot cocoon: careful construction, clever choices, and conscientious waterproofing combine to create a cozy, chic corner. Practical planning prevents problems, precise plumbing preserves performance, and polished finishes promote perpetual pleasure. With sensible selection of materials and steadfast maintenance, the homeowner secures a stylish, sturdy surround that stands up to steam and time, satisfying safety standards while showcasing sublime, timeless style.