
How to Install a Recirculating Pump on a Tankless Water Heater: Step-by-Step Guide for Fast Hot Water
To install a recirculating pump on a tankless water heater, first ensure your unit supports external pumps. This setup provides instant hot water while minimizing waste. Next, plan your plumbing and electrical requirements, obtain necessary permits, and gather your tools and safety gear.
Begin by installing a dedicated return line or crossover valve. Then, mount the pump and connect it using isolation unions. Follow the manufacturer’s instructions to wire controls or a timer. Finally, purge any air from the system and check for leaks. For detailed guidance and troubleshooting tips, continue reading.
Overview of Recirculating Pumps for Tankless Water Heaters
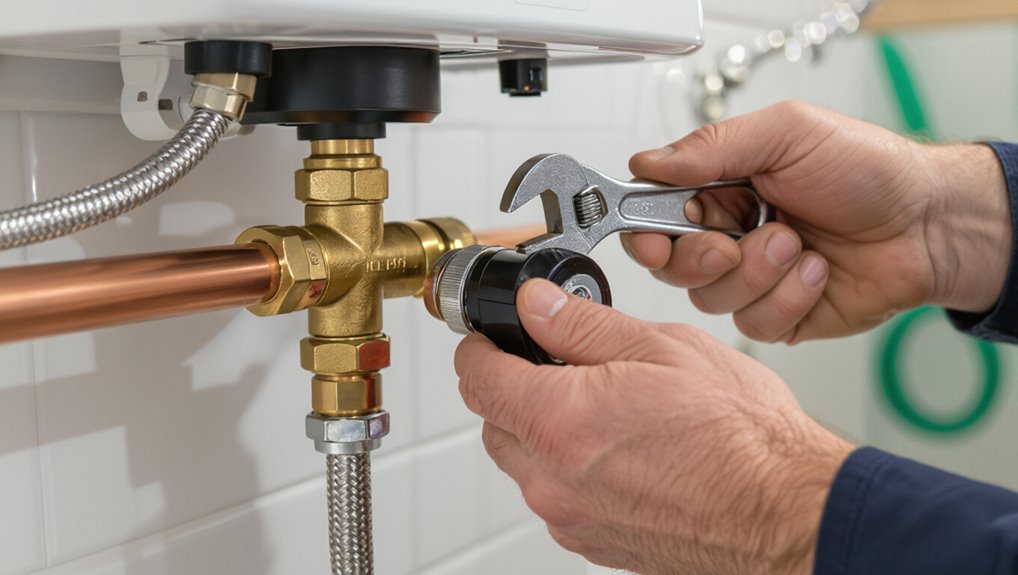
A recirculating pump continuously moves water through the hot water plumbing so hot taps receive heated water almost instantly, reducing wait time and waste.
Compatibility considerations include whether the tankless unit supports an external pump, required flow for activation, and whether a return line or alternative routing is feasible.
Common system types include dedicated return-line setups, comfort systems that use the cold line as a return, and line-locator (or demand-activated) solutions that circulate only when needed.
What a recirculating pump does and why it speeds up hot water delivery
Circulating cooled water back toward the tankless unit through a dedicated loop or the cold supply line, a recirculating pump keeps hot water near fixtures so desired temperatures reach taps far faster.
It minimizes wait time and water waste by returning unused hot water to the heater for reheating.
Readers following how to install recirculating pump on tankless water heater gain improved comfort and efficiency.
Compatibility: tankless water heaters and recirculation systems
Although tankless water heaters offer on-demand heating, not every unit or installation easily supports recirculation; compatibility depends on the heater’s control logic, warranty terms, and plumbing layout.
Manufacturers may require specific pump types or bypass arrangements. Electrical capacity, pump activation methods, and freeze protection matter.
Professional assessment guarantees control compatibility and maintains warranty coverage before installing a recirculation solution.
Types of recirculating systems (dedicated return line, comfort systems, line-locators)
Given the compatibility considerations for tankless units, choosing an appropriate recirculation approach depends on plumbing layout, control preferences, and heater requirements.
Dedicated return lines provide fastest, most efficient circulation with minimal waste.
Comfort systems use existing cold lines with line-locators or thermostatic valves to loop water until hot arrives.
Line-locators detect flow or temperature to trigger pumps, balancing convenience and retrofit simplicity.
Tools, Materials, and Safety Precautions
A concise list of required tools and materials establishes what is needed for a safe, code-compliant recirculating pump installation.
Consideration of optional upgrades and accessories—such as check valves, thermostatic valves, or smart controllers—can improve performance and convenience.
A clear safety checklist and preparation of the work area minimize risks and streamline the installation process.
Required tools and materials
Before beginning the installation, assemble the necessary tools, materials, and safety gear so the work proceeds efficiently and without unexpected stops.
Essential items include the recirculating pump kit, shutoff valves, fittings, and electrical supplies. Safety gear and basic plumbing tools are required.
- Recirculating pump kit (matching heater)
- Ball valves and check valve
- Copper/PEX tubing and fittings
- Voltage-rated wiring and conduit
- Gloves, goggles, and multimeter
Optional upgrades and accessories
After gathering the basic pump kit, valves, fittings, and safety gear, consideration of optional upgrades can improve performance, convenience, and longevity.
Options include smart timers, thermostatic bypass valves, insulated line kits, check valve upgrades, and enhanced mounting brackets.
Choose quality parts for reliability and reduced maintenance.
Emotional benefits include comfort, peace of mind, and pride in a professional finish.
- Smart timers
- Thermostatic bypass valves
- Insulated line kits
- Check valve upgrades
- Enhanced mounting brackets
Safety checklist and preparing the work area
Several essential tools, materials, and safety precautions must be validated before beginning work on a recirculating pump for a tankless water heater.
Verify shutoff valves, electrical disconnect, and pressure relief.
Gather pump, fittings, flex lines, Teflon tape, wrench set, multimeter, and pipe cutter.
Wear gloves, eye protection, and lockout/tagout.
Clear workspace, confirm ventilation, and keep a fire extinguisher nearby.
Pre-Installation Steps and Planning
Before beginning work, the installer evaluates the existing plumbing layout to select an ideal pump location and confirm pipe access.
They also verify electrical requirements and measure flow rates to size the pump appropriately while considering available power source options.
Finally, they review local permits and code requirements and determine whether conditions warrant hiring a licensed professional.
Assessing your plumbing layout and identifying ideal pump location
A clear survey of the existing plumbing layout is essential to determine where a recirculating pump will function most efficiently; this involves mapping hot and cold lines, locating the tankless unit, and noting branch connections, shutoff valves, and access points.
Identify the shortest effective loop, preferred return path (dedicated return or cold line), accessible mounting spot near the heater or main branch, and any space or isolation needs.
Verifying electrical requirements and power source options
Determining the electrical requirements and available power sources is a critical preparatory step that guarantees the recirculating pump will operate safely and reliably with a tankless water heater.
Review pump voltage, amperage, and horsepower; verify circuit capacity, breaker type, and grounding.
Identify nearby outlets or the need for a dedicated circuit.
Confirm local code, GFCI/AFCI requirements, and permit needs before installation.
Measuring for flow rate and pump sizing
Measure cold-to-hot run lengths and record fixture flow needs to size a recirculating pump that matches both the tankless heater’s minimum flow and the plumbing system’s demand.
Calculate cumulative fixture GPM, include peak simultaneous use, and estimate loop friction loss from pipe length, diameter, fittings, and elevation.
Choose a pump curve that delivers required GPM at calculated head, allowing slight margin for efficiency and future changes.
Permits, codes, and when to call a professional
Why consult local authorities before beginning?
Local plumbing and electrical codes, permit requirements, and inspection rules vary; compliance prevents fines and safety risks.
Verify whether a permit is required, allowable materials, and required licensed trades.
Hire a licensed plumber or electrician for gas hookups, structural modifications, or code interpretation.
If unsure or project scope exceeds basic wiring/plumbing, call a professional.
Step-by-Step Installation Process
The installer begins by shutting off water and power and draining the relevant lines to create a safe workspace.
Next steps cover installing a thermostatic bypass or crossover valve for a comfort system, connecting the pump to the return or cold line, and wiring the pump to the heater, timer, or controller.
The sequence finishes with fitting check valves, isolation valves, and unions to guarantee proper flow control and serviceability.
Shutting off water and power; draining lines
Before any connections are touched, shut off the cold-water supply to the heater and isolate power at the breaker to prevent electrical hazard.
Close isolation valves on inlet and outlet, then open a nearby hot faucet to relieve pressure.
Attach a hose to the heater drain or a low point and drain lines into a bucket or floor drain until empty.
Verify no residual flow.
Installing a thermostatic bypass or crossover valve (if using comfort system)
One clear step is to position and install the thermostatic bypass or crossover valve between the hot outlet and cold inlet lines so the comfort system can return warm water to the heater without running the full loop.
Mount the valve near the fixtures, align flow direction, cut and deburr pipes, apply appropriate fittings and sealant, torque connections per spec, and secure supports to prevent stress.
Connecting the pump to the return line or cold line
With the return- or cold-line connection identified and isolated, the installer measures and marks the exact pump location, accounting for flow direction, clearance for wiring and union fittings, and access for future service.
The installer cuts the pipe, deburrs, and dry-fits unions and isolation valves. After confirming alignment and proper slope, joints are soldered or threaded with appropriate sealant, and unions tightened to spec.
Wiring the pump to the heater, timer, or controller
Having secured the pump and completed the unions and fittings on the return/cold line, the next step is to wire the pump so it communicates and receives power from the tankless heater, timer, or external controller.
Power is routed per manufacturer diagrams: connect neutral, live, and ground, and link the pump’s control wire to the heater’s recirculation terminal or to the timer/controller relay.
Verify voltage and polarity before energizing.
Installing check valves, isolation valves, and unions
Begin by identifying the appropriate locations for a check valve, isolation valves, and unions on the cold return and hot supply lines, as these components control flow direction, allow service isolation, and enable easy disassembly.
Install the check valve on the return, isolation valves upstream and downstream of the pump, and unions adjacent to valves for convenient removal.
Tighten, support piping, and verify orientation marks.
Recharging the system: refilling, bleeding air, and leak checks
After the check valve, isolation valves, and unions are secured and verified, the next step is to recharge the loop by refilling, purging air, and performing leak checks.
Open the supply and fill valves slowly, monitor pressure to recommended levels, and operate purge points until steady water flows free of air.
Inspect all joints and fittings for leaks, tighten as needed, and recheck pressure after corrections.
Initial startup and setting pump controls (timers, sensors, priority modes)
Power up the recirculation loop and verify the pump receives correct voltage before configuring controls; initial startup requires confirming pump rotation, checking for unusual noise or vibration, and ensuring flow is steady and within manufacturer specifications.
Program timers for occupancy patterns, enable temperature sensors or demand switches, and set priority modes to protect the tankless heater.
Monitor system for proper cycling and adjust deadbands to prevent short cycling.
Integrating with Tankless Heater Controls and Sensors
The installer should explain how temperature sensors and smart controllers communicate with the recirculation pump to maintain setpoint accuracy and prevent short-cycling.
They must also cover configuring priority recirculation on compatible tankless units so the heater supplies the loop before secondary demands.
Finally, guidance on energy-saving settings and scheduling will help balance rapid hot-water delivery with minimized standby fuel or electricity use.
Using temperature sensors and smart controllers
Temperature sensors and smart controllers enable precise management of a tankless water heater recirculation loop by monitoring return-line temperatures and adjusting pump operation to maintain setpoints.
Compatible sensors feed real-time data to controllers that trigger pumps, set hysteresis, and log performance.
Integration options include dry-contact inputs, relay outputs, and communication protocols (Wi‑Fi, Modbus).
Proper placement and calibration guarantee efficiency and prevent short cycling.
Configuring priority recirculation on tankless units
Several tankless water heaters support priority recirculation, allowing the unit to momentarily favor loop demands over general heating so that hot water is delivered faster to critical fixtures.
Configure via the heater’s control menu to enable priority mode, set trigger thresholds (flow, temperature), and assign sensor inputs.
Verify pump relay wiring and safety interlocks.
Test activation at target fixtures and document settings for maintenance.
Energy-saving settings and scheduling
After configuring priority recirculation and confirming relay and sensor behavior, attention turns to energy-saving settings and scheduling that reduce runtime while maintaining user comfort.
Integrate thermostat setbacks, adaptive learning, and occupancy sensors with the tankless controller. Tune minimum on-times, temperature differentials, and timed holds to balance readiness and efficiency.
- Relief: fewer wasted cycles
- Confidence: predictable hot water
- Pride: lower bills
- Calm: reduced standby losses
- Satisfaction: optimized comfort
Troubleshooting Common Installation Issues
Common post-installation problems include no hot water at fixtures, pumps that short-cycle or overheat, leaks, pressure irregularities, and excessive noise.
The technician should inspect check-valves, flow sensors, and electrical connections to isolate pump or heater causes.
If the heater reports faults, resetting and reviewing error codes guides corrective steps and confirms whether wiring, grounding, or control settings require adjustment.
No hot water at fixtures after installation
Verify that hot water is reaching fixtures by checking for flow, temperature at the faucet, and any visible leaks or closed valves; confirm pump orientation and power, inlet/outlet connections, and that the check valve or thermostatic bypass isn’t blocking flow.
Inspect supply isolation valves, airlocks, and the tankless heater’s error codes.
If unresolved, isolate sections sequentially to pinpoint the fault before calling a technician.
Pump runs but short cycling or overheating
Diagnose short cycling or overheating by isolating the pump’s operating conditions and confirming proper thermal and electrical parameters.
Check pump duty cycle, wiring, voltage, and control signals for intermittent power or incorrect demand.
Verify thermostat or controller settings, flow restrictions, and check valve alignment.
Guarantee motor ventilation and mounting are correct.
Replace failed relays, sensors, or pump if persistent overheating or rapid cycling continues.
Leaks, pressure problems, and noisy operation
Inspecting for leaks, pressure anomalies, and unusual noises requires a systematic approach that isolates mechanical, plumbing, and control causes.
Check fittings, unions, and seals for drips; tighten or replace as needed.
Verify system pressure and expansion tank function; adjust or charge if off.
Listen for cavitation, trapped air, or bearing wear in the pump; purge air and lubricate or replace faulty components.
Resetting electrical faults and error codes on the heater
After resolving leaks, pressure irregularities, and mechanical noises, attention shifts to the heater’s electrical fault indicators and error codes, which often explain persistent operational failures.
Consult the manual for code definitions, verify wiring, grounding, and sensor connections, then clear codes via the unit’s reset function or power cycle.
If faults recur, document codes and contact a qualified technician for diagnostics and safe repair.
Maintenance, Service, and Longevity
A clear maintenance plan helps preserve pump performance and extend system life.
Regular tasks should include a scheduled inspection, descaling and filter care in hard-water areas, and lubrication or tightening of fittings as specified by the manufacturer.
Criteria for replacement—such as persistent noise, loss of flow, leaks, or repeated failures—should be identified so components or the pump itself can be replaced before causing damage to the tankless unit.
Routine maintenance schedule
Establishing a clear routine maintenance schedule secures the recirculating pump and tankless water heater operate efficiently and reliably over time.
Quarterly inspections, annual professional service, lubrication checks, and prompt leak repairs prevent failures. Tracking actions in a simple log guarantees accountability and timely reminders.
- Relief when systems run smoothly
- Confidence in hot water availability
- Frustration avoided by proactive care
- Pride in responsible ownership
- Peace of mind for the household
Descaling and filter care for hard-water areas
Prevent mineral buildup by implementing regular descaling and filter maintenance when a recirculating pump services a tankless water heater in hard-water areas.
Flush the heater and pump annually with a vinegar or citric acid solution, following manufacturer guidelines.
Inspect and clean inlet strainers and inline filters every 3–6 months.
Replace disposable filters per recommended intervals to preserve flow, efficiency, and component lifespan.
When to replace the pump or components
Monitor performance indicators to determine when a recirculating pump or its components require replacement. Signs include persistent noise, reduced flow, intermittent operation, leaks, or frequent tripping of breakers.
If maintenance (cleaning, lubrication, seal or cartridge replacement) fails to restore function, replace the pump.
Also replace aging units nearing manufacturer lifespan or after repeated failures to avoid inefficiency and water damage.
Cost, Efficiency, and ROI
A concise cost overview outlines typical installation expenses—parts, pump, fittings, and labor—so readers can gauge upfront investment.
Energy use and projected savings from reduced water waste and standby losses should be compared to estimate payback time.
The article also contrasts DIY versus professional installation costs and risks to inform the return-on-investment decision.
Typical installation cost breakdown
Most homeowners can expect total installation costs for a tankless water heater recirculating pump to range from roughly $400 to $1,800, depending on pump type, additional piping or return line work, and labor rates; upfront expenses break down into the pump unit (typically $150–$700), control devices or timers ($50–$300), materials such as check valves and fittings ($20–$150), and installation labor ($150–$800).
| Item | Typical Cost | Notes |
|---|---|---|
| Pump unit | $150–$700 | Varies by flow and brand |
| Controls/timers | $50–$300 | Smart options cost more |
| Materials | $20–$150 | Valves, fittings, wiring |
| Labor | $150–$800 | Depends on complexity |
| Total | $400–$1,800 | Site-specific variation |
Energy usage and estimated savings
Many installations reduce hot-water wait time and lower wasted water and energy by circulating preheated water back to the heater, but actual energy use depends on pump type, control strategy, and household hot-water habits.
Fixed-run pumps raise baseline electricity use; demand or timer controls cut runtime. Savings derive from reduced water heating cycles and lower mains reheating losses.
Payback varies with usage, utility rates, and system efficiency.
Comparing DIY vs professional installation costs and risks
Installing a recirculating pump oneself can cut upfront labor costs but introduces trade-offs in time, warranty coverage, code compliance, and potential for mistakes that reduce system efficiency or cause damage.
Hiring a licensed plumber increases initial expense but generally guarantees proper electrical and plumbing connections, permits where required, and adherence to manufacturer specs that preserve warranties and long-term performance.
DIY can save money if experienced; otherwise pros limit risks and assure ROI.
Common Mistakes to Avoid
Common mistakes during recirculating pump installation include choosing the wrong pump size or positioning it improperly, which can reduce flow and stress the heater.
Omitting check valves or isolation valves can cause backflow, maintenance difficulty, and system damage.
Ignoring electrical hookups and local code requirements risks safety hazards and failed inspections.
Incorrect pump sizing or placement
Select the wrong pump size or place it improperly and the recirculation system will underperform, cycle excessively, or strain the water heater.
Undersized pumps fail to overcome loop friction; oversized units create excessive flow, noise, and wear.
Placing the pump far from the return manifold or on the cold leg reduces efficiency and increases response time.
Match pump capacity to loop length and head.
Skipping check valves or isolation valves
Neglecting check valves or isolation valves can allow unwanted backflow, cross-connection, and make servicing the recirculation loop difficult or hazardous.
Omitting them risks cold-water intrusion, pressure loss, and contamination between hot and potable lines.
Properly installed check valves prevent reverse flow; isolation valves enable safe maintenance and pump replacement without shutting the whole system, reducing downtime and protecting the tankless unit.
Ignoring electrical and code requirements
After addressing valves that control flow and maintenance access, attention must turn to the electrical and code requirements that govern recirculating pump installation.
Ignoring permits, local codes, wiring specifications, grounding, and breaker sizing risks unsafe operation, failed inspections, and voided warranties.
Properly sized circuits, GFCI or AFCI protection where required, and documented compliance guarantee legal, reliable, and safe pump integration with a tankless system.
Quick Reference: Checklist for a Successful Installation
A concise checklist helps ascertain a smooth recirculating pump installation on a tankless water heater by outlining essential steps, required tools, and safety checks before work begins.
The installer follows clear items, verifies permits, and minimizes surprise issues to guarantee reliable, fast hot water delivery.
- Confirm compatibility and parts
- Shut off power and water
- Secure permits and code compliance
- Test for leaks and flow
- Validate electrical connections and function
Conclusion
Installing a recirculating pump on a tankless water heater delivers near-instant hot water and reduced waste when planned and executed properly. For example, a suburban family added a demand-activated pump with a dedicated return line and timer; mornings no longer required running faucets for minutes, cutting water usage and improving convenience. With correct sizing, check valves, and periodic maintenance, such systems reliably enhance comfort and efficiency while avoiding common pitfalls like improper bypasses or undersized piping.
