How to Know If You Need a New Water Heater: 10 Signs, Costs, and When to Replace
If you’re wondering whether it’s time to replace your water heater, look for these key signs: age (over 8–12 years for tanks and 15–20 for tankless), persistent leaks, rusty or discolored hot water, frequent ignition failures, or tank corrosion. Additionally, if you experience inconsistent temperatures, loud rumbling noises, foul odors, rising energy bills, or a ruptured tank, it’s likely time for a replacement. While minor issues can often be repaired, a unit showing these symptoms usually requires replacement. Read on for information on costs, timelines, available rebates, and practical next steps.
How to Tell If Your Water Heater Needs Replacement
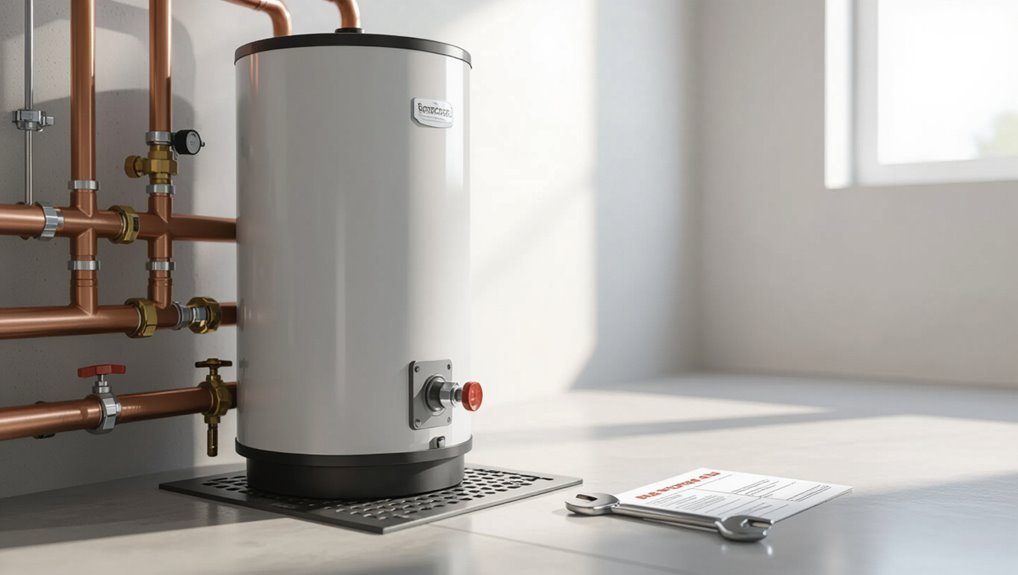
Certain indicators — such as persistent leaks, rusty water, or a failing heating element in an aging tank — clearly signal that replacement is the most practical option.
Other situations, like isolated component failures or recent installation, may still be feasible to repair.
The following discussion will distinguish immediate replacement triggers from repairable conditions to guide decision-making.
Clear signs that immediately indicate replacement is needed
When a water heater shows unmistakable failures—such as persistent leaks, discolored or rusty water, or no hot water at all—replacement is the practical next step rather than continued repair.
Clear indicators include tank rupture or active dripping, brown sediment or rusty taps, frequent ignition failures, and age beyond expected lifespan.
These signs answer how to know if you need a new water heater immediately.
Situations where repair might still be an option
If problems are limited and the unit is otherwise sound, repair can remain a viable choice rather than immediate replacement.
Minor leaks, a failed thermostat, sediment buildup, or a faulty heating element often warrant targeted fixes.
Consider age, repair cost versus replacement, energy efficiency, and warranty status.
A professional diagnosis helps determine whether repairs restore reliable performance or merely postpone inevitable replacement.
Age and Expected Lifespan of Water Heaters
Typical tank-style water heaters usually last about 8–12 years, while tankless units often reach 15–20 years with proper care.
The actual lifespan depends on the installation date, water quality, and routine maintenance such as flushing and anode replacement.
Evaluating age alongside service history helps determine whether repair or replacement is the more practical option.
Typical lifespans for tank-style water heaters
Most tank-style water heaters last between 8 and 12 years, though actual lifespan varies with model, fuel type, water quality, and maintenance history.
Heavy use, hard water, and neglected flushing accelerate corrosion and sediment buildup. Proper maintenance—regular flushing, anode replacement, and pressure-relief testing—can extend service life.
Older units approaching a decade often warrant inspection for leaks, rust, or efficiency loss prior to replacement.
Typical lifespans for tankless water heaters
Tankless water heaters generally outlast tank-style units, commonly operating 15 to 20 years with proper maintenance.
Longevity varies by model, fuel type, and usage intensity; high-quality units sometimes reach 25 years.
Components like heat exchangers and electronics determine replacement timing.
Manufacturers often offer longer warranties for core parts, reflecting expected service life and typical homeowner experience with tankless systems.
How installation date and maintenance affect longevity
While tankless systems often have longer service lives than tank units, the actual lifespan of any water heater is strongly tied to when it was installed and how well it has been maintained.
Age determines corrosion and wear; regular maintenance—flushing, anode replacement, inspections—slows degradation.
Poor installation or neglected service accelerates failure, shortening expected lifespan and increasing the likelihood of leaks, inefficiency, and costly premature replacement.
10 Common Signs Your Water Heater Is Failing
A failing water heater often announces itself through performance and condition changes that warrant prompt attention. Common indicators include inconsistent hot water, discoloration or rust in the supply, loud or unusual noises, visible leaks, and surface corrosion. Recognizing these signs early can guide the decision to repair or replace the unit.
- Inadequate hot water or rapidly fluctuating temperature
- Discolored or rusty hot water; unusual noises (rumbling, popping, banging)
- Leaks around the tank or connections; visible corrosion or rust on the tank
Inadequate hot water or rapidly fluctuating temperature
How can one tell when a water heater is failing?
Inadequate hot water or rapid temperature swings often indicate diminished capacity, sediment buildup, a failing thermostat, or intermittent burner/element function.
Showers go cold unexpectedly, multiple fixtures can’t run simultaneously, or temperature cycles without user input.
Persistent patterns warrant inspection; repair or replacement depends on age, cost, and severity of performance loss.
Discolored or rusty hot water
Why is the water coming out brown or tinged with red?
Discolored hot water often signals internal corrosion, a failing anode rod, or rusting tank lining.
Sediment buildup can also stir and discolor water.
If staining persists after flushing or appears only from hot taps, it indicates the heater rather than household plumbing — a clear sign to inspect, repair, or consider replacement.
Unusual noises (rumbling, popping, banging)
Whereas discolored water points to corrosion or sediment, strange noises from a water heater often signal internal sediment interacting with heat.
Rumbling, popping, or banging indicates mineral buildup creating hot spots that cause boiling beneath the tank’s surface. These sounds reduce efficiency, accelerate tank wear, and may precede failure.
Flushing or professional descaling can help, but recurrent noise suggests evaluation for replacement.
Leaks around the tank or connections
Any visible water around the tank or its fittings is a clear warning that a water heater is failing.
Persistent puddles, dampness at pipe joints, or dripping from valves indicate seals, connections, or the tank itself may be compromised.
Immediate attention is advised: small leaks can worsen, causing damage and inefficiency.
A professional inspection determines repairability versus replacement.
Visible corrosion or rust on the tank
Rust or flaking metal on the exterior of a water heater signals internal corrosion that can shorten the unit’s lifespan.
Visible rust indicates tank deterioration, compromised seams or fittings, and an increased risk of leaks or sudden failure.
Prompt inspection verifies whether repair (anode replacement, patching) suffices or if full replacement is safer to prevent water damage and loss of service.
Increased energy bills without usage change
How can a household notice a failing water heater before a leak appears?
An unexplained rise in monthly energy bills often signals declining efficiency: sediment buildup, a failing thermostat, or a worn heating element forces the unit to run longer.
Comparing usage patterns and past bills can reveal the shift.
Persistent higher costs warrant inspection; repair or replacement choices follow diagnostic results.
Water takes too long to reheat
When hot water runs out quickly and the tank takes noticeably longer than before to heat a fresh supply, the heater is likely losing efficiency or capacity.
Sediment buildup, a failing heating element or burner, or a weakened thermostat reduce recovery rate.
Persistent slow reheating signals declining performance; if flushing or part replacement doesn’t restore normal recovery times, consider replacement to avoid outages and higher operating costs.
Frequent repairs or repeated component failures
Repeated breakdowns or successive part failures signal a water heater nearing the end of its useful life.
Frequent calls for thermostats, heating elements, valves, or burners indicate escalating repair costs and declining reliability.
When repairs cluster within months or different components falter repeatedly, replacement often becomes more economical and prevents unexpected outages, water damage, and efficiency losses compared with ongoing patchwork fixes.
Foul-smelling hot water
Why does hot water sometimes carry a rotten-egg odor? A foul sulfur smell often indicates bacterial growth in the tank reacting with naturally occurring sulfate and the anode rod, producing hydrogen sulfide.
This issue signals contamination or component degradation rather than simple temperature problems.
Persistent odor despite flushing or treatment suggests professional inspection and possible replacement to restore water quality and safety.
Signs of sediment buildup or decreased efficiency
Sediment accumulation and declining efficiency manifest through measurable changes: slower hot-water recovery, fluctuating temperatures, rumbling noises from the tank, and visible particles in faucets or the pressure relief valve discharge.
Reduced capacity, rising energy bills, and frequent thermostat cycling also indicate sediment insulating the burner or heating element.
Regular flushing can restore performance temporarily; persistent symptoms suggest professional inspection or replacement.
How to Diagnose Problems Yourself and When to Call a Pro
A few simple checks can help determine whether a water heater problem is DIY‑friendly: confirm the thermostat setting, briefly test the temperature-pressure relief valve, and inspect for obvious leaks or corrosion.
If those steps uncover unusual noises, fluctuating temperatures, or visible damage, note exact symptoms, model and age of the unit, recent maintenance, and any error codes before calling a technician.
Immediate professional attention is warranted for active leaks, gas smell, or signs of imminent failure such as major rusting or no hot water combined with tripped breakers.
Simple DIY checks (temperature setting, pressure relief valve test, visual inspection)
When homeowners notice reduced hot-water output, strange noises, or leaks, simple DIY checks can quickly reveal whether the issue is an easy fix or a sign of impending failure.
Verify thermostat set to 120°F, inspect visible pipes and tank for corrosion or leaks, and test the temperature-pressure relief valve by lifting its lever briefly to confirm flow stops and reseats.
Call a pro if unsure.
What diagnostic information to gather before contacting a technician
How should homeowners prepare before calling a technician?
Homeowners should note model, age, capacity, and installation date; record visible symptoms (leaks, discoloration, noises), water temperature behavior, recovery time, and recent maintenance.
Measure incoming water pressure and note error codes or pilot light status.
Take photos or short videos.
Compile utility bills for fuel type and usage patterns to help diagnosis and cost estimates.
Red flags that require immediate professional attention
Why act immediately?
Visible leaks, pooling water, rusty discharge, gas smell, or pilot light failure indicate urgent risk and require a licensed technician.
Sudden loss of hot water with banging noises, excessive pressure relief valve discharge, or electrical tripping also demands professional inspection.
These signs suggest imminent failure, safety hazards, or gas/electrical danger; DIY fixes are inappropriate.
Costs of Repair vs Replacement
A clear comparison of repair and replacement costs helps determine the most economical choice.
Typical repairs—such as thermostat, heating element, or valve replacements—often fall in the low-to-mid hundreds, while full replacement costs vary by fuel type: electric and gas tank units generally cost more than basic models and tankless systems command a higher upfront price.
Labor, permit, and disposal fees can add several hundred dollars to either option and should be included in any decision.
Typical cost ranges for common repairs
Many homeowners face a decision when a water heater falters: repair common components or replace the unit entirely. Typical repair costs vary: thermostats $50–$200, heating elements $100–$300, valves $75–$250. Aging tanks may need sediment flushing or minor seals. Consider age, frequency, and cost before choosing replacement.
| Component | Typical Cost | Emotional Weight |
|---|---|---|
| Thermostat | $50–$200 | Relief |
| Element | $100–$300 | Frustration |
| Valve | $75–$250 | Anxiety |
| Flush/Seal | $50–$150 | Hope |
Typical cost ranges for full replacement by fuel type (electric, gas, tankless)
When weighing repair versus replacement, homeowners should compare typical full-replacement costs by fuel type—electric tank units generally range from $700 to $1,800 installed, gas tanks from $900 to $2,500, and tankless systems often start around $1,200 and can exceed $4,500 with installation and necessary venting or gas-line upgrades.
| Fuel Type | Typical Range | Emotional Weight |
|---|---|---|
| Electric | $700–$1,800 | Relief |
| Gas | $900–$2,500 | Caution |
| Tankless | $1,200–$4,500+ | Investment |
Labor, permits, and disposal fees to expect
Expect labor, permit, and disposal fees to add several hundred dollars—or more—to any repair or replacement total.
Labor varies with complexity and region; licensed plumbers charge higher local rates.
Permits may be required for gas or major electrical work, adding fixed fees.
Disposal or recycling of old tanks incurs pickup or landfill costs.
Factor these into any repair-versus-replace calculation.
How to Decide: Repair, Replace, or Upgrade
A simple cost-benefit checklist helps determine whether repair, replacement, or upgrade offers the best value, weighing repair price, remaining lifespan, and expected savings.
Upgrading to a tankless, heat pump, or other high-efficiency system becomes sensible when fuel savings, space needs, or performance improvements outweigh conversion costs.
Environmental impact and long-term operating expenses should factor into the decision alongside upfront costs.
Cost-benefit checklist for repair vs replacement
Weigh costs, performance, and lifespan to determine whether repairing a water heater is economically sensible or if replacement or an upgrade will provide greater value.
This checklist guides that analysis by comparing repair expenses, remaining service life, energy efficiency, and potential long-term savings.
Assess repair cost versus replacement price, age versus expected years left, frequency of failures, warranty implications, energy cost differences, and resale or safety benefits.
When upgrading to a different type (tankless, heat pump, high-efficiency) makes sense
After comparing repair costs, remaining service life, and energy savings, homeowners may find that switching water heater technologies offers greater long-term value than simply replacing like-for-like.
Upgrading suits households needing higher hot-water demand, space savings, or lower operating expenses.
Consider installation complexity, fuel compatibility, and upfront cost.
Choose tankless for continuous flow, heat pump for efficiency in moderate climates, high-efficiency tanks for simpler retrofits.
Environmental and long-term cost considerations
Because decisions about repair, replacement, or upgrading affect both household costs and environmental impact, homeowners should evaluate lifetime expenses and ecological consequences together.
Calculate total cost of ownership including fuel, maintenance, expected lifespan, and disposal.
Compare energy efficiency, emissions, and potential rebates for heat-pump or tankless systems.
Prioritize options that lower long-term bills and carbon footprint while matching household hot-water demand and budget.
Choosing the Right Replacement Water Heater
Selecting a replacement water heater requires weighing fuel options—electric, natural gas, propane, solar, or heat pump—against home infrastructure and operating costs.
Appropriate sizing hinges on required capacity and flow rate, while efficiency ratings, warranties, and expected running costs determine long-term value.
Brand and model choices should be guided by reliability data, service availability, and total lifecycle expense.
Comparing fuel types: electric, gas, propane, solar, heat pump
Which fuel type best matches a household’s needs depends on efficiency, operating cost, installation constraints, and local fuel availability. Each option—electric, natural gas, propane, solar, or heat pump—has tradeoffs in upfront cost, running expense, emissions, and space. Consider climate, utility rates, and ventilation requirements when choosing.
| Fuel | Pros | Cons |
|---|---|---|
| Electric | Simple, low install | Higher operating cost |
| Gas | Cheaper to run | Needs venting |
| Propane | Portable, powerful | Fuel delivery needed |
| Solar/Heat pump | Efficient, low emissions | High upfront cost |
Sizing guidelines: how to pick capacity and flow rate
After choosing the fuel type that fits a home’s constraints and costs, proper sizing determines whether the replacement heater will meet demand without wasting energy.
Calculate peak hour demand: count simultaneous fixtures and multiply by typical flow rates (showers 1.5–2.5 gpm, faucets 0.5–1.5 gpm).
For storage tanks, match first-hour rating to peak demand; for tankless, select unit with sufficient gpm at required temperature rise.
Efficiency ratings, warranties, and expected running costs
How efficient will the new heater be, and what will it cost to operate over time? Evaluate energy factor (EF) or Uniform Energy Factor (UEF) ratings, fuel type, and insulation; higher UEFs reduce fuel use but raise purchase price. Compare estimated annual operating costs using local energy rates. Review manufacturer warranties—tank life, parts, and labor—and consider extended protection for peace of mind.
Brand and model selection tips
Select a brand and model based on proven reliability, local service availability, and features that match household needs.
Compare energy efficiency, capacity, fuel type, and warranty terms.
Prioritize manufacturers with accessible parts and certified installers.
Read independent reviews and verify dealer support.
Balance upfront cost against lifecycle expenses and anticipated maintenance to choose the most practical, durable replacement.
Installation Process and What to Expect
The installation process typically follows clear steps—removal of the old unit, site preparation, mounting and hookups, and final testing—usually completed within a few hours to a day depending on complexity.
Necessary permits and inspections vary by locality and must meet local plumbing and electrical codes to guarantee safety and warranty compliance.
Common pitfalls include improper venting, incorrect sizing, and poor connections, which licensed professionals avoid through code knowledge, proper tools, and systematic testing.
Typical installation steps and timeline
Begin by scheduling an on-site assessment so a technician can confirm the replacement type, required permits, and any preparatory work.
Once approved, the installation proceeds through ordered steps—gas or electric disconnection, draining and removal of the old unit, site preparation, new unit placement and connections, pressure and leak tests, and final code inspections—typically taking 3–6 hours for a straightforward tank model and longer if upgrades, venting changes, or tankless systems are involved.
Technician then starts system commissioning, explains operation, and documents work.
Required permits, inspections, and code considerations
Confirming permits and inspections is a critical step in any water heater replacement, since local building codes dictate ventilation, fuel connections, seismic strapping, relief valve routing, and electrical requirements that affect safety and compliance.
Homeowners should verify permit needs, schedule required inspections, and retain documentation. Inspectors confirm code adherence; noncompliance can trigger fines, rework, or insurance issues.
Licensed installers typically manage permitting.
Common installation pitfalls and how professionals avoid them
After permits and inspections are in place and documentation secured, attention turns to common installation pitfalls that can compromise safety, performance, and code compliance.
Professionals prevent errors by ensuring correct venting, proper pressure relief valve installation, accurate gas/electrical connections, correct water line orientation, secure seismic/bracing where required, and adequate clearance for maintenance.
Testing, adherence to manufacturer instructions, and final inspections confirm safe, efficient operation.
Maintenance Tips to Extend Water Heater Life
A concise maintenance routine can greatly extend a water heater’s service life by addressing flushing, anode rod inspection, and correct temperature settings.
Homeowners should perform basic seasonal and annual tasks—such as flushing sediment, checking the anode rod, and verifying pressure relief and thermostat settings—while keeping a simple checklist.
Professional maintenance is advisable for tankless systems, persistent issues, or inspections every 1–2 years to guarantee safe, efficient operation.
Regular maintenance checklist (flushing, anode rod, temperature setting)
Perform routine maintenance to keep a water heater efficient and to prevent premature failure.
Flush the tank annually to remove sediment, improving heat transfer and reducing corrosion.
Inspect and replace the sacrificial anode rod when heavily corroded to protect the tank.
Verify thermostat settings (120°F recommended) to balance safety, energy use, and scald risk.
Document actions and dates for future reference.
Seasonal and annual tasks homeowners can perform
Routine maintenance items naturally lead into a seasonal and annual checklist that homeowners can handle themselves to extend a water heater’s lifespan.
Inspect for leaks, corrosion, and insulation gaps; test the pressure relief valve; drain a few gallons to remove sediment; check pipe connections and insulation; verify thermostat settings for seasonal needs; and document dates and observations for future reference.
When to schedule professional maintenance
While many upkeep tasks suit a confident homeowner, certain inspections and repairs require a licensed technician to secure safety and preserve warranty coverage.
Schedule professional maintenance annually for tank systems and every 1–2 years for hybrids or gas units.
Call a pro for unusual noises, persistent leaks, pilot or ignition issues, or if work involves gas, electrical, or anode rod replacement to guarantee proper diagnostics and code compliance.
Energy Savings and Rebates
A new, more efficient water heater can meaningfully reduce household energy bills by using less fuel or electricity for the same hot water demand.
Homeowners should review available rebates, tax credits, and utility incentives, which often vary by equipment type such as tankless, heat pump, or high-efficiency tank models.
Pairing a replacement with simple efficiency upgrades—pipe insulation, smart thermostats, or low-flow fixtures—can amplify savings and improve payback time.
How a new unit can lower energy bills
When homeowners replace an old water heater with a modern, high-efficiency model, they typically see measurable reductions in monthly energy use because newer units lose less heat and operate more efficiently.
Improved insulation, advanced burners or heat pump technology, and smarter controls cut standby and recovery losses.
Over time these savings often offset higher upfront costs, lowering utility bills and reducing household energy demand.
Available rebates, tax credits, and incentives by equipment type
Curious about offsetting upgrade costs? Federal tax credits sometimes cover high-efficiency heat pump water heaters.
States and utilities add rebates for ENERGY STAR models, tankless systems, or solar thermal installs.
Incentives vary by equipment type, efficiency rating, and income level.
Verify local program eligibility, combined offers, and application deadlines; documentation and contractor certification often required to claim available savings.
Simple efficiency upgrades to pair with a new heater
Although replacement is the centerpiece of a water-heating upgrade, pairing the new unit with a few targeted efficiency measures often multiplies energy savings and improves rebate eligibility.
Insulate hot water pipes and the tank, install low-flow fixtures, add a smart controller or timer, and lower thermostat settings.
These low-cost steps reduce demand, shorten recovery cycles, and can meet utility program requirements for enhanced rebates.
Common Mistakes to Avoid When Replacing a Water Heater
When replacing a water heater, common mistakes can undermine performance and safety.
These include choosing an undersized or oversized unit, neglecting venting, clearance, or local code requirements, and skipping required permits or warranty registration.
Awareness of these pitfalls helps guarantee a compliant, efficient installation.
Undersizing or oversizing the unit
If a replacement water heater is too small, it will run out of hot water during peak use; if it is too large, it will cycle inefficiently and raise energy costs.
Proper sizing considers household hot water demand, simultaneous fixtures, and recovery rate. Selecting capacity and recovery matching usage avoids discomfort and waste.
Consult manufacturer charts or a professional for accurate load calculations and efficient performance.
Ignoring venting, clearance, or code requirements
Because venting, clearance, and local code requirements dictate safe and efficient operation, neglecting them during replacement creates serious hazards and potential legal issues.
Improper venting risks carbon monoxide buildup; inadequate clearance impedes maintenance and increases fire danger.
Failing to meet codes can lead to failed inspections, fines, or voided insurance.
Adhering to manufacturer guidelines and local regulations guarantees safety and compliance.
Skipping permits or warranty registration
Although it may seem like an easy shortcut, bypassing required permits or failing to register a new water heater exposes homeowners to costly consequences.
Permits guarantee inspections, code compliance and insurance validity; skipping them risks fines, denied claims and unsafe installations.
Not registering a unit can void warranties, leaving owners responsible for repairs.
Proper paperwork protects safety, finances and future resale value.
Real-World Scenarios and Recommendations
The following scenarios present common homeowner circumstances and concise recommendations to guide decision-making about replacement or interim measures. Each point matches a typical situation—aging tank units, limited-term occupancy, and whole-home efficiency planning—and suggests the most practical action. Readers should use these as starting recommendations and consult a professional for specifics.
- For older tank heaters showing early signs of failure: prioritize inspection and plan for timely replacement to avoid emergency breakdowns.
- For renters or short-term homeowners: consider temporary fixes or notifying the property owner; avoid large investments unless ownership will change.
- For those planning a whole-home efficiency upgrade: evaluate high-efficiency tankless or heat-pump models now to align with broader retrofit goals.
Best action for homeowners with older tank heaters showing first signs of failure
When an older tank water heater begins showing signs of failure—such as intermittent hot water, rumbling noises, rusty or discolored water, slow recovery, or minor leaks—homeowners should promptly assess options to avoid sudden loss or water damage.
Short-term fixes like flushing the tank, replacing the anode rod, or tightening fittings can extend service life by months to a few years, but a clear replacement plan is advisable if multiple symptoms appear, the unit is over 10–12 years old, or repair costs approach half the price of a new heater.
Homeowners should document problems, obtain professional inspection, compare repair versus replacement costs, and schedule replacement before leaks cause damage.
Best action for renters or short-term homeowners
If living in a rental or occupying a home only briefly, tenants and short-term owners should prioritize minimizing disruption and liability by notifying the property owner or manager at the first sign of water heater trouble.
Documenting symptoms with photos and dates is essential, and avoiding major repairs themselves is crucial. Small preventive steps like flushing sediment, tightening accessible fittings, or replacing an easily reachable anode rod can be offered as temporary measures. However, full replacement decisions and invasive work are the owner’s responsibility.
Tenants should review lease obligations, request prompt professional inspection, and keep records of communications to guarantee responsibility and timely resolution.
Best action when planning a whole-home efficiency upgrade
Evaluate the water heater’s role within the home’s overall energy system before committing to upgrades.
An energy audit identifies interactions among heating, insulation, ventilation, and appliances.
Prioritize measures with highest cost-effectiveness, such as insulating pipes, upgrading to a high-efficiency tankless or heat pump unit, and integrating with smart controls.
Coordinate contractor plans to guarantee equipment sizing, ventilation, and load balancing match whole-home goals.
Checklist: Steps to Take When You Decide to Replace Your Water Heater
When a replacement is chosen, a clear checklist guarantees the process proceeds smoothly from purchase through final checks. The homeowner should verify essential specifications and compatible parts before buying, prepare targeted questions for installers and contractors, and confirm post-installation performance and safety. Following these steps reduces surprises and helps protect the investment.
- Confirm required capacity, fuel type, dimensions, and any replacement parts or permits needed.
- Ask installers about warranties, installation timeline, credentials, and disposal of the old unit.
- Verify proper venting, pressure relief operation, temperature settings, and absence of leaks after installation.
Pre-purchase items to confirm
How should a homeowner proceed before purchasing a replacement water heater: by confirming measurements, fuel type, venting requirements, and local code constraints to guarantee the new unit fits and operates as planned.
Verify tank height, diameter, and clearance; confirm gas, electric, or propane supply and line capacity; note vent type and chimney compatibility; record water heater capacity and energy-efficiency ratings for proper selection.
Questions to ask installers and contractors
What specific questions should be asked to guarantee a smooth installation and reliable service?
Ask about licensing, insurance, and local code compliance.
Confirm written estimates, timelines, and payment terms.
Inquire about warranty coverage for equipment and labor, parts availability, and service response times.
Request references, past project examples, and a clear scope of work including cleanup and disposal of the old unit.
Post-installation verification steps
After installation, a concise post-installation checklist guarantees the new water heater performs as expected and meets warranty and code requirements.
Verify proper venting, secure connections, and correct pressure settings. Inspect for leaks, correct thermostat operation, and adequate insulation.
Confirm earthquake straps, discharge piping, and TPR valve function. Obtain signed completion paperwork, appliance registration, and local inspection approval where required.
Conclusion
After months of debating leaks, lukewarm showers, and mysterious noises, the homeowner finally embraced the inevitable: replace the water heater. Ironically, the appliance that once promised endless hot water became a lesson in timing, cost, and patience. Armed with age checks, warning signs, and a pros-and-cons list, the sensible choice—though less romantic than heroic repairs—restores comfort, efficiency, and fewer plumber texts at 2 a.m. The next shower will feel triumphant.