How to Replace Ductwork in Attic: Step-by-Step Guide for DIY & Pros
Replacing ductwork in your attic can significantly improve your HVAC system’s efficiency by eliminating leaks and ensuring proper insulation. This process involves several key steps: starting with safety checks and necessary permits, followed by inspecting and mapping the existing duct runs to size the new ducts. You’ll then remove the old ducts, properly handle any contaminated sections, and install new trunk and branch lines, ensuring they are sealed, insulated, and supported. Finally, you’ll conduct airflow tests to balance the system and check for leaks. For detailed steps, required tools, estimated costs, and advice on hiring professionals, continue reading.
Overview of Replacing Attic Ductwork: What to Expect
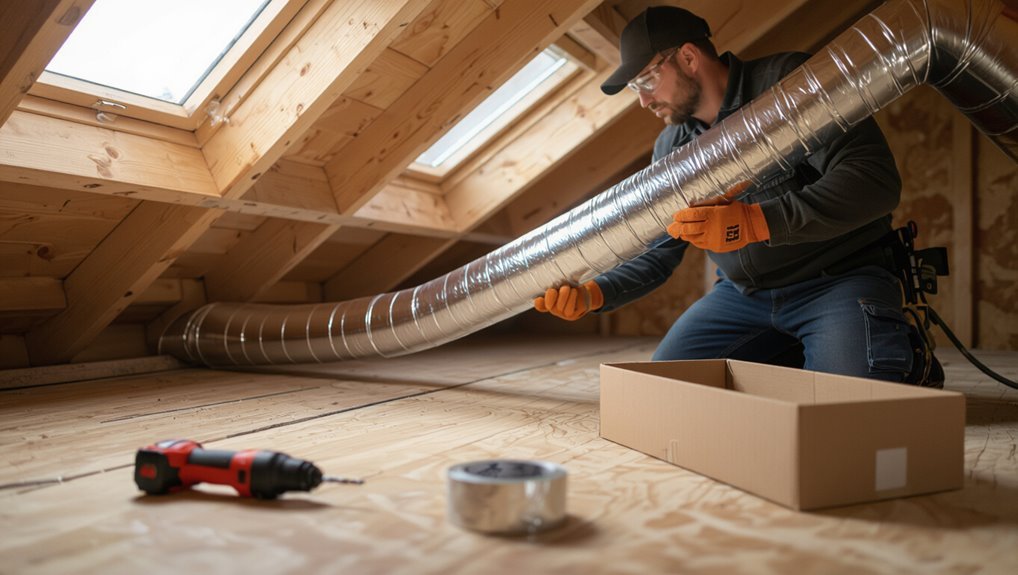
The section outlines common signs that attic ductwork needs replacement—such as persistent leaks, severe damage, and performance loss—and typical failure modes.
It then summarizes benefits of replacement, including improved efficiency, indoor air quality, and reduced energy bills.
Finally, it compares DIY versus professional approaches regarding cost, time, and safety risks to help readers choose the right option.
When replacement is necessary signs and common failures
When attic ductwork shows persistent uneven heating or cooling, visible damage, or unusually high energy bills, replacement should be considered rather than patched.
Signs include severe corrosion, crushed or disconnected runs, pervasive leaks, and mold contamination.
Mechanical failures like failed joints, insulation breakdown, or improper sizing warrant full removal.
Professionals or DIYers researching how to replace ductwork in attic should prioritize safety and accurate diagnosis.
Benefits of replacing ductwork in the attic
Replacing attic ductwork delivers measurable gains in comfort, efficiency, and indoor air quality that justify the disruption.
New ducts reduce energy loss, balance airflow, and stabilize indoor temperatures.
Sealed, insulated runs limit dust, mold, and pest infiltration, improving system longevity and reducing maintenance.
Home value and HVAC performance both benefit from properly sized, routed, and installed attic duct replacements.
DIY vs hiring a professional cost, time, and risk comparison
After outlining the performance and health advantages of new attic ductwork, homeowners must weigh whether to tackle the job themselves or hire a licensed contractor. Costs, time, and safety differ: DIY saves labor but increases risk and often takes longer; professionals charge more but guarantee code compliance, warranty, and faster completion.
| Factor | DIY vs Pro |
|---|---|
| Cost | Lower vs Higher |
| Time | Longer vs Shorter |
| Risk | Higher vs Lower |
| Compliance | Variable vs Assured |
Safety, Codes, and Preparation Requirements
Before beginning work, the installer must verify applicable building codes, obtain any required permits, and confirm compliance with local HVAC regulations.
Proper personal protective equipment and an attic safety checklist—including fall protection, ventilation, and stable footing—are essential to prevent injuries.
A concise tools-and-materials checklist should be prepared so the replacement proceeds efficiently and meets code requirements.
Building codes, permits, and local HVAC regulations
Because duct replacement affects a building’s safety and energy performance, compliance with local building codes, permit requirements, and HVAC regulations is essential before work begins.
Contractors or DIYers should verify zoning rules, obtain necessary permits, and follow code-prescribed materials, sealing standards, insulation R-values, and firestopping.
Inspections and documented approvals guarantee legal occupancy, system efficiency, and eligibility for rebates or warranty coverage.
Personal protective equipment and attic safety checklist
With permits in place and code requirements confirmed, attention shifts to personal protective equipment and an attic safety checklist to protect workers and the structure.
Workers must assess hazards, secure access, and plan ventilation.
Essential items include:
- Hard hat, eye protection, and respirator rated for insulation dust
- Gloves and knee pads for prolonged work
- Fall protection and stable walkboards
- Portable lighting and thermal monitoring
Tools and materials checklist for replacing attic ductwork
A concise, well-organized toolkit and materials list streamlines attic ductwork replacement and minimizes safety and code-related delays.
The professional recommends verified tools, code-compliant materials, and spares; documentation and permits should accompany the kit.
Essentials include:
- Gloves, respirator, kneepads, safety glasses
- Sheet metal snips, crimpers, drill, foil tape
- Insulated duct sections, collars, hangers, mastic
- Combustion air vents, seals, code guides, permits
Assessing Existing Duct System Before Replacement
Before replacing attic ductwork, a thorough assessment should document visible issues such as leaks, damaged or missing insulation, mold, and signs of pests.
Quantitative testing of airflow and static pressure helps confirm performance deficiencies that justify replacement.
Finally, mapping the existing runs and marking critical problem areas guides removal and installation planning.
Inspecting condition: leaks, insulation, mold, and pests
Begin by systematically examining the attic ductwork for visible signs of damage and contamination: follow runs from the air handler to registers, noting gaps, disconnected joints, crushed sections, missing or degraded insulation, surface or powdery mold, and evidence of nesting or droppings from rodents or insects.
Document locations, estimate repair versus replacement, photograph issues, check sealant integrity, and flag areas needing remediation or professional cleanup.
Measuring airflow and static pressure to confirm need
Having identified visible damage and contamination, the next step is to quantify airflow and static pressure to determine whether repairs will suffice or full duct replacement is warranted.
Technicians measure supply/return cfm at registers and total system flow, then record system static at fan inlet and discharge with a manometer.
Results are compared to manufacturer specs and target cfm to confirm inadequate performance.
Mapping existing runs and identifying critical problem areas
A detailed map of the attic ductwork provides the foundation for any replacement decision: technicians trace every supply, return, takeoff, and junction, noting material, size, insulation, slope, and access points.
They mark leaks, crushed sections, disconnected seams, excessive bends, and thermal bridging.
Prioritization ranks safety hazards, airflow bottlenecks, and insulation failures to guide scope, budget, and phased replacement planning.
Planning the New Duct Layout
The planner evaluates correct duct sizing to guarantee adequate airflow and system efficiency.
They weigh the pros and cons of flexible, sheet metal, and rigid fiberglass options for durability, cost, and ease of installation.
Routing in the attic is laid out to provide clear access, appropriate drops, and properly placed returns.
Determining correct duct sizing for airflow and efficiency
Determine duct sizing by balancing required airflow, static pressure limits, and practical layout constraints to guarantee efficient heating and cooling performance.
Calculations use CFM per room, duct velocity targets, and friction loss tables to select trunk and branch diameters.
Include allowances for fittings, turns, and register locations.
Verify total system resistance against blower capacity and adjust sizes to prevent noise, imbalance, or inefficient operation.
Choosing duct types: flexible, sheet metal, or rigid fiberglass pros and cons
Having sized ducts for airflow and pressure, the next decision is selecting the duct material—flexible, sheet metal, or rigid fiberglass—since each affects installation, airflow characteristics, noise, durability, and thermal performance. Flexible: easy, lower cost, higher friction. Sheet metal: low friction, durable, louder. Rigid fiberglass: insulated, quiet, bulky.
| Type | Key trait |
|---|---|
| Flexible | Easy install |
| Sheet metal | Low friction |
| Fiberglass | Insulated, quiet |
Routing considerations in attic spaces: access, drops, and returns
Careful routing in an attic balances accessibility, efficient drops, and properly placed returns to guarantee performance and serviceability.
Plans prioritize straight runs, minimum bends, and clear access points for future inspection.
Drops should be short, insulated, and located near ceiling joists to simplify connections.
Return pathways must minimize noise, avoid obstructions, and use dedicated plenums or insulated flex to maintain airflow and efficiency.
Step-by-Step: Removing Old Ductwork
Before removal begins, the attic should be prepared and the HVAC system isolated to prevent dust and airflow during work.
Workers should remove insulation and old duct sections methodically, using proper tools and PPE to minimize damage and exposure.
Any contaminated or moldy duct material must be handled and disposed of as hazardous waste according to local regulations.
Preparing the attic and isolating HVAC system
Shut off the HVAC system at the thermostat and trip the breaker to guarantee no power reaches the air handler before entering the attic.
Verify lockout with a non-contact voltage tester.
Clear a stable work path, lay down protective boards, and establish ventilation.
Seal off attic access to prevent dust migration to living spaces.
Document existing duct connections and label pipes, vents, and insulation locations.
Safe removal of insulation and old duct sections
Begin by donning appropriate PPE—respirator rated for dust and fibers, safety goggles, gloves, and disposable coveralls—then confirm the work area is secure and well-ventilated.
Remove insulation gently with a soft brush and shop vacuum equipped with HEPA filter. Cut duct sections into manageable pieces, seal sharp edges, and bag debris immediately.
Label reusable components and keep pathways clear for safe removal.
Handling contaminated or moldy duct material
Once insulation and intact duct sections have been cleared, attention turns to handling contaminated or moldy duct material with strict containment and disposal measures.
Workers don PPE, seal work area with plastic sheeting, and mist surfaces to limit spores.
Contaminated ducts are removed whole, double-bagged, labeled, and transported to approved waste facilities.
Surfaces are HEPA-vacuumed and wiped with antimicrobial solution before inspection.
Step-by-Step: Installing New Ductwork (DIY Guide)
The installer begins by laying out and suspending the main trunk and branch lines to establish proper routing and support.
Precision cutting, secure joining, and thorough sealing of sheet metal and flexible ducts follow, with careful connections to plenums, boots, and registers.
Finally, the new ducts are insulated and fitted with an appropriate vapor barrier to prevent heat loss and condensation.
Laying out and suspending main trunk and branch lines
Lay out the main trunk along the planned route and mark branch takeoff points before lifting any duct into place.
Install level supports at regular intervals, using metal strapping or threaded rod with vibration isolators.
Position hangers to prevent sagging and maintain slope toward the furnace for condensate.
Temporarily brace branches, confirm clearances around joists and insulation, then secure final hangers before system testing.
Cutting, joining, and sealing sheet metal ducts
After the trunk and branches are supported and hung, attention shifts to cutting, joining, and sealing the sheet-metal sections to create airtight runs.
Technicians measure, mark, and cut with aviation snips or shears, deburr edges, and fit collars or slip joints.
Secure with screws, seal seams with UL-rated foil tape and mastic, and reinforce corners to prevent leaks and maintain airflow.
Installing and sealing flexible ducts correctly
Begin by measuring each run and cutting flexible duct to length, leaving a few inches of slack for connections and insulation.
Slide inner liner and insulation smoothly to avoid kinks, then secure fittings with approved clamps or foil tape.
Maintain gentle bends, support every 4–6 feet with straps, compress insulation slightly at supports, and seal all joints with mastic or UL-listed foil tape for airtight performance.
Connecting ducts to plenums, boots, and registers
Connect each duct end to the plenum, boot, or register using properly sized fittings and secure fasteners to guarantee airflow integrity.
Align collars squarely, slide ducts fully over beads or flanges, then clamp with sheet-metal screws or approved clips.
Seal seams with UL-listed mastic or HVAC foil tape.
Verify register orientation and adjust pitch for drainage.
Test connections for leaks and correct airflow balance.
Insulating new ducts and vapor barrier best practices
While insulating new attic ducts and applying a proper vapor barrier, the installer should prioritize thermal performance, condensation control, and ease of future access.
Use closed-cell insulation or UL-listed duct wrap, seal seams with HVAC tape, and maintain service clearances.
Recommended practices include:
- R-value matching local code
- Continuous vapor barrier over joints
- Tape and mastic on seams
- Avoid compressing insulation
Testing and Balancing After Installation
After installation, the system should be checked for leaks using pressure tests and smoke or visual inspections to verify airtight joints.
Airflow at each register is measured and dampers are adjusted to balance distribution.
Final adjustments address static pressure, audible noise, and temperature consistency room-to-room.
Leakage testing and smoke/visual inspection
Begin by conducting a systematic leakage test to verify airtightness at joints, seams, and register boots before completing insulation and access closures.
Use pressure testing or a flow hood to locate leaks. Follow with smoke or theatrical fog to visualize airflow paths and identify bypasses or gaps.
Document findings, mark defects, reseal with mastic or UL‑181 tape, and retest until acceptable leakage rates are achieved.
Measuring airflow and balancing dampers
Measure airflow at each supply and return grille using a calibrated flow hood or vane anemometer to confirm system performance and guarantee zones receive designed volumes.
Record CFM, static pressure, and temperature differentials.
Adjust manual or motorized dampers incrementally to match design CFM per zone.
Recheck readings after each adjustment.
Document final settings and label dampers for future reference and maintenance.
Adjusting for pressure, noise, and temperature consistency
Calibrate system performance by checking pressure differentials, acoustic levels, and temperature distribution throughout the attic ductwork and living spaces to guarantee the installation meets comfort and efficiency targets.
Technicians verify static pressure with manometers, adjust dampers to equalize airflow, seal leaks reducing noise and loss, and insulate runs.
Perform room-by-room temperature checks, document results, and fine-tune registers for consistent, quiet operation.
Common Problems, Troubleshooting, and Fixes
Common post-installation issues include persistent leaks from poor seals, sagging or kinked flex ducts due to inadequate support, and condensation that can lead to mold.
Technicians should inspect joints and seams for gaps, verify proper hanger spacing and gentle duct routing, and address insulation or ventilation shortcomings to prevent moisture.
Practical fixes range from resealing with approved mastic and replacing damaged flex sections to adding supports, improving insulation, and ensuring attic ventilation.
Persistent leaks and poor seals causes and remedies
Identify persistent leaks and poor seals as frequent causes of energy loss, moisture damage, and reduced HVAC performance in attic duct systems.
Inspect joints, seams, collar connections, and penetration points for gaps, disconnected sections, or deteriorated mastic.
Remedy with UL-rated foil tape, darts sealed with mastic, proper collar adapters, and insulation wrap.
Pressure-test and recheck after repair to guarantee airtight, code-compliant performance.
Sagging flex ducts, kinks, and improper supports
After sealing joints and correcting leaks, attention must turn to the physical routing of flex ducts, where sagging, kinks, and inadequate supports frequently undermine airflow and insulation performance.
Inspect runs for low spots, stretched sections, and sharp bends.
Re-tension sagging ducts, replace crushed or kinked segments, and install straps or hangers every 4 feet with gentle loops to maintain shape and slope.
Condensation and mold prevention strategies
When warm, humid attic air contacts cool duct surfaces or gaps in insulation, moisture can condense on ducts and surrounding framing, creating conditions that encourage mold growth and degrade indoor air quality.
Preventing this requires controlling humidity, ensuring continuous thermal insulation, and eliminating pathways for air leakage.
Recommended measures include sealing duct joints, adding class-1 vapor barrier insulation, installing ventilation or dehumidification, and inspecting regularly.
Time, Cost Estimates, and Material Selection Guidance
The section outlines typical timelines for attic duct replacement, contrasting a weekend-focused DIY job with the faster but scheduled pacing of professional crews.
It provides a concise cost breakdown covering materials, insulation, and labor, and notes price drivers such as access difficulty and system complexity.
Guidance is offered on when to upgrade insulation, expect energy-cost payback, or consider zoning for improved comfort and efficiency.
Typical timeline for DIY vs professional replacement
How long will replacing attic ductwork take, and how do time, cost, and material choices differ between a DIY effort and hiring a professional?
DIY projects typically span 1–3 weekends depending on skill, access, and scope; professionals complete jobs in 1–2 days with crews.
DIY saves labor but may use simpler materials; pros use higher-grade fittings, faster seals, and warranty-backed methods, affecting overall value.
Cost breakdown: materials, insulation, and labor
A clear cost breakdown separates materials, insulation, and labor to reveal where savings or hidden expenses occur. Estimates vary: materials (sheet metal, flex) $200–$1,200; insulation per linear foot; labor depends on complexity. Contractors provide itemized bids; DIY reduces labor but increases time and tool costs.
| Item | Typical Cost |
|---|---|
| Materials | $200–$1,200 |
| Insulation | $0.50–$3/ft |
| Labor | $300–$1,500 |
| Misc | $50–$300 |
When to upgrade insulation, returns, or add zoning
When is it worthwhile to upgrade attic duct insulation, add dedicated returns, or install zoning controls?
Owners should consider upgrades when energy bills, comfort complaints, or visible duct degradation occur.
Typical project time: a few hours to two days.
Estimated costs: insulation $100–$800, return work $200–$1,200, zoning $1,000–$3,500.
Select materials rated for attic R-value, rigid returns, and compatible zoning thermostats.
Professional Hiring Guide and When to Call a Pro
Selecting the right HVAC contractor requires checking licenses, insurance, references, and detailed bids to compare scope and price.
The homeowner should prepare targeted questions about experience, timelines, materials, and warranty terms, and insist on written guarantees.
Immediate contact with a licensed professional is recommended for code-related issues, major structural work, refrigerant handling, or any signs of mold, asbestos, or unsafe attic access.
How to vet HVAC contractors and compare bids
Although homeowners may feel capable of DIY ductwork replacement, vetting HVAC contractors carefully guarantees safety, code compliance, and long-term performance.
Assess qualifications, licenses, and insurance; verify local references and recent projects. Request detailed, itemized bids and compare scope, materials, and timelines.
Look for red flags like vague estimates or high-pressure sales.
- Verify license and insurance
- Check references and reviews
- Compare itemized bids
- Note timelines and exclusions
Questions to ask and warranties to request
What specific questions should homeowners ask to guarantee a contractor will deliver safe, code-compliant ductwork?
Ask for license and insurance verification, permitting and inspection plans, materials and R-value specs, sealing and testing methods (leak and airflow), timeline, change-order policy, and references from similar attic projects.
Request written workmanship and materials warranties, explicit coverage durations, and terms for repairs or callbacks.
Red flags and situations requiring licensed professionals
When should a homeowner call a licensed professional?
Significant structural modifications, evidence of mold, asbestos-containing insulation, major HVAC system mismatches, persistent pressure or airflow problems, repeated condensation or ice, or unclear permit requirements warrant licensed intervention.
Additionally, complex zoning, multi-level balancing, electrical integration, or safety-sensitive attic access should prompt hiring a licensed contractor to guarantee code compliance, warranty validity, and occupant safety.
Energy Savings, Maintenance, and Long-Term Care
Replacing attic ductwork typically yields measurable energy savings and a predictable payback period when leaks and insulation losses are corrected.
A straightforward maintenance plan—annual visual inspections, filter changes, and sealing checks—helps sustain efficiency and indoor air quality.
Seasonal checks after extreme weather and a full re-inspection every 3–5 years are recommended to catch deterioration early.
Expected energy efficiency improvements and payback
Upgrading attic ductwork can yield measurable gains in system efficiency and lower utility bills by reducing leaks, improving airflow balance, and minimizing thermal losses through better-insulated, properly sized ducts.
Typical energy savings range 10–30% depending on baseline condition; payback often occurs within 3–7 years.
Savings vary with local energy costs, system age, installation quality, and complementary measures like sealing and insulation.
Routine maintenance schedule for attic ducts
Establishing a regular maintenance schedule for attic ducts helps preserve efficiency, prevent air leaks, and extend system life.
Recommended routine includes simple inspections, filter and seal checks, insulation integrity, and professional assessments. Tasks can be staggered quarterly to yearly depending on usage and risk factors.
- Inspect seams and joints
- Replace or clean filters
- Verify insulation and supports
- Schedule professional duct testing
Seasonal checks and when to re-inspect
After routine inspections and scheduled service tasks are in place, seasonal checks provide targeted timing for spotting changes that affect energy savings and long-term duct performance.
Inspect before cooling and heating seasons for insulation gaps, seal failures, rodent damage, and moisture. Re-inspect after severe weather, attic work, or system retrofits.
Document findings, prioritize repairs, and schedule expert follow-up when leaks or structural issues are found.
Appendix: Quick Reference Checklists
The appendix presents three concise checklists to guide the project: a pre-installation checklist to verify materials, permits, and safety preparations; a step-by-step installation quick checklist to record key actions and alignments during work; and a post-installation testing checklist to confirm airflow, sealing, and system performance.
These checklists are formatted for fast reference on-site. Users are encouraged to follow each sequentially to reduce errors and rework.
Pre-installation checklist
Before any tools are unpacked, a concise pre-installation checklist gathers site measurements, material lists, safety equipment, and permit confirmations to verify the attic duct replacement proceeds without delay.
The checklist guarantees readiness, identifies hazards, and confirms logistics. Key items include:
- Exact duct runs and attic access measurements
- Materials and fasteners inventory
- Personal protective equipment and ventilation
- Permits and utility locate confirmations
Step-by-step installation quick checklist
With measurements, materials, and permits confirmed from the pre-installation checklist, the step-by-step installation quick checklist outlines the sequence of actions technicians follow to remove old ductwork and install new runs safely and efficiently.
The checklist emphasizes sequence, safety, and verification:
- Isolate HVAC power and ventilate attic.
- Remove and dispose of old ducts.
- Install new runs, sealing joints and insulating.
- Secure hangers, restore power, and document placements.
Post-installation testing checklist
Although the physical installation is complete, a concise post-installation testing checklist guarantees new attic ductwork performs to specification and that safety and efficiency standards are met.
Verify airflow balance, inspect for leaks and proper sealant, confirm insulation continuity, and test thermostat response. Follow measurable steps and record results.
- Measure supply and return CFM
- Perform smoke or pressure leak test
- Check insulation R-value and seals
- Validate temperature drop and thermostat cycles
Conclusion
Quiet boxes of insulation and metal once humming with warm breath fall silent as fresh, precise trunks are threaded through dusty rafters. The uneasy dance of old leaks and new seals—worn frustration beside meticulous order—maps a small triumph: safety and comfort restored. Hands ache, plans align, and the attic breathes differently. In that contrast—chaos made tidy—homeowners glimpse both the cost of neglect and the calm reward of careful work.