How to Know If You Have a Freon Leak: 8 Signs, Tests, and Next Steps
If you suspect a Freon leak in your HVAC system, look for these signs: reduced cooling, longer run cycles, warm vents, and uneven temperatures. Additional indicators include ice or frost on coils and lines, oil stains or moisture near fittings, and hissing or bubbling noises. To test for a leak, you can perform a soap-bubble check, conduct a visual inspection, or use handheld refrigerant sniffers. Professionals may employ electronic detectors, UV dye, nitrogen pressure tests, and gauges. It’s crucial to address any leaks promptly for safety and compliance. For further assistance, consider guidance on tests, repairs, and next steps.
How to Tell If Your HVAC or Appliance Has a Freon Leak
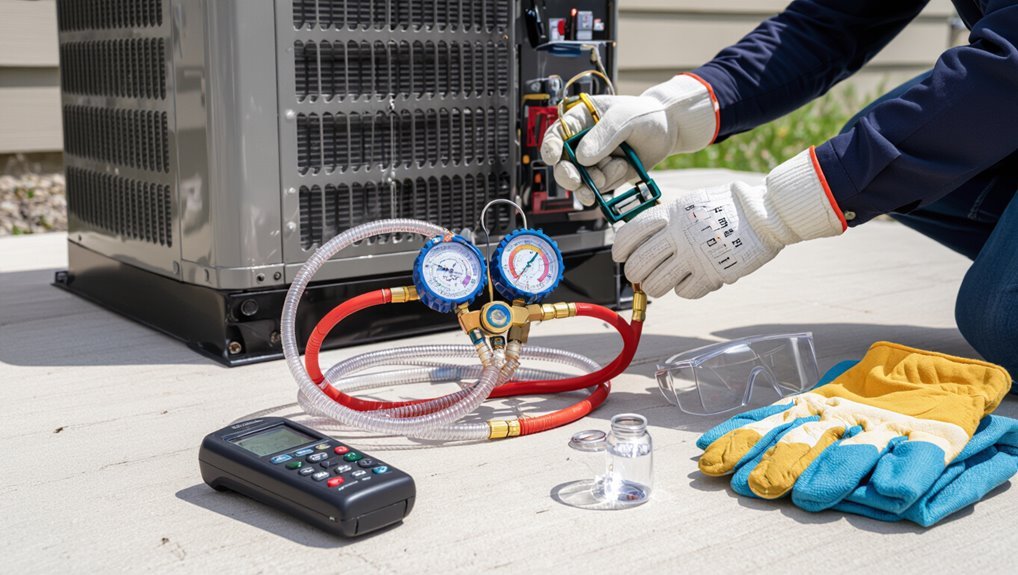
Signs of a Freon leak in an HVAC system or appliance can be subtle but are often consistent.
Technicians and homeowners should watch for reduced cooling performance, ice buildup on coils, hissing noises, and increased energy bills.
Visible oil stains near fittings or a chemical, sweet odor can also indicate refrigerant loss.
Common signs you may have a Freon leak
How can one tell if an HVAC system or appliance is losing Freon? Observable signs include reduced cooling, longer run cycles, and uneven temperatures.
Frost or ice on coils, hissing sounds, and higher energy bills are indicators.
Visible oil stains or corrosion near fittings suggest leaks.
Occupant symptoms like headaches or dizziness warrant immediate professional inspection for how to know if you have a freon leak.
##
Immediate signs of a refrigerant leak can be seen and heard around the unit, and quick recognition helps prevent further damage or health risks.
Consider these indicators:
- Visible oil stains, frost buildup, or hissing at connections.
- Unusual smells like a sweet or chemical odor and unexplained noise such as hissing or bubbling.
Immediate visual and physical indicators to watch for
Several clear visual and tactile cues can indicate a freon leak, and recognizing them promptly helps prevent system damage and health risks.
Oil stains or residue near fittings, coils, or service ports often mark escaping refrigerant. Frost or ice buildup on lines or evaporator coils, unexplained moisture or pooling, and sudden drops in airflow or cooling performance are immediate signs warranting inspection.
Warning sounds and odors associated with refrigerant leaks
What noises or smells might signal a refrigerant leak? Hissing, bubbling, or faint metallic chirps near coils or lines often indicate escaping gas. Unusual chemical or sweet, clove-like odors can accompany leaks; sometimes there’s little smell. Persistent compressor noise changes combined with these scents warrant inspection. Because refrigerants can be hazardous and odorless at low concentration, professional testing is recommended promptly.
8 Specific Signs of a Freon Leak
The following signs commonly indicate a Freon leak and warrant prompt inspection.
Symptoms include weak or uneven cooling, ice buildup on evaporator coils or refrigerant lines, and hissing or bubbling noises near refrigerant lines.
Homeowners may also notice higher-than-normal energy bills and warm air from vents despite the system running.
Weak or uneven cooling performance
Detecting weak or uneven cooling often serves as an early indicator of a Freon leak: rooms that struggle to reach set temperatures, inconsistent cold spots across vents, or a compressor that runs continuously without delivering steady chilled air can all point to insufficient refrigerant.
Persistent temperature variance, reduced airflow despite normal fan operation, and rising energy bills further support suspicion of a leak requiring professional inspection.
Ice buildup on evaporator coils or refrigerant lines
Ice accumulation on evaporator coils or refrigerant lines often signals a refrigerant issue rather than ordinary condensation.
Persistent freezing occurs when low refrigerant pressure reduces coil temperature, causing moisture to freeze. This restricts airflow and reduces system capacity.
Technicians view repetitive or widespread icing as a strong indicator of a leak or undercharge and recommend professional inspection and leak testing before defrosting or charging.
Hissing or bubbling noises near the refrigerant lines
While ice on coils often points to low refrigerant, audible cues provide a different, more immediate indication of a leak. A steady hissing or intermittent bubbling near refrigerant lines often signals escaping Freon under pressure.
Sounds are usually localized at joints, valves, or corrosion spots. Technicians use listening devices to pinpoint leaks; homeowners should avoid intrusive probing and contact a qualified HVAC professional for diagnosis and repair.
Higher than normal energy bills
How can a Freon leak affect utility costs? A leaking refrigerant forces HVAC compressors to run longer and cycle more frequently to maintain set temperatures.
Increased runtime and reduced efficiency raise electricity consumption, reflected as higher utility bills.
Tracking unexplained, sustained bill increases alongside other refrigerant-leak indicators helps pinpoint potential Freon loss and justifies prompt diagnostic service.
Warm air from vents despite the system running
Detecting warm air from vents while the system runs is a clear, specific sign of refrigerant loss: without adequate Freon, the evaporator coil cannot absorb enough heat, so the air blown into living spaces remains warmer than the thermostat setting.
Occupants may notice weak cooling despite continuous fan operation; indoor humidity can rise as the system struggles, prompting reduced comfort and signaling professional inspection for refrigerant levels.
Frost patterns or oily residue around connections
Frost forming on refrigerant lines or oily residue around fittings often indicates a Freon leak: escaping refrigerant cools surrounding metal and moisture condenses and freezes in cold conditions, while lubricant carried by the leak leaves a visible film.
Technicians inspect joints, service valves and brazed connections for white ice or dark oily spots.
Documentation of locations and photos aids diagnosis and repair planning.
Frequent short-cycling of the compressor
Frequent short-cycling of the compressor—where the unit turns on and off in rapid succession—is a common indicator of low refrigerant due to a Freon leak.
The system struggles to reach pressure balance, causing overheating and premature wear. Energy use rises and temperature swings occur.
Technicians check pressures and watch cycling patterns; confirmed leaks require refrigerant recovery, repair, and proper recharge by a certified professional.
Plants wilting or unexplained condensation near units
Plants near an outdoor condenser that suddenly wilt or yellow while other vegetation remains healthy can signal a refrigerant leak, as escaping Freon (refrigerant) displaces oxygen and cools nearby soil and foliage.
Likewise, unexplained frost, ice, or persistent condensation on coils, lines, or casings indicates abnormal temperature and pressure.
Homeowners should inspect visually and call a licensed HVAC technician for leak detection and repair.
Simple Tests You Can Do Yourself
A brief set of simple tests can help a homeowner confirm suspected Freon loss before calling a professional. These include a visual inspection checklist for indoor and outdoor units, a soap-bubble test for accessible joints and fittings, use of refrigerant detector pens or handheld electronic sniffers, and basic DIY pressure and temperature comparisons with appropriate safety precautions.
Each method has limits and safety considerations that should guide how and when they are used.
Visual inspection checklist for indoor and outdoor units
Several simple visual checks can quickly indicate a Freon leak before professional testing becomes necessary.
Inspect indoor coils for frost, excessive ice, or oil stains; look for hissing or damaged insulation on refrigerant lines.
Outdoors, examine the condenser for bent fins, oil residue, or unusual corrosion around fittings.
Note unexplained pooling or persistent low airflow and document observations for technician reference.
Soap-bubble test for accessible joints and fittings
After completing the visual checks, homeowners can perform a simple soap-bubble test on accessible joints and fittings to detect small refrigerant leaks that are not visibly obvious.
Mix mild dish soap and water, apply with a brush or spray bottle to valves, couplings, and service ports, then watch for steady bubbling.
Mark suspected areas and arrange professional repair if bubbles persist.
Refrigerant detector pens and handheld electronic sniffers
Handheld refrigerant detectors—available as pen-style probes or larger electronic sniffers—offer a quick, sensitive way for homeowners to pinpoint leaks that soap-bubble tests might miss.
Users wave the probe slowly along fittings, coils, and joints; audible or visual alarms indicate trace refrigerant. They require fresh calibration, battery power, and careful slow scanning to reduce false positives but are effective for initial DIY detection.
DIY pressure and temperature comparisons (safety precautions)
Refrigerant detectors help locate leaks, but confirming system performance often requires simple pressure and temperature comparisons; these checks can indicate abnormal charge levels or airflow problems that a sniffer cannot.
Using manifold gauges and thermometers, record high/low pressures and suction/discharge temperatures.
Observe safety: power off when connecting gauges, wear gloves and eye protection, avoid open flames, and consult a professional if pressures or readings are unfamiliar.
Professional Diagnostic Tests and Tools
Professional technicians use specialized equipment—electronic and ultrasonic leak detectors, UV dye and ultraviolet inspection tools, and gauge manifolds—to accurately locate and verify refrigerant leaks.
Nitrogen pressure testing combined with soap-solution checks helps isolate problem areas, while controlled refrigerant recovery protects systems and the environment.
Testing and any refrigerant handling should be performed by a licensed HVAC technician when pressures, recoveries, or repairs exceed basic homeowner capability.
Electronic leak detectors and ultrasonic tools
Several types of electronic leak detectors and ultrasonic tools are used by technicians to locate refrigerant leaks quickly and accurately.
Electronic detectors sense trace refrigerant concentrations, offering sensitivity and audible/visual alerts.
Ultrasonic devices pick up hissing from pressurized leaks, useful when detectors struggle with background gases.
Both require calibration, steady scanning, and trained interpretation to pinpoint leak locations noninvasively before repair.
Nitrogen pressure testing and soap solution verification
After electronic and ultrasonic scanning narrows likely leak areas, technicians commonly move to controlled pressure testing with dry nitrogen to confirm and locate breaches.
Lines or components are pressurized to a safe PSI, monitored for pressure decay, then inspected with a soap solution. Bubbles indicate leak sites, allowing precise repair planning.
Tests avoid refrigerant introduction and are documented for repair verification.
UV dye injection and ultraviolet inspection
Technicians introduce a fluorescent dye into the sealed refrigeration circuit and later inspect suspected areas with a UV (black) light to reveal leakage paths.
This method locates small or intermittent leaks invisible to the eye. Technicians wear goggles and use proper lamps; dye compatibility with system oil and refrigerant is verified beforehand.
Inspection highlights oil-stained traces, fittings, valves, brazed joints, and condenser coils.
Refrigerant recovery and gauge manifold readings
Begin by connecting a manifold gauge set to the service ports and a certified recovery machine to safely remove refrigerant from the system before any repair or deep diagnostics.
Technicians record static and running pressures on low and high sides, compare readings to manufacturer specs and ambient temperature tables, and calculate superheat/subcooling.
Deviations indicate leaks, blockages, or compressor issues requiring targeted repair.
When a licensed HVAC technician should perform testing
Once manifold readings, recovery procedures, and basic diagnostics suggest abnormal pressures or unresolved loss of charge, a licensed HVAC technician should be engaged for advanced testing.
The technician uses electronic leak detectors, nitrogen pressure decay, fluorescent dye, and vacuum decay tests, plus infrared and ultrasonic tools.
They verify system integrity, identify leak location, assess oil and component contamination, and recommend repair or refrigerant reclamation.
Safety Risks and Legal Considerations
Exposure to leaking refrigerant can cause respiratory irritation, dizziness, and other acute health effects, particularly in confined spaces.
Environmental harm from released refrigerants and strict regulations on their handling require careful containment and proper disposal.
Repairs often must be performed by certified technicians to comply with legal requirements and to guarantee safe, effective remediation.
Health hazards from refrigerant exposure
Concern over refrigerant inhalation stems from its potential to cause acute and chronic harm to respiratory, neurological, and cardiovascular systems.
Exposure can provoke dizziness, headaches, nausea, shortness of breath, arrhythmias, and, in severe cases, unconsciousness or death.
Skin and eye contact may cause irritation or frostbite.
Vulnerable individuals, such as those with heart or lung disease, face increased risk and should avoid contaminated areas.
Environmental impact and regulations on refrigerant handling
Beyond immediate health risks, refrigerant releases also carry significant environmental consequences and legal responsibilities.
Many common refrigerants deplete ozone or act as potent greenhouse gases, so leaks contribute to atmospheric damage and climate change.
Regulations restrict venting, mandate recovery and proper disposal, and impose reporting for large releases.
Compliance reduces environmental harm and potential penalties while promoting safe, responsible refrigeration practices.
Legal requirements for repairs and certified technicians
When refrigerant systems leak or require servicing, laws commonly require that repairs be performed by certified technicians using approved recovery and monitoring equipment to guarantee safe handling and prevent unlawful emissions.
Compliance often mandates documentation, proper disposal, and reporting of significant releases.
Homeowners and businesses should verify technician credentials, insist on written invoices detailing refrigerant charges, and follow local permitting and recordkeeping to avoid fines and liability.
What to Do If You Suspect a Freon Leak
If a freon leak is suspected, occupants should first guarantee safety by ventilating the area, shutting off affected equipment if safe, and limiting access to the space.
They should then document visible signs, symptoms, dates, and any readings or photos to share with technicians or for warranty claims.
Finally, guidance should be given on criteria for calling a certified HVAC technician versus seeking emergency repair.
Immediate steps to take for safety and to limit damage
At the first sign of a suspected freon leak—hissing sounds, frost on lines, or the odor associated with refrigerant—occupants should prioritize safety by evacuating the immediate area, ventilating enclosed spaces, and shutting off the appliance or system at the power source if it can be done without risk.
Close doors to limit spread, remove pets, avoid ignition sources, and contact a qualified HVAC technician promptly for assessment and repair.
How to document the problem for technicians or warranty claims
Because clear, concise documentation speeds diagnosis and supports warranty claims, homeowners should record specific details about the suspected freon leak before technicians arrive.
Note dates, times, symptoms, thermostat settings, unusual noises, odors, and visible oil or frost.
Photograph affected components and serial/model numbers, save receipts for recent service or parts, and log any temporary actions taken.
When to call a professional vs. emergency repair
When should a homeowner call a professional versus treat a freon leak as an emergency?
If symptoms are mild (reduced cooling, hissing sound without odors, slow performance), schedule a certified HVAC technician for diagnosis and repair.
If there is strong chemical odor, dizziness, loss of consciousness, visible refrigerant spray, or system failure, evacuate, ventilate, and seek immediate emergency HVAC service and medical attention as needed.
Repair Options and What to Expect
Repair options for Freon leaks range from applying sealants and replacing faulty components to brazing pipes for permanent fixes.
Technicians will also weigh a simple refrigerant recharge against a full system evacuation and recharge, depending on leak severity and contamination.
Expected timelines and costs vary with the method chosen, parts required, and labor complexity.
Common repair methods for leaks (sealants, part replacement, brazing)
Technicians evaluate several common repair methods for Freon leaks—sealants, part replacement, and brazing—each suited to different leak types, locations, and system ages.
Sealants offer temporary fixes for small leaks. Replacing faulty components (valves, hoses, evaporators) provides durable resolution. Brazing restores metal joints but requires evacuating and testing.
Costs, downtime, and warranty implications guide the chosen approach.
Refrigerant recharge vs. full system evacuation and recharge
After evaluating repair options like sealants, part replacement, or brazing, a decision must be made about how to restore refrigerant levels: a simple recharge or a full system evacuation and recharge.
A simple recharge adds refrigerant to a confirmed-sealed system.
Evacuation removes moisture and contaminants before precise recharging, required after major repairs or prolonged leaks.
Technicians choose based on contamination risk and warranty compliance.
Typical timelines and cost factors
Several common factors determine how long freon leak repairs take and what they will cost.
Complexity of the leak, accessibility, required parts, and technician experience affect labor hours. Simple recharges may take under an hour; leak detection and soldering can require several hours and diagnostic tools.
Costs range widely: minor fixes and recharge are low-cost, while evacuations, compressor replacement, or extensive brazing raise both time and expense.
##
Signs of a freon leak often begin subtly: reduced cooling performance, ice buildup on evaporator coils, and hissing sounds near refrigerant lines are common indicators. Technicians evaluate pressures, inspect connections, and use electronic detectors to confirm leaks. Immediate documentation and isolation of affected circuits limit damage and guide repair or replacement decisions.
| Indicator | Typical Finding |
|---|---|
| Pressure drop | Low PSI |
| Visual oil | Stains |
| Frost | On coils |
| Sound | Hissing |
Preventive Maintenance to Avoid Future Leaks
A regular inspection schedule with targeted tasks—filter changes, coil cleaning, and seal checks—helps prevent refrigerant loss.
Between professional visits, occupants should watch for diminished cooling, unusual noises, or oil residue around fittings.
When appropriate, system upgrades and retrofits such as improved fittings, vibration isolators, or factory-sealed components can substantially reduce leak risk.
Routine inspection schedule and key maintenance tasks
When proactive inspection routines are established, HVAC systems are far less likely to develop unnoticed Freon leaks.
Schedule biannual professional inspections plus quarterly homeowner checks.
Key tasks: verify refrigerant pressure, inspect coils and insulation, tighten electrical connections, clear condensate drains, and test thermostat accuracy.
Document findings, correct minor issues promptly, and replace aging components before failure to minimize leak risk and prolong system life.
Signs to monitor between professional service visits
Several clear indicators warrant homeowner attention between professional visits to catch potential Freon leaks early: reduced cooling performance, longer run cycles, unusually high electric bills, ice formation on evaporator coils or refrigerant lines, hissing or bubbling noises near refrigerant components, and oily residue or staining around fittings and connections.
Regularly note temperature inconsistencies across vents, check filter cleanliness, and inspect visible lines and outdoor units for damage or oil streaks.
Upgrades and retrofits that reduce leak risk
If homeowners pursue targeted upgrades and retrofits focused on components, seals, and system compatibility, the likelihood of refrigerant leaks can be markedly reduced.
Recommended measures include replacing aging hoses and fittings, installing corrosion-resistant coils, upgrading to modern leak-resistant compressors, and retrofitting joints with improved seals.
Ensuring proper refrigerant type compatibility and adding leak-detection sensors further diminishes long-term leak risk.
When Replacement Is Better Than Repair
When repeated Freon leaks or costly compressor repairs approach the price of a new unit, replacement may be the more economical choice.
The discussion should compare short-term repair costs with efficiency gains and projected energy savings from modern systems.
It should also cover selecting a replacement system and compatible, future-proof refrigerant options.
Indicators that replacement is more cost-effective
A few clear signs indicate that replacing an HVAC system is more cost-effective than repairing a Freon leak.
Frequent leaks, recurring compressor or coil failures, and repair costs approaching or exceeding half the unit’s replacement price suggest replacement.
Older systems near end-of-life, discontinued refrigerant compatibility, and diminished cooling capacity despite repairs further justify investing in a new, reliable system.
Comparing efficiency gains and long-term savings
Multiple factors determine whether replacing an HVAC system yields better efficiency and long-term savings than repeatedly repairing Freon leaks.
Age, SEER ratings, and recurring repair costs influence payback time. Newer units often reduce energy use and maintenance expenses, offsetting upfront investment.
Calculations should compare projected utility savings, estimated repair frequency, and residual value to decide if replacement is economically justified.
Choosing a replacement system and refrigerant options
If repair costs and ongoing inefficiencies indicate replacement is the better investment, the next step is selecting a suitable system and refrigerant.
Evaluate system size, SEER/HSPF ratings, compatibility with existing ductwork, and installation costs.
Prioritize refrigerants with lower global warming potential (R-410A alternatives like R-32, R-454B) and future regulatory compliance.
Consult certified HVAC professionals for sizing and charge specifications.
Glossary of Key Terms Related to Refrigerant Leaks
A concise glossary clarifies terms readers will encounter when evaluating a suspected Freon leak.
Definitions include Freon and general refrigerant types, plus key components such as the compressor and evaporator.
Clear explanations of these terms help distinguish normal operation from signs of leakage.
Definitions of Freon, refrigerant, compressor, evaporator, and related terms
Understanding key terms clarifies discussions about refrigerant leaks and their detection.
Freon (a common tradename) refers to several refrigerants.
Refrigerant: fluid that absorbs/releases heat.
Compressor: pressurizes vapor.
Condenser: rejects heat and condenses vapor to liquid.
Evaporator: absorbs heat and evaporates liquid to vapor.
Leak: unintended loss of refrigerant.
Service valve, seal, and line are related components.
Recommended Questions to Ask Your HVAC Technician
Homeowners should prepare specific diagnostic and repair questions to guarantee the technician conducts a complete inspection and documents fixes.
They should also verify the technician’s warranty terms, certification, and experience with refrigerant handling.
Clear, focused questions help confirm the service was thorough and compliant with regulations.
Diagnostic and repair questions to confirm thorough service
When should a customer press for specific diagnostic and repair details to guarantee a freon leak has been fully addressed?
The customer should request a clear leak location, method used to find it, parts replaced, and dye or pressure test results.
Ask for before-and-after refrigerant charge levels, a timeline of repairs, and preventive recommendations.
Require written confirmation of completed diagnostics and repairs.
Warranty, certification, and refrigerant handling questions
Why ask about warranties, certifications, and refrigerant handling?
Homeowners should request proof of technician EPA certification, licensing, and insurance, plus written warranty terms for parts and labor.
Ask which refrigerant was used, recovery and disposal procedures, and compliance with local regulations.
Confirm cost coverage for future leaks and obtain a detailed invoice documenting work, serial numbers, and pressure readings.
Conclusion
In the end, the household transforms into a dramatic stage where even the faint hissing of freon becomes an ominous trumpet blast; sensible observers understand that discoloration, soggy carpets, or rising energy bills are not mere nuisances but urgent signals. Armed with the checklist and a wary eye, one imagines technicians as detectives and tools as truth-telling instruments; prompt inspection, responsible repair, or timely replacement prevents small leaks from staging a catastrophic finale.