How to Install Teflon Tape Correctly: Step-by-Step Guide for Leak-Proof Plumbing
How to Install Teflon Tape Correctly: Step-by-Step Guide for Leak-Proof Plumbing
To install Teflon tape correctly and ensure leak-proof plumbing, follow these simple steps: First, inspect and clean the threads of your plumbing joint. Confirm the thread direction, then wrap the tape clockwise from the pipe shoulder toward the end. Keep the tape flat and aligned with the grooves. For small fittings, apply 2–3 wraps; for larger sizes, use more tape, but avoid overwrapping or covering damaged threads. Start the joint by hand and finish tightening with a wrench for 1–2 turns. This method will help you achieve a secure, leak-proof seal. The guide also covers different tape types, common mistakes, and troubleshooting tips.
What Teflon Tape Is and Why It Matters for Plumbing
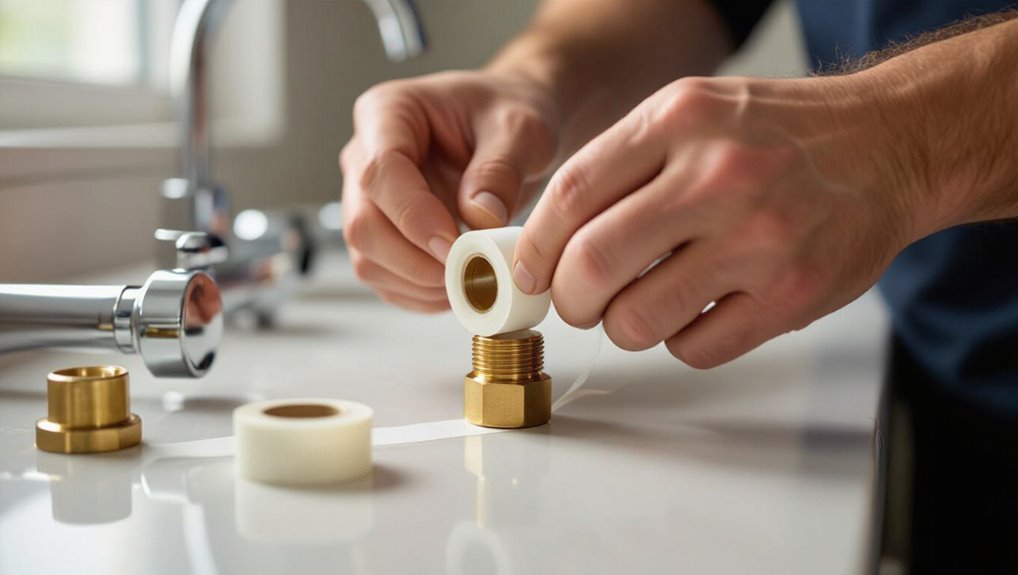
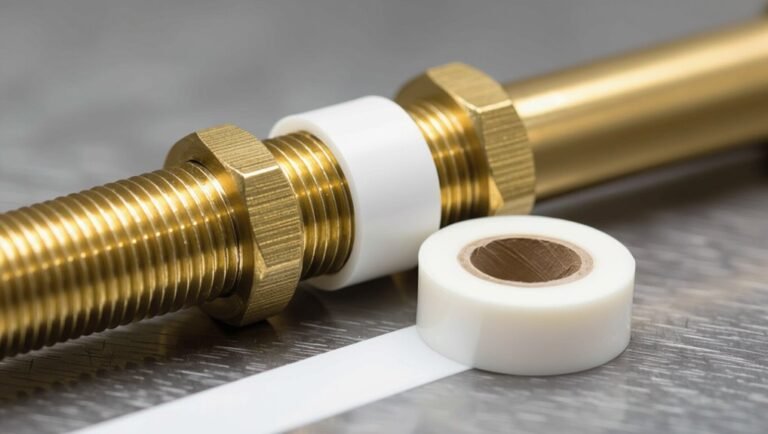
Teflon tape, also known as PTFE tape or plumber’s tape, is a thin polytetrafluoroethylene film wrapped around pipe threads to improve seal and reduce friction.
It helps prevent leaks by filling microscopic gaps between threads but will not correct damaged fittings or replace proper thread sealant in all applications.
Different grades—such as standard white for water, yellow for gas, and thicker pink or green variants for specific pressures or materials—are chosen based on the job.
Definition and common names (PTFE tape, plumber’s tape)
A thin, white film of polytetrafluoroethylene (PTFE) commonly called plumber’s tape serves as a sealing thread for threaded pipe joints.
Often labeled PTFE tape, Teflon tape, or plumber’s tape, it is sold in thin, dense or thick variants for different fittings.
Readers seeking how to install teflon tape will find consistent naming across brands simplifies purchasing and identification.
How Teflon tape prevents leaks and its limitations
Seal threaded pipe joints by filling microscopic gaps and creating a low-friction barrier: PTFE tape conforms to thread crevices to block pathways for water and gas while allowing threads to tighten without binding.
It reduces galling and eases disassembly.
Limitations: it won’t seal damaged threads, high-pressure flanges, or soft-seat fittings, and excessive layers can impede proper engagement or cause leaks under vibration.
Types of Teflon tape and their uses
Plumbing thread tape comes in several formulations, each color-coded for common applications such as general-purpose water lines, gas fittings, and high-temperature or chemically aggressive systems.
Selection depends on pressure, temperature, media, and joint type. Common types include:
- White: general-purpose water and low-pressure fittings
- Yellow: gas lines (natural and propane)
- Pink: water main/high-density seal
- PTFE blends: chemical/high-temp applications
When to Use Teflon Tape vs. Other Sealants
Teflon tape is recommended for sealing metal and plastic threaded fittings on water and gas lines where threads are clean and mechanically tight.
In cases requiring stronger fill of irregular threads, vibration resistance, or chemical compatibility—such as with some gas fittings or softer plastics—pipe dope, anaerobic sealants, or gaskets may be preferable.
Material compatibility and the service (water vs. gas, pressure, temperature) should guide the choice of tape versus other sealants.
Threaded fittings suitable for Teflon tape
Many threaded metal fittings with tapered threads—such as NPT valves, pipe nipples, and compression adapters—are appropriate for PTFE tape because the tape fills thread gaps without altering thread geometry.
It suits brass, stainless, and galvanized steel connections on water, air, and gas lines when threads are clean and undamaged.
Fine-threaded fittings and soft-plastic threads require caution or alternative sealing methods.
Situations where pipe dope, anaerobic sealants, or gasket seals are better
When should an alternative sealant be chosen over PTFE tape? Alternatives suit applications needing gap filling, high-pressure permanence, or chemical resistance. Pipe dope bonds irregular threads; anaerobic sealants cure for metal hydraulic fittings; gaskets handle flange joints and soft-material interfaces.
| Situation | Recommended Sealant |
|---|---|
| Irregular threads | Pipe dope |
| Metal hydraulic fittings | Anaerobic sealant |
| Flange joints | Gasket seal |
| Chemical exposure | Specialized compound |
Compatibility with metal, plastic, gas, and water lines
Choosing the right sealant depends on the pipe material and service—metal, plastic, gas, or water—because each environment presents different mechanical and chemical demands.
Teflon tape suits metal threads and most water lines; use gas-rated yellow tape for natural gas.
Avoid standard PTFE on some plastics—use compatible tapes or liquid sealants.
For high-pressure or critical joints, prefer pipe dope or anaerobic sealants.
Tools and Materials You Need
The section lists essential tools and supplies required for a proper Teflon tape installation, such as tape, pipe wrenches, and thread cleaners.
It also outlines necessary safety equipment and preparatory items like gloves, eye protection, and solvent for degreasing threads.
Clear identification of these materials guarantees the job proceeds safely and efficiently.
Essential tools and supplies
A few basic items make applying Teflon tape quick and reliable: quality PTFE tape, an adjustable wrench or suitable pliers, a clean rag, and a small utility knife or scissors for trimming.
Additional useful supplies streamline the job and guarantee a proper seal:
- Spare rolls of PTFE tape (different thicknesses)
- Thread-cleaning brush or steel wool
- Thread sealant paste (optional)
- Small flashlight for inspection
Safety equipment and preparatory items
Why start with safety gear before handling PTFE tape and fittings? Protective gloves, safety goggles, and a dust mask prevent skin irritation and inhalation of debris.
Adequate lighting, a clean work surface, and rags control contamination. A small container for loose fittings, a utility knife with guarded blade, and a magnetic tray reduce loss and injury.
Proper preparation speeds safe, accurate assembly.
Preparing Pipes and Fittings Before Applying Tape
Before applying Teflon tape, the pipes and fittings should be inspected for damaged threads and any debris that could prevent a proper seal.
Threads must then be cleaned and thoroughly dried to guarantee the tape adheres and seats correctly.
Finally, the installer should confirm thread direction and type (NPT vs. BSP) to wrap the tape in the correct orientation and avoid mismatched fittings.
Inspecting threads for damage or debris
Inspect the male and female threads closely for nicks, burrs, corrosion, or embedded debris that could prevent a tight seal.
Note any damaged or deformed sections, uneven thread pitches, or flattened crests.
Confirm threads align properly without cross-threading.
Mark threads needing repair or replacement.
Identifying defects early prevents leaks and guarantees Teflon tape and fittings perform as designed once cleaned and dried.
Cleaning and drying threads properly
With damaged or misaligned threads identified and marked, the next step is to remove oil, grime, corrosion, and loose particles so tape and fittings will seat correctly.
Use a stiff brush or nylon pad and a solvent or degreaser compatible with the material.
Rinse thoroughly, dry with lint-free cloth or compressed air, and recheck threads for cleanliness before applying Teflon tape.
Determining thread direction and type (NPT vs. BSP)
Although thread direction may seem trivial, identifying whether threads are right- or left-hand and whether they follow NPT (National Pipe Taper) or BSP (British Standard Pipe) standards is essential because the two systems are not compatible and require different sealing approaches.
Inspect thread angle, pitch, and taper; use gauges or compare fittings.
Mark left-hand threads, match standards, and choose tape or joint compound suited to the thread type.
Step-by-Step Guide to Applying Teflon Tape for Leak-Proof Joints
The following steps outline precise actions for applying Teflon tape to threaded pipe joints, beginning with correct positioning and initial thread engagement.
Guidance includes the appropriate amount of tape by pipe size, wrapping direction and technique, and how to manage tension, overlap, and finishing.
The sequence concludes with assembly and the recommended tightening method to achieve a leak-proof joint.
Step 1: Positioning the fitting and establishing thread engagement
Begin by aligning the male and female threads so they seat straight and engage fully; proper alignment prevents cross-threading and confirms the tape will cover the designated sealing surfaces.
Ascertain full hand engagement for initial turns, feel for smooth threading, and back off slightly if resistance indicates misalignment.
Correct seating exposes the proper thread length for tape application and reduces the risk of distorted threads.
Step 2: How much tape to use by pipe size
For each nominal pipe size, a specific range of Teflon tape wraps guarantees a reliable seal without overfilling the threads.
Typical recommendations:
1/8″–1/4″—2–3 wraps;
3/8″–1/2″—3–4 wraps;
3/4″—4–5 wraps;
1″—5–6 wraps;
larger sizes—6–8 wraps.
Adjust toward fewer wraps for coarse threads and more for finer threads. Excess tape can prevent proper engagement.
Step 3: Correct wrapping technique and direction
Orient the tape so it will follow the thread rotation and wrap tightly from the thread start toward the pipe end, covering threads evenly without overlapping the pipe shoulder.
The installer keeps the tape flat, maintains consistent alignment with thread grooves, and smooths each turn to prevent bunching.
Wrapping direction must match tightening motion so tape seats into threads for a uniform sealing layer.
Step 4: Tension, overlap, and finishing the wrap
Maintain firm, even tension while wrapping to guarantee the tape conforms to thread grooves without stretching thin or bunching. Each turn should slightly overlap the previous by about half the tape width to create a continuous seal.
Continue until reaching the end of the threads, typically 3–6 wraps. Smooth the final edge against the threads, tear or cut the tape cleanly, and press the end flat.
Step 5: Assembling the joint and recommended tightening method
Begin assembling the joint by hand-threading the taped fitting onto its counterpart to guarantee proper engagement and alignment of the threads.
Once hand-tight, use an appropriate wrench to tighten further—typically one to two full turns for tapered threads—while holding the mating fitting steady.
Avoid over-tightening; stop when resistance increases and sealing feels snug to prevent thread damage and distortion.
Step 6: Final checks and initial pressure test
With the joint tightened to the recommended snugness, a final inspection verifies threads are seated and tape remains undisturbed before testing.
Visually check alignment, confirm no exposed tape in the flow path, and validate fittings are supported.
Slowly introduce water or air to low pressure, monitor for leaks at joint and nearby connections, then increase to operating pressure if no seepage appears.
Special Procedures for Gas Lines and High-Pressure Systems
For gas lines and high-pressure systems, only yellow gas-rated PTFE tape should be used and applied in the thread direction to avoid unraveling during installation.
Installers must follow manufacturer torque specifications to prevent over- or under-tightening that can compromise seals.
After assembly, pressure-test joints with approved leak-detection methods and correct any detected leaks before putting the system into service.
Using yellow gas-rated PTFE tape and additional precautions
Use yellow gas-rated PTFE tape specifically labeled for fuel and natural gas applications when sealing gas-line fittings, and reserve standard white tape for water and non-pressurized uses.
The installer applies two to three wraps in the thread direction, avoids overbuilding joints, and guarantees tape does not enter the bore.
For high-pressure systems, pair tape with compatible pipe dope and follow local codes and manufacturer instructions.
Torque and leak-detection methods for gas fittings
When installing gas fittings in high-pressure systems, technicians must apply specified torque values and verify joint integrity using approved leak-detection methods to prevent hazardous leaks.
Torque specifications from manufacturers and calibrated torque tools guarantee proper compression without damaging threads.
After assembly, use approved gas detectors, soapy solution, or electronic sniffers to inspect joints.
Document torque readings and test results before service return to confirm safety.
Common Errors and How to Avoid Them
Common installation mistakes can compromise seals and safety, so attention to technique and materials is essential.
Typical errors include overwrapping or underwrapping threads, wrapping against the thread direction, applying tape over damaged threads or sealing surfaces, and using the wrong tape grade for the job.
The following guidance explains how to recognize and prevent each of these problems.
Overwrapping or underwrapping threads
Applying Teflon tape with the correct orientation is essential: wrapping too many layers or in the wrong direction can prevent proper thread engagement and cause leaks.
Overwrapping adds bulk, distorts taper, and risks shearing; underwrapping leaves gaps and insufficient seal.
Use the manufacturer’s recommended thickness—typically two to three snug wraps—ensure even coverage, and trim excess for a reliable seal.
Wrapping in the wrong direction
Mistakes in wrap direction often undo careful work on layer count and coverage: if tape is wound opposite the thread’s tightening rotation, it can bunch, peel off, or prevent full engagement of the male and female threads.
To avoid this, orient the tape so its end tucks under as the fitting is turned clockwise (right-hand threads), maintain tension, and overlap neatly without crossing.
Applying tape over damaged threads or sealing surfaces
Attempting to hide nicks, corrosion, or warped sealing faces with Teflon tape compromises joint integrity and often leads to leaks.
Damaged threads require repair or replacement; tape cannot restore proper engagement or seating. Clean, file, chase, or replace fittings as needed.
Use tape only on sound threads and flat sealing surfaces; verify threads align and seats contact fully before wrapping and assembling.
Using the wrong tape grade for the application
Once fittings and sealing faces are confirmed sound, attention must turn to selecting the proper grade of PTFE tape; using the wrong type can undermine a correctly prepared joint.
Use thicker, gas-rated tape for high-pressure or gas lines and thinner, plumber’s grade for water.
Avoid multi-purpose or low-density tape on critical systems.
Match tape density and thickness to thread pitch and service media for reliable seals.
Troubleshooting Leaks After Taping
A systematic approach helps distinguish tape-related leaks from mechanical failures by inspecting the seal, threads, and visible damage.
If the tape is at fault, the joint should be disassembled, old tape removed, threads cleaned, fresh tape applied correctly, and the connection reassembled and tested.
If leaks persist or fittings show cracks, stripped threads, or corrosion, replacement or a professional assessment is recommended.
How to identify tape-related leaks vs. mechanical failures
How can one distinguish a sealant fault from a failing fitting when a joint leaks after applying Teflon tape?
Inspect leak location: tape failures usually show seepage at thread crevices or unraveling tape; mechanical failures produce cracks, corrosion, or stripped threads and often leak under pressure changes.
Smell and fluid type may hint gasket vs. metal failure.
Movement or loosening during testing indicates mechanical issues.
Steps to disassemble, re-tape, and reassemble a leaking joint
Begin by shutting off the supply and relieving system pressure.
The technician loosens the joint with appropriate wrenches, inspects threads and seats for damage or debris, and cleans old tape and sealant.
If threads are sound, apply fresh PTFE tape clockwise, three to five wraps, smooth it into threads, then hand-start and tighten to spec.
Test slowly for leaks.
When to replace fittings or call a professional
If leaks persist after proper disassembly, cleaning, and three to five clockwise wraps of PTFE tape, the technician should evaluate the fittings for damage and wear before attempting further tightening.
Cracked, corroded, or deformed threads, stripped fittings, or soft seals warrant replacement.
If diagnosis is uncertain, leaks continue despite new parts, or the system involves gas or complex piping, a licensed professional should be called.
Maintenance and Long-Term Considerations
Teflon tape seals do not last indefinitely; their useful life and common signs of degradation—such as cracking, thinning, or leaking—should be noted.
A simple routine inspection schedule, timed to system usage and exposure conditions, helps catch failures early.
When working on older installations, compatibility with existing fittings and the need for retaping or retrofitting should be evaluated before reassembly.
Lifespan of Teflon tape seals and signs of degradation
How long a PTFE thread seal lasts depends on factors such as application pressure, temperature, chemical exposure, and installation quality.
Typically, PTFE remains stable for years under moderate conditions but degrades faster with high heat, aggressive solvents, or mechanical abrasion.
Signs of failure include hardening, cracking, shredding during disassembly, thread exposure, or recurring leaks indicating loss of sealing integrity.
Routine inspection schedule for taped joints
Given the factors that affect PTFE longevity and the signs of degradation, a regular inspection schedule helps catch early wear before leaks occur.
Inspect taped joints every 6–12 months in typical residential settings, and quarterly for high-pressure or outdoor exposures.
Check for loosening, cracking, discoloration, or moisture.
Replace tape or reassemble joints immediately upon detected deterioration to maintain seal integrity.
Retrofitting older installations and compatibility notes
Assess older threaded assemblies for material compatibility and existing sealant residues before applying new PTFE tape.
Inspect for corrosion, damaged threads, and incompatible metals; remove old pipe dope or degraded tape fully.
Match tape thickness and grade to service (fuel, gas, potable water).
Replace badly worn fittings.
Document changes and retest joints after reassembly to confirm leak-free performance.
Quick Reference Cheat Sheet
A concise cheat sheet lists common tape color codes and their typical thread sealant uses, recommended wrap counts based on pipe diameter, and a short pre-tightening checklist.
The color guide clarifies which tape suits gas, water, or general plumbing, while the wrap recommendations show how many turns to apply for various thread sizes.
The checklist reminds installers to clean threads, check thread direction, and guarantee proper tension before final tightening.
Tape color codes and meanings
Color-coded PTFE tape quickly communicates thread size and designated use, helping technicians choose the correct tape for a job.
Common colors indicate material compatibility and pressure rating. Use codes to prevent cross-application errors.
- White: general-purpose, small fittings
- Yellow: gas lines, thicker for seal
- Pink: water systems, medium density
- Green: oxygen-compatible, specialty use
Recommended wraps by pipe diameter
For each pipe diameter, the recommended number of PTFE tape wraps balances sealing effectiveness with thread clearance: smaller fittings typically require more thin, tight wraps while larger diameters need fewer, thicker wraps to avoid overfilling threads.
| Pipe Diameter | Recommended Wraps |
|---|---|
| 1/8″ | 6–8 |
| 1/4″ | 5–7 |
| 3/8″ | 4–6 |
| 1/2″ | 3–5 |
Fast checklist before tightening a joint
Before tightening a joint, inspect alignment, clean mating surfaces, confirm correct PTFE wrap direction, and verify thread engagement length: guarantee tape covers threads without overlapping the first thread, fittings seat squarely, and any seals or O-rings are present and lubricated as required.
Quick checklist for final check:
- Confirm thread type and cleanliness
- Count PTFE wraps and direction
- Verify seal/O-ring condition and lubrication
- Hand-start threads, then torque appropriately
Conclusion
To sum up, the guide equips readers with clear, practical steps so a homeowner can wrap Teflon tape like a safeguard against leaks. Confidence grows as threads align and seals form, turning anxious dripping into calm silence. When used correctly—wrapped snugly in the thread direction and paired appropriately with metals and fluids—the tape becomes a quiet guardian of plumbing integrity. Regular checks keep that guardian vigilant, preventing small faults from becoming costly cascades.