How to Hide a Radon Pipe Outside: 7 Safe, Code-Compliant Solutions
To effectively hide an exterior radon pipe while ensuring safety and adherence to building codes, homeowners can utilize several solutions. Options include using ventilated decorative enclosures, lattice screens, trellises, planted screening, painting the pipes, or installing a ventilated utility box with removable panels. It’s crucial to maintain proper vent clearance, allow for inspection access, and avoid airtight enclosures around fans. Always opt for weather-resistant materials and corrosion-resistant fasteners, and ensure labels remain visible. Regular inspections and consulting a professional are advisable to guarantee compliance and optimal performance. Continue reading for detailed steps, recommended materials, and common pitfalls to avoid.
Overview of Hiding Exterior Radon Pipes Safely
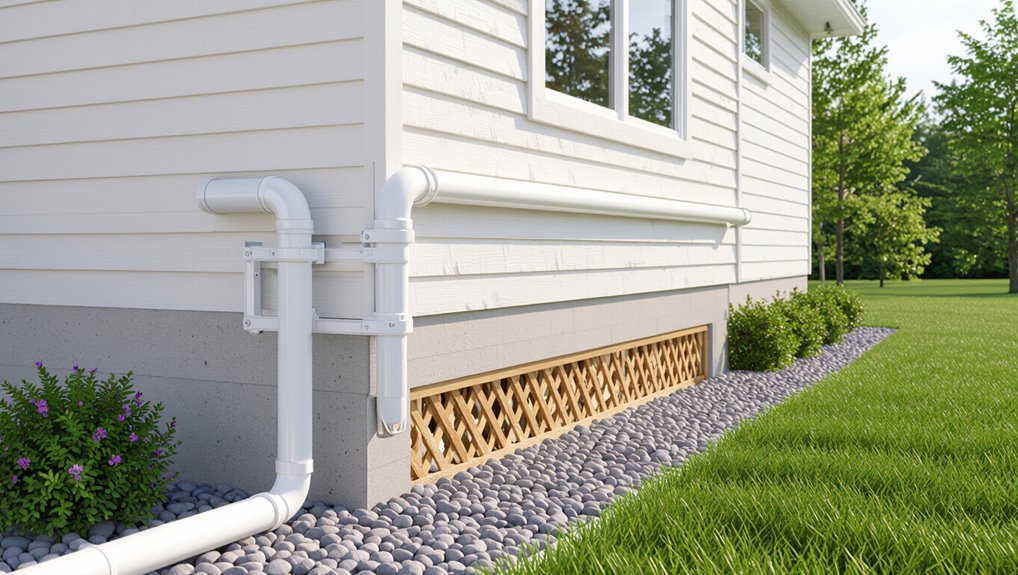
The overview explains that concealing exterior radon mitigation pipes balances safety, visual impact, and adherence to building codes.
It notes that any cover or routing must preserve pipe integrity, allow access for inspection, and avoid obstructing vents.
A brief summary of code-compliant principles—proper materials, clearances, and visible labeling—frames the detailed guidance that follows.
Why conceal radon mitigation pipes safety, aesthetics, and code considerations
A visible radon mitigation pipe can affect more than curb appeal: homeowners must balance safety, aesthetics, and code compliance when deciding how to conceal exterior systems.
Considerations include maintaining airflow and inspection access, preventing damage, and avoiding materials or placements that trap gas.
Practical approaches address visibility without compromising function; guidance on how to hide radon pipe outside emphasizes unobtrusive, reversible, and safe solutions.
Quick summary of code-compliant principles to follow
When planning to conceal an exterior radon pipe, homeowners and contractors should prioritize safety, code compliance, and accessibility by following a concise set of principles that preserve system function.
Maintain unobstructed venting, preserve pipe slope and support, avoid airtight enclosures over fans, provide service access and inspection points, use weather‑resistant materials, label piping, and comply with local setbacks, clearances, and electrical codes.
Assessing Your Property Before Concealing a Radon Pipe
Before concealing an exterior radon pipe, the property should be surveyed to locate the pipe route and its entry and exit points.
Local building codes and radon mitigation standards must be checked, while planned concealment allows for ventilation and future maintenance access.
Materials and likely weather exposure at the installation site should be evaluated to guarantee long-term durability and compliance.
Locating the pipe route and entry/exit points
Although often overlooked, mapping the radon pipe’s route and its entry and exit points is the essential first step in planning concealment.
It establishes where the pipe will be visible, how it interacts with grade, landscaping, and building features, and what obstacles must be addressed.
Identify wall penetration locations, measure heights and distances, note nearby utilities, plantings, doors, and slopes, and mark ideal concealment zones.
Checking local building codes and radon mitigation standards
Why confirm local rules and radon mitigation standards now?
One must verify municipal codes, permit requirements, setback and height limitations, and certified installer or equipment mandates before concealing a radon pipe.
Compliance prevents fines, safety hazards, and failed inspections.
Review state radon program guidance, ASTM or ANSI standards, and utility easements; document approvals to guarantee lawful, durable concealment.
Identifying ventilation and maintenance access needs
A property assessment must determine how the radon stack will vent and how accessible components will remain for inspection and service.
The evaluator maps pipe routing, vent termination height and clearances, and locations of junctions, fans and manometers.
Identify unobstructed inspection paths, removable panels or quick-access boxes, and safe ladder or ground access.
Plan concealment that preserves required sightlines and service reach.
Evaluating materials and weather exposure at the installation site
When deciding how to conceal an exterior radon pipe, assess the materials and expected weather exposure at the installation site to guarantee durability and maintenance access.
Inspect prevailing wind, sun, precipitation, freeze–thaw cycles, and salt or chemical exposure.
Choose rot-, UV- and corrosion-resistant cladding and fasteners.
Plan removable panels, clearances for vents and service, and materials compatible with local code and landscaping.
Code-Compliant Concealment Options (Visual and Practical Solutions)
When selecting concealment methods, attention must be paid to codes that require unobstructed airflow and easy access for inspection and maintenance.
Practical solutions range from discreet painting and landscaping to purpose-built ventilated enclosures that blend with the site.
The following examples illustrate compliant approaches that balance aesthetics and functionality:
- Decorative enclosures or ventilated utility boxes that allow inspection and airflow.
- Lattice screens, trellises, or painted pipes integrated with shrubs, raised planters, or rock beds.
- Color-matching with approved exterior paint combined with removable screening for access.
Use of decorative enclosures that allow airflow and inspection
Several practical enclosure styles combine visual screening with the ventilation and access required for radon mitigation systems.
Enclosures can be built from slatted wood, perforated metal, or vented composite panels that permit airflow and allow visual inspection. Panels should be removable or equipped with hinged access, secured with tamper‑resistant fasteners, and sited to maintain required clearances and unobstructed exhaust dispersion per local code.
Installing lattice screens or trellis to hide pipe while permitting access
Following the discussion of ventilated enclosures, lattice screens and trellises offer a lightweight, attractive alternative that preserves airflow and inspection access for exterior radon pipes.
They can be mounted on simple frames, hinged for easy removal, and spaced to meet ventilation requirements.
Materials should resist moisture and meet local code; guarantee unobstructed visual access for maintenance and labeled pipe visibility.
Building a ventilated fake utility box or cabinet around the pipe
A simple ventilated utility box or cabinet can conceal an exterior radon pipe while maintaining required airflow and access for inspection and repairs.
Constructed from weatherproof materials, it should include screened vents top and bottom, removable panels or hinged door, and interior clearance for fittings.
Fasten clear labels and avoid airtight enclosures.
Confirm installation complies with local codes and does not obstruct service access.
Painting the pipe with approved exterior paint for color-matching
Paint the exterior radon pipe with a UV-resistant, exterior-grade paint approved for plastics or PVC to blend it with surrounding siding while preserving integrity.
Surface preparation, light sanding and a compatible primer guarantee adhesion.
Use color-matched, breathable coatings; avoid heavy wraps or sealants that block vents or joints.
Maintain visible inspection access and follow local code and manufacturer painting recommendations.
Integrating the pipe into landscaping: shrubs, raised planters, and rock beds
Integrate the radon pipe into landscaping by positioning shrubs, raised planters, or rock beds so they conceal the stack without obstructing vents, access points, or required clearances.
Choose shallow-rooted plants to avoid soil disturbance, build planters that allow inspection access, and use loose rock beds to permit airflow.
Maintain clearances per local code and schedule inspections after installation to guarantee ongoing compliance.
Routing inside a fence or behind a gate with removable panels
When shrubs or planters cannot fully conceal a radon stack without compromising clearances, routing the pipe inside a fence or behind a gate with removable panels offers a tidy, code-aware alternative.
Panels should be removable for inspection, located to maintain required vertical and horizontal clearances, and constructed of noncombustible or treated materials per local code.
Vent termination must remain visible and accessible for service.
Concealing behind soffits or under eaves while preserving clearance
If routed beneath a soffit or tucked under eaves, a radon pipe can be concealed without violating safety requirements by maintaining the required vertical and horizontal clearances, ensuring the vent terminates in a location free of obstructions, and using removable access panels or clear chase spaces for inspection and maintenance.
The installation should avoid enclosing the terminal, prevent backflow of exhaust toward openings, and follow local code for pipe support.
Step-by-Step Guide to Installing a Ventilated Decorative Enclosure
A concise materials and tools checklist precedes a practical plan that guarantees adequate airflow and inspection access.
The installation sequence covers measuring, cutting, assembling, mounting, and fitting removable access panels for testing and maintenance.
Final steps address weatherproofing and pest prevention to protect the pipe and enclosure long term.
Materials and tools checklist
Several essential materials and a concise set of tools are required to build a ventilated decorative enclosure for an outdoor radon pipe: weather-resistant lumber or composite panels, corrosion-resistant fasteners, exterior-grade paint or stain, breathable vent screens, silicone or exterior caulk, flashing, and a vapor-permeable, UV-stable mesh for insect control. Also needed: measuring tape, speed square, circular saw, drill/driver, level, stainless screws, exterior brush, safety gear.
Measuring and planning for airflow and inspection access
With the materials and tools assembled, measurements and a clear plan for airflow and inspection access should be made before cutting or fastening any pieces.
Determine pipe height, clearance from vents, and required gap sizes to maintain unobstructed flow.
Plan removable panels or hinged access for visual inspection and probe insertion.
Verify compliance with local codes and guarantee weatherproof clearances without restricting airflow.
Cutting, assembling, and mounting the enclosure
Begin by laying out the pre-cut panels and hardware on a flat, level surface. Then follow the measured dimensions and airflow gaps from the planning stage to guide each cut and fastener placement.
Square and clamp panels, drill pilot holes to prevent splitting, and dry-fit all joints. Permanently fasten with corrosion-resistant screws and exterior adhesive.
Mount enclosure around the pipe, level and secure to substrate.
Securing removable access panels for testing and maintenance
Secure removable access panels so testing and maintenance are safe, quick, and repeatable: properly sized panels, durable fasteners, and accessible mounting points guarantee technicians can reach the radon pipe and monitor ports without disturbing the enclosure or compromising airflow.
Panels should align with inspection points, use tamper-resistant yet serviceable hardware, incorporate simple indexing for reinstallation, and provide clear clearance for tools and test probes.
Weatherproofing and pest prevention details
A few focused measures will keep the decorative enclosure weatherproof and pest-resistant while preserving radon mitigation performance.
Use corrosion‑resistant flashing and sealed joints to prevent water ingress; slope tops away from the pipe.
Install fine stainless‑steel mesh over vents to block insects and rodents without restricting airflow.
Elevate the base off soil, apply insect‑proof sealant around penetrations, and leave removable testing access clear.
Ensuring Ongoing Safety and Compliance
The homeowner must guarantee the enclosure preserves airflow and prevents backflow or blockage by keeping vents clear and using non-restrictive materials.
A brief inspection checklist—visual vent check, seal integrity, and outlet clearance—should be followed regularly, with a radon professional contacted if readings rise or physical damage is found.
Concealment choices should be evaluated for their potential to alter test results or impair mitigation performance.
How to maintain ventilation and prevent backflow or blockage
Although hidden piping improves aesthetics, maintaining unobstructed airflow and preventing backflow are essential for long-term radon mitigation performance.
Keep vents clear of debris, snow, vegetation, and paint. Use screened terminations and backflow preventers where code requires.
Guarantee slope and support prevent water pooling. Verify fan function and pressure direction without detailed inspection steps.
Document changes affecting airflow.
Regular inspection checklist and when to call a radon professional
Begin routine inspections on a seasonal schedule to confirm that hidden radon piping remains unobstructed, structurally sound, and performing as designed.
Check joints, seals, supports, external vents, and visible fan operation.
Look for damage, corrosion, animal nests, or paint/landscaping interference.
Record findings and air readings.
Contact a certified radon professional if elevated levels persist, visible damage exists, or repairs exceed homeowner capability.
How concealment can affect radon testing and mitigation performance
When concealment obscures radon piping or components, it can mask leaks, restrict airflow, and interfere with accurate short- and long-term testing, undermining system performance and safety.
Hidden components prevent visual inspections, delay detection of seal failures or fan issues, and skew diagnostic readings.
Maintenance, unobstructed access panels, and clear labeling preserve testing integrity and regulatory compliance.
Comparing Concealment Methods by Pros and Cons
When weighing concealment options, the author compares aesthetic impact, airflow retention, maintenance ease, cost, and code risk to help readers choose a balanced solution. Below is a compact emotional prompt to frame those trade-offs:
| Benefit | Drawback |
|---|---|
| Looks pleasing | May reduce airflow |
| Low maintenance | Higher upfront cost |
| Meets code easily | Limited aesthetic options |
| Affordable | Potential long-term risk |
A clear comparison of these points reveals priorities and consequences for each method.
Aesthetic impact, airflow retention, maintenance ease, cost, and code risk
Although concealment options can improve a home’s appearance, they differ significantly in effects on airflow, accessibility, cost, and code compliance.
Painted enclosures and lattice screen well for aesthetics but may restrict airflow and complicate inspections.
Flexible wraps preserve draft but age faster.
Custom boxes balance looks and access at higher cost.
Permanent alterations risk code violations; professional review minimizes compliance and safety issues.
Common Mistakes and How to Avoid Them
Common errors when concealing an outdoor radon pipe include blocking access ports or inspection points, enclosing the system in non-ventilated or sealed boxes that trap gases, and painting over warning labels or system tags.
Unauthorized DIY modifications that conflict with local codes also occur and can compromise safety and legality.
Each mistake can be avoided by maintaining clear access, using ventilated enclosures or approved covers, preserving visible labels, and consulting local regulations or a certified professional.
Blocking access ports or inspection points
Blocking access ports or inspection points renders future maintenance and testing difficult and can jeopardize the functioning of a radon mitigation system.
Covering or sealing them for aesthetics prevents pressure readings, fan replacement, and smoke testing.
Proper concealment leaves clear, labeled access with removable panels or discreet covers meeting code.
Regular access guarantees system performance, timely repairs, and compliance without compromising appearance.
Using non-ventilated or sealed enclosures that trap gases
After explaining why access points must remain available, attention turns to the mistake of enclosing radon pipes and fans in unventilated or airtight boxes.
Such enclosures can trap leaks, increase fan backpressure, and hide odors or signs of failure.
Best practice: use ventilated, accessible screening or open lattice work, maintain clearances, and document locations for inspection without sealing gases into confined spaces.
Painting or covering active warning labels and system tags
Many homeowners inadvertently obscure active warning labels and system tags by painting over them or affixing coverings, which defeats their purpose as immediately visible indicators of system status, maintenance needs, and safety warnings.
Labels must remain legible and exposed; instead, use adjacent discreet signage, clear protective covers, or integrate unobtrusive housings that preserve visibility while blending with landscaping and siding.
DIY modifications that violate local codes
Homeowners sometimes undertake DIY changes to radon mitigation systems—relocating piping, adding unapproved vents, or altering seals—without realizing those actions can breach local building codes and compromise safety.
Such alterations can void warranties, disable depressurization, or create leaks.
Professionals should inspect, permit, and execute modifications.
When hiding pipes, use approved materials and maintain access to labels, monitors, and inspection points to remain code-compliant.
Cost Estimates and Timeframe for Popular Concealment Options
The discussion compares low-cost quick fixes, such as paint or lattice panels, with more permanent built structures like boxed enclosures or landscaping walls, noting the differences in materials and longevity.
Estimates for simple cosmetic solutions often run low and can be completed in a day, while permanent builds may require days to weeks and higher material costs.
Labor rates, local permit requirements, and contractor scheduling are typical factors that affect final cost and timeframe.
Low-cost quick fixes vs. permanent built structures
Several common concealment approaches fall into two clear categories: low-cost quick fixes that can be implemented in an afternoon and permanent built structures that require more materials, labor, and planning.
Quick fixes—paint, lattice panels, planter boxes—typically cost $20–$200 and take 1–4 hours.
Permanent solutions—wooden enclosures, stone veneers, custom trellises—range $300–$2,500 and take days to weeks.
Typical labor and permit considerations
Moving from cost and time distinctions between quick fixes and permanent builds, attention turns to the labor and permit factors that affect final project scope.
Labor ranges from an hour for simple paint or trim to days for masonry or enclosure work; licensed contractors increase hourly rates.
Permit needs depend on local code and structural changes; inspections add scheduling delays and potential plan revisions.
Examples and Practical Scenarios
The following examples illustrate practical choices for concealing an outdoor radon pipe in varied settings.
Scenarios include compact yards where space-saving routing and vertical screening are preferred, historic or HOA-restricted exteriors requiring reversible, code-compliant disguises, and regions with extreme weather that demand robust materials and secure mounting.
Each case highlights trade-offs in visibility, cost, and durability to guide selection.
Small yard with limited space recommended approaches
One practical approach for a small yard with limited space is to combine compact planting, low-profile hardscaping, and strategic screening to conceal a radon pipe without impeding access or altering airflow.
Use narrow perennial beds, dwarf shrubs, and lattice fixed a few inches from the pipe to permit inspection.
Opt for removable panels, gravel or pavers around the base, and clear visual markers for maintenance.
Historic home or HOA-restricted exterior discreet compliance solutions
Although exterior modifications must respect period details or HOA guidelines, discreet radon mitigation is achievable through reversible, low-visibility solutions; examples include routing pipes along existing architectural lines, matching vent sleeves to historic trim colors, and using removable wooden louvers or screened boxes painted to blend with siding so inspectors retain clear access while aesthetic integrity remains intact.
Case examples: corner runs hidden behind shutters, faux downspout enclosures, and narrow fascia channels.
Extreme weather locations material and mounting adaptations
When exposed to high winds, heavy snow, salt spray, or extreme UV, radon pipe installations require materials and mounting details chosen for durability and minimal movement; stainless steel or UV-stabilized PVC, heavy-gauge straps with vibration-damping pads, and sealed, flexible roof penetrations reduce risk of failure while preserving airflow.
Examples: elevated standoffs for drift, sacrificial zinc anodes in coastal areas, and strap spacing tightened to local wind-loads.
Final Checklist Before and After Concealment
Before concealing the radon pipe, a concise checklist should confirm compliance with local codes, verify airtight seals, and guarantee all safety measures are in place.
After concealment, a post-installation verification should inspect access points and visible connections.
A radon retesting schedule must be established to confirm continued system effectiveness.
Pre-concealment code and safety checklist
A concise final checklist confirms that all regulatory, safety, and functional requirements are met prior to and after concealing an exterior radon vent pipe.
Inspect clearances, secure visible access points, confirm pipe slope and support, verify termination height and labeling, guarantee weatherproof seals and fire barriers remain intact, document compliance with local code, and record photos and dates for future reference.
Post-installation verification and radon retesting schedule
Complete post-installation verification confirms that the system functions as designed and establishes a baseline for future monitoring.
A certified test verifies fan operation, suction levels, seal integrity, and unobstructed discharge.
Record readings and photograph installations before concealment.
Retest radon level after 48–72 hours, then annually or after structural changes.
Immediate retesting follows repairs, weather damage, or suspected performance loss.
Conclusion
The radon pipe, a narrow lantern against unseen dangers, becomes more than plumbing when hidden with care. Like a sapling sheltered yet reaching skyward, it must stay visible to purpose even as it blends with landscape. The homeowner, guardian and steward, balances beauty and duty—ensuring airflow, access, and code. Concealment consequently transforms into a quiet promise: protection maintained, precautions honored, and the household’s breath kept safe beneath an unobtrusive, watchful veil.