
How to Operate a Pipe Bender: Step-by-Step Guide for Beginners and Pros
A pipe bender reshapes tubing by applying controlled force, preventing kinks and flattening. To operate one effectively, choose between manual, hydraulic, or rotary machines based on your material and production needs. Essential steps include wearing safety gear, measuring accurately, selecting the correct die, lubricating the pipe, and using proper supports. Mark your bends, consider bend allowance and springback, and apply steady pressure until you achieve the desired angle. Always follow tooling specifications and practice on scrap material to fine-tune your settings. More detailed guidance is available for both beginners and pros.
How a Pipe Bender Works and When to Use One
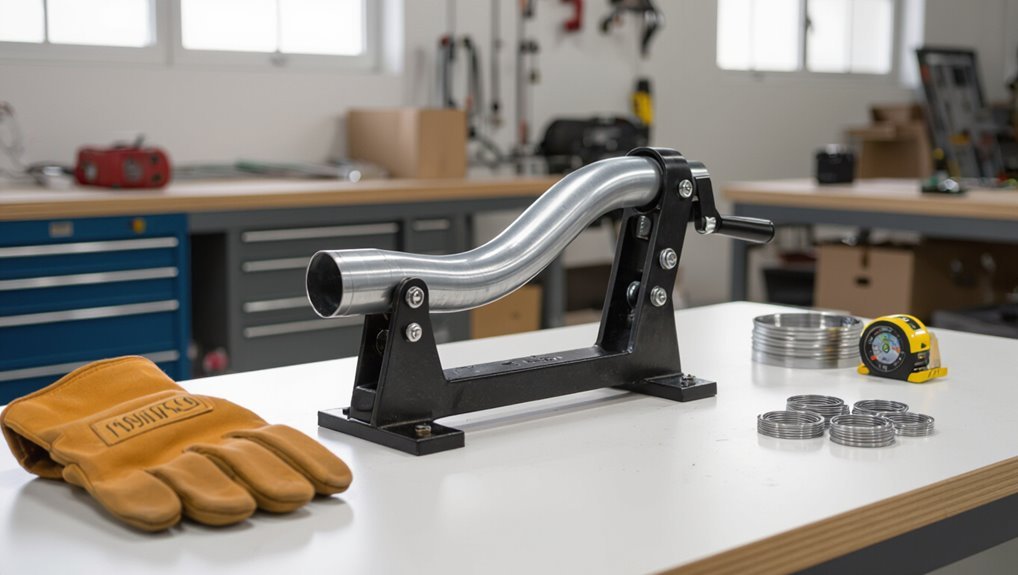
A pipe bender operates by applying controlled force to reshape tubing without kinking, with different machines—manual, hydraulic, and rotary—suited to specific bending methods and precision levels.
Selection depends on material and diameter, since copper, aluminum, steel, and various wall thicknesses require matching tooling and machine capacity.
Typical uses include plumbing runs, HVAC conduit and refrigerant lines, metalwork frames, and home DIY projects where accurate, repeatable bends are needed.
Types of pipe benders and how they differ
Pipe benders come in several distinct types—manual, hydraulic, electric, and rotary—each designed for specific materials, tube diameters, and production volumes.
The guide clarifies how to operate a pipe bender and choose based on accuracy, force, and cycle speed.
- Manual: low volume, tactile control.
- Hydraulic: high force, semi-automatic.
- Rotary: precision, minimal flattening.
Materials and pipe sizes suitable for bending
Having reviewed how different bender types match force, accuracy, and cycle speed, the discussion now turns to which materials and diameters each method can handle.
Manual and roll benders suit softer metals (copper, aluminum) and small diameters (1/8″–1½”).
Hydraulic and induction benders handle steel, stainless, and larger diameters up to several inches.
Wall thickness and alloy determine springback and tooling choice.
Common applications in plumbing, HVAC, metalwork, and DIY
Bending equipment finds wide use across plumbing, HVAC, metalworking, and DIY projects where accurate, repeatable curves are required for fluid transport, structural runs, or aesthetic trim.
Common uses include forming copper and PEX lines, shaping conduit and refrigerant tubing, creating handrails and frames, and fabricating brackets or decorative elements.
Controlled bends reduce fittings, leak points, and installation time while improving appearance and system efficiency.
Quick Overview Can You Safely Bend Pipe with This Tool?
A quick assessment shows whether a given pipe bender can safely form the pipe material, diameter, and wall thickness required, and highlights its limits on bend radius and repeatability.
The choice between manual, hydraulic, and electric models hinges on needed force, precision, production volume, and portability.
Readers should match tool capabilities to the job to avoid material damage or safety hazards.
Instant answer: capabilities and limitations
Assess whether a pipe bender is suitable by matching the tool’s capacity—material type, diameter, wall thickness, and desired bend radius—to the project’s requirements.
Confirm rated maximum sizes and springback limits, inspect dies for proper profile, and verify secure clamping.
Recognize limitations: brittle alloys, excessively thick walls, or tight radii may cause cracking, kinking, or tool overload; consult specs before proceeding.
When to choose manual vs. hydraulic vs. electric benders
When is a manual, hydraulic, or electric pipe bender the safest and most effective choice?
Manual benders suit light-gauge tubing, tight spaces, and occasional use—low cost, high control.
Hydraulic units handle thicker wall or larger-diameter pipe with consistent force for repetitive jobs.
Electric benders combine speed and automation for production environments but require power, guarding, and training for safe operation.
Essential Safety Precautions Before You Begin
Before any bending begins, operators should confirm appropriate personal protective equipment and a clear, well-lit workspace.
The bender and pipe must be inspected for cracks, wear, coating damage, or other defects that could cause failure.
Special care is required when handling pressurized or pre‑coated pipes to prevent sudden releases, coating contamination, or surface damage.
Personal protective equipment and workshop setup
Because pipe bending involves high forces, sharp edges, and flying debris, operators must equip themselves with appropriate personal protective equipment and prepare the workspace to minimize hazards.
Protective gear and setup priorities include:
- Safety glasses, cut-resistant gloves, hearing protection, and steel-toe boots.
- Clear, well-lit area with non-slip floors and stable workbench.
- Fire extinguisher, first-aid kit, and adequate ventilation.
Inspecting the bender and pipe for defects
Having donned protective gear and prepared the workspace, the operator proceeds to inspect the pipe bender and the stock to identify any defects that could cause failure or injury.
They check tooling for cracks, wear, loose fasteners, and proper alignment; verify dies and mandrels are clean and undamaged; examine pipes for dents, corrosion, fractures, and correct dimensions; reject compromised components before bending.
Safe handling of pressurized or pre-coated pipes
Handle pressurized or pre-coated pipes with deliberate care, recognizing that trapped pressure, residual fluids, or coating materials can create hazards during manipulation and bending.
Verify depressurization, venting, and fluid removal before handling. Confirm coatings are compatible with heat and bending; protect against cracking or toxic off-gassing.
Wear appropriate PPE, use containment for leaks, and follow manufacturer and workplace procedures to mitigate exposure and sudden release risks.
Tools and Materials You’ll Need
To operate a pipe bender effectively, the technician must select the appropriate equipment—manual, hydraulic, or electric benders—along with sturdy stands and supports to secure workpieces.
Essential consumables and accessories include the correct dies and mandrels, suitable lubricant, and any required heat sources for annealing.
Accurate measuring and marking tools are also necessary to guarantee bends meet specified dimensions.
Required equipment: types of pipe benders, stands, and supports
Before beginning any bending work, a clear inventory of essential equipment should be assembled. Required equipment covers machine choice, secure mounting, and work supports. Appropriate selection depends on pipe diameter, wall thickness, and production volume.
- Hydraulic and electric rotary-draw benders for precision and heavy work.
- Portable manual benders for field jobs and tight spaces.
- Stands, v-blocks, and adjustable supports for alignment and safety.
Consumables and accessories: dies, mandrels, lubricant, heat sources
Dies, mandrels, lubricants, and heat sources complete the toolkit needed to produce accurate, defect-free bends; each item must be matched to pipe material, diameter, and bend radius to prevent collapse, wrinkling, or cracking.
Select die profiles for shape, mandrels for internal support, appropriate lubricant to reduce friction, and controlled heat for annealing or bending assistance.
Inspect consumables before each use.
Measuring and marking tools for accurate bends
When precision is required for repeatable, defect-free bends, accurate measuring and marking tools become essential; a combination of tape measures, calipers, angle finders, spring dividers, permanent markers, and layout fluid allows the operator to transfer dimensions and bend centers reliably from plan to pipe.
Clear, hardened scribe tips, depth gauges and a magnetic protractor minimize setup error; consistent reference points guarantee repeatability.
Preparing the Pipe for Bending
Before bending, measurements and markings are verified and bend allowance is calculated to guarantee the final fit.
The operator selects the correct die and bending radius for the pipe diameter and application.
Material-specific preparation follows, with techniques adjusted for copper, steel, aluminum, and PVC to prevent collapsing, cracking, or kinking.
Measuring, marking, and calculating bend allowance
Accurate measuring and marking set the foundation for any successful bend: the operator determines the required centerline-to-end dimensions, accounts for machine offset, and transfers those measurements onto the pipe with clear, durable marks.
Next, bend allowance is calculated using material thickness, tube diameter, and bend angle to locate neutral axis shift; markings are adjusted accordingly to guarantee final length and fit.
Choosing the correct die and bending radius
Selecting the correct die and bending radius is critical to achieving the desired geometry and avoiding defects such as wrinkling, ovalization, or excessive thinning.
The operator matches die profile and radius to pipe diameter and wall thickness, considers material springback, and chooses tighter or larger radii per design limits.
Proper die contact and lubrication minimize surface marks and maintain cross-sectional integrity.
Prepping different materials: copper, steel, aluminum, PVC
After confirming die choice and target bend radius, the operator prepares the pipe according to material-specific needs:
Copper requires cleaning, annealing where tight bends are planned, and removal of internal obstructions.
Steel demands degreasing, inspection for mill scale or heat-affected zones, and consideration of partial anneal for thicker or high-strength grades.
Aluminum calls for gentle surface cleaning, attention to work-hardening tendencies, and careful support to avoid folding.
PVC needs verification of chemical compatibility with any lubricant, scoring or heating only when prescribed by manufacturer, and ensuring the pipe is free of cracks or soft spots.
Step-by-Step Pipe Bending Procedure
The procedure begins with correctly setting up the bender and securing the pipe to guarantee alignment and safety.
It then covers making basic 90° and 45° bends, followed by techniques for compound and offset bends and the use of mandrels or internal supports to prevent collapse.
Finally, the operator verifies bend accuracy and compensates for springback as needed.
Setting up the bender and securing the pipe
Begin by positioning the bender on a level, stable surface and confirming it is clean, properly lubricated, and securely mounted to prevent movement during operation.
Select appropriate dies and clamps for pipe diameter and material.
Measure and mark bend start.
Insert pipe, align marks with die reference, and tighten clamps evenly to prevent slippage or deformation.
Check clearances and safety guards before proceeding.
Performing a basic 90° and 45° bend
Position the pipe and bender components for the chosen angle, confirm die alignment, and gradually apply force while monitoring the bend to achieve a clean 90° or 45° curve without kinking.
Clamp securely, mark bend start, and bend slowly to the angle gauge.
Release tension, inspect radius and wall condition, and correct minor springback.
Repeat for additional pieces as needed.
Making compound and offset bends
After completing single-plane 90° and 45° bends, the operator moves on to compound and offset bends, which combine two or more directional changes in a single run.
The operator marks bend centers, calculates cumulative angles and leg lengths, sequences bends to avoid interference, aligns the pipe carefully in the die, performs incremental forming with checks, and verifies final geometry against layout tolerances.
Using mandrels and internal supports to prevent collapse
To prevent inward collapse and wrinkling during tight-radius or thin-wall bends, the operator installs a mandrel or other internal support tailored to the pipe size and bend radius.
The chosen device—ball, plug, or form mandrel—must match the pipe ID, be positioned at the bend apex, and be secured to allow consistent material support as the die closes.
Lubrication, correct insertion depth, and mandrel withdrawal timing guarantee uniform wall thickness.
Checking bends for accuracy and springback adjustment
Verify each bend immediately after forming to guarantee it meets the specified angle, radius, and dimensional tolerances and to determine the extent of springback.
Use calibrated protractors, templates, or CNC readouts to measure. Note deviations, compare to material springback charts, and adjust bend angle or tooling accordingly.
Retest after adjustment. Record results for repeatability and continuous process improvement.
Troubleshooting Common Bending Problems
Troubleshooting common bending problems requires identifying the root causes of kinking, wrinkling, and flattening and applying appropriate fixes such as proper die selection and internal support.
Correcting overbends and underbends involves measuring bend angles, adjusting machine settings, and using springback compensation.
Preventing and repairing surface damage or cracking depends on material preparation, correct tooling, and timely remediation like polishing or localized heat treatment.
Kinking, wrinkling, and flattening: causes and fixes
Kinks, wrinkles, and flattening are common defects that occur when a pipe’s wall cannot redistribute stress evenly during bending; each has distinct visual cues and root causes—insufficient internal support, incorrect die radius, excessive bend speed, or incompatible material thickness—and diagnosing the specific failure mode directs the appropriate corrective action such as using a tighter mandrel, increasing wiper dies, selecting a larger bend radius, slowing the stroke, or choosing a different tubing grade.
- Use appropriate mandrels and plugs to prevent kinks.
- Add or adjust wiper dies to reduce wrinkles at tight radii.
- Increase bend radius or select thicker/tougher tubing to avoid flattening.
Overbending and underbending: how to correct
Detecting and correcting overbends and underbends requires evaluating both setup and process variables to guarantee the final bend angle matches specifications.
Inspect die radius, clamp position, material springback, lubrication, and bending speed.
For underbends, increase bend angle or tighten holding force; for overbends, reduce rotation, allow springback, or back off slightly.
Re-test on scrap and document adjustments.
Surface damage and cracking: prevention and repair
Surface integrity is critical when bending pipe because scratches, gouges, and cracks compromise both appearance and structural performance.
Operators should inspect material, select correct die radii, lubricate contact points, and control bending speed to prevent damage.
For minor surface defects, polish and apply corrosion protection; for cracks, cut out and replace affected sections or weld with qualified procedures and reheat-treat as required.
Comparing Bender Types and When to Buy Which
The section compares common bender categories—manual hand benders, hydraulic/powered units, and bench versus portable models—to clarify strengths, limitations, and typical applications.
It outlines when a simple hand bender suffices for light, occasional work and when a powered or hydraulic machine is warranted for higher volume, thicker materials, or tighter tolerances.
Selection criteria such as mobility, capacity, precision, and cost guide the buying decision.
Manual (hand) benders: pros, cons, and best use cases
A manual (hand) bender offers a low-cost, portable option for shaping conduit and tubing by using leverage and die sets to form bends without power; it excels in simple, low-volume jobs, tight spaces, and field work where electricity or large equipment is impractical. Advantages: portability, low cost. Limitations: physical effort, limited capacity.
| Pros | Cons |
|---|---|
| Portable | Labor intensive |
| Affordable | Limited size |
| Simple setup | Slower |
Hydraulic and powered benders: pros, cons, and use cases
Hydraulic and powered benders deliver greater force and speed than manual models, making them well suited for high-volume work, larger-diameter tubing, and materials that require precise, repeatable bends. They offer consistency and reduced fatigue but cost more, need maintenance, and lack portability. Ideal for shops and contractors handling heavy or frequent bending tasks.
| Power | Emotion | Outcome |
|---|---|---|
| Strong | Confidence | Efficiency |
| Loud | Respect | Reliability |
Bench vs. portable benders: selection criteria
Having considered the advantages and limitations of hydraulic and powered machines, attention turns to choosing between bench-mounted and portable benders.
Bench units suit shop work: greater rigidity, higher capacity, repeatability, and accessory support.
Portable benders prioritize mobility, lighter weight, and quick setup for field jobs.
Selection depends on frequency, tube sizes, precision needs, workspace, transport, and budget constraints.
Maintenance and Care for Your Pipe Bender
Routine inspection and a regular lubrication schedule keep moving parts functioning and prevent premature wear.
Worn dies and components should be replaced promptly to maintain bending accuracy and safety.
Proper storage and periodic calibration further extend the machine’s lifespan and guarantee consistent performance.
Routine inspection and lubrication schedule
A regular inspection and lubrication schedule keeps the pipe bender reliable and extends component life by identifying wear early and preventing corrosion.
Technicians should follow fixed intervals, document findings, and apply recommended lubricants to bearings, slides, and pivot points.
- Daily: visual check, clean chips, light lubrication.
- Weekly: inspect fasteners, test controls, grease fittings.
- Monthly: thorough inspection, replace seals, record maintenance.
Replacing dies and worn components
Replace worn dies and components promptly to maintain bend accuracy and prevent secondary damage to the bender.
Technicians should inspect dies, rollers, pins, and clamps for wear or deformation before use.
Replace parts following manufacturer specifications, using correct part numbers and torque settings.
Test the bender after replacement with scrap material.
Document replaced components and dates for maintenance records.
Storage and calibration tips to extend lifespan
Store the pipe bender in a clean, dry, and temperature-stable environment to prevent corrosion, warping, and seal degradation.
Regularly coat exposed metal with light oil, cover with breathable fabric, and remove humidity sources.
Perform calibration checks monthly: verify die alignment, backup stop positions, and pressure gauge accuracy.
Record adjustments, torque settings, and part replacements to track wear and schedule preventive maintenance.
Cost, Skill Level, and When to Hire a Professional
When deciding whether to tackle a bending job personally or hire a pro, a clear project checklist—covering material, tolerances, number of bends, and access constraints—helps determine required skill and risk.
Typical costs and time vary by bend type and volume, with simple single bends often completed quickly and affordably while complex or tight-tolerance work increases price and lead time.
For professionals, concise specifications (material, OD, wall thickness, angle, bend radius, and any springback allowances) and reference drawings guarantee accurate quotes and results.
Project complexity checklist to decide DIY vs. pro
How complex is the bending task, and is the homeowner equipped to handle it safely and economically?
A checklist evaluates pipe material, diameter, required accuracy, number of bends, access constraints, special fittings, tooling availability, and safety risks.
If multiple factors score high—tight tolerances, hazardous materials, confined spaces, or specialist tools—professional services are recommended; simple, low-risk jobs suit determined DIYers.
Typical costs and time estimates for common bends
Typical pipe-bending jobs fall into a few predictable cost and time ranges based on material, diameter, bend type, and operator skill:
Small-diameter soft metals, single 90° bends—low cost, minutes to an hour for experienced DIYers.
Larger diameters or multiple bends increase cost and time.
Complex mandrel bends or stainless require higher skill or a pro; hire when tolerance, finish, or safety risks rise.
How to communicate bend specifications to a professional
After outlining common cost and time ranges, the next step is to translate those expectations into clear specifications for a professional.
Provide material type, OD/ID, wall thickness, exact bend angles, centerline radius, leg lengths, tolerance, quantity, finish, and joint requirements.
Indicate desired turnaround, budget limit, and whether prototype or production.
If welds, pressurization, or tight tolerances are needed, hire higher-skilled fabricators.
Pro Tips and Best Practices for Clean, Accurate Bends
Start by inspecting the tube and tooling for burrs, contamination, or damage, since clean surfaces and properly matched dies are the foundation of accurate bends.
Follow precise setup, consistent speed, and proper lubrication to minimize springback and scoring.
- Verify die alignment and clamp pressure.
- Use internal support or mandrels for thin walls.
- Record settings and test on scrap material.
Sample Projects and Step-By-Step Examples
The article presents clear, task-oriented examples that walk through bending copper for residential plumbing with a concise step checklist.
It also outlines step-by-step procedures for creating conduit runs for electrical work.
Finally, it provides a focused checklist for fabricating handrails and tubing frames to illustrate common shop workflows.
Bending copper for residential plumbing: step checklist
Prepare a concise checklist that guides users through bending copper tubing for common residential plumbing tasks, highlighting required tools, safety checks, measurement and marking steps, bend-radius considerations, and leak-prevention practices.
Include:
- verify tubing type and size;
- gather bender, spring, deburring tool, flux, torch, and fittings;
- measure and mark bend points;
- confirm minimum radius;
- support tubing;
- execute smooth bends;
- deburr, clean, flux, and solder or braze;
- pressure-test for leaks.
Creating conduit runs for electrical work: step checklist
Plan conduit runs with attention to route, conduit type, and code compliance to guarantee safe, accessible electrical installations.
Measure pathway, mark bends and supports, and select correct conduit size and fittings.
Cut and deburr lengths, make precise bends with the pipe bender, assemble with proper connectors, and secure supports at code intervals.
Test continuity and label runs before energizing.
Fabricating handrails and tubing frames: step checklist
Several clear steps guide fabricating handrails and tubing frames, beginning with precise measurements, material selection, and a layout that balances strength with aesthetics.
Next, mark bends, choose appropriate die and mandrel, and set machine parameters.
Perform trial bends, adjust for springback, weld or join fittings, grind and finish connections, and inspect alignment, safety, and compliance before installation.
Additional Resources and Reference Charts
The article now points readers to practical reference materials, including bend radius charts and cross-reference tables for common pipe sizes and wall thicknesses.
It also lists recommended suppliers and official equipment manuals to guarantee compatibility and safety.
Curated video tutorials are suggested for visual guidance on setup and technique.
Bend radius charts and cross-reference tables
Bend radius charts and cross-reference tables provide concise, standardized data for matching pipe material, wall thickness, and tooling to the minimum achievable radii without compromising integrity. They aid selection, prevent collapse or wrinkle, and document safe limits for repeatable bends.
| Material | Wall (in) | Min Radius (in) |
|---|---|---|
| Steel | 0.065 | 1.5 |
| Copper | 0.035 | 1.0 |
| Aluminum | 0.050 | 1.2 |
| Stainless | 0.065 | 2.0 |
Recommended suppliers, manuals, and video tutorials
When sourcing pipe-bending equipment and learning materials, professionals should prioritize suppliers and tutorials that document tooling specifications, material limits, and step-by-step procedures.
Trusted manufacturers, industry bodies, and vocational schools provide reliable guides, spec sheets, and certified courses.
Recommended resources combine clear manuals, parts catalogs, and filmed demonstrations for practical learning and safety compliance.
- Manufacturer manuals and spec sheets
- Industry association guides
- Certified video courses
Conclusion
The reader is left with the tangible hum of possibility: practical knowledge quiets doubt, yet the theory that a single controlled curve can transform raw metal into purposeful form proves both scientific and almost mythic. Having learned the mechanics, safety, and subtlety of the pipe bender, one recognizes that skill reshapes more than pipe—it reshapes confidence. This realization stirs a modest awe, urging cautious curiosity and the steady hand of practice for more refined workmanship.
