How to Create Drainage in Yard: Easy DIY Solutions to Stop Water Pooling
To effectively stop water pooling in your yard, consider simple DIY solutions such as regrading low areas to create a 1–2% slope, adding a dry creek bed or swale to direct runoff, and installing a French drain for persistent wet spots. Additionally, planting a rain garden can enhance soil infiltration. Improve compacted clay with compost and coarse sand, extend downspouts away from your foundation, and install catch basins as needed. Your budget and soil type will influence your choices, and the following sections will provide detailed methods and cost estimates.
How to Stop Water Pooling in Your Yard
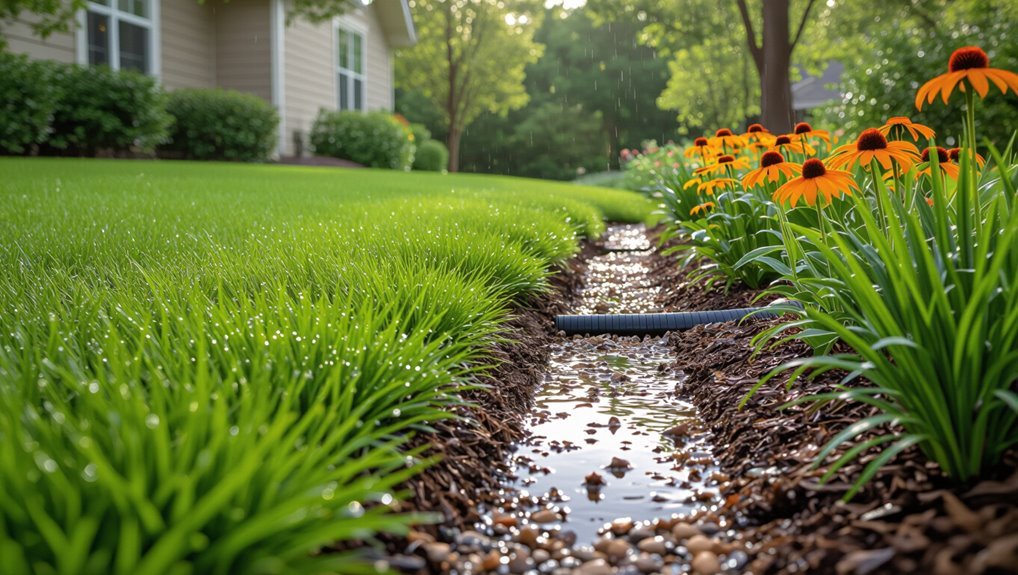
A simple fix—improving grading, installing a dry well, or adding a French drain—often redirects standing water effectively.
Homeowners can handle minor regrading or small-scale drains with basic tools and materials.
For persistent pooling, soggy soil, or issues near foundations and utilities, a professional assessment and installation is recommended.
One-sentence solution summary
Implement targeted grading, install appropriate drains like French drains or dry wells, and route runoff to safe discharge points so standing water is diverted away from low spots and structures.
This concise recommendation summarizes how to create drainage in yard: combine slope correction, trench or pipe drains, soil amendment, and strategic discharge to eliminate pooling while protecting foundations and landscaping without unnecessary complexity.
When to call a pro vs DIY
Determine whether the job is within typical homeowner skills or requires professional expertise by evaluating scope, safety, and potential for property damage.
Simple fixes—grading, installing surface drains, or adding soil amendments—suit DIYers.
Call a pro for major regrading, buried utility conflicts, persistent saturation, or permit‑required work.
Professionals guarantee proper permits, long‑term solutions, and liability coverage for complex or high‑risk drainage projects.
Basics Why Yard Drainage Matters
Water pooling in a yard often stems from compacted or clay soil, improper grading, clogged or misdirected downspouts, and impermeable hardscape.
Poor drainage can harm plants, attract mosquitoes, and even cause foundation or basement damage if left unaddressed.
Homeowners should understand basic terms like runoff, grade, infiltration, and French drain to plan effective fixes.
What causes water to pool (soil, grading, downspouts, hardscape)
Pooling in a yard results when precipitation or runoff cannot move away fast enough, and several common factors contribute: compacted or clay-heavy soil slows infiltration; poor grading leaves low spots where runoff collects; clogged or misdirected downspouts concentrate roof discharge near foundations; and impermeable hardscape — patios, driveways, or compacted paths — blocks natural drainage paths.
Seasonal saturation and nearby impermeable surfaces increase volume and duration.
Risks of poor drainage (plant damage, foundation issues, mosquitoes)
When runoff and standing moisture persist where they shouldn’t, the consequences extend beyond soggy turf. Saturated soil suffocates roots, causing rot and plant decline.
Persistent dampness undermines foundations, promotes cracks, and increases repair costs. Stagnant pools create mosquito breeding sites and heighten disease risk.
Property value and usability suffer, making prompt drainage solutions essential to prevent escalating damage and health hazards.
Key drainage terms homeowners should know
A few core terms give homeowners the vocabulary to assess and address yard drainage effectively: runoff, grading, infiltration, impervious surface, catch basin, French drain, swale, and sump.
Understanding each term clarifies problems and solutions: runoff flows, grading directs it, infiltration soaks it, impervious surfaces block it, catch basins collect it, French drains and swales convey it, and sumps pump it away.
Assessing Your Yard Diagnose Drainage Problems
The homeowner begins by performing a simple water test and observing the yard after rain to identify pooling and slow-draining areas.
They map low spots, slopes, and runoff paths while noting soil type and permeability—compaction or clay versus sand—to gauge infiltration.
Finally, they inspect gutter and downspout discharge and existing outlets, and consider a professional site survey if problems persist or the property is complex.
Step 1: Conduct a simple water test and observe after rain
Begin by checking how water behaves on the property: perform a simple ponding test and make careful observations after the next rainfall to identify low spots, slow-draining areas, and surface flow paths.
Note standing-water duration, soggy patches, and where runoff concentrates. Record locations, approximate depths, and persistence.
Repeat after multiple storms to confirm patterns before planning interventions.
Step 2: Map low spots, slopes, and runoff paths
Mapping transforms observations into a clear, scaled plan that shows where water accumulates and how it moves across the property.
Using a simple sketch, note down low spots, high points, roof downspouts, hard surfaces, and visible runoff channels.
Mark standing-water locations after storms and connect contours to indicate flow direction.
This map guides placement of drains, swales, and diversion strategies.
Step 3: Check soil type and permeability (compaction, clay vs sand)
Because soil type and compaction determine how quickly water soaks in, evaluating permeability is an essential next step in diagnosing yard drainage.
Probe soil with a spade, perform a percolation test, and note texture: clay holds water, sand drains quickly.
Identify compacted areas from heavy traffic or machinery.
Record findings to guide solutions like aeration, soil amendment, or targeted drainage installations.
Step 4: Inspect gutter/downspout discharge and drainage outlets
A homeowner should examine gutters, downspouts, and any outlet pipes to confirm that roof runoff is being carried well away from foundations and low spots.
Check for clogs, leaks, sagging sections, disconnected extensions, or outlets draining onto compacted soil.
Verify downspout splash blocks or extenders direct water beyond the wet area.
Note pooled discharge and reroute to swales, dry wells, or storm drains as needed.
When to get a professional site survey
When should a homeowner call in a professional site survey? A surveyor or drainage specialist is warranted when persistent pooling, recurring basement dampness, complex grading issues, or unclear surface/subsurface flow patterns exist.
Professionals assess soil type, slope, utilities, and permit needs, provide diagnostic data, and recommend engineered solutions.
Hire one if DIY fixes fail, property value is affected, or liability concerns arise.
DIY Drainage Solutions Step-by-Step Projects
The article now outlines practical, step-by-step DIY drainage projects suited to common yard problems.
It presents regrading to direct water away from structures, dry creek beds or swales for surface flow, trench-style French drains, and catch basins or surface drains for concentrated runoff.
It also covers dry wells and infiltration pits for subsurface storage and gradual dispersal.
Solution 1 Regrading the yard (shaping slopes away from structures)
The regrading section lists the basic tools and materials required for reshaping yard slopes, from shovels and rakes to soil and gravel.
It then outlines a concise step-by-step process for establishing proper pitch away from foundations and finishing with compaction and grading checks.
Typical costs and time estimates for a DIY project are provided to help readers gauge effort and budget.
Tools and materials needed
Regrading a yard requires a concise set of tools and materials chosen for earthmoving, measuring, and erosion control.
Essential items enable safe grading, soil relocation, and temporary stabilization without detailing procedures.
- Long-handled shovel and flat spade cutting turf
- Wheelbarrow loaded with excavated soil
- Line level or laser level across stakes
- Rake and tamper for smoothing and compacting
- Erosion control fabric and mulch
Step-by-step regrading process
After gathering the listed tools and marking high and low points, the homeowner proceeds to shape gentle slopes that direct runoff away from foundations.
They cut turf, loosen soil, and move earth with a shovel and rake, creating a consistent grade of about 1–2% away from structures.
Finish by compacting, smoothing, and restoring sod or seed to prevent erosion and encourage drainage.
Typical costs and time
Cost and time estimates for DIY regrading projects vary with yard size, soil type, slope complexity, and homeowner experience.
Small yards often require one day and minimal tools, costing $50–$300 for rental equipment and materials.
Medium to large jobs may take several days to a week, $300–$1,500 in supplies and rentals.
Professional help raises costs substantially.
Solution 2 Installing a dry creek bed or swale
The next section introduces installing a dry creek bed or swale, outlining key design considerations and ideal placement to move water safely through the yard.
It then summarizes suitable materials, recommended plantings for erosion control and aesthetics, and routine maintenance needs.
Finally, it provides a concise step-by-step installation sequence for a successful DIY project.
Design considerations and placement
Several key factors guide placement and design of a dry creek bed or swale: natural slope and drainage patterns, soil type and permeability, expected water volume and flow rate, and proximity to structures or utilities.
The layout should follow existing contours, direct runoff away from foundations, avoid underground utilities, and include enough length and grade to slow flow.
Consider outlet stability and neighboring properties’ drainage.
Materials, planting, and maintenance
Many projects rely on a handful of durable materials—liner fabric, angular gravel, river rock, and native plants—to form an effective dry creek bed or swale.
Choose erosion‑resistant fabric, appropriately sized stone to slow flow, and local, deep‑rooted species for stabilization.
Mulch and soil amendments aid establishment.
Routine inspections remove debris, redistribute rock after storms, and replace stressed plants to maintain long‑term function.
Step-by-step installation
After selecting erosion‑resistant fabric, appropriately sized stone, and hardy native plants, attention turns to the step‑by‑step installation of a dry creek bed or swale.
Excavate the route, compact a subtle grade, lay fabric, add base gravel, position larger stones for flow and aesthetics, finish with smaller rock and mulch, plant stabilizers along edges, and test with water, adjusting pitch and rock placement as needed.
Solution 3 French drain installation (trench drain)
A French drain is recommended where surface runoff and subsurface seepage concentrate along foundations or low spots, and where grading or swales are insufficient.
The discussion will cover required materials and tools—geotextile fabric, perforated pipe, gravel, shovels, and a level—and how to size them for the job.
A clear step-by-step outline will describe trench layout, excavation, pipe placement, gravel backfill, and final grading.
When to choose a French drain
When is a French drain the appropriate choice for yard drainage? It suits yards with persistent surface pooling, high groundwater, or sloped areas directing water toward foundations. Use when passive, long-term diversion is needed and space allows trenching. Not ideal for small localized low spots needing simple grading or spot drains.
| Condition | Recommend? |
|---|---|
| Persistent pooling | Yes |
| Minor low spots | No |
| Near foundation | Yes |
Materials and tools
Having decided a French drain fits the site conditions, the next step is assembling the correct materials and tools. Essential items include perforated pipe, geotextile fabric, angular gravel, a wheelbarrow, and safety gear.
Tools include a shovel or trenching machine, level, tape measure, utility knife, and gloves. Visualize components ready at the trench edge.
- Perforated PVC or corrugated pipe
- Geotextile fabric roll
- Washed angular gravel
- Shovel and wheelbarrow
- Protective gloves and eye protection
Step-by-step trench, pipe, and gravel installation
Begin by marking the trench line and excavating to the required depth and slope, typically 18–24 inches deep with a 1% (1-inch per 10 feet) fall toward the outlet.
Line trench with landscape fabric, add 2–3 inches of coarse gravel, lay perforated pipe with holes facing down, cover with more gravel to 2 inches below grade, fold fabric, then backfill and compact.
Solution 4 Catch basins and surface drains
Catch basins and surface drains are best placed at low spots, along roof runoff paths, and where water accumulates, with sizing determined by the drainage area and expected flow.
Installation involves excavating to grade, setting the basin or grate on a stable base, and connecting via PVC or corrugated pipe to existing drainage lines or an outlet.
Proper slope, sealed pipe connections, and access for maintenance guarantee effective long-term performance.
Best locations and sizing
Where should catch basins and surface drains be placed, and how large should they be to handle expected flows?
They belong at low points, along roof runoff paths, and near concentrated sheet-flow routes.
Size depends on peak runoff: estimate contributing area and rainfall intensity, then select basins/grates and sump capacity to match calculated flow.
Provide room for debris and easy access for maintenance.
Installation steps and connection to drainage lines
Installers should excavate to the planned invert depth, set the catch basin on a stable, level bedding of compacted gravel or concrete, and confirm outlet elevations before backfilling.
Pipe connections require proper couplings, slope (typically 1%–2%), and debris traps. Compact backfill in layers, restore surface grading, and test flow by running water.
Anchor basins against flotation where groundwater is present.
Solution 5 Dry wells and infiltration pits
Dry wells and infiltration pits suit yards with permeable soils, adequate setback from structures, and any required municipal permits.
The construction typically involves excavating to size, installing a perforated chamber or stone-filled pit, and connecting inlet piping to direct runoff.
Appropriate backfill—clean washed gravel or engineered chamber fill—ensures void space for storage while preventing sediment migration.
When they’re appropriate and permit considerations
A dry well or infiltration pit is appropriate when stormwater can be safely collected above a permeable soil layer and there is sufficient distance to foundations, utilities, and neighboring properties to prevent damage or nuisance.
Local regulations, setbacks, and groundwater table limits must be checked; permits or inspections may be required.
Avoid sites with contaminated runoff or high seasonal groundwater; consult local authorities before installing.
Construction steps and backfill materials
After confirming site suitability and permit requirements, the construction steps and choice of backfill materials determine a dry well or infiltration pit’s performance and longevity.
Excavate to grade, install filter fabric, set a perforated chamber or riser, and backfill with clean, washed stone.
Compact native soil around stone sparingly, add geotextile wrap, and cap with topsoil and vegetation for stability and infiltration.
Solution 6 Permeable hardscaping and rain gardens
Permeable hardscaping and rain gardens offer contrasting approaches to managing surface runoff, with permeable pavers allowing infiltration where traditional paving forces runoff into drains.
Effective rain garden design focuses on siting and grading to capture flow, plus planting and amended soils that promote absorption and slow release.
Plant selection should prioritize native, moisture-tolerant species and soil amendments that increase porosity and nutrient uptake.
Permeable pavers vs traditional paving
How do permeable pavers compare with traditional paving when managing yard drainage? Permeable pavers allow infiltration, reduce runoff, and recharge soil; traditional paving sheds water to drains or causes pooling. Choose based on soil, slope, and maintenance capacity.
| Feature | Permeable Pavers | Traditional Paving |
|---|---|---|
| Runoff | Low | High |
| Maintenance | Moderate | Low |
Designing a rain garden for runoff capture
Moving from hardscaping choices to vegetated solutions, a rain garden captures roof and pavement runoff, slows flow, and allows water to infiltrate into the soil rather than enter storm drains.
Site selection prioritizes low spots, away from foundations and utilities. Grade a shallow basin with gentle side slopes, add an overflow outlet for heavy storms, and shape contours to direct and retain water temporarily.
Plant selection and soil amendments
When selecting plants and amending soil for a rain garden, prioritize species adapted to alternating wet and dry conditions and soils that promote infiltration without eroding.
Choose native sedges, rushes, grasses, and perennials tolerant of saturation and drought.
Amend compacted clay with compost and coarse sand or engineered mix to improve structure.
Mulch lightly, avoid invasive species, and match plant zones to moisture gradients.
Solution 7 Gutter and downspout improvements
Gutter and downspout improvements focus on directing roof runoff away from foundations using extensions, splash blocks, or buried downspout drains.
Homeowners can often install these simple DIY fixes with basic tools and materials.
Design choices should also account for winter conditions, such as preventing ice dams and protecting extensions from freeze–thaw damage.
Extensions, splash blocks, and underground downspout drains
Several simple attachments can redirect roof runoff away from foundations: extensions, splash blocks, and underground downspout drains each serve specific site needs.
Extensions and flexible hoses move water several feet from the house.
Splash blocks dissipate flow and prevent erosion at discharge points.
Underground drains connect to downspouts and carry water to a safe outlet or dry well, requiring proper slope and occasional maintenance.
Simple DIY fixes and winter considerations
Inspecting and maintaining gutters and downspouts can prevent common drainage problems and extend their service life.
Regular debris removal, secure fasteners, and proper pitch keep water flowing. Add extensions or splash blocks to direct runoff away from foundations.
In winter, install heat cable, clear ice dams promptly, and check for frozen blockages. Small seasonal fixes reduce erosion and costly repairs.
Materials, Tools, and Estimated Costs
A concise inventory of common materials—gravel, perforated pipe, landscape fabric, catch basins, and connectors—will be presented along with their typical uses.
Essential tools such as shovels, trenchers, pipe-cutters, levels, and safety gear are outlined for most DIY drainage tasks.
Estimated ballpark costs are provided by project type, from simple yard grading to full French-drain installation.
Common materials list with uses
Effective yard drainage requires a concise set of materials and tools selected for the specific method chosen—French drain, dry creek bed, surface swale, or catch basin system.
Common materials and uses are listed briefly for planning and cost estimates.
- Perforated pipe: channels subsurface flow
- Gravel: promotes drainage and supports pipe
- Landscape fabric: prevents silt clogging
- Catch basins: collect surface runoff
- River rock: stabilizes and decorates channels
Tools required for most DIY drainage projects
Gathering the right tools reduces time and prevents costly mistakes when installing yard drainage.
Essential handheld and powered tools, safety gear, and measuring devices streamline trenching, pipe laying, and backfilling tasks. Proper choices improve accuracy and durability without overspending.
- Shovel and trenching spade
- Wheelbarrow
- Tape measure and level
- Utility knife and pipe cutter
- Work gloves and safety glasses
Ballpark cost ranges by project type
With tools selected and measured, budget expectations can be set by project type: simple surface grading, French drain installation, dry well or catch basin setups, and full-yard subsurface systems each carry distinct material, tool, and labor ranges. Typical costs vary by scope, materials, and whether contractors are hired; table summarizes ballpark ranges.
| Project Type | Materials & Tools | Estimated Cost |
|---|---|---|
| Grading | Shovel, rake, soil | $50–$500 |
| French drain | Pipe, gravel, fabric | $300–$2,000 |
| Dry well/Catch basin | Basin, pipe, backfill | $200–$1,500 |
Step-by-Step Project Planner (Sample Order of Work)
A concise project planner outlines the sequence from pre-work permits and planning through final checks.
It lists a planning and permits checklist, utility marking and site setup steps, a sample implementation timeline for a typical yard drainage fix, and post-installation inspection and adjustment tasks.
The order of work helps guarantee compliance, safety, and efficient use of time and materials.
Planning and permits checklist
Before breaking ground, the planner should confirm local regulations, identify required permits, and assemble documentation—site plans, soil reports, and drainage calculations—so the project complies with municipal codes and avoids costly delays.
A concise checklist outlines timelines, contractor qualifications, inspection schedules, fee estimates, and contingency plans.
- stamped site plan
- soil borings and percolation data
- permit application packet
- inspection timetable
- budget contingency estimate
Prep: marking utilities and site setup
Once all permits are secured and the site plan is finalized, the crew marks underground utilities and establishes a clear, fenced work zone to prevent accidental damage and guarantee worker safety.
Stakes and spray paint outline trenches, sump locations, and outlet routes. Erosion controls, access paths, and material storage areas are designated.
A brief safety briefing and documentation complete site setup before excavation begins.
Implementation timeline example for a typical yard drainage fix
The sample timeline outlines a clear, sequential workflow for a typical yard drainage repair, breaking the project into discrete phases—mobilization, excavation, pipe and structure installation, backfill and compaction, surface restoration, and final inspection—each with estimated durations, dependencies, and key quality checks to keep work on schedule and compliant with plans and permits.
Day-by-day sequencing assigns mobilization (0.5–1 day), excavation (1–2 days), install (1–2 days), backfill (0.5–1 day), restore (0.5–1 day), and inspection (0.5 day), noting weather and permit contingencies.
Post-installation checks and adjustments
Begin a systematic inspection of the newly installed drainage system to verify alignment, gradient, connections, and component integrity against the project plan and permit requirements.
Confirm flow during a controlled water test, check for leaks, settling, or erosion, and guarantee outlet discharge is unobstructed.
Adjust pipe slope, reseat fittings, add backfill or compaction where needed, and document all corrections for warranty and compliance.
Common Mistakes and How to Avoid Them
Common errors in yard drainage projects often stem from procedural oversights and poor design choices, such as ignoring permits and local codes or misgrading the site.
Technical mistakes like undersized drains, inappropriate materials, compacted soil, and failure to enhance infiltration can turn fixes into new problem areas.
Highlighting these pitfalls early helps prioritize compliance, correct grading, proper component selection, and soil improvement.
Overlooking permits and local codes
Although homeowners often focus on grading and gutters, neglecting permits and local codes can lead to costly delays, fines, or required rework.
Contractors and DIYers should verify local regulations, setback rules, and stormwater ordinances before starting.
Obtaining necessary permits guarantees inspections, legal compliance, and eligibility for insurance or warranty claims.
Skipping this step risks project stoppage, penalties, and forced undoing of completed drainage work.
Incorrect grading and creating new problem areas
After confirming permits and code requirements, attention shifts to grading—where small mistakes can redirect water toward foundations, neighboring properties, or landscaping beds.
Incorrect slopes, abrupt swales, or piled soil can create new pooling or erosion. Properly plan flow paths, verify slopes with a level, compact soils gradually, and tie new grades into existing contours to avoid exchanging one drainage problem for another.
Undersizing drains or using wrong materials
Undersizing drains or choosing inappropriate materials compromises a yard’s ability to move water safely, leading to backups, erosion, and premature system failure.
Proper sizing based on runoff volumes and slope prevents overload. Use durable, noncorrosive piping and geotextile-wrapped gravel for longevity.
Avoid temporary fixes like thin plastic or undersized pipe; consult basic flow charts or a professional for correct component selection.
Ignoring soil compaction and not improving infiltration
Neglecting soil compaction and failing to enhance infiltration leave even well-designed drainage systems struggling, because compacted soil drastically reduces pore space and slows water percolation.
Homeowners overlook aeration, organic matter addition, and proper grading, then blame drains.
Address compaction with mechanical aeration, deep ripping in severe cases, and amending soils with compost or sand as appropriate to restore infiltration and reduce pooling.
Maintenance, Monitoring, and Seasonal Care
Regular routine inspections should follow a simple checklist to catch erosion, blockages, and damaged components early.
Winterizing drains, using covers or heat tape where needed, and removing debris will reduce freeze-related clogs.
The schedule for reseeding, revitalizing mulch, or topping gravel should be tied to inspection findings and seasonal growth patterns.
Routine inspection checklist
When should a property be checked for drainage issues? Inspections are recommended after heavy rain, seasonal changes, and monthly visual checks to catch erosion, pooling, or blocked channels.
A concise checklist guides quick action and documents recurring problems.
- Soggy low spots near foundations
- Overflowing gutters and downspouts
- Eroded swales or exposed pipe joints
- Standing water in yard depressions
- Sediment buildup in catch basins
Winterizing drains and preventing clogs
A few targeted steps can keep yard drains clear and functional through freeze-thaw cycles and winter debris: inspect and clean gutters, downspouts, catch basins, and surface drains; remove leaves and sediment; secure or reroute exposed pipes; and install strainers or heat tape where freezing is likely.
Regularly flush lines, check for cracks, clear access points after storms, and store removable grates to prevent ice buildup.
When to reseed, mulch, or refresh gravel
Timing reseeding, adding mulch, or rejuvenating gravel depends on soil temperature, plant growth cycles, and the extent of surface erosion or compaction.
Reseed in early fall or spring when soil warms and moisture is reliable; mulch after planting or before winter to conserve moisture and prevent erosion; refresh gravel when ruts or thin spots appear, typically every few years, or after heavy runoff events.
Decision Guide Which Solution Is Right for Your Yard?
A concise decision guide helps homeowners match symptoms and yard types to appropriate fixes using a quick diagnostics flowchart.
It also presents a clear pros-and-cons summary of major solutions — from surface grading to subsurface drains — so trade-offs are easy to compare.
Together these tools streamline choosing the most effective, practical option for a given yard.
Quick diagnostics flowchart (choose by symptom and yard type)
How should one choose a drainage fix when symptoms vary by location and yard type?
A compact flowchart guides selections: identify symptom (standing water, slow soak, soggy lawn, erosion), note yard type (flat, sloped, clay, sandy), match to actions (surface grading, French drain, dry well, swale, soil amendment), then confirm scale and utility access before implementing or consulting a pro.
Pros and cons summary of major solutions
When choosing among surface grading, French drains, dry wells, swales, and soil amendments, each option carries distinct trade-offs in cost, installation complexity, maintenance needs, and suitability for soil type and slope; homeowners should weigh upfront expense and disruption against long-term effectiveness and local restrictions to select the best fit for their yard.
| Solution | Quick pros/cons |
|---|---|
| Surface grading | Cheap, simple / may need heavy earthwork |
| French drain | Effective for subsurface / costs and trenching |
| Dry well | Good for concentrated flow / needs infiltration |
| Swale/soil amendment | Natural, low maintenance / space and soil limits |
When to Hire a Professional
If visible structural issues, proximity to septic or storm drain connections, or unclear subsurface conditions are present, a professional should be consulted.
A contractor’s bid typically outlines scope, materials, timeline, permits, and warranty—ask for references, insurance proof, and clarification of change-order policies.
Compare quotes by checking scope parity, unit costs, timelines, and credentials rather than choosing the lowest price alone.
Red flags that require pros (structural risk, septic/drain connections)
Although many yard drainage issues can be handled by a competent homeowner, certain signs indicate risks that warrant professional assessment.
Cracks in foundations, bowed walls, or settling near the house; persistent backups or odors suggesting septic or drain line involvement; visible sewer cleanouts or mapped utility conflicts; contaminated runoff affecting neighbors.
These red flags require licensed contractors, structural engineers, or septic specialists.
What to expect in a professional bid and questions to ask
After identifying red flags that require expert involvement, homeowners should know what to expect from a professional bid and what questions to ask before signing any contract.
The bid should list scope, materials, timeline, permits, and warranty. Ask about drainage design, soil testing, erosion control, subcontractors, and change-order procedures.
- Detailed scope and plans
- Material brands and quantities
- Start and completion dates
- Permit responsibilities
- Warranty terms
How to compare contractor quotes
How should a homeowner evaluate multiple contractor quotes to choose the best fit for a yard drainage project?
Compare scope, materials, timeline, and warranties line by line.
Verify licensing, insurance, references, and local experience.
Assess value over lowest price: clarity of drainage solution, permit handling, and cleanup.
Request written change-order policies and a final payment schedule before signing any contract.
Final Best Practices and Preventive Tips
Final best practices emphasize long-term strategies that consistently channel water away from foundations and other structures.
Recommended measures include grading, gutter maintenance, and installation of permanent drainage features to reduce future risks.
Thoughtful landscape design—such as selecting permeable surfaces, rain gardens, and strategic plantings—supports ongoing drainage performance.
Long-term strategies to keep water moving away from structures
Because water damage accumulates over time, long-term drainage strategies focus on durable, maintenance-friendly solutions that consistently direct runoff away from foundations and low spots.
Install and maintain gutters, downspouts, and splash blocks; grade soil to promote positive slope; use French drains or buried drainpipe to channel flow; inspect and clear systems seasonally; protect foundation with waterproofing membrane and install sump pumps where persistent groundwater occurs.
Landscape design choices that improve drainage over time
After establishing durable infrastructure like gutters, grading, and subsurface drains, landscape choices can reinforce and simplify long-term water management.
Plant selection, permeable paving, swales, rain gardens, and terracing channel runoff, reduce erosion, and increase infiltration. Thoughtful placement prevents pooling near foundations and directs flows to safe discharge points.
- Native deep-rooted grasses
- Gravel drainage paths
- Curved swales
- Pollinator rain garden
- Tiered planting beds
Conclusion
Effective yard drainage prevents plant loss, foundation damage, and mosquito breeding; homeowners addressing pooling can often resolve issues with simple grading, swales, or dry wells. One striking statistic underscores urgency: the EPA estimates that urban flooding damages billions of dollars in property annually, and poorly drained yards contribute to localized runoff and erosion. Regular maintenance and choosing appropriately scaled DIY fixes reduce risks, while complex problems still warrant professional evaluation to protect landscape and home.