How to Tighten Drain Valve on Water Heater: Simple Steps to Stop Leaks Quickly
To quickly stop a leaking water heater drain valve, first shut off the water and power supply, then relieve the tank pressure. Attach a hose to the drain valve and release a small amount of water. Next, hand-tighten the valve or use an adjustable wrench to snug it gently. If you notice leaks from the threads, apply Teflon tape or thread sealant. For a temporary fix, pipe tape or a hose clamp can help until you can replace the valve. Further steps will guide you on inspection, replacement options, and when to seek professional assistance.
How to Stop a Leaking Water Heater Drain Valve Quickly
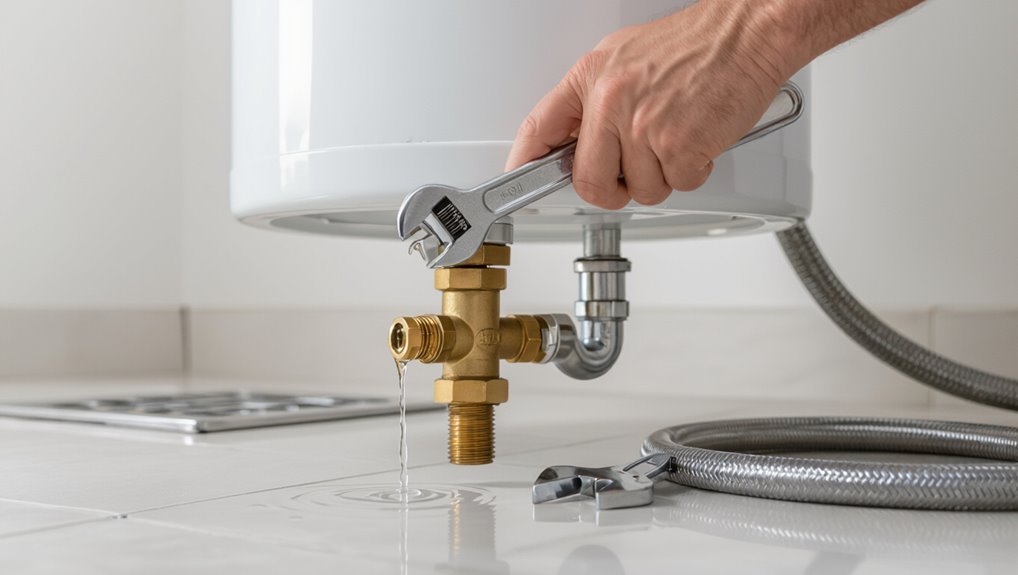
A quick fix for a leaking water heater drain valve usually involves shutting off the water, draining any remaining pressure, and tightening or replacing the valve packing or spigot, which can stop most minor drips within minutes.
Temporary measures like pipe tape or a hose clamp can reduce leakage until a proper repair is made, but they are not permanent solutions.
If the valve is corroded, cracked, or continues to leak after basic attempts, a professional plumber should be called to replace the valve safely.
Quick fix overview and expected results
Begin by shutting off the water supply and relieving pressure so the leaking drain valve can be inspected safely.
A quick fix for how to tighten drain valve on water heater often involves tightening the packing nut, using Teflon tape, or replacing a cheap spigot.
Expected results: reduced or stopped drip immediately; temporary seal lasting until full replacement or professional assessment.
When to call a professional vs. DIY
When should a homeowner attempt a DIY fix versus calling a professional?
A homeowner may tighten or replace a plastic valve, use plumber’s tape, or perform basic draining if comfortable with tools and water shutoff.
Call a professional for metal valve failure, persistent leaks, corrosion, sediment-clogged tanks, gas/electric connections, or unclear causes to guarantee safety and prevent costly damage.
What a Water Heater Drain Valve Is and How It Works
A water heater drain valve provides a controlled outlet for flushing sediment and emptying the tank during maintenance or replacement.
Valves commonly are ball, gate, or simple spigot types and come in plastic or brass construction, with brass generally more durable.
Leaks typically arise from worn seals, loose fittings, or cracked plastic components that fail under thermal cycling and mineral buildup.
Purpose of the drain valve on tank water heaters
Draining a tank water heater relies on a simple but essential component: the drain valve, which controls release of stored water and sediment from the tank.
Its purpose is to enable periodic flushing to remove sediment buildup, prevent corrosion, maintain heating efficiency, facilitate complete drainage for repairs or replacement, and provide a controlled outlet for water during maintenance, protecting the tank and system components.
Common valve types and materials (ball, gate, spigot; plastic vs. brass)
Valves on tank water heaters come in several basic types—ball, gate, and spigot—each with distinct mechanisms, flow characteristics, and durability profiles that affect maintenance and performance.
Choice influences leak risk, serviceability, and lifespan. Materials matter: plastic is economical but less durable; brass costs more but resists corrosion.
Typical considerations include:
- longevity
- corrosion resistance
- ease of operation
- repairability
- cost
How leaks develop at the drain valve
Locate the drain valve at the tank’s lower side; it serves as the controlled outlet for flushing sediment and lowering tank water.
Leaks arise from worn seals, corroded threads, mineral buildup, overtightening stress, or cracks in plastic bodies. Thermal cycling and vibration loosen fittings.
Sediment can prevent full closure, while brass valves corrode at joints.
Timely inspection and replacement prevent progressive deterioration and water damage.
Tools and Materials You’ll Need
A concise list of tools and materials helps guarantee the drain valve can be tightened or replaced efficiently.
The article will cover a basic tool checklist, commonly recommended replacement parts and sealants, and the safety equipment and precautions needed for the task.
Readers are advised to gather items before beginning to minimize interruptions and hazards.
Basic tool checklist
Several essential tools and a few materials are needed to tighten a water heater drain valve safely and effectively.
A concise checklist guarantees readiness and safety:
- Adjustable wrench or pliers
- Pipe wrench or basin wrench
- Bucket and rags
- Teflon tape and gloves
- Flashlight and safety glasses
Recommended replacement parts and sealants
Consider stocking a few common replacement parts and reliable sealants before attempting valve work.
Essential items include a replacement drain valve, rubber washer kit, PTFE (Teflon) tape, thread sealant paste, and a small spare hose connection.
These parts address worn threads, degraded seals, and minor fittings issues, enabling quick, durable repairs without full valve replacement when tightening alone proves insufficient.
- Replacement drain valve
- Rubber washer kit
- PTFE tape
- Thread sealant paste
- Spare hose connection
Safety equipment and precautions
At least basic personal protective equipment and a few specialized tools are required before attempting any work on a water heater drain valve to reduce risk and guarantee a controlled repair.
Safety essentials include gloves, safety glasses, and sturdy footwear.
Also recommended are adjustable wrench, channel-lock pliers, Teflon tape, a bucket, hose, and a flashlight.
Verify power/gas shutoff and allow cooling time before starting.
Prepare the Water Heater Before Tightening
Before attempting to tighten the drain valve, the water heater must be made safe by switching off electrical power or shutting off the gas supply.
The cold-water inlet should be closed and the tank allowed to cool while the pressure is relieved via the temperature-pressure relief valve.
If necessary, partially drain the tank or open the relief valve to reduce internal pressure before working on the drain valve.
Turn off power or gas safely
When preparing to tighten the drain valve, the technician must first shut off the water heater’s energy source to eliminate the risk of burns, electrical shock, or gas leaks.
For electric units, switch off the circuit breaker and verify with a noncontact voltage tester.
For gas units, turn the gas control to “OFF” and confirm pilot extinguished; ventilate area if odor is present before proceeding.
Shut off the cold-water supply
With the power or gas supply secured, attention turns to stopping the incoming water to prevent refilling during the drain valve service.
The homeowner locates the cold-water shutoff valve—usually atop the heater or on the main line—and turns it clockwise until fully closed.
Verify by opening a nearby hot faucet; no steady flow confirms the supply is isolated and ready for valve work.
Cool-down and pressure-relief steps
To cool the tank and relieve built-up pressure, the homeowner opens a nearby hot-water tap and allows the system to run until water flow slows and temperature drops.
Then, they carefully lift the temperature-and-pressure (T&P) relief valve lever—standing clear of the discharge path—to vent steam and residual pressure.
After a few minutes, they verify no hissing or discharge, ensuring the tank is safer to access.
Drain or reduce tank pressure safely
Before loosening the drain valve, the homeowner reduces tank pressure by shutting off the cold-water supply and attaching a hose to the drain spigot that leads to a safe discharge point; this allows controlled draining and prevents sudden high-pressure release.
Then the homeowner opens a hot-water faucet to vent air, slowly opens the drain valve to bleed water until pressure is relieved, and closes the faucet.
Step-by-Step: How to Tighten a Leaking Drain Valve
The technician first locates and inspects the drain valve and surrounding area to determine the source and severity of the leak.
If a simple loosened connection is found, hand-tightening may stop the drip, but stubborn leaks require careful use of pliers or a wrench to avoid damaging the valve.
If tightening alone fails, plumber’s tape or thread sealant is applied, the tank is repressurized, and the area is rechecked for leaks.
Locate and inspect the valve and surrounding area
One should first locate the water heater’s drain valve—typically near the bottom of the tank on the front or side—and visually inspect the valve, surrounding fittings, and nearby pipe for corrosion, mineral buildup, cracks, or dampness.
Note residue patterns, loose connections, or worn threads. Photograph issues for reference, check for active drips, and assess whether fittings are plastic or metal before proceeding.
Hand-tightening methods and when they work
Start by shutting off the water supply to the heater and confirming the tank is cool to the touch; this prevents sudden flow and scalding while adjustments are made.
The technician then drains a small amount, uses fingers to tighten the valve handle or housing, and tests for drips.
Hand-tightening suffices for minor loose fittings or worn packing but not for stripped threads or persistent leaks.
Using pliers or a wrench without damaging the valve
Before reaching for tools, the technician confirms water and power are off and the heater is cool. They then inspect the valve to determine grip points and damage; this prevents forcing a tool onto a corroded or plastic component that could break.
Using adjustable pliers or a properly sized wrench, they cradle the valve body gently, apply steady even torque, avoid rounding flats, and stop when resistance increases.
Applying plumber’s tape or thread sealant properly
Apply plumber’s tape or thread sealant carefully to guarantee a watertight connection without clogging the valve passage.
Wrap Teflon tape clockwise around male threads two to three turns, keeping tape clear of the opening.
For liquid sealant, apply a thin, even coat to threads only.
Reinstall the valve, ensuring alignment so sealant seats properly and excess is wiped away.
Re-pressurize the tank and check for leaks
With the valve reinstalled and sealant seated, the water supply can be restored to pressurize the tank and reveal any leaks.
Open the cold-water inlet slowly, monitor pressure rise, and inspect the drain valve and surrounding fittings for drips.
If no leaks appear, cycle the valve open briefly to confirm sealing.
Isolate and retighten only if leakage resumes; otherwise return system to normal.
When Tightening Isn’t Enough: Repair and Replacement Options
If tightening fails, the valve may need replacement with a purpose-made drain valve or a more durable brass unit.
Options include swapping in a threaded hose bib for easy hose attachment, adding an inline drain extension, or installing a ball valve for a more reliable shutoff.
The choice should reflect material durability, ease of future maintenance, and compatibility with the heater.
Replacing a faulty drain valve
When a drain valve continues to leak despite tightening, replacement becomes the most reliable course of action; a new valve restores safe, controllable drainage and prevents water damage or sediment-related heater issues.
The process involves shutting off power and water, draining the tank, removing the old valve, cleaning the threads, installing a compatible replacement with proper sealant or tape, and testing for leaks before restoring service.
Installing a brass replacement vs. replacing with a hose bib
Choose between a brass replacement valve and a hose bib by weighing durability, ease of use, and installation complexity.
A brass valve offers corrosion resistance and longevity; a hose bib can simplify drainage but may require adapters.
Consider water pressure, leak risk, and access. Install per code and test for leaks.
- Durability
- Installation skill
- Leak potential
- Accessibility
- Cost
Alternatives: add an inline drain extension or install a ball valve
Consider alternatives such as adding an inline drain extension or replacing the heater’s existing drain with a ball valve when tightening proves insufficient; these options restore reliable drainage, reduce leak risk, and improve accessibility for routine flushing.
An inline extension provides secure hose connection and easier routing. A brass ball valve offers full shutoff, durability, and simpler maintenance.
Both require proper fittings and occasional inspection.
Common Mistakes and How to Avoid Them
Common mistakes during drain valve work include over-tightening plastic valves until they crack, attempting repairs on a pressurized or still-hot tank, and using the wrong sealant or tape that fails to seal.
The article will outline how each error occurs, the risks involved, and straightforward steps to prevent them.
Practical tips will focus on correct torque, verification of a depressurized and cooled system, and selecting appropriate sealing materials.
Over-tightening and cracking plastic valves
Over-tightening a plastic drain valve can strip threads, deform the housing, or cause hairline fractures that lead to slow leaks or sudden failure.
Because plastic lacks the ductility of metal, small increases in torque beyond what the valve was designed to handle concentrate stress and create cracks.
Inspect for stress marks, tighten only until snug, use minimal hand force, and replace brittle valves promptly.
Working on a pressurized or hot tank
When servicing a water heater, recognize that working on a pressurized or hot tank carries risks of scalding, sudden water discharge, and pressurized spray that can damage fittings or injure the technician.
Always shut off power/gas, close the cold-water inlet, and relieve tank pressure via the relief valve or a nearby faucet.
Use heat-resistant gloves and eye protection; verify cool, depressurized conditions before tightening.
Using wrong sealant or tape
After confirming the tank is cool and depressurized, attention shifts to the sealant or tape used on the drain valve threads—choices here determine leak prevention and serviceability.
Using inappropriate thread sealants (e.g., silicone, pipe dope incompatible with potable water, or non-PTFE tapes) can cause leaks, contamination, or stuck valves.
Recommend clean, plumber-grade PTFE tape applied correctly and minimal compatible thread compound when specified.
Testing and Verifying a Successful Repair
After tightening the drain valve, the homeowner should perform both immediate and long-term leak-check methods, such as running water through the tank and periodically inspecting the area over several weeks.
Regular checks should include looking for slow drips, staining, or moisture accumulation and using a paper towel to detect minor weeps.
Additionally, monitoring for early signs of corrosion or recurring leaks will indicate whether further repair or replacement is needed.
Long-term leak-check methods
Monitor the repaired drain valve over several days to confirm the fix holds under typical tank pressure and temperature cycles.
Inspect for moisture after use, check the surrounding floor and pan for slow accumulation, and re-tighten fittings if minor seepage appears.
Record observations and test the valve monthly for three months to verify stability before deeming the repair permanent.
Monitoring for corrosion or recurring leaks
Having verified short-term performance, attention should turn to longer-term signs of corrosion or recurring leaks around the drain valve.
Inspect monthly for rust, mineral buildup, or moisture stains. Feel for dampness and check nearby fittings, hoses, and the tank base.
Document changes and photograph problem areas. If corrosion advances or leaks reappear, replace the valve or consult a qualified technician promptly.
Preventive Maintenance to Avoid Future Leaks
A regular inspection schedule helps catch wear and corrosion on the drain valve and surrounding fittings before they fail.
Periodic tank flushing, performed according to manufacturer recommendations, removes sediment that accelerates valve degradation and should be done at least annually or more often in hard-water areas.
Valves showing signs of leaks, stiffness, or corrosion should be replaced proactively rather than waiting for a failure.
Regular inspection schedule
Because small drips often precede larger failures, establishing a concise, regular inspection schedule for the water heater drain valve prevents leaks and extends equipment life.
Inspections should be brief, consistent, and documented. Key checkpoints include:
- Visual leak check
- Valve tightness test
- Handle operation
- Corrosion assessment
- Drain hose condition
Record dates, findings, and any corrective actions taken.
How and when to flush the tank properly
Routine inspection notes often reveal sediment buildup or reduced drain flow that signal when a flush is needed. Flushing the tank removes accumulated minerals and debris that accelerate valve wear and cause leaks.
A proper flush involves shutting power/gas, attaching a hose, opening the drain and a hot-water faucet, running until clear, then closing and restoring service.
Frequency depends on water hardness and annual checks.
When to replace valves preemptively
When should a drain valve be replaced before it fails? The homeowner or technician should replace valves showing corrosion, persistent minor leaks, stiffness, or mineral buildup.
Replace if over five to ten years old, after sediment-heavy use, or following repair attempts that weakened threads.
Proactive replacement prevents water damage, guarantees reliable draining during maintenance, and avoids emergency failures.
Cost, Time, and When to Hire a Pro
Typical DIY tightening of a water heater drain valve often takes 15–45 minutes and may cost under $20 for tools or a replacement valve.
Persistent leaking, rust, visible valve damage, or recurrent problems after attempted repair indicate the need for professional replacement or service.
A plumber can provide accurate diagnostics and labor-backed warranty for more complex or risky situations.
Typical DIY time and cost estimates
A handful of common drain-valve tightening jobs can be completed by a competent DIYer in 15–45 minutes with basic tools; parts usually cost $5–$25 depending on whether a washer or a replacement valve is needed. Typical estimates vary by complexity and region; labor rarely applies for DIY.
| Task | Time | Parts Cost |
|---|---|---|
| Tighten washer | 15–30 min | $5–$10 |
| Replace valve | 30–45 min | $15–$25 |
| Inspect/drain | 20–40 min | $0–$5 |
Signs that indicate professional replacement or service is needed
Following basic tightening and part-replacement tasks, certain symptoms indicate that a homeowner should seek professional service rather than continue DIY efforts.
Persistent leaks, rusted or corroded valves, recurrent failures after repairs, low water pressure, sediment buildup causing noisy operation, visible tank corrosion, or unclear origin of leaks all justify hiring a licensed plumber.
Expect higher costs and longer repair or replacement timeframes.
Quick Troubleshooting Guide
The guide separates leaks that occur only during tank refill from those that produce a constant drip, noting different likely causes for each.
It outlines quick temporary fixes—such as tightening the valve, applying thread seal tape, or attaching a hose clamp and rubber patch—to stop leaks until a permanent repair or replacement is arranged.
Practical safety reminders are included so the homeowner can act without creating additional hazards.
Leak only when filling vs. constant drip probable causes
When a water heater drain valve leaks only during tank refilling versus when it drips continuously, the underlying causes differ and demand different responses:
- Leak when filling: pressure surge, loose seat, or thermal expansion relief interacting.
- Constant drip: worn washer, corroded valve body, or mineral buildup preventing seal.
- Intermittent suggests system pressure issues.
- Continuous implies component replacement.
Temporary emergency fixes until a permanent repair can be made
Apply temporary measures to control a leaking water heater drain valve until a permanent repair can be made, prioritizing safety and minimizing water loss.
Turn off water and power, relieve pressure, and catch drips.
Use these short-term fixes:
- Tighten valve gently with pliers
- Wrap threads with plumber’s tape
- Install hose and direct flow to drain
- Use a rubber washer patch
- Replace with a cheap shutoff valve
Conclusion
Regularly inspecting and promptly fixing a leaking water heater drain valve helps avoid costly water damage; indeed, plumbing failures cause an estimated 250,000 insurance claims annually in the U.S., averaging over $10,000 per incident. By following simple preparation, tightening, and testing steps, most homeowners can stop minor leaks quickly. Routine maintenance—flushing the tank and checking fittings—reduces failure risk, though persistent leaks or corroded valves warrant professional replacement for safety and reliability.