How to Loosen a Stuck Gas Pipe Fitting Safely: Step-by-Step Guide
How to Loosen a Stuck Gas Pipe Fitting Safely: Step-by-Step Guide
To safely loosen a stuck gas pipe fitting, first ensure the gas supply is shut off and isolated, then ventilate the area and eliminate any ignition sources. Wear appropriate personal protective equipment (PPE) before proceeding. Apply penetrating oil, use correctly sized pipe wrenches along with a backup wrench, and only introduce controlled heat after taking necessary precautions. If the threads begin to deform, stop immediately. If these methods fail, you may need to cut and replace the affected section and conduct a thorough leak test afterwards. Follow the steps below for detailed guidance and troubleshooting options.
Quick explanation of why gas pipe fittings get stuck
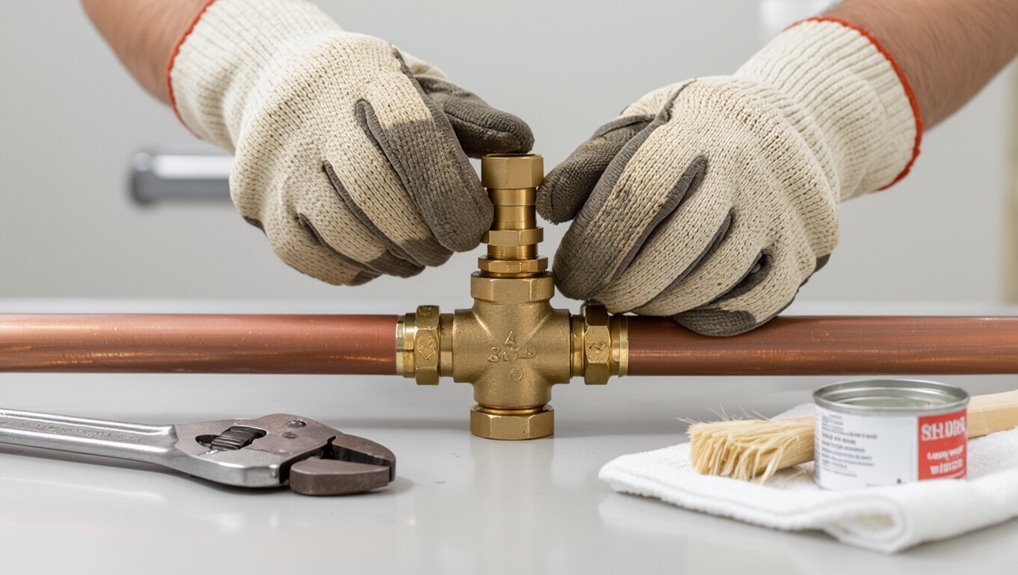
Gas pipe fittings commonly seize from corrosion, overtightening, paint or debris in the threads, and cured thread sealant.
Forcing a stuck fitting can strip or crack threads, cause gas leaks, and create a direct safety hazard to anyone nearby.
The following section explains practical steps to free fittings while minimizing damage and risk.
Common causes (corrosion, overtightening, paint and debris, thread sealant)
Many stuck pipe fittings result from a handful of predictable causes: corrosion that fuses metal surfaces, overtightening that compresses and deforms threads, paint or debris that binds mating parts, and hardened thread sealant that locks joints.
Understanding these drivers helps plan how to loosen a stuck gas pipe fitting: target rust removal, thread restoration, careful debris clearance, and softening or removing old sealant before applying controlled torque.
Risks of forcing a stuck fitting (gas leaks, damaged fittings, injury)
After addressing corrosion, overtightening, debris, and hardened sealant, it’s important to recognize the risks of applying excessive force to a stuck fitting.
Forcing can rupture threads or joints, deform pipes, and create gas leaks that cause fires or asphyxiation. Sudden breaks may cause sharp fragments and tool kickback, risking injury.
Proper inspection and controlled techniques reduce these hazards.
Immediate safety precautions before attempting any work
Before any attempt to loosen a stuck gas pipe fitting, the gas supply should be shut off at the meter or appliance valve and confirmed by checking for pressure drop or using a gas detector.
Work areas must be ventilated, open flames and electrical ignition sources removed, and appropriate PPE—gloves, eye protection, and a respirator—worn.
If there is any doubt about a leak, inaccessible valves, or uncertainty about procedures, a licensed gas professional should be contacted rather than proceeding.
When to shut off the gas supply and how to confirm it
At the first sign of a stuck gas fitting, the gas supply should be shut off immediately to eliminate the risk of a leak or ignition.
Locate and turn the appropriate valve (usually at the meter or appliance shutoff) to the closed position, then verify isolation by testing nearby pilot lights, listening for hissing, and confirming appliances will not light.
After shutdown, inform occupants and notify the gas utility if uncertain.
Ventilation and eliminating ignition sources
With the supply confirmed shut and occupants informed, attention should turn to ventilating the area and removing all possible ignition sources.
Open windows and doors, use fans to expel residual gas, and avoid creating sparks.
Extinguish pilot lights, unplug electrical devices, and do not operate switches.
Post warning signs and keep ignition-capable tools and open flames well away until testing confirms safety.
Required personal protective equipment (gloves, eye protection, respirator)
Several essential items of personal protective equipment (PPE) are required to reduce risk when dealing with a suspected gas leak and any ensuing pipe work:
- chemical-resistant gloves to protect skin from contaminants and sharp edges;
- impact-resistant safety glasses or goggles;
- a NIOSH-approved respirator (organic vapor cartridge) if odor or concentration is suspected;
- flame-resistant clothing and sturdy closed-toe footwear to minimize burn and puncture hazards.
When to call a licensed professional instead of DIY
When should a licensed professional be contacted instead of attempting DIY repairs?
If a gas odor is present, if someone feels ill, if fittings are corroded, welded, or damaged, or if the system involves appliance connections, multi-family meters, or unfamiliar regulators.
Also call a pro when proper tools, permits, or leak-testing equipment are unavailable.
Prioritize licensed intervention to prevent leaks, fire, or legal violations.
Tools and materials you’ll need
Before beginning work, the article lists the essential hand tools—adjustable and pipe wrenches, a strap wrench, and penetrating oil—alongside specialty items such as a torch, heat shield, backup wrench, and pipe vice.
It also covers materials and safety items: a soap solution or gas detector, thread sealant, and clean rags.
Recommended tool sizes and quality tips are provided to guarantee proper fit and reliable leverage.
Hand tools (adjustable wrench, pipe wrenches, penetrating oil, strap wrench)
Gathering the right hand tools is essential for safely loosening a stuck gas pipe fitting. An adjustable wrench provides quick gripping; two pipe wrenches counter-rotate fittings without slipping.
Penetrating oil reduces corrosion and eases initial movement—apply and wait per instructions. A strap wrench protects soft finishes and plastic components.
All tools should be in good condition and correctly sized for the job.
Specialty tools (torch for heat, heat shield, backup wrench, pipe vice)
Apply specialized tools only with proper precautions: a small torch provides controlled heat to expand fittings, a heat shield protects nearby components and finishes, a backup wrench prevents joint stress and twisting, and a pipe vice holds the assembly steady for safe leverage.
Use each tool sparingly, monitor heat transfer, position shields correctly, and secure the pipe before applying torque to avoid damage or injury.
Materials and safety items (soap solution or gas detector, thread sealant, rags)
After heat, shielding, and bracing have been set, attention shifts to the materials and safety items required for controlled work on gas fittings.
Required items include a soap solution or handheld gas detector to verify leak absence, approved thread sealant or pipe dope compatible with gas, clean rags for wiping and cooling, and a fire extinguisher nearby.
Use PPE and ventilation.
Recommended tool sizes and quality tips
A concise set of high-quality tools reduces the risk of damaging fittings.
Use adjustable wrench sizes covering 1/2″ to 1″ and a dedicated 10–14 mm spanner set for metric fittings.
Include a pipe wrench (12–18″), penetrating oil, and a non-marring strap wrench.
Choose corrosion-resistant, hardened steel tools with comfortable grips.
Verify calibration and inspect jaws before use.
Step-by-step method to loosen a stuck gas pipe fitting safely
The procedure begins with preparing the workspace, securing the gas system, and confirming the supply is fully shut off.
Next, the technician tests for any residual gas, applies penetrating oil with adequate dwell time, and uses proper wrenches to apply steady, controlled force.
If necessary, controlled heat may be applied to expand the metal, with strict precautions to prevent ignition and damage.
Step 1 Prepare the workspace and secure the system
Before any tools touch the joint, the workspace should be cleared, well-lit, and ventilated while the gas supply is shut off and system pressure is relieved; this minimizes ignition risk and gives unobstructed access for wrenches and inspection.
Remove flammable materials, isolate electrical sources, post warnings, and confirm a fire extinguisher and proper PPE are present.
Gather correct tools and spare fittings before proceeding.
Step 2 Test for gas presence and ensure gas is fully off
With the workspace secured and tools staged, attention shifts to verifying that no gas remains in the system and that the supply is fully shut off.
The technician confirms valve positions, not relying on handles alone, and vents trapped gas per local code.
A combustible gas detector and soap-solution checks are used at joints.
Only upon a clean, zero-reading environment are further actions initiated.
Step 3 Apply penetrating oil and allow dwell time
Apply a liberal amount of a suitable penetrating oil to the joint, ensuring coverage of the thread root and any visible corrosion.
Allow ample dwell time—typically 15–30 minutes or longer for heavy rust—so the oil soaks in. Reapply if runoff occurs.
During dwell, avoid disturbing the joint; observe for leaks and ventilate the area.
Prepare tools and plan next steps.
Step 4 Use proper wrenches and apply steady, controlled force
Select the correct wrench sizes and positions so the force is transmitted through the tool, not the pipe or fittings.
Use two wrenches: one to anchor the adjacent fitting, the other to turn the stuck joint.
Apply steady, controlled pressure—avoid sudden jerks. Reposition if slipping occurs.
Stop if resistance increases sharply and reassess to prevent rounding, bending, or gas-line damage.
Step 5 Use heat cautiously to expand metal if needed (how to, precautions)
If steady, controlled force and proper wrenching fail to free the joint, gentle heat can be used to expand the metal and break corrosion bonds—but only with strict precautions.
The operator should remove nearby flammables, shut gas supply and ventilate, use a small propane torch at low flame, heat evenly for short intervals, avoid overheating fittings, monitor temperature, and have a fire extinguisher ready.
Step 6 Apply cold after heat to create contraction if appropriate
After heating, introduce controlled cold to the fitting to encourage metal contraction and break remaining corrosion bonds.
Apply an appropriate cold source—cold spray or ice pack—briefly and locally, avoiding thermal shock to nearby components.
Monitor temperature and surrounding seals.
Contraction may free threads; attempt a measured, gentle turn.
If no movement, cease and reassess to prevent damage or gas-line hazards.
Step 7 Alternate loosening techniques (back-and-forth, shock taps)
Begin by alternating controlled rotational pressure—apply a firm quarter-turn in the loosening direction, then reverse slightly—so the joint experiences incremental movement rather than sustained force.
If resistance persists, deliver short, controlled shock taps to the wrench handle with a soft mallet to break corrosion.
Repeat alternating rotation and taps, inspecting thread engagement frequently.
Stop if leaks, cracks, or sudden failures occur.
Step 8 When and how to cut and replace a section safely if loosening fails
When repeated loosening attempts fail and the joint remains immovable, the work should shift to cutting out and replacing the affected pipe section while treating the line as a live gas system until proven otherwise.
Isolate the area, shut nearby supply if possible, ventilate, and verify with gas detector.
Use appropriate cutters, support adjacent pipe, remove corroded section, fit replacement with approved couplings, and test for leaks.
Step 9 Reassembly best practices (clean threads, proper sealants, torque guidance)
Reassemble the joint with clean, properly prepared surfaces and the correct sealing materials to guarantee a gas-tight, durable connection.
Inspect and brush threads, remove debris and old sealant.
Apply manufacturer-recommended thread sealant or approved PTFE tape correctly, wrapping directionally.
Hand-start fittings to avoid cross-threading, then tighten to specified torque values or wrench turns per component instructions.
Recheck alignment before final tightening.
Step 10 Leak testing and returning the system to service
Proceed to verify system integrity with a controlled leak test before restoring gas service.
Isolate the section, pressurize with inert gas or soapy solution per code, and inspect joints for bubbles or pressure decay.
Repair any leak, retest, then purge air following manufacturer and code procedures.
Restore gas supply gradually, relight pilots if required, and monitor for stability before leaving the site.
Common problems encountered and how to handle them
Common problems include stripped threads or damaged fittings, frozen or heavily corroded joints, and leaks discovered after loosening.
The text should compare repair versus replacement for compromised parts, outline techniques and replacement options for seized or corroded connections, and specify emergency steps if a leak appears.
It should also cover precautions and approaches for working near appliances or in confined spaces.
Stripped threads or damaged fittings repair vs replace
When threads on a gas pipe fitting become rounded or the fitting body is dented, the technician must quickly decide whether repair or replacement is safer and more reliable.
Minor thread damage can sometimes be corrected with thread chasers, sealant, or an insert, but compromised fittings that affect alignment, sealing surfaces, or structural integrity should be replaced to prevent leaks and code violations.
Assess damage, pressure test, and document.
Frozen or heavily corroded joints techniques and replacement options
Tackle frozen or heavily corroded gas joints methodically: technicians should first identify the corrosion extent and whether the joint is seized by mineral buildup, rust, or welded-on scale.
Then choose between conservative freeing techniques (penetrating lubricants, heat applied cautiously, mechanical shock or soft-jaw extraction) and full replacement.
If freeing fails or metal integrity is compromised, cut out and replace the fitting and nearby pipe with compatible materials, reassemble with proper torque and new seals.
Leaks discovered after loosening emergency steps
After loosening a seized gas fitting, discovering a leak is a frequent and urgent complication that requires immediate, measured action.
The technician should stop work, shut off the gas supply, ventilate the area, and avoid ignition sources.
Use soapy water or approved leak detectors to confirm the leak.
If small, retighten or replace the fitting with proper sealant; for significant leaks, evacuate and call the utility.
Handling fittings near appliances or confined spaces
Although confined spaces and appliance-adjacent fittings often limit access and visibility, technicians must prioritize safe, methodical approaches to prevent damage and gas leaks.
Use proper ventilation, shut off gas, and test for leaks before work.
Employ compact tools, low-profile wrenches, and flexible extensions.
Protect appliance surfaces, avoid excessive force, and have an assistant or permit ready for confined-space protocols and emergency shutoff.
Comparison of techniques and when to choose each
A concise comparison helps determine whether penetrating oil, heat, or mechanical force is most appropriate for a stuck gas pipe fitting. The following table summarizes typical advantages and limitations to guide selection. Choice depends on pipe material, nearby components, and safety considerations.
| Method | Typical use-case |
|---|---|
| Penetrating oil | Best for slow, non-pressurized fittings and where heat is unsafe |
| Heat | Effective for seized metal joints but unsuitable near flammable materials |
| Mechanical methods | Fast for heavily corroded or damaged fittings but risks deformation |
Penetrating oil vs heat vs mechanical methods
Comparing penetrating oil, heat, and mechanical methods clarifies their strengths, limits, and appropriate order of use when loosening a stuck gas pipe fitting. Penetrating oil is low-risk, first choice; heat works when oil fails but risks seals; mechanical force is last resort, controlled to avoid damage.
| Method | Best use |
|---|---|
| Penetrating oil | Initial, gentle |
| Heat | Stubborn corrosion |
| Mechanical | Final, careful use |
Preventive measures to avoid stuck gas fittings in the future
To reduce the likelihood of future stuck gas fittings, the article outlines correct installation torque, proper thread preparation, and the use of suitable thread sealants or anti-seize compounds designed for gas service.
It also describes recommended sealant and anti-seize options compatible with common gas line materials.
Finally, it recommends regular inspection schedules and corrosion-protection measures to catch early problems before fittings seize.
Proper installation torque and thread preparation
Proper installation torque and correct thread preparation greatly reduce the risk of fittings seizing over time.
Technicians should follow manufacturer torque specs, use calibrated wrenches, and avoid over-tightening.
Clean and inspect threads for damage, remove debris, and guarantee proper engagement depth.
Apply appropriate thread lubricant or sealant per code and allow proper curing.
Record torque values for future maintenance and inspections.
Recommended thread sealants and anti-seize options for gas lines
Although material choice and application method vary by system and code, selecting the correct thread sealant and anti-seize for gas lines is essential to prevent galling and leakage without compromising safety or compliance.
Recommended options include approved PTFE tape rated for gas, pipe thread compounds labeled for gas service, and copper- or nickel-based anti-seize for ferrous connections.
Avoid graphite or silicone products unless code permits.
Regular inspection routines and corrosion protection
Following correct sealant and anti-seize selection, a consistent inspection schedule and targeted corrosion protection greatly reduce the risk of fittings seizing.
Inspectors should perform visual and leak tests semiannually, check for moisture, corrosion, and mechanical stress, and document findings.
Apply appropriate coatings, sacrificial anodes, or corrosion inhibitors where compatible.
Promptly replace compromised components and maintain environmental controls to minimize deterioration.
Cost, time, and when to hire a professional
Typical DIY attempts to loosen a stuck gas fitting may take an hour or two and cost under $50 for tools and sealant.
In contrast, professional service commonly runs $100–$400 or more depending on complexity and travel.
Legal and code requirements often restrict who may work on gas lines, so homeowners should verify local regulations before starting any repair.
When in doubt, hiring a licensed gas plumber with clear credentials, insurance, references, and positive reviews minimizes risk and guarantees compliance.
Typical time and cost for DIY repair vs professional service
Estimate costs and time realistically: a DIY attempt to free a stuck gas pipe fitting generally takes 30 minutes to a few hours and costs under $50 for tools and supplies.
Hiring a licensed plumber typically runs $100–$300 for a service call plus labor and parts, with jobs completed in 1–2 hours on site.
DIY suits minor stuck fittings; call a professional for leaks, corrosion, or failed attempts.
Legal and code considerations for working on gas lines
After outlining time and cost differences between DIY attempts and professional service, legal and code considerations become the next practical filter for deciding who should work on a gas line.
Local regulations often require licensed technicians for gas work, permits, and inspections.
Liability, insurance, and safety codes affect homeowner risk and project timeline.
When compliance is uncertain, hire a certified professional.
How to find and vet a qualified gas plumber or technician
Where should a homeowner start when professional help is needed for a stuck gas pipe fitting?
Search licensed gas plumbers, check certification, insurance, and local code familiarity.
Request references, recent job photos, and written estimates.
Expect emergency response for leaks, standard repairs within hours to a day, complex jobs longer.
Costs vary by region and scope; get clear pricing and warranty before hiring.
Safety checklist to follow after completing the repair
After completing the repair, a concise safety checklist verifies the work is secure and that others are informed. The person who performed the repair should perform final leak tests, record what was done, notify relevant parties, and know what signs to watch for afterward. Following these steps reduces risk and clarifies responsibility.
- Conduct final leak tests using a soapy solution and a calibrated gas detector.
- Document the repair details: parts used, procedures, time, and tester readings.
- Notify landlord, utility company, or other responsible parties as appropriate.
- Monitor for odor, hissing, health symptoms, or changes in appliance performance over the following days.
Final leak test steps with soap solution and gas detector
Begin by restoring gas flow slowly and observing system pressure to confirm normal operation before testing for leaks.
Apply a soap solution to joints and watch for sustained bubbling for at least one minute. Sweep surrounding areas.
Use a calibrated electronic gas detector to scan fittings and seams; note any readings above background.
If leaks persist, shut off gas and re-tighten or replace fittings.
Documenting the repair and notifying relevant parties (landlord, utility)
Document the repair thoroughly and notify stakeholders to guarantee safety, accountability, and regulatory compliance.
Record date, time, steps taken, materials used, test results, and any photos.
Provide copies to the landlord and utility or log via their reporting channels.
Note technician names and contact details.
Retain records for inspections and future reference; follow any specific reporting requirements stipulated by local codes or the utility provider.
Signs to monitor in the days after repair
A concise post-repair checklist helps guarantee the fitting remains secure and the area stays safe; monitor for gas odors, hissing sounds, dead or dying vegetation near the line, and any unexpected changes in appliance performance.
Check connections for visible leaks, listen during quiet hours, recheck with a gas detector, note pressure fluctuations, and log any symptoms.
If concerns arise, evacuate and contact the utility immediately.
Conclusion
Concludingly, the guide reassures readers that safely loosening a stuck gas pipe fitting is achievable with patience, proper tools, and strict adherence to safety steps. Even skeptics worried about complexity can picture the process as a simple sequence: isolate the gas, apply penetrating oil, heat or leverage gently, and retest for leaks. Visualizing each step reduces anxiety and reinforces that, when unsure or time-pressed, calling a licensed professional remains the safest choice.