How to Connect PEX Pipe to a Shut-Off Valve: Step-by-Step Guide for DIY Plumbers
To connect PEX pipe to a shut-off valve, start by shutting off the water supply and cutting the PEX to the desired length. Choose a compatible valve and fitting, then use the appropriate method—crimp, clamp, expansion, push-fit, or compression—depending on your setup. After making the connection, pressure-test the joint and check for leaks. Follow this step-by-step guide for detailed instructions, essential tools, and testing tips to ensure a secure and leak-free installation.
Overview of Connecting PEX Pipe to a Shut-Off Valve

Connecting PEX to a shut-off valve is commonly done when installing new fixtures, replacing old valves, or adding localized control for maintenance.
Common compatible valve types include compression, push-to-connect, and crimped or clamp-style fittings designed for PEX.
The task ranges from basic to intermediate skill, so following safety precautions and local plumbing codes is essential.
When and why you would connect PEX to a shut-off valve
Installing a shut-off valve on a PEX line provides a convenient way to isolate fixtures or sections of plumbing for maintenance, repairs, or emergency shutoffs.
Homeowners and plumbers learn how to connect PEX pipe to shut-off valve when adding new fixtures, replacing components, or creating service points.
Strategic shut-offs limit water damage, simplify repairs, and enable localized control without disrupting whole-house supply.
Types of shut-off valves compatible with PEX
Selecting the right shut-off valve for PEX systems requires understanding the fitting style and material compatibility. Common options include compression, push-to-connect (quick-connect), crimp/clamper with PEX-specific fittings, and sweat or solder adapters for changes to copper.
Angle and straight stop valves, ball-style quarter-turns, and multi-turn globe types are available in brass or lead-free alloys, matched to tubing size and connection method.
Required skill level and safety considerations
Evaluating the skill level required and observing basic safety measures guarantees a successful connection of PEX pipe to a shut-off valve.
The task suits a competent DIYer familiar with cutting, deburring, and using crimp/expansion tools.
Essential precautions include shutting water, depressurizing lines, wearing eye protection, checking local codes, and testing for leaks.
Complex jobs or gas-related work require licensed professionals.
Tools and Materials Needed
A concise list of tools and materials sets the stage for a safe, reliable PEX-to-valve connection.
Required items include PEX-specific tools (crimp, clamp, or expansion systems), the appropriate shut-off valve and compatible fittings, and spare rings, tubing, and sealants.
Personal protective equipment and basic supplies—gloves, safety glasses, a pipe cutter, and a cleaning brush—should also be on hand.
PEX-specific tools (crimp, clamp, expansion)
Understand the differences between crimp, clamp, and expansion systems before choosing tools, as each method requires a specific set of fittings and proprietary equipment.
Proper tool choices guarantee reliable seals and code compliance.
- Crimp tool with copper rings
- Stainless steel clamp tool and cinch bands
- Expansion tool with expander head
- Calibration gauge and cutter for clean ends
Valve types and fittings required
Before installing a shut-off valve on PEX, identify the valve style (ball, stop, or angle) and the corresponding connection type—crimp ring, clamp/cinch band, expansion sleeve, or push-to-connect—since each combination demands specific fittings and sometimes proprietary components.
Select compatible valves, matching PEX size and material.
Typical fittings include:
- Brass sweat-to-PEX adapter
- Compression-to-PEX valve
- Push-fit straight shut-off
- Expansion-compatible stop valve
Additional supplies and safety gear
Gather a concise set of additional supplies and proper safety gear to guarantee the PEX-to-shut-off valve installation proceeds safely and correctly.
Essential extras include fittings, flux or lubricant, and cleanup materials, alongside personal protection.
Recommended items:
- Safety glasses and nitrile gloves
- Adjustable wrench and tubing cutter
- Deburring tool and emery cloth
- Rags, tape, and a small bucket for drips
Choosing the Right PEX and Valve Combination
Choosing the appropriate PEX type and valve guarantees a reliable connection and long-term performance.
The discussion contrasts PEX-A, PEX-B, and PEX-C characteristics and notes which valve styles—compression, crimp, cinch, or expansion—are compatible with each.
It also covers correct sizing of both PEX and valve for the specific flow and installation requirements.
PEX-A vs PEX-B vs PEX-C: which to use
Which PEX type best balances flexibility, durability, and ease of installation depends on the application and valve pairing.
PEX-A offers maximum flexibility and excellent freeze resistance, ideal for expansion fittings.
PEX-B is stiffer, cost-effective, and widely compatible with many valves.
PEX-C is less common, moderate in flexibility and strength.
Match material properties to installation constraints and the chosen valve connection method.
Compression, crimp, cinch, and expansion-compatible valves
Select the appropriate valve type based on the PEX tubing and termination method to guarantee a reliable, code-compliant connection. Match valve compatibility: compression for rigid pipe or adapter; crimp for copper rings; cinch (stainless clamp) for ease and repair; expansion exclusively for PEX-A with expansion fittings. Choose matching fittings, tools, and sizes to prevent leaks and failures.
| Valve Type | Typical Use |
|---|---|
| Compression | Rigid/adapters |
| Crimp | Copper rings |
| Cinch | Clamps/repairs |
| Expansion | PEX-A only |
Sizing the PEX and valve for your application
After confirming valve compatibility with the chosen termination method, attention turns to sizing both the PEX tubing and the shut-off valve to meet flow, pressure, and code requirements.
Select PEX diameter matching fixture demand and run length to minimize pressure loss. Choose valve size and pressure rating equal to or exceeding system maximums.
Verify local code for required fittings, temperature limits, and approved materials.
Preparing the PEX Pipe and Valve for Connection
Before beginning, the water supply must be shut off and the line drained to prevent spills and pressure during work.
The installer measures and cuts the PEX to length, then deburrs and chamfers each end to guarantee a smooth, square surface.
Finally, the valve and fittings are inspected for damage, cleaned, and prepared according to the chosen connection method.
Turning off water and draining the line
Shut the main supply or the branch shut-off for the fixture to stop water flow, then open the nearest faucets to relieve pressure and drain the line.
Verify flow has ceased and check adjacent fixtures.
Place a bucket under the valve and use towels to catch residual drips.
Close faucets after draining.
Confirm the work area is dry and well-lit before proceeding.
Measuring and cutting PEX correctly
With the line depressurized and drained, attention turns to preparing the PEX and valve for connection.
Measure twice: determine required insertion length plus allowance for the fitting. Mark the pipe squarely with a fine marker.
Use a PEX-specific cutter held perpendicular to produce a clean, straight cut. Verify length against the valve’s insertion depth before proceeding.
Deburring, chamfering, and checking pipe ends
Inspect the freshly cut PEX end for burrs, jagged edges, or a slightly deformed lip that can impede a watertight seal.
Remove imperfections with a deburring tool or fine file, rotate evenly, and wipe away shavings. Lightly chamfer the outside edge to ease fitting insertion.
Confirm the end is square, clean, and free of nicks or distortion before proceeding to fitting attachment.
Inspecting and prepping the valve and fittings
Before joining the PEX to the shut-off valve, the valve and fittings should be examined for cleanliness, damage, and correct configuration.
Remove debris, burrs, and manufacturing coatings. Verify threads, compression seats, or crimp/alignment marks are intact.
Confirm valve orientation and shut-off operation. Replace worn or corroded components.
Lightly lubricate O-rings with approved lubricant and guarantee fittings match PEX size and connection method.
Step-by-Step: Connecting PEX with Crimp/Cinch Clamp Method
The technician begins by positioning the shut-off valve and sliding the crimp or cinch clamp over the PEX.
Next, the PEX is pushed fully onto the barb to the correct depth before the clamp is set and compressed with the appropriate tool.
Finally, the connection is pressure-tested and inspected for leaks, with common issues like insufficient insertion or an improperly crimped ring corrected as needed.
Positioning the valve and sliding on the clamp/ring
Position the shut-off valve so its barb or male fitting aligns squarely with the end of the PEX pipe, ensuring there is enough straight pipe length for a secure connection; then slide the crimp or cinch clamp/ring onto the PEX tubing, keeping it a short distance from the pipe end to allow the valve to seat fully without interference.
Verify clamp orientation and leave room for tool access.
Inserting the PEX barbed fitting and ensuring depth
Insert the PEX barbed fitting straight into the tubing using a smooth, steady push until the pipe seats fully against the fitting’s shoulder; confirm the proper depth by checking that the end of the PEX reaches the fitting’s stop or aligns with the designated depth mark, ensuring no gap that could compromise seal integrity.
Rotate slightly while pushing if resistance occurs, then visually and tactilely verify full engagement.
Setting the crimp/clamp tool and verifying the crimp
Set the crimp or cinch tool jaws to match the ring size and confirm the tool’s calibration before use.
Position the ring squarely over the barb, seat the tool perpendicular to the fitting, and apply steady pressure until the tool indicates completion.
Visually inspect the ring for uniform compression and proper distance from the pipe end.
Repeat on remaining joints as required.
Testing the connection and troubleshooting common issues
Once crimping or cinching is complete, the connection must be pressure-tested and inspected to verify a watertight seal.
Slowly restore water, pressurize to recommended psi, and observe for leaks at the fitting, ring, and valve.
If leaks appear, depressurize, cut back, re-seat the ferrule/pipe, and redo the crimp or replace the clamp.
Re-test until dry.
Step-by-Step: Connecting PEX with Expansion (Uponor) Method
The expansion method requires preparation of the expansion tool and correct selector ring prior to work.
The installer expands the PEX, inserts the Uponor fitting, then allows the tube to recover and verifies a snug joint before pressure testing.
Attention to recovery time, proper sizing, and common mistakes (incomplete expansion or insufficient seating) reduces leak risk.
Preparing the expansion tool and retaining ring
Prepare the expansion tool by selecting the correct jaw size for the PEX tubing and confirming the battery is charged or the manual pump is primed.
Inspect jaws and drive components for wear, clean and lightly lubricate per manufacturer guidance, and install the matching retaining ring on the mandrel.
Verify ring size, orientation, and secure seating.
Keep spare rings and a calibration check tool nearby.
Expanding the PEX and inserting the fitting
Begin by aligning the properly sized expansion jaw squarely over the PEX tube end, ensuring the pipe is cut cleanly and deburred so the jaw seats evenly.
Activate the tool to expand the tubing uniformly until it reaches the correct diameter.
Immediately insert the matching fitting fully into the expanded tube, holding alignment and depth.
Release the tool, keeping the joint undisturbed.
Allowing recovery time and checking the joint
Allow a full recovery period after insertion so the PEX contracts uniformly around the fitting, creating a secure, leak-resistant seal.
During this time the installer should avoid movement or stress on the joint.
Visually inspect the connection for even material return and flush seating.
After recovery, gently palpate the joint for firmness; any soft spots or visible gaps require rework before proceeding.
Testing and common expansion-method pitfalls
Once the expansion joint has fully recovered, the installer should pressure-test the assembly and inspect for leaks and proper seating before concealing the work.
Test at recommended pressure and duration, monitor fittings and valve operation, then drain and recheck.
Common pitfalls include insufficient expansion, overexpansion, dirty or damaged sleeves, incorrect ring placement, and inadequate recovery time; each risks leaks or premature failure.
Step-by-Step: Connecting PEX with Compression Valves
The section explains how to use compression fittings with PEX to create a reliable shut-off valve connection.
It covers proper torque and tightening sequence to avoid leaks or damage to the tubing.
Guidance is provided on when to use ferrules versus adapter fittings for different valve and pipe combinations.
Using compression fittings with PEX
Begin by confirming that the shut-off valve and compression nut are rated for use with PEX and that the PEX pipe is cut squarely and deburred; using improper parts or a rough cut can compromise the seal.
Install a brass compression sleeve or insert as specified, slide the nut and ferrule onto the tube, seat the ferrule against the valve body, then hand-start the nut before final tightening per manufacturer guidance.
Proper torque and tightening sequence
Tighten the compression nut in a controlled, two-stage sequence to achieve the proper compression without over-stressing the PEX or valve threads.
First, hand-tighten until snug.
Second, use a wrench to turn an additional 1/8 to 1/4 turn while holding the valve body steady.
Check alignment, confirm no deformation, then pressure-test for leaks and retighten minimally if required.
When to use ferrules or adapter fittings
When connecting PEX to compression shut-off valves, determine whether a ferrule or an adapter fitting is appropriate based on pipe type, valve design, and local code requirements.
Use ferrules (metal or plastic) when valves accept compression sleeves and rigid support is needed.
Choose adapter fittings when valves require threaded or sweat connections, or when switching from copper/CPVC to PEX.
Match materials and follow manufacturer specs.
How to Replace an Existing Shut-Off Valve with PEX
When replacing an existing shut-off valve with PEX, the technician first shuts off supply and removes the old valve using appropriate tools and precautions to prevent pipe damage.
Next, the technician selects a compatible adapter or a PEX-ready replacement valve that matches the pipe size and connection type.
Finally, the new valve is installed, reconnected to the PEX line, and the system is pressurized and inspected for leaks.
Removing the old valve safely
Before removing the old shut-off valve, the water supply must be fully isolated and any remaining pressure relieved to prevent leaks or injury; confirm isolation by opening a downstream fixture and draining the line.
Wear safety glasses, place a bucket/towels, and inspect the valve and fittings.
Loosen and remove fasteners or compression nut carefully, support piping to avoid stress, then remove the valve and clean the stub for connection.
Choosing the correct adapter or replacement valve
Several common options exist for connecting PEX to an existing stub-out: a PEX-compatible compression adapter, a sweat-to-PEX adapter, or a threaded male/female adapter, each chosen based on the stub material, space, and local code.
Selection depends on stub pipe type (copper, CPVC, galvanized), required connection orientation, available clearance, and whether a stop-valve or angle/straight replacement is preferred; verify pressure ratings.
Reconnecting and leak-checking the new valve
With the correct adapter or replacement valve selected and prepped, reattaching the valve to the PEX line requires careful alignment, secure fittings, and a systematic leak check.
Fasten the connection per manufacturer torque or crimp specification, confirm PEX insertion depth, and seat ferrules or rings properly.
Restore water pressure slowly, inspect joints for drips, operate the valve several times, and recheck for hidden leaks.
Leak Testing and Post-Installation Checks
After installation, a systematic leak testing and inspection routine verifies valve integrity and PEX connections. This includes pressure testing at recommended levels (typically 50–100 psi for domestic systems).
A visual and tactile checklist for fittings and crimps is also part of the process, along with methods to locate and address slow leaks.
The homeowner or technician should document test results and correct any faults before restoring normal service.
Pressure testing procedures and recommended pressures
Begin pressure testing by isolating the new PEX run and attaching an appropriate pressure gauge and a calibrated test pump or air/water source rated for plumbing tests.
Pressurize to recommended levels—typically 50–80 psi for residential systems or per local code—and hold for 15–30 minutes.
Monitor for pressure drop, document readings, and repair any leaks.
Depressurize slowly before restoring service.
Visual and tactile inspection checklist
Once pressure stability has been confirmed, a systematic visual and tactile inspection should be performed to locate any subtle leaks, loose fittings, or signs of improper installation.
Check connections, valve seats, and crimps; feel joints for moisture or movement; inspect PEX for kinks or abrasions.
Suggested checklist:
- Trace fittings for wetness and mineral deposits
- Feel for soft spots or temperature anomalies
- Wiggle fittings for play
- Inspect tubing alignment and support
How to detect and fix slow leaks
Detecting and remedying slow leaks requires methodical leak testing and targeted post-installation checks to prevent long-term damage and water waste.
Inspect fittings, crimps, and O-rings for moisture; feel joints after pressurizing the line.
Use dye or paper towels to locate hairline seepage.
Tighten or re-seat fittings, replace damaged rings or crimps, and retest until dry and stable.
Common Problems and How to Fix Them
Common installation issues include poor crimp or clamp rings, misaligned fittings, damaged PEX ends, and valve malfunctions.
Each problem has a straightforward remedy: replace or retighten rings, realign and reseat fittings, trim and re-terminate damaged pipe ends, or run simple diagnostics on the valve and replace faulty units if needed.
The following section explains identification steps and practical fixes for each case.
Poor crimp/clamp rings and how to remedy
Poorly formed crimp or clamp rings compromise PEX connections by allowing leaks, reduced pressure, or pipe pull-off under stress.
Inspect rings for gaps, uneven compression, or tool marks. Cut off the faulty ring and tubing back to undamaged PEX, deburr, and reinsert fitting.
Use correct-size crimp/clamp tool and gauge; replace with a new ring and re-test under pressure to confirm seal.
Misaligned fittings and correcting alignment
After correcting a faulty crimp or clamp ring, attention should turn to the alignment of fittings, since a perfectly sealed connection can still fail if fittings are cocked or rotated off-axis.
Misalignment causes stress, leaks, and premature joint failure. To correct, loosen the coupling or nut, realign pipe and valve so axes match, then retighten evenly while maintaining straightness and proper support.
Damaged PEX ends and how to repair
Inspecting PEX ends for nicks, burrs, or fraying is essential before attempting a connection, because damaged tubing can compromise seals and lead to leaks even when fittings are correctly installed.
Cut back to a clean, square end with a sharp tubing cutter. Deburr and re-measure insertion depth.
Replace sections with fittings or use a coupling if damage is extensive. Test for leaks after repair.
Valve malfunction diagnostics
Diagnose a malfunctioning shut-off valve by narrowing the issue to common causes—stiff or stuck stems, internal corrosion or mineral buildup, worn seals, and improper installation—and then verify each possibility systematically.
Inspect stem movement, apply penetrating lubricant, and test for leaks.
Remove valve bonnet to assess cartridge or washer condition.
Flush lines to remove deposits.
Replace seals or entire valve when deterioration or persistent leaks persist.
Code, Warranty, and Best-Practice Considerations
Before starting any PEX-to-shut-off valve work, the installer should verify relevant local plumbing codes such as approved fittings, support spacing, and permitted connection methods.
They should also check manufacturer warranty terms, since crimp, clamp, or push-fit connections can affect coverage and may require specific components or installation steps.
If code requirements are unclear, the warranty is at risk, or the installation is complex, a licensed plumber should be consulted.
Local plumbing code points to verify
When verifying local plumbing code, the installer must confirm that the selected PEX type, fittings, and shut-off valve meet municipal code sections and manufacturer warranty requirements.
Noncompliant materials or installation methods can void warranties and lead to failed inspections.
Check permitted PEX types, approved connection methods, required support and clearance, allowable pressure/temperature ratings, backflow prevention, and accessible shut-off valve placement per local ordinances.
Manufacturer warranty implications for different connection methods
Having confirmed code compliance for PEX type and shut-off placement, attention must turn to how chosen connection methods affect manufacturer warranties.
Manufacturers often require approved fittings, installation tools, and pressure-testing procedures; unauthorized adapters or excessive compression can void coverage.
Documentation of materials and steps preserves claims eligibility. Homeowners should follow manufacturer instructions precisely and retain receipts and photos to support any future warranty inquiries.
When to call a licensed plumber
Under what circumstances should a licensed plumber be engaged for PEX-to-shut-off connections depends on code requirements, warranty conditions, and the complexity of the job.
A licensed plumber is advised when local code mandates credentialed installation, when warranty terms require professional fitting, for main shut-off or concealed-wall work, complex manifolds, unfamiliar fittings, or if pressure testing, permits, or insurance documentation are needed to guarantee compliance and liability protection.
Time, Cost Estimates, and Project Planning
A typical DIY connection of PEX to a shut-off valve can be completed in one to two hours for a straightforward replacement, with more time needed for access or additional fittings.
Material costs are usually modest—PEX tubing, a shut-off valve, fittings, and clamps—though initial investment in a crimp or expansion tool will raise the upfront expense.
Careful measurement, cutting once, and laying out parts before assembly help minimize waste and reduce the risk of rework.
Typical time required for DIY installations
Most novice DIYers can expect a straightforward PEX-to-shut-off-valve installation to take about 1–2 hours for a single connection when gathering tools and prepping the workspace are included.
Experienced hobbyists often finish in 30–45 minutes.
Complex layouts, tight spaces, or corrective work may extend time to several hours.
Allow extra time for drying, testing, and unexpected adjustments to guarantee a reliable installation.
Cost breakdown for materials and tool investment
After estimating time requirements, attention turns to the financial side: materials and tools needed for a PEX-to-shut-off-valve connection typically range from minimal single-use parts to a larger one-time tool investment. Typical costs: fittings $5–15, valve $10–25, clamps $3–8, cutter $15–40, expander $60–150; total varies by method and reuse.
| Item | Low | High |
|---|---|---|
| Fittings | $5 | $15 |
| Valve | $10 | $25 |
| Tools | $15 | $150 |
| Clamps | $3 | $8 |
| Total est. | $33 | $198 |
Tips to minimize waste and avoid rework
Plan projects with checkpoints and conservative time buffers to reduce wasted materials and avoid rework.
Measure twice and cut once; pre-fit connections dry before final crimping. Use correct-sized fittings and quality tools to prevent leaks.
Keep spare lengths and a small parts kit for quick fixes.
Document steps and take photos to guarantee consistency and simplify future maintenance, saving time and money.
Maintenance Tips to Prolong Valve and PEX Life
Routine seasonal inspections and occasional exercise of shut-off valves help guarantee smooth operation and reveal early signs of wear.
Protecting PEX and fittings from freezing and addressing corrosion risks extends service life and prevents sudden failures.
Components showing persistent leaks, stiffness, or corrosion should be replaced proactively to avoid larger repairs.
Seasonal checks and exercise of shut-off valves
Inspecting and briefly operating shut-off valves every season helps prevent corrosion, mineral buildup, and seizure that can compromise both valve function and PEX connections.
A simple exercise—turning each valve fully closed then open—reveals stiffness, leaks, or drips.
Any resistance or visible wear prompts cleaning, lubrication with manufacturer-approved products, or timely replacement to maintain reliable operation and protect PEX fittings.
Preventing freezing and corrosion
Seasonal exercising of shut-off valves naturally leads to attention on environmental threats that shorten valve and PEX service life, chiefly freezing temperatures and corrosive conditions.
Insulate exposed pipes and valves with foam or heat tape, maintain dry, ventilated spaces, and route PEX away from acidic materials or dissimilar metals.
Apply dielectric unions where metals meet and monitor for early signs of ice damage or corrosion.
When to proactively replace components
When should components be replaced before failure occurs?
The guide recommends replacing valves and PEX sections at signs of visible wear, persistent leaks, stiffness, discoloration, or after 10–15 years of service.
Replace fittings after repeated repairs or if corrosion appears.
Proactively swap components following major system stress, freezing events, or when upgrading to higher-quality materials to reduce future failures.
Visual Guide and Reference Diagrams
A set of labeled diagrams shows common PEX-to-valve connection types and identifies each component for quick reference.
An accompanying troubleshooting flowchart guides users through diagnosis and corrective steps when a connection fails.
Together, these visuals make it easier to recognize issues and choose the proper repair method.
Common connection types with labeled parts
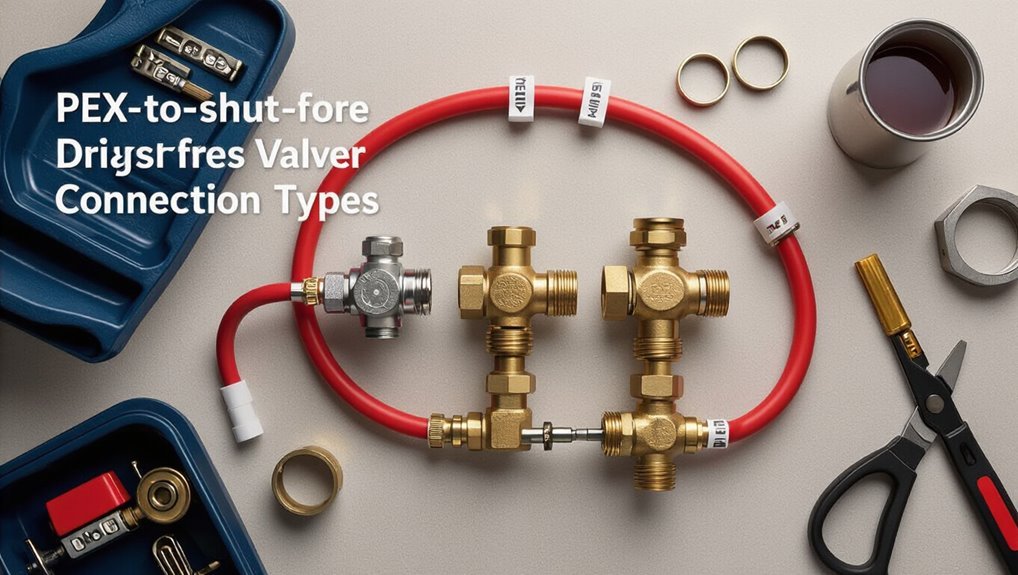
Several common PEX-to-shut-off valve connection types are presented below with labeled parts to aid identification and installation:
- crimp (PEX ring, ferrule, valve stem, cutter),
- clamp (stainless clamp, ferrule, valve body, tool),
- expansion (expander, ring, valve adapter, sleeve),
- push-fit (O-ring, retaining teeth, valve inlet, release collar),
- threaded adaptor (male/female threads, thread seal, ferrule).
Troubleshooting flowchart for failed connections

Begin by tracing the failed connection through a concise flowchart that guides diagnosis from visible leaks to hidden faults. The diagram directs users to check seal integrity, correct ring/clamp placement, proper pipe cut and insertion depth, and compatibility of fittings.
Then, it branches to specific remedies (re-seat O-rings, re-crimp or replace ferrule, re-expand PEX, or swap incompatible adapters) based on the observed symptom.
The visual guide pairs clear symbols with brief actions, expected outcomes, and escalation points for replacement or professional help.
Conclusion
In conclusion, the DIYer completes the PEX-to-shut-off valve task confidently, having chosen compatible materials, followed proper preparation, and used the crimp/cinch clamp technique with care. Like a medieval scribe relying on a trusty quill, attention to correct fittings and code compliance preserves system integrity and warranty. Regular inspections and simple maintenance will prolong valve and PEX life, ensuring reliable shut-off performance and avoiding costly water damage down the road.