How to Unclog Rain Drain Quickly: Step-by-Step Fixes for Gutters and Downspouts
To quickly unclog a rain drain, start by assessing the area for hazards and securely positioning a stable ladder. Remove any visible debris such as leaves and twigs by hand or with a scoop. Next, use a hose to flush the gutters and identify any blockages. For downspouts, clear them using a plumber’s snake, a wet/dry vacuum, or by pressure flushing; detach sections if necessary. Finally, check the outlets and splash blocks to ensure proper flow. For further details on tools, safety precautions, and prevention tips, continue reading.
What Causes Rain Drain Clogs and Why Fast Action Matters
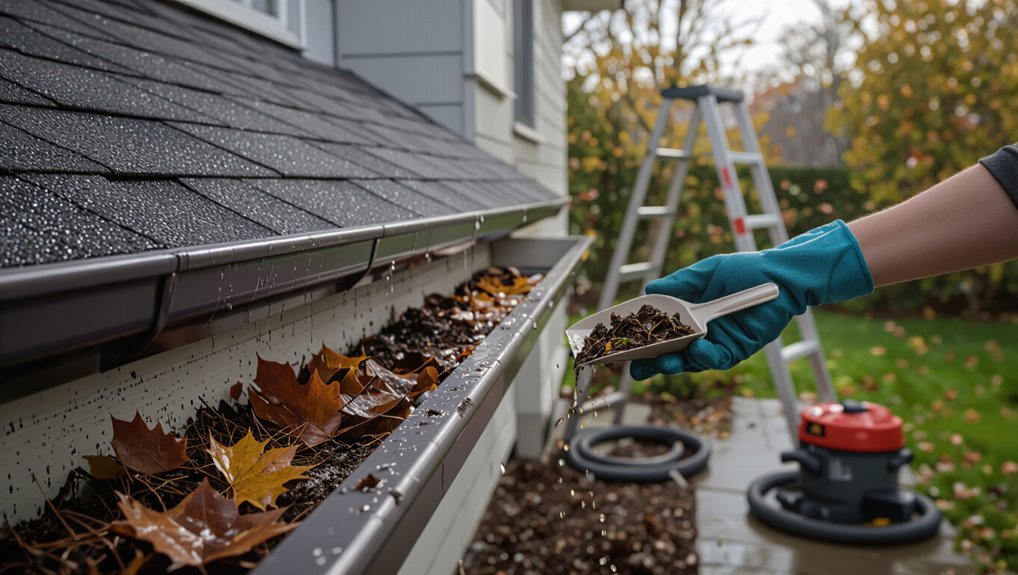
Roof litter, leaves, pine needles, bird nests, and sediment commonly obstruct gutters and downspouts, while accumulated granules or ice can further restrict flow.
Left unaddressed, clogged drains can cause roof leaks, siding and foundation water damage, and create breeding sites for mosquitoes and rodents.
Before attempting a clear-out, the situation should be assessed for urgency and safety—confirming active overflow, identifying electrical or fall hazards, and determining whether professional help is needed.
Common debris and blockages in gutters and downspouts
Many gutters and downspouts become obstructed by leaves, pine needles, twigs, and granules from deteriorating shingles, while birds’ nests, accumulated sediment, and clinging moss further restrict flow.
Other common blockages include roof grit, seed pods, and small animal debris.
Proper inspection reveals clog locations and informs how to unclog rain drain systems efficiently with scooping, rinsing, and targeted rod or pressure methods.
Risks of clogged drains (water damage, pests, foundation issues)
When rain drains become blocked, water no longer follows its designated path and instead pools on roofs, in gutters, around foundations, and inside basements. This quickly escalates from a minor nuisance to costly damage.
Standing water accelerates rot, mold, and siding deterioration, invites mosquitoes and rodents, and undermines soil supporting foundations. Left unchecked, clogged drains can cause structural cracking, interior flooding, and expensive repairs.
How to assess urgency and safety before starting
Why act immediately? Assess urgency by checking overflow, water pooling near foundations, and visible damage; active leaks demand prompt action.
Evaluate safety: power lines, unstable ladders, icy surfaces, and wet roofs increase risk. Use two-person teams, appropriate footwear, and insulated tools.
If hazards exist or damage is extensive, prioritize professional help to prevent injury and worsening structural problems.
Tools and Materials You Need for a Quick and Safe Fix
The next section lists the basic and optional gear needed to clear a rain drain safely.
Recommended items include a concise checklist:
- Ladder, gloves, trowel, garden hose
- Plumbing snake, wet/dry vac, pressure washer
- PPE and ladder safety practices
These tools and precautions prepare a homeowner for both simple and stubborn clogs.
Essential tools for homeowners (ladder, gloves, trowel, garden hose)
A few basic tools make clearing a clogged rain drain safe and efficient: a sturdy ladder for roof or gutter access, durable gloves to protect hands, a small trowel or gutter scoop to remove debris, and a garden hose to flush remaining sediment and check flow.
These essentials enable quick inspections, manual debris removal, and simple flow tests without specialized equipment.
Optional tools for stubborn clogs (plumbing snake, wet/dry vac, pressure washer)
When simple tools fail, homeowners can reach for optional equipment—plumbing snakes to break up blockages, wet/dry vacuums to extract trapped debris and standing water, and pressure washers to flush stubborn sediment from downspouts and channels.
Choose snake length and head type for pipe size, use a wet/dry vac with proper attachments and seals, and set pressure washer to moderate spray to avoid damage.
Personal protective equipment and ladder safety tips
Wear appropriate personal protective equipment and follow ladder safety rules before attempting any rain drain work.
Gloves, eye protection, non‑slip shoes, and a dust mask protect against debris and contaminants.
Use a sturdy extension ladder on level ground, secure its base, maintain three points of contact, avoid overreaching, and have a spotter.
Inspect tools and PPE before starting to guarantee safe, efficient unclogging.
Fast Step-by-Step Method to Unclog Gutters and Downspouts
The procedure begins with preparing the area and securing a ladder to guarantee safety.
Next, surface debris is removed from gutters, the troughs are flushed with a hose to locate flow restrictions, and downspout clogs are cleared with a plumber’s snake or pressure flush.
Finally, outlets and splash blocks are rechecked to confirm proper drainage.
Step 1 Prepare the area and secure the ladder
Clear the ground around the house and position the ladder on level, solid footing at the section of gutter to be serviced.
The worker inspects ladder condition, locks spreaders, and sets non-slip feet.
Nearby obstructions and bystanders are cleared; tools and a bucket are staged within easy reach.
A partner steadying the ladder is recommended for added safety before ascent.
Step 2 Remove surface debris from gutters by hand or with a scoop
Once the ladder is stable and the worker is positioned, attention moves to removing leaves, twigs, and grit that sit on the gutter lip.
Using gloved hands or a plastic scoop, debris is gathered into a bucket or tarp.
Stubborn compacted material is loosened gently to avoid damaging the gutter.
Collected waste is disposed of properly before proceeding.
Step 3 Flush the gutter with a hose to identify flow and blockage points
Start a gentle stream from the hose at the high end of the gutter and watch how water flows toward the downspout to reveal weak spots, standing pools, or places where water backs up.
Note sections with slow flow, leaks, or overflowing seams. Run the hose long enough to flush fine grit and expose hidden debris.
Mark trouble spots for targeted cleaning or repairs.
Step 4 Clear downspout clogs using a plumber’s snake or pressure flush
Use a plumber’s snake or a pressurized hose flush to dislodge obstructions in the downspout, working from the top opening and, if accessible, from the elbow or bottom outlet.
Feed the snake slowly, rotate to break debris, then retract while flushing.
For pressure flushes, use short bursts to avoid damage.
Clear loosened material into the gutter or a collection bucket.
Step 5 Re-check outlets and splash blocks for proper drainage
Inspect the outlets and splash blocks to confirm water flows freely away from the foundation and that no debris, displacement, or erosion is hindering discharge.
Guarantee splash blocks sit level and direct water onto stable ground or a drain. Remove sediment, realign displaced units, and replace cracked blocks.
Verify downspout connections are secure so outlets channel runoff without pooling near the structure.
Step 6 Final inspection and cleanup
With outlets and splash blocks confirmed level and clear, attention turns to a final inspection and cleanup to guarantee the entire system functions properly.
The technician scans gutters, downspouts, seams and fasteners for remaining debris, leaks, or loose brackets. Joints are tightened, minor repairs completed, and debris hauled away.
A runoff test verifies unobstructed flow; notes record observations and next maintenance date.
Quick Alternative Techniques When Standard Tools Fail
When standard gutter rods and brushes cannot clear a blockage, alternative quick techniques can restore flow.
A wet/dry vacuum can extract debris from downspouts. A DIY flush with a high-pressure nozzle can dislodge compacted material, and removing and unbolting downspout sections allows direct manual clearing.
These options offer practical, fast remedies for stubborn clogs.
Using a wet/dry vacuum to suck clogs from the downspout
A wet/dry vacuum can often clear stubborn downspout blockages by creating enough suction to dislodge debris or extract it whole.
Operators should confirm the vacuum is rated for outdoor wet use and that the unit and hose fit the downspout opening.
Use a wide nozzle or adapter, seal the connection with tape or cloth, work in short bursts, and inspect removed material.
Test flow afterward.
Creating a DIY downspout flush with a high-pressure nozzle
If a wet/dry vacuum fails to clear compacted debris, using a DIY high-pressure flush can force obstructions through or break them into passable pieces.
A pressure washer with a narrow nozzle or a garden hose fitted with a custom high-pressure tip directs bursts upward through the downspout.
Protect nearby surfaces, maintain secure footing, and use short bursts to avoid damaging seams or fittings.
Removing and unbolting downspout sections for manual clearing
Detach the downspout at accessible joints to gain direct access to stubborn blockages that resist flushing or vacuuming.
Loosen fasteners with appropriate tools, support sections to prevent drops, then remove segments for inspection.
Clear debris manually or with a flexible brush, rinse the interior, and check seals.
Reassemble securely, ensuring alignment and pitch for proper drainage; test with water to confirm flow.
How to Diagnose Persistent or Hidden Drain Problems
Persistent gurgling, recurring backups, or consistently slow drainage can signal a clog in the underground drain or lateral line rather than the visible gutter.
Such symptoms often indicate deeper blockages or collapsed pipes that simple surface cleaning will not fix. At that point, a professional plumber or specialized gutter service should be engaged to perform camera inspection and targeted repairs.
Signs the clog is in the underground drain or lateral line
Several clear indicators point to a blockage located in the underground drain or lateral line rather than the visible surface gutters and downspouts.
Water pools near the downspout outlet, slow yard drainage persists after heavy rain, or nearby lawn depressions and soggy patches appear.
Foul odors, sinkholes, or unexpected wetness away from gutters also suggest subterranean obstruction needing camera inspection or professional clearing.
When gurgling, backups, or slow drainage indicate deeper issues
Listen for gurgling or note slow egress of water: these are common signs that the problem extends beyond surface gutters into deeper pipes.
Persistent backups, water pooling near downspout exits, or foul odors suggest partial blockages, root intrusion, or collapsed lateral lines.
Inspect accessible cleanouts, test flow with a garden hose, and check for sudden wet spots that indicate hidden leaks or compromised underground drainage.
When to call a professional plumber or gutter service
When should a homeowner escalate to professional help?
A plumber or gutter service should be called when recurring backups, persistent slow drainage, foul odors, visible leaks, sagging gutters, or water pooling near foundations occur.
Professionals diagnose hidden clogs, pipe damage, tree root intrusion, or improper grading.
Emergency service is warranted for significant backups, structural water intrusion, or after failed DIY attempts.
Preventive Maintenance Schedule to Avoid Future Clogs
A concise preventive maintenance schedule helps keep rain drains clear and reduces emergency repairs.
Recommended actions include the following list to cover timing, hardware, and simple habits:
- Spring and fall cleaning checklist and timing
- Installing gutter guards with pros and cons
- DIY habits: tree trimming and routine screen checks
Regular adherence to these steps minimizes debris buildup and extends system performance.
Seasonal cleaning checklist and timing (spring, fall)
Seasonal cleaning of rain drains should be scheduled at predictable intervals—typically in early spring after thaw and late fall before the first hard freeze—to prevent debris buildup and ice blockages.
Inspect gutters, downspouts, outlets, and splash blocks. Remove leaves, seeds, and sediment. Flush with a hose, check for leaks or sagging, tighten fasteners, and confirm proper water flow away from the foundation.
Installing gutter guards and their pros/cons
Consider installing gutter guards to reduce debris entry and minimize routine maintenance: these covers, screens, or inserts fit over or inside gutters to block leaves, pine needles, and large particles while allowing water to pass, thereby lowering the frequency of cleanings and reducing the risk of clogs that lead to overflow and foundation damage.
| Type | Benefit |
|---|---|
| Mesh | Keeps small debris out |
| Foam | Easy install, may trap sediment |
| Surface-tension | Low visibility, higher cost |
Simple DIY habits to reduce debris buildup (tree trimming, screen checks)
Trim overhanging branches and perform regular screen inspections to keep debris from accumulating in gutters and downspouts.
Homeowners should schedule seasonal branch pruning, removing limbs within several feet of the roof.
Inspect and clean gutter screens monthly during leaf-fall and after storms.
Promptly clear small blockages, tighten fasteners, and replace damaged screens to maintain flow and reduce the need for major cleanouts.
Common Mistakes to Avoid When Unclogging Rain Drains
When unclogging rain drains, common errors can create safety hazards and long-term damage if not recognized.
Improper ladder use increases fall risk, while pouring harsh chemicals can corrode gutters and harm nearby plants.
Neglecting downspout outlets and underground connections often leaves blockages unresolved.
Unsafe ladder practices and how to prevent falls
Climbing a ladder to access clogged rain drains carries significant fall risk if basic safety practices are ignored.
Work should use a stable, level ladder placed on firm ground, secured or footed by another person. Avoid overreaching; descend and reposition instead.
Wear slip-resistant footwear, inspect ladder condition before use, maintain three points of contact, and never climb in adverse weather.
Using harsh chemicals that can damage gutters or plants
Resorting to strong chemical drain cleaners may seem like a quick fix, but they can corrode gutter coatings, damage joints, and leach into soil where they harm plants and beneficial microorganisms.
Professionals advise manual removal, flushing with water, or using biodegradable enzyme-based cleaners.
Avoid pouring concentrated chemicals directly into gutters; rinse thoroughly if exposure occurs and consider protective liners or physical guards to prevent recurrence.
Overlooking downspout outlets and underground connections
After addressing surface clogs and avoiding harsh chemicals, attention must turn to downspout outlets and the buried pipes they feed.
Ignoring these often-hidden junctions allows backups, erosion, and basement seepage. Inspect outlet screens, elbow joints, and underground connections with a plumber’s snake or camera.
Flush thoroughly, clear sediment, and reseat fittings. Confirm proper slope and discharge away from foundations to prevent recurrence.
Cost and Time Estimates for Typical Unclogging Jobs
Costs and time vary widely depending on whether a homeowner tackles the blockage personally, uses specialized tools, or hires a professional. The following quick comparison frames typical time commitments and likely expenses to help set realistic expectations. Consider local rates and severity of the clog when applying these estimates.
| Scenario | Typical Time | Typical Cost |
|---|---|---|
| Quick DIY | 15–45 minutes | Very low (tools on hand) |
| Moderate effort with tools | 1–3 hours | Low–moderate (specialized tools) |
| Professional service | 1–4 hours | Moderate–high (service fee + parts) |
Quick DIY: time and minimal cost
Estimate time and money realistically before starting: most straightforward rain drain unclogs can be resolved with basic tools in 30–90 minutes and under $30.
Typical quick fixes include scooping debris, flushing with a hose, and clearing downspout elbows.
Costs: gloves, gutter scoop, hose nozzle, and basic ladder rental or already-owned ladder.
Plan 30–60 minutes for single-run gutters; add time for multiple sections.
Moderate effort with special tools: time and likely expenses
Tackle moderate clogs with a clear plan: these jobs typically require specialized tools—an electric wet/dry vacuum, a plumber’s snake or power auger, gutter-cleaning attachments for a drill, and sometimes a ladder stabilizer or scaffold—and will take roughly 1.5 to 4 hours depending on gutter length, access difficulty, and severity of buildup.
Expect tool rental or purchase costs of $40–$300; disposable supplies add $5–$25.
Professional service: average costs and scope
When homeowners opt for a professional, a routine gutter or downspout unclogging job typically takes between one and three hours and is billed according to access difficulty, severity of blockage, and local labor rates.
Typical costs range from $75–$250 for standard clearings; complex jobs, roof access, or repairs can raise prices to $300–$600.
Estimates often include inspection, debris removal, and basic downspout flushing.
Long-Term Upgrades to Improve Rain Drain Performance
Long-term upgrades can greatly reduce recurring clogs by installing seamless gutters, upsizing downspouts, and correcting gutter pitch.
Additional measures such as rain diverters, downspout extensions, and French drains redirect water away from vulnerable areas.
Choosing materials that resist debris buildup and corrosion—like smooth aluminum or coated steel—extends system performance and lowers maintenance.
Seamless gutters, larger downspouts, and improved pitch
Upgrading to seamless gutters, increasing downspout diameter, and correcting gutter pitch can substantially reduce clogs and improve runoff during heavy storms.
Seamless gutters eliminate joints that trap debris, larger downspouts handle higher flow and resist backups, and proper pitch guarantees steady drainage toward outlets.
These upgrades lower maintenance frequency and minimize overflow damage when paired with regular inspections and debris removal.
Adding rain diverters, extensions, and French drains
Beyond improving gutters and downspouts, homeowners can further protect foundations and landscape by redirecting roof runoff with rain diverters, extensions, and French drains.
Rain diverters steer concentrated flows away from vulnerable spots; downspout extensions discharge water farther from the foundation; French drains collect and disperse subsurface runoff.
Together these upgrades reduce erosion, basement seepage, and soil saturation when planned with proper slope and outlet locations.
Material choices that resist clogging and corrosion
Durable materials and thoughtful component selection greatly reduce clogging and corrosion in rain drainage systems.
Aluminum and copper resist rust and shed debris; smooth PVC and high-density polyethylene minimize buildup.
Install stainless-steel or polymer mesh guards and reverse-curve covers to block leaves while preserving flow.
Choose coated fasteners and corrosion-resistant brackets.
Regular inspection complements durable materials to sustain long-term performance.
Troubleshooting Checklist: If Water Still Isn’t Draining
If standing water persists after basic clearing, a systematic checklist helps isolate the cause by testing inlet points, downspouts, and surface flow in sequence.
A camera inspection or targeted pipe replacement is recommended when blockages cannot be reached or structural damage is suspected.
In urgent situations, temporary measures—such as routing water to a safe discharge area or installing a temporary sump—can prevent immediate property damage until permanent repairs are made.
Stepwise checks to isolate the problem
Begin by working methodically through a short checklist that isolates common causes of standing water: inspect visible gutters and downspouts for blockages, check low spots and grading near the foundation, verify downspout extensions and outlet connections, and examine nearby drains or catch basins for clogs.
Next, run water through the system section by section, note overflow points, feel for leaks, and confirm discharge location.
When camera inspection or pipe replacement is needed
When section-by-section checks still yield standing water, further investigation with a camera or consideration of pipe replacement becomes the next practical step.
A camera inspection locates hidden blockages, sags, joint failures, root intrusions, or collapses without guesswork.
If damage, chronic clogging, or irreparable deformation is confirmed, replacing the affected pipe segment or rerouting the line restores reliable drainage and prevents recurring failures.
Emergency temporary fixes to prevent immediate damage
Act quickly to protect structures and landscaping while a permanent repair is arranged: divert standing water away from foundations using sandbags, temporary gutters, or flexible drain hoses.
Shore up low spots with gravel or soil to prevent erosion.
Patch visible gutter holes with waterproof tape, clear nearby debris, prop downspouts above drains to improve flow, and place buckets or pumps to remove pooled water until professionals arrive.
Conclusion
Sunlight slips off a tidy roof as water, once trapped like morning tea, finds its path again. Gutters and downspouts, loosened and cleared, sing with steady rivulets that sketch bright lines against siding. Hands move with practiced calm, tools laid aside like quiet sentinels. The house breathes easier; drains release the rain’s burden. Small repairs ripple outward — protection stitched back into place, ready for the next storm’s first, steady beat.