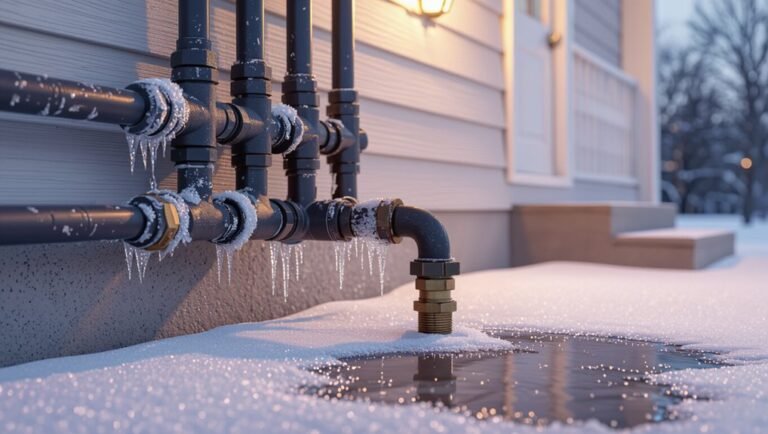
How to Build an Outdoor Bathtub: Step-by-Step DIY Guide for Any Backyard
Transform your backyard into a personal oasis with an outdoor bathtub. This DIY guide walks you through everything you need to know, from selecting the perfect location and obtaining necessary permits to preparing a solid base and choosing drainage and heating options. You’ll learn about frost protection, foundation types, waterproofing techniques, and essential safety checks. Depending on your skills, the project can take from a weekend to a few weeks if you’re hiring a contractor. Follow along for detailed steps, materials lists, and checklists to confidently complete your outdoor bathing retreat.
Why Build an Outdoor Bathtub and What to Expect
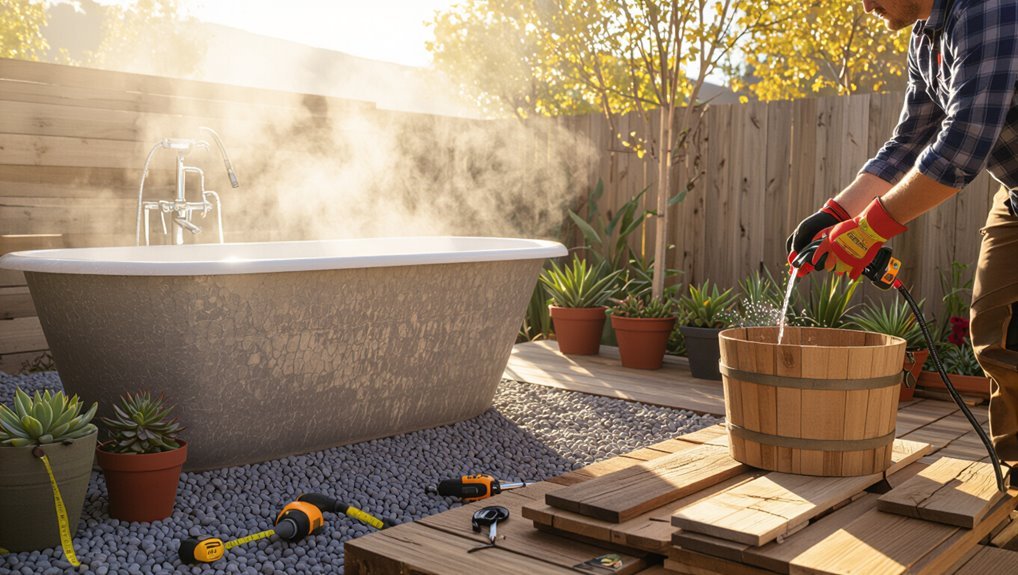
An outdoor bathtub can enhance a backyard’s aesthetic, increase property appeal, and provide a private retreat for relaxation.
Prospective builders should expect varied costs and timelines depending on materials, site work, and whether skilled trades are hired.
Before starting, local building codes, permit requirements, and homeowner association rules must be checked and followed.
Benefits of an outdoor bathtub for any backyard
A backyard bathtub transforms ordinary outdoor space into a private retreat that boosts property appeal and daily wellbeing.
It offers relaxation, outdoor bathing benefits, and versatile styling for any landscape. Homeowners considering how to build an outdoor bathtub gain increased usable space, enhanced aesthetics, and potential resale appeal.
Low-maintenance options and customizable features suit varied climates and personal routines, promoting restorative outdoor living.
Typical costs, timeframes, and required skills
Many projects fall into clear cost and time ranges, so homeowners can plan realistically for materials, labor, and permits when adding an outdoor bathtub.
Typical DIY costs range from modest (basic tub, gravel pad) to several thousand dollars (custom stone, plumbing, decking).
Timelines span a weekend to several weeks.
Required skills include carpentry, basic plumbing, site preparation, and finishing; professionals shorten schedules.
Local regulations, permits, and homeowner association considerations
Beyond costs and skills, homeowners must verify local regulations and HOA rules before building an outdoor bathtub.
Zoning, setback, plumbing, and drainage codes may require permits or professional inspections.
HOAs often restrict visible structures, materials, and colors; approval timelines vary.
Failure to comply can mean fines, removal orders, or denied resale disclosures.
Consulting local authorities and HOA covenants prevents costly revisions and delays.
Choosing the Right Location and Design
Selecting a site and design for an outdoor bathtub requires evaluating slope, drainage, privacy, and sunlight to guarantee proper function and comfort.
Decisions about size, shape, and style should respond to the backyard’s scale while materials for tub and surround are weighed for durability and appearance.
Accessibility, safety, and the placement of water, power, and waste connections must be planned before construction begins.
Assessing site conditions: slope, drainage, privacy, and sunlight
Although a chosen spot may seem appealing at first glance, a careful evaluation of slope, drainage, privacy, and sunlight is essential to affirm long-term function and comfort.
Inspect grade for stable, level pad or simple retaining; confirm runoff routes and soil permeability to prevent pooling; map sun exposure for seasonal comfort; and assess sightlines, fencing, or plantings to affirm privacy without compromising ventilation or access.
Size, shape, and style options to match your backyard
With site constraints clarified, attention turns to choosing a tub that fits the yard’s scale and aesthetic.
Compact freestanding tubs suit small patios; elongated designs fit narrow corridors.
Round or oval shapes soften formal gardens; rectilinear tubs echo modern decks.
Consider proportion to surrounding plants, sightlines, and seating.
Style choices—rustic, contemporary, minimalist—should harmonize with existing landscaping and architecture.
Materials comparison for tubs and surrounds
Materials matter as much for durability and comfort as they do for appearance when choosing an outdoor bathtub and its surround. The guide compares common options: acrylic for lightness, stone for longevity, wood for warmth, and metal for modern aesthetics, matching maintenance and climate.
| Material | Strength |
|---|---|
| Acrylic | Light, low-cost |
| Stone | Durable, heavy |
| Wood | Warm, requires care |
| Metal | Stylish, conductive |
Accessibility, safety, and nearby utilities planning
Choosing the right location and layout for an outdoor bathtub requires moving beyond material selection to evaluate access, safety, and utility connections.
The designer should guarantee level, stable approaches, non-slip surfaces, adequate lighting, and privacy screening.
Plan water, drainage, and electrical runs with local codes and permits in mind.
Incorporate barriers or handrails and position the tub near utilities to minimize trenching and risk.
Essential Tools, Materials, and Budget Breakdown
The section outlines a concise tools checklist for excavation, plumbing, and finishing, specifying what homeowners and contractors will need at each stage.
It then lists materials organized by build type—freestanding tub, recessed tub, and DIY shell—with notes on durability and installation requirements.
Finally, it presents typical budget scenarios (DIY basic, mid-range, luxury) to set realistic cost expectations and trade-offs.
Tools checklist for excavation, plumbing, and finishing
Before breaking ground, a clear checklist aligns excavation, plumbing, and finishing tasks with the right tools and realistic costs, ensuring each phase proceeds without costly delays.
Essential items include protective gear, measurement devices, and budget estimates.
Quick numeric overview:
- Excavation: shovel, mattock, compacting tool, rental excavator estimate
- Plumbing: pipe kit, fittings, trenching shovel, pressure tester
- Finishing: trowels, sealant, surface grinder, paint supplies
- Misc: level, tape measure, contingency fund, disposal bags
Material list by build type: freestanding tub, recessed tub, DIY shell
A clear materials breakdown helps match each build type—freestanding, recessed, or DIY shell—to its specific toolset, consumables, and realistic budget range.
Freestanding: tub, simple deck, basic plumbing.
Recessed: concrete, waterproof membrane, reinforcement, skilled labor.
DIY shell: plywood form, fiberglass, resin, sealant.
Estimated quantities and preferred suppliers should be listed before purchasing.
- Freestanding
- Recessed
- DIY shell
- Common consumables
Typical budget scenarios: DIY basic, mid-range, luxury
Outline three budget tiers—DIY basic, mid-range, and luxury—to clarify the essential tools, materials, and realistic cost ranges for each outdoor bathtub approach.
DIY basic: salvaged tub, minimal plumbing, hand tools; $200–$800.
Mid-range: new tub, improved drainage, basic decking, power tools; $1,000–$4,000.
Luxury: custom tub, professional plumbing, heated system, premium decking, landscaping; $5,000+.
Preparing the Site
The author outlines the initial steps for preparing the site, beginning with precise marking and measuring of the tub footprint.
Next comes excavation and base preparation tailored to the tub type, including compacted gravel or concrete pads as required.
Attention is given to ground stabilization, effective drainage, and frost protection to guarantee long-term performance.
Marking and measuring the footprint
Before any excavation, measure and mark the bathtub’s exact footprint to guarantee level placement, proper clearances, and correct plumbing alignment.
Using a tape measure, chalk line, and stakes with string, outline the tub perimeter and service access.
Verify orientation relative to slope, sun, privacy, and existing utilities.
Cross-check dimensions against tub specifications and local setback requirements before proceeding.
Excavation and base preparation for different tub types
Once the footprint is set, excavation and base preparation differ by tub type and site conditions and must be executed to confirm stability, drainage, and easy service access.
Compact soil to required depth, level subgrade, and remove organic material.
For freestanding tubs use crushed stone and sand bedding; for in-ground tubs prepare concrete pad or reinforced slab per manufacturer specs; guarantee conduit and access risers remain reachable.
Ground stabilization, drainage solutions, and frost considerations
After excavation and base compaction are confirmed, attention shifts to stabilizing the surrounding ground, managing surface and subsurface water, and mitigating frost action that can heave or damage the tub and its supports.
Install compacted crushed stone and geotextile to prevent settling, slope surfaces away, add perimeter French drains or gravel trenches, and use frost-protected shallow foundations or insulation to limit freeze-thaw movement.
Plumbing, Water Supply, and Drainage
The plumbing phase evaluates whether to use an outdoor cold tap, extend a hot water line, or install a tankless heater to meet bathing needs.
It then plans routing and insulation of supply lines to prevent freeze damage while selecting a drainage strategy—gravity outlet, French drain, or closed recirculating system—that fits site constraints.
Finally, installation of traps, vents, and backflow prevention is specified to guarantee code compliance and sanitary operation.
Choosing water source: outdoor tap, hot water line, or tankless heater
Selecting a water source for an outdoor bathtub requires balancing convenience, cost, and local plumbing constraints. Options include tapping an existing outdoor spigot for cold water, extending an indoor hot water line for mixed temperatures, or installing a tankless heater for on-demand hot water.
Each choice varies by installation complexity, energy use, and code requirements; assess local regulations and long-term operating costs before deciding.
Routing supply lines and protecting against freezing
Plan supply-line routes that minimize exposure and simplify insulation while meeting code and site constraints.
Run lines through heated spaces, buried below frost depth, or inside insulated conduit. Use PEX or insulated copper with heat tape where needed, include accessible shutoffs and expansion loops, and slope lines for drainage.
Test for leaks, label valves, and document locations for winter maintenance and future repairs.
Drainage options: gravity drain, French drain, and recirculating systems
Consider three primary drainage approaches—gravity drain, French drain, and recirculating system—each offering distinct trade-offs in complexity, cost, and site suitability.
A gravity drain directs water to existing sewer or soakaway with minimal maintenance.
A French drain disperses water into soil, useful on permeable sites.
A recirculating system pumps, filters, and reuses water, conserving supply but increasing installation and energy needs.
Installing traps, vents, and backflow prevention
A few essential plumbing components—trap, vent, and backflow preventer—must be integrated into an outdoor bathtub system to protect against sewer gas, guarantee proper drainage, and prevent contaminated water from returning to the supply.
The trap retains a water seal; vents prevent siphoning and promote flow; backflow preventers (or air gaps) protect potable lines.
Install per local code, using accessible cleanouts.
Building the Tub Foundation and Support
The section outlines practical foundation options for an outdoor bathtub, including step-by-step concrete slab construction, a raised timber platform, and a gravel pad with paver base.
It also addresses necessary reinforcement and simple load-bearing calculations to guarantee stability and longevity.
Practical tips and decision criteria will guide selection based on site conditions and expected loads.
Concrete slab method step-by-step
Before pouring concrete, precise site preparation and accurate measurements guarantee the slab will support the tub’s weight and plumbing.
Excavate to frost depth, compact base, and add gravel.
Install formwork level and square, set reinforcement mesh or rebar with chairs, and embed plumbing sleeves.
Mix and pour concrete, screed, float, and control joints.
Cure properly before removing forms and installing the tub.
Raised timber platform construction
While some installations pour a concrete slab, many outdoor tubs sit on raised timber platforms that provide elevation, drainage, and easier access to plumbing.
Construction involves pressure‑treated posts on footings, a level ledger or beam layout, joists sized for load, galvanized fasteners, and water‑resistant decking.
Include ventilation, access panels for plumbing, and check local codes and load ratings before final assembly.
Gravel pad and paver base option
One practical alternative to a poured slab or raised timber platform is a compacted gravel pad with a paver base, which provides stable drainage, easy access for plumbing, and simpler installation for lighter tubs.
Excavation, geotextile fabric, 4–6 inches of compacted crushed stone, and level pavers create a firm, permeable surface.
Edge restraints prevent spreading and simplify maintenance.
Reinforcement and load-bearing calculations
Having settled the gravel pad or paver base, attention shifts to reinforcement and load-bearing calculations that guarantee the foundation supports the tub, water, and occupants without settlement or failure.
Determinations include total dead and live loads, soil bearing capacity, required slab thickness, and rebar or mesh spacing.
Use conservative safety factors, reference local codes, and consult an engineer for borderline soils or heavy, custom tubs.
Installing the Bathtub
With the foundation in place, the installer sets and levels a freestanding tub or positions a recessed unit to exact specifications.
Fixtures are secured, plumbing is connected and pressure-tested, and all joints receive proper waterproofing.
Final checks confirm drains, seals, and mounting points meet durability and safety standards.
Setting and leveling a freestanding tub
Before securing plumbing or finishing trim, the freestanding tub must be positioned, leveled, and supported so it sits flat, drains properly, and bears weight without shifting.
Place tub on final pad, check level front-to-back and side-to-side, shim under feet with noncompressible material, secure adjustable mounts, confirm drain alignment, test with water and weight, then mark and fasten anchor points to prevent movement.
Installing a recessed or sunken tub
When installing a recessed or sunken tub, the contractor first verifies that the excavation matches the tub’s dimensions and planned surround elevations.
Walls, footing, and subfloor must be square, level, and load-rated to support the filled tub and occupants.
The tub is lowered, shimmed, and blocked to distribute loads.
Waterproof membranes and drainage planes are installed, and access panels planned for future maintenance.
Securing fixtures and connecting plumbing
Having guaranteed the recessed tub sits squarely, shims and blocks secured, attention shifts to fastening fixtures and tying in plumbing.
Install the faucet, spout, and drain assembly per manufacturer torque specs.
Run supply lines and connect to shutoffs using compression or soldered joints as applicable.
Test for leaks under pressure before backfilling.
Secure exposed piping to framing to prevent movement and strain.
Waterproofing and sealing joints
Seal the bathtub installation by creating continuous waterproof barriers at all junctions between tub, surround, and floor.
The installer applies marine-grade sealant to seams, backs joints with waterproof tape or membrane, and guarantees tight shifts at drains and fixtures.
Corners receive reinforced flashing.
Surfaces are tested for leaks, allowed full cure time, and inspected before finishing cladding or decking to ascertain durable, watertight performance.
Heating Options and Temperature Control
After plumbing and placement are complete, the question of how to supply and maintain warm water becomes central. Options range from tying into an existing hot-water line or installing a dedicated outdoor heater to off-grid choices such as solar panels, wood-fired boilers, or propane units.
Attention should also be given to insulation, covers, and other heat-retention measures to minimize energy use and keep temperatures steady.
Integrating a hot water connection vs. outdoor water heater
Several practical approaches exist for heating an outdoor bathtub, most commonly tapping an existing indoor hot-water line or installing a dedicated outdoor water heater; each option carries distinct trade-offs in complexity, cost, energy efficiency, and maintenance.
Connecting to indoor plumbing minimizes equipment but needs frost protection and permits; an outdoor heater offers independence, simpler routing, and localized controls but requires weatherproofing, fuel/electrical supply, and regular servicing.
Solar, wood-fired, and propane heating methods
When choosing a heat source for an outdoor bathtub, solar, wood-fired, and propane systems each offer distinct advantages in cost, responsiveness, and installation demands.
Solar relies on panels or collectors and low operating costs but variable performance.
Wood-fired requires a stove or rocket heater, manual fueling, and slower heat-up.
Propane delivers rapid, controllable heat with straightforward hookups and higher fuel expense.
Insulation and heat-retention strategies
Choosing a heater is only part of keeping outdoor bathtub water warm; effective insulation and heat-retention strategies determine how long that heat lasts and how much fuel or energy is needed.
Use insulated shells, closed-cell foam, and reflective radiant barriers under and around the tub.
Add fitted thermal covers, minimize exposed piping, and insulate access panels.
Windbreaks and positioning in sun reduce heat loss.
Finishing Touches and Surroundings
Attention to decking choices, non-slip finishes, and alternative surfaces sets the stage for safe, attractive access to the tub.
Privacy screens, strategic planting, and layered lighting create comfort and atmosphere around the bathing area.
Convenient storage, towel hooks, and nearby seating complete the layout for practical use.
Decking, decking alternatives, and non-slip surfaces
Several practical options exist for surrounding an outdoor bathtub, each balancing aesthetics, durability, and safety: traditional hardwood decking, composite boards, poured concrete, stone pavers, and compacted gravel are common choices.
Non-slip considerations include textured finishes, anti-slip coatings, grooved boards, and rubber mats.
Drainage, maintenance, and material resistance to moisture and UV determine long-term performance and user safety.
Privacy screens, landscaping, and lighting ideas
After selecting durable, well-drained decking or paving around the tub, attention turns to privacy screens, landscaping, and lighting to define the space and enhance comfort.
Install lattice, bamboo panels, or operable slats for seclusion without trapping airflow. Surroundings benefit from native shrubs, fragrant perennials, and gravel beds for drainage.
Layer soft, warm LED lighting—path, accent, and dimmable fixtures—for safety and ambience.
Storage, towel hooks, and nearby seating
When finalizing the outdoor tub area, practical storage, sturdy towel hooks, and nearby seating should be arranged to balance convenience with weather resistance.
Use sealed cabinets or slatted benches for ventilation and drainage. Install corrosion-resistant hooks at reachable heights.
Provide a small bench or waterproof stools for dressing and placing items. Make certain materials match overall aesthetic and can withstand sun, rain, and humidity.
Safety, Maintenance, and Seasonal Care
The section addresses essential care protocols for an outdoor bathtub, covering water treatment and filtration to prevent algae and maintain safe water quality.
It also outlines winterizing and off-season shutdown procedures to protect plumbing and structure.
A concise routine inspection checklist and notes on common repairs complete the maintenance guidance.
Water treatment, filtration, and preventing algae
Maintain clear, balanced water through regular testing and targeted treatment to guarantee safety and minimize maintenance for an outdoor bathtub.
Use appropriate sanitizers (chlorine or bromine), maintain pH 7.2–7.8, and monitor alkalinity.
Install a suitable cartridge or sand filter sized to tub volume and run daily circulation.
Prevent algae with UV, algaecide as needed, and routine scrubbing of surfaces.
Winterizing and off-season shutdown procedures
How should an outdoor bathtub be prepared for winter to protect plumbing, finishes, and water quality?
The owner drains and cleans the tub, adds antifreeze to exposed lines as specified, disconnects and stores pumps and filters, insulates fittings, seals covers to prevent debris, and applies protective coatings to vulnerable finishes.
Water sources are shut off and runoff is managed to avoid freeze damage.
Routine inspection checklist and common repairs
After winterizing and securing the tub, regular inspections help catch wear and faults before they escalate.
Inspect seals, drains, fittings, and structural supports monthly; check for cracks, rot, corrosion, loose fasteners, and drainage blockages.
Test plumbing and heater function.
Common repairs: resealing joints, replacing gaskets, tightening or replacing hardware, patching surface cracks, treating or replacing rotten wood, and clearing clogs.
Cost-Saving Alternatives and Upgrades
The section examines practical ways to reduce expense and enhance value when building an outdoor bathtub.
It compares repurposing and upcycling options with the costs and risks of DIY work versus hiring professionals.
It also identifies a few high-impact upgrades—such as durable finishes, efficient heating, and proper drainage—that typically justify their price.
Repurposing bathtubs and upcycling options
Many homeowners find that repurposing an old tub into an outdoor feature cuts costs while adding character. Salvaged cast-iron, clawfoot, or acrylic tubs can be cleaned, refinished, and adapted into soaking baths, planters, or livestock troughs with minimal investment.
Solid mounting, drainage, and weatherproof coatings extend lifespan. Upcycled tubs paired with reclaimed decking, simple plumbing kits, and tasteful finishes create distinctive, budget-friendly backyard retreats.
DIY vs. professional trade-offs
Weighing DIY against hiring a professional hinges on skill level, budget, and long-term goals: DIY offers lower upfront costs through salvaged tubs, basic plumbing kits, and self-applied weatherproofing, while professionals deliver guaranteed waterproofing, code-compliant connections, and faster, safer installation.
Homeowners should compare time investment, permit requirements, warranty gaps, and potential repair costs when choosing between savings now and reduced risk later.
High-impact upgrades worth the investment
Several targeted upgrades can dramatically elevate an outdoor bathtub’s comfort, durability, and resale appeal without requiring a full remodel.
Prioritize a weatherproof surround, stainless or composite fixtures, and insulated plumbing to reduce maintenance and heat loss.
Add a locking cover, LED lighting, and non-slip decking for safety and ambiance.
These investments balance longevity, performance, and property value.
Common Mistakes to Avoid
Common mistakes can undo months of work, from poor site selection and inadequate drainage to overlooked plumbing and waterproofing details.
Ignoring safety standards or local regulations further risks injury and costly rework.
The following section highlights these pitfalls and how to prevent them.
Site selection errors and drainage oversights
When choosing a location for an outdoor bathtub, overlooking soil stability, slope, and proximity to utilities often leads to costly corrections later; equally problematic are assumptions that surface runoff and groundwater will naturally divert away without engineered drainage.
Poor site choice causes settling, erosion, or buried utility damage. Inspect soil, map water flow, allow access for maintenance, and design proper graded drains and French drains to prevent pooling.
Plumbing and waterproofing pitfalls
Neglecting proper plumbing layout and waterproofing materials creates the most frequent and costly failures in outdoor bathtubs.
Incorrect pipe sizing, poor slope, and exposed joints lead to leaks and blockages.
Inadequate membrane selection, improper seam sealing, and neglecting UV-resistant coatings cause deterioration.
Overlooking access panels and test-fitting drains complicates repairs.
Prioritizing durable materials and correct installation prevents moisture damage and costly remediation.
Safety and legal compliance mistakes
Failing to address safety codes and legal requirements can turn a backyard soak into a liability.
Builders often neglect permits, zoning limits, electrical and gas regulations, or inspection schedules. Noncompliance risks fines, forced removal, or insurance denial.
Proper documentation, licensed contractors for regulated work, adherence to barrier and drainage rules, and consultation with local authorities prevent costly legal and safety consequences.
Example Build Plans and Timelines
The article presents three practical schedules: a simple weekend project with a concise materials list and step-by-step tasks, a multi-week recessed tub plan broken into clear milestones, and a luxury build timeline organized by contractor phases.
Each plan outlines expected durations, required skills, and key decision points.
Readers are encouraged to compare options and choose the timeline that matches budget, experience, and site conditions.
Simple weekend project plan with materials and steps
A simple weekend plan breaks the outdoor bathtub project into clear, time-boxed tasks: site preparation and foundation on day one, tub assembly and plumbing on day two, and finishing touches—sealing, testing, and cleanup—on the final half-day.
Materials and steps are listed for efficiency:
- Concrete pad, level, and compacted base.
- Tub, mounting brackets, and sealant.
- Flexible plumbing, fittings, and test kit.
- Finish trim, waterproofing, and cleanup.
Multi-week recessed tub plan with milestones
How should the project be paced to balance careful excavation, structural work, and finishing details? A clear multi-week plan staggers tasks, allows curing, inspections, and weather buffers.
Milestones mark completion of excavation, framing and drainage, waterproofing and plumbing rough-in, then finishes and testing.
- Week 1–2: excavation, base prep
- Week 3–4: structure, drainage
- Week 5: waterproofing, plumbing
- Week 6: finishes, testing
Luxury build timeline with contractor phases
Following the multi-week recessed tub schedule, a luxury build timeline reframes those stages into contractor-managed phases with added coordination for specialists, permits, and higher-end finishes.
The project proceeds with clear handoffs, contingency buffers, and quality inspections to guarantee premium results.
- Preconstruction: permits, design, specialist bids
- Site prep: demolition, utilities, foundation
- Install: tub, plumbing, HVAC, waterproofing
- Finishes: stone, fixtures, landscaping, final inspection
Quick Reference Checklists
The article provides three concise checklists to streamline the build: a pre-build permit and planning checklist, an installation day checklist, and a post-installation maintenance schedule.
Each checklist highlights essential tasks, required documents, and timing to prevent delays.
Readers can use these reference sheets to confirm readiness at each project stage.
Pre-build permit and planning checklist
Why verify local codes and site conditions before ordering materials? A pre-build permit and planning checklist guarantees compliance, accurate budgeting, and site readiness.
Key items to confirm:
- Permit requirements and approval timelines.
- Zoning setbacks, drainage, and easements.
- Utility locations and required inspections.
- Material specifications, load limits, and contractor certifications.
Installation day checklist
1. The crew confirms permits, safety gear, and site access before work begins.
Tools, materials, and plumbing parts are staged; measurements are rechecked.
Power, water, and waste connections are verified.
A final inspection of framing and base level precedes tub placement.
- Verify permits
- Stage tools/materials
- Recheck measurements
- Confirm utilities and safety
Post-installation maintenance schedule
Routine checks stabilize performance and prolong the life of an outdoor bathtub after installation.
A simple, regular schedule prevents issues and preserves finish.
Recommended quick reference checklist:
- Weekly: drain, clean surfaces, check fittings for leaks.
- Monthly: inspect seals, test drain and overflow.
- Quarterly: service pump/heater, clear filters.
- Annually: deep clean, reseal surfaces, professional inspection.
Conclusion
An outdoor bathtub transforms a backyard into a private retreat, blending simple construction with thoughtful planning. Readers are reminded that attention to location, drainage, and durable materials pays dividends; shortcuts can cost more down the line. With careful budgeting and creative alternatives, a satisfying soak is within reach. By keeping risks in check and following stepwise plans, one can leap before looking and still enjoy a peaceful, long-lasting outdoor oasis.