
How to Attach Brass Pipe: Step-by-Step Guide for Soldering, Threading, and Using Fittings
To attach brass pipe effectively, you can choose from three main methods: soldering, threading, or using fittings. Each method has its own advantages depending on your project requirements and skill level. Soldering involves cleaning the pipe, applying flux, heating it evenly, and using lead-free solder for a durable joint. Threading requires cutting the pipe squarely, using appropriate dies, applying cutting oil, and sealing with PTFE tape. For fittings, simply use the right ferrules or push-fit connectors, ensuring they are seated properly. This guide will also provide additional advice on tools, safety, testing, and troubleshooting.
Overview of Attaching Brass Pipe: Key Methods and When to Use Each
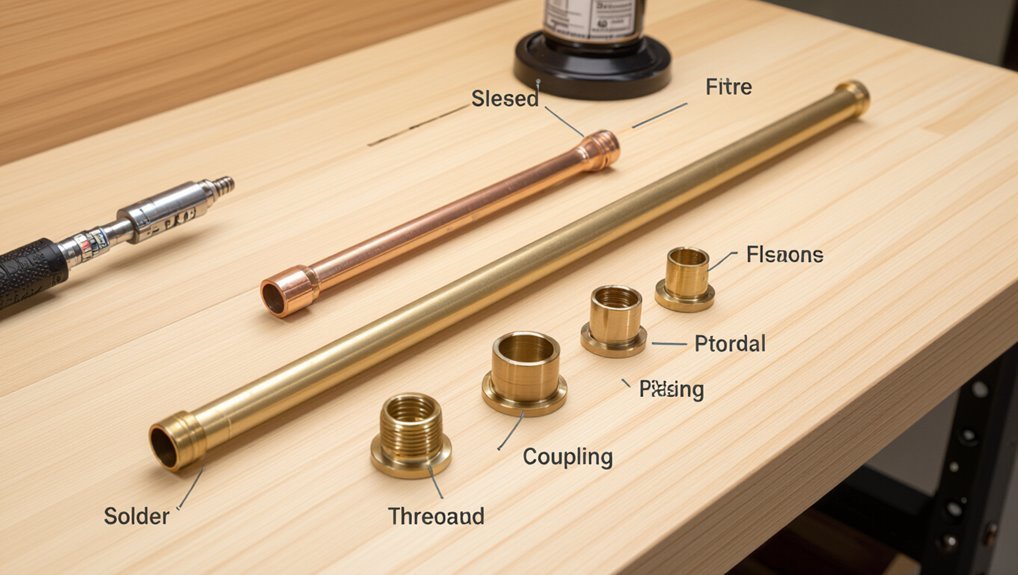
The section summarizes the pros and cons of soldering, threading, and compression or push-fit fittings to help choose the appropriate attachment method.
It also outlines typical uses of brass pipe in plumbing and HVAC systems, such as water supply, refrigeration lines, and gas service.
Finally, it highlights essential safety practices and code checks to verify compatibility and compliance before beginning work.
Quick comparison of soldering, threading, and fittings
Several common methods—soldering, threading, and mechanical fittings—cover most needs for joining brass pipe, each offering distinct strengths in strength, speed, and serviceability. A concise comparison aids selection when learning how to attach brass pipe.
| Method | Best for |
|---|---|
| Soldering | Permanent, leak-proof joints |
| Threading | Durable, pressure-rated connections |
| Fittings | Fast, repairable, no heat required |
Common applications for brass pipe in plumbing and HVAC
In many residential and light-commercial systems, brass pipe is chosen for hot and cold potable water lines, refrigeration and air-conditioning service connections, and small-diameter fuel and lubricant runs because of its corrosion resistance, machinability, and thermal stability.
It is also used for instrument lines, condensate drains, and exposed fittings where appearance and durability matter, and for repair work where threading or soldering access is limited.
Safety and code considerations to check before you start
Because brass pipe is selected for both visible and concealed systems, planning must begin with safety and applicable codes before any attachment method is chosen.
Inspect local plumbing and building codes for approved pipe types, pressure ratings, and soldering restrictions.
Verify joint materials compatibility, ventilation for flux/solder fumes, fire protection when soldering, and permit or inspection requirements to guarantee compliant, safe installation.
Tools and Materials Needed for Brass Pipe Work
This section lists the specific tools and materials required for common brass pipe techniques, including soldering, threading, and using fittings.
It covers hand and power tools, fitting types and components, and the recommended fluxes, solders, and sealants.
Readers will learn which items are essential for safe, reliable joints and how each is used.
Essential tools for soldering brass pipe
A compact set of reliable tools and quality materials is fundamental to soldering brass pipe safely and effectively. Necessary items include a propane or MAPP torch, solder wire (appropriate lead-free alloy), flux, wire brush or emery cloth, heat-resistant gloves, safety glasses, adjustable wrench or pipe vise, soldering paste brush, and clean rags.
A temperature indicator or heat sink improves joint control and consistency.
Essential tools for threading brass pipe
Several specialized tools and a few consumables are necessary to thread brass pipe safely and accurately.
Required items include a ratcheting pipe threader or manual die head sized for the pipe, matching dies, a sturdy pipe vise, reamer or deburring tool, cutting oil formulated for brass, and calibrated thread gauge.
Gloves, eye protection, and a cleaning brush complete the essential set.
Essential tools and components for using fittings (compression, push-fit, flare)
Gathering the right fittings and hand tools guarantees reliable connections when working with compression, push-fit, and flare fittings on brass pipe.
Essential items include brass compression nuts, olives, push-fit connectors, flare nuts and cones, tube cutters, flaring tools, adjustable and basin wrenches, deburring tools, small files, and a torque-limited wrench or calibrator.
Spare seals and O-rings complete the kit.
Recommended materials, fluxes, solders, and sealants
Successful brass pipe work depends on selecting compatible materials and compatible fluxes, solders, and sealants that match the alloy, joint type, and service conditions.
Use rosin-based flux for potable lines, acid flux for non-potable, and silver or lead-free bronze solder with appropriate melting points.
Thread sealants include PTFE tape or paste rated for brass and service temperature.
Match compatibility and certification.
Preparing Brass Pipe and Work Area
Before assembly, the pipe should be measured and marked precisely, then cut to length using an appropriate saw or cutter.
After cutting, ends must be deburred, reamed, and cleaned while fittings and threads are prepared and inspected for proper fit.
The workspace should be organized with adequate lighting, ventilation, and personal protective equipment to guarantee safety and efficiency.
Measuring, marking, and cutting brass pipe accurately
Measure twice and mark once: precise layout is essential when preparing brass pipe for cutting.
The technician measures with a tape, accounts for fittings and allowances, and marks cut lines with a fine-tip marker or scribe. A square guarantees perpendicular marks.
Clamping the pipe in a vise or guide prevents movement. A tubing cutter or saw follows the mark, making steady, controlled cuts.
Deburring, reaming, and cleaning pipe ends
Remove burrs and smooth the bore immediately after cutting to guarantee reliable joints and prevent debris from entering the system.
Use a deburring tool or file to remove sharp edges, then ream inside edges to eliminate ridges.
Wipe ends with a clean, lint-free cloth and solvent to remove oil, shavings, and particulates.
Inspect visually and by touch before assembly.
Preparing fittings and threads for assembly
Prepare fittings and threads by inspecting for damage, cleaning surfaces, and selecting appropriate sealing methods to guarantee leak-free joints.
Remove burrs, corrosion, and old sealant. File or chase damaged threads with a die or tap.
Choose compatible thread sealant—PTFE tape or pipe dope—and apply correctly: wrap tape clockwise, or brush on dope evenly.
Verify fit before final assembly.
Workspace setup and safety gear
After inspecting fittings and confirming threads are clean and sealed, attention turns to arranging the work area and personal protection before handling brass pipe.
Guarantee adequate ventilation, stable workbench, heat-resistant surface, and clear access to tools.
Wear safety glasses, heat-resistant gloves, long sleeves, and a respirator when soldering.
Keep a fire extinguisher and first-aid kit nearby and remove flammable materials.
How to Solder Brass Pipe: Step-by-Step
The section outlines selecting appropriate solder and flux for brass, proper application of flux, and correctly fitting the pipe to its mating component.
It then covers heating technique to achieve good solder flow, followed by cooling, cleaning, and inspection of the joint.
Finally, common soldering mistakes are identified with practical steps to avoid them.
Choosing the correct solder and flux for brass
When selecting solder and flux for brass pipe, one must match the materials and joint type to guarantee strong, corrosion-resistant bonds; typically a 60/40 tin-lead or a lead-free tin-silver-copper alloy is used for general plumbing, while a silver-bearing solder is preferred for higher-strength or potable-water applications.
Choose flux rated for brass and potable use, avoiding acid fluxes; rosin or water-soluble fluxes are common.
Applying flux and fitting pipe and mating component
Prepare the joint by thoroughly cleaning both the pipe and mating fitting with emery cloth or a wire brush until bright metal is visible.
Then remove debris with a clean rag or solvent.
Apply a thin, even coat of appropriate flux to both surfaces, avoiding excess.
Assemble the parts fully, ensuring proper alignment and correct insertion depth, and secure with supports or clamps to prevent movement before heating.
Heating technique and achieving proper solder flow
Begin by evenly heating the joint so solder flows by capillary action rather than by melting directly from the torch tip.
Heat the pipe and fitting equally, moving the flame to distribute warmth.
Touch solder to the heated joint (not the flame); it should liquefy and be drawn into the seam.
Maintain steady heat until a continuous fillet forms around the circumference.
Cooling, cleaning, and inspecting solder joints
Allow the joint to cool naturally to room temperature without disturbance so the solder solidifies uniformly and avoids cracks or weakened seams.
Once cool, remove flux residue with a damp cloth or appropriate cleaner to prevent corrosion.
Visually inspect for continuous, shiny fillets and complete capillary action around the joint.
Test for leaks under low pressure before returning to service.
Common soldering mistakes and how to avoid them
Common mistakes during soldering—insufficient heat, dirty surfaces, wrong flux, excess or too little solder, and moving the joint before the solder cools—are the usual causes of weak or leaky connections.
To avoid them, clean and flux thoroughly, apply heat evenly until solder flows by capillary action, use correct solder type and amount, secure the joint until cooled, and test for leaks before commissioning.
How to Thread Brass Pipe: Step-by-Step
Proper threading of brass pipe begins with choosing the correct die and matching pipe diameter to guarantee compatible threads.
The process then moves through clean, safe cutting of threads, proper application of sealant or tape, and careful tightening to specified torque to avoid damage.
Guidance for identifying and repairing stripped or imperfect threads completes the procedure.
Selecting the right threading die and pipe size
Which threading die matches a given brass pipe depends on the pipe’s nominal size and thread standard.
The writer compares NPT, BSP, and metric systems, noting nominal pipe size versus actual OD.
They recommend checking manufacturer charts, matching die type to thread pitch and taper, and selecting dies sized for the pipe wall thickness.
Proper selection prevents leaks and guarantees compatible fittings.
Cutting threads on brass pipe safely and cleanly
Begin by securing the brass pipe in a vice with soft jaws to prevent marring. Then mark the length of thread required and apply cutting oil to the area; these preparatory steps guarantee accurate, smooth cuts and reduce galling.
Use the correctly sized die, align it squarely, and advance with steady pressure. Back off periodically to clear chips, reapply oil, and inspect threads for uniformity.
Applying thread sealant or tape correctly
After threads are cleaned and inspected, attention turns to sealing: choose between PTFE tape and pipe joint compound based on application, temperature, and fluid type, with tape favored for general plumbing and compound preferred for high-pressure or gas lines.
Apply tape clockwise three to five wraps without overhang; for compound, coat male threads evenly avoiding end-face transfer. Remove excess before assembly.
Making threaded connections and torque guidance
Thread the prepared brass fittings together by hand until resistance is felt, then complete the joint with the appropriate wrench while monitoring alignment to prevent cross-threading.
Use progressive, measured turns—typically a quarter to half turn past hand-tight depending on fitting size. Apply recommended torque values from manufacturer charts when available.
Avoid over-tightening to prevent deformation; recheck alignment and leak-test after assembly.
Troubleshooting stripped or imperfect threads
When threads are damaged or imperfect, identify the extent of the defect before attempting repairs.
Inspect for cross-threading, burrs, or stripped peaks. Small burrs can be removed with a file or die; re-cut shallow threads with an appropriate die.
Severely damaged threads require replacement of the fitting or use of an insert (e.g., Helicoil) sized for brass.
Test fit and pressure-check after repair.
How to Use Fittings to Join Brass Pipe (Compression, Push-Fit, Flare)
The section outlines three common fitting methods for brass pipe—compression, push-fit, and flare—highlighting key installation steps and sealing considerations for each.
It summarizes when push-fit connectors are appropriate and provides a concise checklist for their use.
It describes the flaring technique and correct assembly for flare fittings, and covers compression nut and ferrule installation tips.
Finally, it compares the fittings’ reliability, reusability, and resistance to leaks to help determine the best choice for a given application.
Compression fittings: installation steps and sealing tips
Compression fittings provide a straightforward, solder-free method for joining brass pipe by compressing a ring (ferrule) against the pipe and fitting body to form a watertight seal.
Installation: cut square, deburr, slide nut and ferrule, insert pipe fully, tighten nut hand-tight then one to one-and-a-quarter turns with wrench.
Check for leaks; tighten slightly if needed. Replace damaged ferrules.
Push-fit connectors: when to use and installation checklist
Choose push-fit connectors for quick, tool-free joins where speed, accessibility, and future serviceability matter.
Use on clean, deburred brass or compatible pipe; verify proper pipe type and size.
Cut square, remove burrs, mark insertion depth, push fully until seated.
Test by tugging and pressure-checking.
Avoid near high-heat sources and confirm compatibility with fluid, temperature, and code requirements.
Flare fittings: flaring technique and proper assembly
Begin by forming a clean, square-cut end on the brass pipe, then flare it outward evenly with the correct-sized flaring tool so the pipe lip mates flush with the fitting cone.
Inspect the flare for cracks or unevenness.
Insert the tubing into the flare fitting, tighten the flare nut hand-tight, then wrench to specified torque.
Test for leaks under pressure and retighten if necessary.
Comparing reliability, reusability, and leak resistance of fitting types
Evaluate three common brass pipe joining methods—compression, push-fit, and flare—by their reliability, reusability, and resistance to leaks under typical service conditions. Compression is reliable but may fatigue; push-fit excels for quick, reusable installs; flare offers durable, vibration-resistant seals when properly made.
| Method | Reusability | Leak Resistance |
|---|---|---|
| Compression | Moderate | Good |
| Push-fit | High | Good |
| Flare | Low/Moderate | Excellent |
Testing and Verifying Joints
The section outlines standard pressure testing procedures for both water and gas lines, including safe test pressures and hold times.
It also provides a concise visual and tactile inspection checklist to confirm proper seating of fittings and absence of corrosion or deformation.
Methods for locating and repairing small leaks—such as soap-solution testing, pressure-drop monitoring, and targeted tightening or resealing—are introduced.
Pressure testing procedures for water and gas lines
Technicians conduct pressure testing on brass water and gas lines to confirm joint integrity and detect leaks before systems are placed into service.
They isolate the section, apply specified test medium and pressure (hydrostatic for water, inert gas or air per code for gas), monitor gauges for required duration, inspect for pressure loss, document results, and repair or re-test any failing joints until readings remain stable and within allowable limits.
Visual and tactile inspection checklist
A concise visual and tactile inspection checklist guarantees each brass joint is examined methodically for defects, proper assembly, and readiness for pressure testing.
Inspect solder fillets for continuity and smoothness; verify threads are fully engaged and sealed; confirm fittings are aligned and supported; check for machining burrs, cracks, or voids; feel for cold joints or loose connections; make certain flux and debris are removed before testing.
How to locate and fix small leaks
Begin testing by pressurizing the system incrementally and observing each joint under live conditions to reveal leaks that are invisible when unpressurized.
Use soapy water or electronic leak detector to pinpoint bubbles or signals.
Mark faults, depressurize, dry area, then tighten fittings, re-solder, or replace seals/threads as needed.
Repressurize and recheck until no leak indicators remain.
Common Problems and Repairs for Brass Pipe Joints
Common failures of brass pipe joints include leaks at soldered connections, stripped or damaged threads on fittings, and failed compression or push-fit assemblies.
Typical repairs range from reheating and re-soldering joints, chasing or replacing threaded sections, to reseating or swapping out compression and push-fit fittings.
Decisions to repair versus replace depend on extent of corrosion, metal loss, and accessibility, with heavily corroded or repeatedly failing runs warranting replacement.
Causes and fixes for leaks at soldered joints
Leaks at soldered brass joints typically result from poor joint preparation, incorrect soldering technique, or incompatible materials; identifying the root cause quickly directs the appropriate repair.
Common causes include dirty or oxidized surfaces, insufficient flux, cold joints from inadequate heat, and wrong solder type.
Fixes: clean and file mating surfaces, apply proper flux, reheat evenly and add correct solder, then pressure-test for leaks.
Repairing damaged threads and replacing threaded sections
Repairing damaged threads and replacing threaded sections requires careful assessment of the damage, the pipe’s material, and the joint’s pressure rating to choose an appropriate method.
Minor thread damage can be chased with a die or cleaned with a thread file; severely scored or corroded ends warrant cutting back and installing a replacement nipple or coupling.
Use compatible fittings, apply thread sealant appropriately, and pressure-test.
Replacing or reseating failed compression or push-fit fittings
When compression or push-fit fittings fail, the affected joint must be evaluated for cause, component wear, and tubing condition before any reseating or replacement is attempted.
After diagnosis, remove the fitting, inspect ferrule, olive, and tube for nicks or corrosion; replace damaged parts.
Clean and deburr tubing, guarantee proper insertion depth, tighten to manufacturer torque for compression fittings, or fully seat push-fit connectors per instructions.
When to replace vs. repair brass pipe
After evaluating and addressing failed compression or push-fit fittings, a determination must be made whether a brass pipe joint merits repair or full replacement.
Consider corrosion extent, hairline cracks, threads stripped, and wall thinning.
Repair is suitable for minor leaks, isolated damaged fittings, or removable sections.
Replace when corrosion, systemic deterioration, or multiple compromised joints exist, ensuring long-term reliability and code compliance.
Maintenance and Long-Term Care for Brass Pipe Systems
A clear preventive maintenance schedule—including periodic inspections, cleaning, and seal checks—helps extend the life of brass pipe systems.
Early signs of corrosion such as greenish discoloration, pitting, or leaking joints should be monitored and addressed with cleaning, replacement of affected fittings, or application of corrosion inhibitors.
Keep a small stock of essential tools (adjustable wrench, tubing cutter, emery cloth) and spare parts (compression rings, ferrules, gaskets) for prompt repairs.
Preventive maintenance schedule and tips
Routine inspections form the backbone of preventive maintenance for brass pipe systems, ensuring early detection of corrosion, wear, and joint leaks before they escalate.
Establish quarterly visual checks, annual pressure testing, and lubrication of movable fittings. Document findings, replace worn seals proactively, verify support brackets, and flush lines annually to remove deposits.
Train staff on recognition and safe shutoff procedures.
Corrosion signs and mitigation strategies
Many brass pipe systems exhibit predictable corrosion indicators—greenish or bluish-green patina, pitting, white powdery deposits, galvanic staining at dissimilar-metal joints, and increased leak frequency—that signal different underlying mechanisms and urgency levels.
Regular inspection, cleaning with mild acids or chelators, dielectric isolation of dissimilar metals, protective coatings, water chemistry control, and timely replacement of compromised sections reduce progression and preserve joint integrity.
Recommendations for tools and spare parts to keep on hand
Several essential tools and a limited stock of spare parts should be kept on hand to respond quickly to leaks, corrosion, and routine maintenance without unnecessary downtime.
Recommended items include a propane torch, solder, flux, tubing cutter, deburring tool, pipe wrenches, adjustable wrench, thread sealant, spare compression and flare fittings, O-rings, isolation valves, and replacement brass nipples sized to common installations.
Cost, Time, and Skill Comparison of Attachment Methods
A concise comparison of soldering, threading, and compression fittings highlights differences in cost, time, and required skill.
Typical soldering involves low material cost but higher time and a moderate learning curve for reliable joints; threading requires more tools and time with intermediate skill.
Push-fit or compression fittings cost more per joint but save significant installation time and require minimal training.
This overview frames choices based on budget, schedule, and the installer’s experience.
Typical cost range and time estimate for soldering, threading, and fittings
When comparing soldering, threading, and mechanical fittings for brass pipe attachment, cost, time, and required skill vary greatly: soldering typically has low material cost but demands moderate skill and setup time for flux, torch, and prep; threading requires investment in tools (pipe threader or dies) and a moderate time commitment per joint with greater technique; push-fit and compression fittings carry higher per-piece costs but minimize labor and skill, producing the fastest installations.
| Method | Typical cost/time |
|---|---|
| Soldering | $5–15/joint, 15–30 min |
| Threading | $10–30/joint, 20–40 min |
| Push-fit/Compression | $8–40/part, 5–15 min |
Skill level required and learning curve for each method
Different attachment methods demand distinct skill levels and learning curves that influence project outcomes and labor time.
Soldering requires moderate skill: mastering heat control and flux takes practice but is quick once learned.
Threading demands precision and tool familiarity, with a steeper initial curve.
Push-fit and compression fittings are easiest, suited to beginners, offering fastest proficiency and minimal specialized training.
Step-by-Step Project Examples
The article presents three concise project examples to illustrate common brass pipe tasks.
First is installing a new branch line using soldered joints, with a clear step list from measuring to fluxing and soldering.
Then are procedures for replacing a section with threaded connections and for converting a joint to a push-fit coupling, each outlined as step-by-step actions.
Installing a new brass branch line with soldered joints (step list)
Begin by laying out the work area and gathering tools and materials: measured lengths of brass tubing, appropriate fittings, flux, lead-free solder, a propane torch, a tubing cutter, emery cloth or sandpaper, and safety gear.
Clean, deburr, and flux tube ends; assemble fittings; heat joints evenly and apply solder; cool, inspect, and pressure-test.
- Cut and dry-fit components
- Clean mating surfaces
- Apply flux sparingly
- Solder uniformly and test
Replacing a section with threaded connections (step list)
Remove the damaged section and prepare for threaded replacements by gathering matching threaded brass fittings, pipe dope or PTFE tape rated for potable water, an adjustable wrench or two, a tubing cutter or hacksaw, emery cloth, and a pressure gauge or test kit.
Cut and deburr, clean threads, apply tape or dope, assemble and tighten, then pressure-test for leaks.
- Cut squarely and deburr
- Clean mating threads
- Seal with PTFE or dope
- Tighten to spec and test
Converting a joint to push-fit for a quick repair (step list)
Convert a threaded or soldered brass joint to a push-fit connection for a rapid, reliable repair by preparing the pipe, selecting the correct push-fit fitting, and following a clear sequence of cutting, deburring, and inserting.
The technician measures, isolates water, cuts squarely, deburrs, and marks insertion depth before pressing the fitting fully home to confirm a leak-free connection.
- Isolate water
- Cut square
- Deburr edge
- Insert to depth
Troubleshooting Checklist and Quick Tips
The troubleshooting checklist offers fast fixes for common leaks and poorly seated joints, with step-by-step remedies that can be applied on-site.
It also summarizes best practices for making durable, code-compliant connections and preventing future failures.
Guidance is provided on indicators that a job exceeds DIY scope and when to call a professional plumber.
Fast fixes for leaks and poor joints
When a brass pipe joint leaks or feels loose, a rapid, systematic check helps isolate the cause and guide the appropriate repair.
Inspect for visible damage, corrosion, or misalignment. Tighten fittings incrementally; drain and dry the area.
For threaded joints, apply proper tape or compound and retighten.
For soldered joints, reheat and add solder or replace the fitting if cracks persist.
Best practices to ensure durable, code-compliant connections
Follow a concise, code-focused checklist to verify brass pipe connections remain durable and compliant:
- verify pipe material and fitting types match code and application,
- confirm proper thread standards (NPT vs. BSP),
- guarantee correct flux and solder or compatible sealant,
- maintain specified thread engagement and torque,
- inspect for burrs or contamination,
- pressure-test per code, and
- document materials and test results for inspection.
When to call a professional plumber
How should a homeowner decide whether to call a professional plumber for a brass pipe issue?
A technician is advised when:
- Leaks persist after basic repairs
- Corrosion or pinhole damage appears
- Pipe movement or joint failure occurs
- Water discoloration or pressure loss exists
- Installations must meet code
- Gas lines are involved
Complex threading, inaccessible piping, or uncertainty about permits also warrant professional service.
Additional Resources and References
The article points readers to manufacturer installation guides and industry standards for authoritative specifications on brass pipe fittings and thread sealing.
It also recommends curated videos and tool tutorials for step‑by‑step demonstrations and safety practices.
For parts and replacement components, reputable suppliers and parts catalogs are suggested as reliable sources.
Recommended manufacturer guides and standards
Because proper attachment of brass pipe depends on material properties, pressure ratings, and joining methods, consulting manufacturer guides and industry standards is essential for safe, reliable work.
Refer to ASTM B43/B62, ASME B1.20.1 for thread form, manufacturer installation sheets for soldering/cresting clearances, and ISO/EN standards where applicable.
Follow published torque, temperature, and compatibility limits; document traceable sources.
Useful videos, tool tutorials, and parts suppliers
Practical instruction and vetted suppliers complement the standards and manufacturer guidance by demonstrating techniques, tool setup, and part selection in real-world contexts.
Concise video tutorials, tool manufacturer how-tos, and verified parts catalogs expedite safe, code-compliant brass pipe work. Recommended resources highlight soldering technique, threading best practices, safety gear, and authentic fittings to minimize leaks and rework.
- Manufacturer video series
- Tool setup tutorials
- Parts supplier catalogs
- Safety and code briefings
Conclusion
Like a craftsman smoothing the last seam of a mosaic, the guide closes by reminding readers that brass pipe joins are as much art as mechanics. Whether soldering’s molten kiss, the precise spiral of threading, or the snug embrace of fittings is chosen, each method shapes flow and function. With tools sharpened and patience steady, one can turn raw metal into a gleaming conduit—durable, elegant, and ready to carry the next project’s lifeblood.
