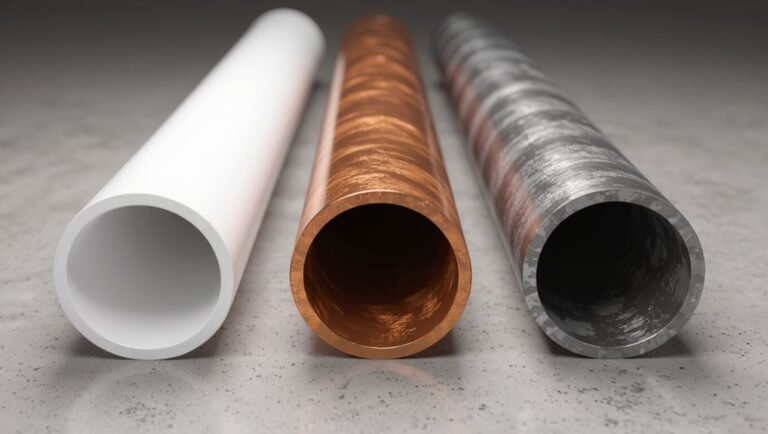
How to Repair CPVC Pipe Without Cutting: Step-by-Step Fixes That Work
To repair a leaking CPVC pipe without cutting, first shut off the water and relieve any pressure. For small leaks, apply a CPVC-compatible sealant or epoxy after drying and lightly sanding the affected area; ensure it fully cures before testing. For larger leaks, use a repair clamp or sleeve, tightening it gradually to prevent cracking. If the ends of the pipe are intact, you can also use push-fit or slip-on fittings to replace limited sections without cutting. Always follow safety guidelines and local codes for effective repairs.
What to do first when a CPVC pipe leak appears
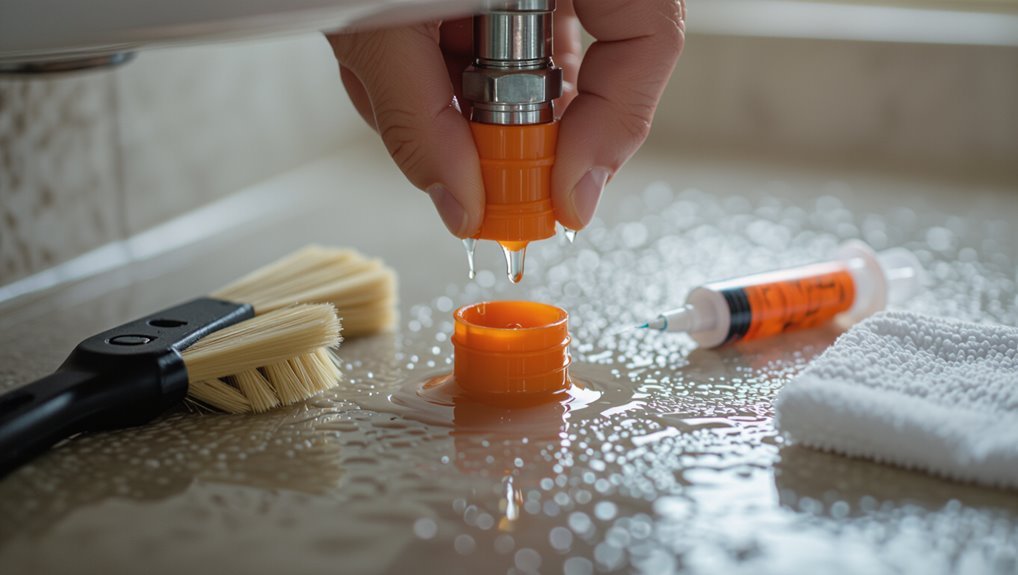
When a CPVC pipe leak appears, the first step is to shut off the main water supply and open nearby taps to relieve system pressure.
A quick visual check should locate the leak and gauge whether it is a slow drip or a significant rupture.
If the leak is large, uncontrollable, or near electrical fixtures, a professional should be contacted immediately.
How to safely shut off water and relieve pressure
Locate and close the nearest shutoff valve to stop flow immediately. Then open a downstream faucet to relieve remaining pressure before attempting any repairs.
In preparing to learn how to repair cpvc pipe without cutting, confirm main and fixture valves are fully closed. Drain affected runs, and wear eye protection.
Note the water meter or main shutoff if local valves fail.
Quick assessment: locating the leak and determining severity
A quick visual survey should begin at the visible wet area and follow the run in both directions to find active drips, hairline cracks, or softened fittings.
Next, dry the pipe and re-observe under low pressure to reveal slow leaks.
Note leak location, size, and nearby joints or supports.
Photograph and mark findings to guide repair choice without cutting.
When to call a professional immediately
Having completed the quick assessment and documented the leak, the homeowner should stop and evaluate whether immediate professional intervention is required.
Call a plumber immediately if water gushes, structural damage is evident, electrical risks exist, multiple leaks occur, or temporary fixes fail.
Shut off the main water supply, evacuate affected areas, and preserve safety while waiting for qualified service to prevent escalation and property loss.
Why cutting may not be necessary: pros and cons of non-cut repairs
Non-cut repair methods can preserve existing fittings, reduce downtime, and avoid the mess of cutting and rejoining pipe. They are best suited to surface cracks, small pinholes, and loose joints, though they may fail on severe cracks, collapsed sections, or chemical damage.
Each situation requires weighing the convenience and speed of non-cut options against their limited durability and potential for hidden damage.
Benefits of repairing without cutting
While cutting and replacing damaged CPVC can be effective, many situations make repairs without cutting preferable because they reduce disruption, preserve pipe integrity, and often require less time and skill.
Non-cut repairs minimize mess, avoid weakening joints, lower immediate cost, and enable quicker water restoration. They suit localized leaks, confined spaces, and temporary fixes pending full replacement decisions.
Limitations and risks of non-cut methods
Evaluating limitations and risks is essential before choosing a repair that avoids cutting CPVC.
Such methods can conceal underlying damage, offer only temporary relief, and sometimes create safety or code-compliance issues.
Non-cut fixes may fail under pressure, mask corrosion or hairline fractures, complicate future repairs, and void warranties or violate local plumbing codes.
Types of damage suitable for non-cut fixes
Identify the kinds of CPVC damage that can be addressed without cutting by focusing on localized, surface-level problems rather than structural failures.
Suitable issues include pinhole leaks, hairline cracks, small joint leaks, blistered or softened spots from heat exposure, and external abrasions.
Major cracks, crushed sections, or fittings with internal damage require cutting and replacement for reliable, code-compliant repairs.
Tools and materials needed for non-cut CPVC repairs
A concise inventory of tools and materials clarifies what is required to perform non-cut CPVC repairs safely and effectively.
The list includes personal protective equipment, compatible adhesives and sealants, and a range of mechanical repair options that eliminate the need for cutting.
It also notes optional diagnostic tools for locating leaks and evaluating pipe condition.
- Essential safety gear
- Adhesives, sealants, and tapes compatible with CPVC
- Mechanical repair clamps, sleeves, and push-fit options
- Optional diagnostic tools
Essential safety gear
Because working on CPVC systems involves exposure to heat, solvents, and pressurized water, wearing appropriate safety gear is essential to prevent burns, chemical irritation, and impact injuries.
Recommended PPE includes chemical-resistant gloves, safety goggles or a face shield, heat-resistant gloves for soldering or torch work, long sleeves, and sturdy closed-toe shoes.
A respirator should be used when ventilation is inadequate.
Adhesives, sealants, and tapes compatible with CPVC
Select adhesives, sealants, and tapes that are chemically compatible with chlorinated polyvinyl chloride and rated for pressurized potable or non-potable systems.
Use CPVC-specific solvent cements, contact primers where required, and silicone or NSF‑61 approved plumbing sealants for threads and small gaps.
Self-fusing silicone tape and PTFE tape rated for potable water suit temporary seals; verify manufacturer compatibility and cure times before application.
Mechanical repair clamps, sleeves, and push-fit options
Having reviewed compatible adhesives and tapes, focus now turns to mechanical repair options that require no cutting: clamps, split sleeves, and push-fit couplings designed for CPVC.
Stainless or coated steel clamps compress a rubber gasket over leaks; split sleeves cradle damaged sections and fasten with bolts; push-fit couplings create a gasket seal around clean pipe ends.
Choose CPVC-rated components sized to pipe OD for reliable sealing.
Optional diagnostic tools
A small set of diagnostic tools can speed identification of leaks and assess pipe condition before applying clamps, sleeves, or push-fit repairs: a digital moisture meter to detect hidden dampness, a compact inspection camera for visualizing joints and interior defects, pressure gauges to confirm system integrity, and an infrared thermometer to spot temperature differentials indicating fluid escape.
Additional useful items include tubing dye, ultrasonic leak detectors, and a flexible mirror.
Step-by-step method: temporary fixes for small pinhole leaks
Before applying any repair material, the surface around the pinhole must be cleaned, sanded lightly, and fully dried to guarantee adhesion.
Epoxy putty should be mixed per manufacturer instructions, molded over the hole with firm pressure, and allowed to cure for the specified time.
Alternatively, a bead of silicone or a CPVC-compatible sealant can be applied neatly over the dried area and smoothed to form a watertight seal.
Surface preparation and drying techniques
Prepare the pipe surface thoroughly and verify it is dry to maximize adhesion for temporary repairs of small pinhole leaks.
Remove loose debris, scale, and oxidation with fine-grit sandpaper or a utility brush.
Wipe with a clean, lint-free cloth and use isopropyl alcohol to degrease.
Allow ample air drying or use gentle heat from a hair dryer; confirm no residual moisture remains before applying a seal.
Applying epoxy putty: mixing, molding, and curing
With the surface clean and fully dry, epoxy putty can be mixed and shaped for a durable temporary seal over small pinhole leaks.
The two-part stick is kneaded until uniform color, then pressed firmly over the defect and smoothed to eliminate voids.
Allow specified cure time and avoid pressure until set.
Inspect for seepage and replace with permanent repair when feasible.
Using silicone or specialized CPVC-compatible sealant
Several small pinhole leaks can often be temporarily sealed using a high-quality silicone or a CPVC-compatible plumbing sealant applied directly to a dry, clean surface.
The technician wipes and dries the area, roughens slightly with fine sandpaper, applies sealant smoothly over the defect, and allows specified curing time.
After cure, pressure is tested; repeat application if seepage persists.
Step-by-step method: using repair clamps and sleeves
The guide next addresses using repair clamps and sleeves, beginning with selecting a device that matches the CPVC pipe diameter and the leak type.
It then covers correct placement and incremental tightening to compress the seal without cracking the pipe.
Finally, the procedure concludes with systematic pressure and leak testing to confirm a durable repair.
Choosing the right clamp or sleeve size
Before selecting a clamp or sleeve, measure the pipe’s outer diameter and the length of the damaged area to guarantee a snug fit and full coverage. Accurate measurements prevent leaks and stress points after installation.
Then choose a clamp or sleeve rated for CPVC, matching diameter and covering the defect with minimal overlap. Verify material compatibility, pressure rating, and gasket type before purchase.
Proper placement and tightening to avoid further damage
With the correct clamp or sleeve selected to match diameter and defect length, attention shifts to precise placement and tightening to prevent additional stress or cracking.
The clamp should center over the defect, seating evenly on clean, dry pipe.
Bolts are tightened incrementally and alternately to specified torque, avoiding overtightening.
Final alignment is checked to guarantee no pinching or bending of the CPVC.
Testing the repair for leaks and pressure
Begin by isolating the repaired section and gradually restoring system pressure while observing for leaks.
After initial pressurization, inspect clamp edges and sleeve seams for drips or moisture.
Monitor pressure gauge for stability over several minutes; note any drop.
If no leaks and pressure holds, fully restore flow.
If leakage or pressure loss occurs, depressurize, retighten or reseat the clamp/sleeve, then retest.
Step-by-step method: push-fit and slip-on fittings without cutting
The section outlines when push-fit fittings are appropriate for CPVC repairs, emphasizing compatibility with intact pipe ends and limited damage.
It then describes preparing the pipe surface for slip-on solutions, including cleaning, deburring, and applying primer where recommended.
Finally, it summarizes correct installation and securing of push-fit connectors to guarantee a watertight seal and proper seating.
When push-fit fittings work on CPVC
When a CPVC run has intact pipe ends and only a short damaged section, push-fit and slip-on fittings can restore service without cutting or solvent welding. These fittings rely on a combination of a rubber O-ring seal and mechanical grip to form an immediate, watertight joint suitable for many domestic hot- and cold-water applications.
They work when pipe diameter matches, wall integrity is sound, lengths reach inside stops, and accessible alignment allows full engagement.
Preparing the pipe surface for slip-on solutions
After confirming that push-fit or slip-on fittings are viable for the undamaged CPVC run, attention turns to preparing the pipe surface to secure a reliable seal and grip.
Clean area with a cloth and mild solvent to remove grease, dirt, and oxidation.
Lightly abrade with fine sandpaper for better adhesion, then wipe residue.
Mark insertion depth and guarantee the pipe is dry before proceeding.
Installing and securing push-fit connectors
Begin by aligning the push-fit connector to the prepared CPVC run, ensuring the marked insertion depth on the pipe matches the connector’s stop.
Push firmly until it seats; a tactile click often confirms engagement. Rotate slightly to verify grip.
Secure with a stainless steel clamp or cable tie for vibration-prone locations.
Test under low pressure, then full system pressure, checking for leaks and re-seating if necessary.
Permanent versus temporary: how to decide next steps
A practical assessment of repair longevity helps determine whether a non-invasive fix will suffice or a permanent replacement is warranted. Observable signs—recurring leaks, spreading damage, or pressure loss—indicate a temporary repair should be upgraded to a lasting solution.
Decisions should also weigh available budget and time, balancing immediate needs against long-term costs and downtime.
How to evaluate repair longevity
Longevity is determined by evaluating the damage, the repair method used, and the planned service life of the system.
Assess crack size, material degradation, pressure/stress exposure, and environmental factors.
Match those findings to repair type—adhesive, clamping, or reinforcement—and estimate expected lifespan.
Factor in expected use, maintenance ability, and safety margins to choose permanent replacement or monitored temporary repair.
Signs that a temporary repair should be replaced with a permanent fix
Recognize when a temporary CPVC repair has outlived its usefulness by watching for persistent or worsening symptoms: recurring leaks, visible crack propagation, softening or discoloration of the pipe or patch materials, pressure drops, and repeated reliance on emergency clamps or adhesives.
If any appear, pursue a permanent repair promptly. Ongoing temporary fixes indicate structural failure risk, escalating damage, and reduced system reliability.
Budget and time considerations
Cost-consciousness often dictates whether a CPVC repair remains temporary or becomes permanent: owners must weigh the immediate expense and disruption of a full replacement against the lower short-term cost and quicker turnaround of a provisional fix.
Decision factors include leak severity, accessibility, expected lifespan of the temporary patch, labor costs, and long-term risk of failure.
Prioritize permanent replacement when cumulative costs or failure risk exceed temporary savings.
Common mistakes to avoid when repairing CPVC without cutting
When repairing CPVC without cutting, common missteps can undermine a repair’s effectiveness and lead to leaks or failures.
Attention to adhesive and tape compatibility, thorough surface preparation and drying, and correct clamp tension and placement are essential to avoid recurring problems. Noting these pitfalls early helps determine whether a temporary fix will hold or a permanent repair is required.
- Using incompatible adhesives or tapes
- Insufficient surface prep or drying
- Over-tightening clamps
- Improper clamp placement
Using incompatible adhesives or tapes
Why choose the wrong adhesive for CPVC when compatibility is critical?
Selecting adhesives or tapes not formulated for CPVC risks solvent damage, weak bonds, leaks, and code violations.
Only use CPVC-rated cements, primers, or approved repair tapes per manufacturer instructions.
Verify chemical compatibility and temperature ratings; incompatible products often fail prematurely, wasting time and creating larger repairs.
Insufficient surface prep or drying
Prepare the pipe surface thoroughly and allow it to dry completely before applying any repair product; failing to remove dirt, grease, oxidation, or residual moisture undermines adhesion and shortens the repair’s life.
Neglecting sanding, cleaning with appropriate solvent, or adequate curing time causes bonds to fail, leaking to recur, and temporary fixes to degrade rapidly.
Proper prep guarantees durable adhesion and reliable sealing.
Over-tightening clamps or improper placement
Clamps that are too tight or positioned incorrectly can cause as much harm as the original leak: excessive compression can crack CPVC, distort the pipe profile, or cut through sealant, while misaligned clamps fail to compress the gasket evenly and leave gaps for continued seepage.
Proper torque, centered placement over the repair, and using pads or rubber sleeves prevent crushing, uneven pressure, and renewed leaks.
Safety precautions and code considerations
The writer notes that using CPVC adhesives and primers requires attention to fire risk, ventilation, and proper handling of chemicals to protect occupants and the installer.
They also point out that local plumbing codes may restrict non-cut repair methods or specify approved products and techniques.
Finally, the article will outline when permits or inspections are necessary to keep repairs compliant and safe.
Fire, ventilation, and chemical safety when using adhesives
When working with solvent cements and primers on CPVC, users must recognize the fire and inhalation hazards these products pose and take measures to control ignition sources and airborne vapors.
This includes using low-flame or non-sparking tools, keeping work areas free of open flames and hot surfaces, and ensuring adequate ventilation or local exhaust to maintain solvent concentrations well below occupational exposure limits.
Practitioners should wear appropriate respirators, gloves, and eye protection, store flammables properly, and follow manufacturer safety data sheets for spill response and disposal.
Local plumbing codes affecting non-cut repairs
Because local plumbing codes vary widely and govern what constitutes an acceptable non-cut repair, practitioners must verify municipal and state requirements before attempting solvent-free patches or mechanical couplings on CPVC.
Codes may restrict repair materials, approved fittings, pressure ratings, and application locations (e.g., concealed spaces).
Compliance avoids failed inspections, liability, and insurance issues; document approvals and follow manufacturer and code-listed installation practices.
When permits or inspections may be required
Who must be notified and when depends on jurisdictional rules and the scope of the repair.
Permits or inspections may be required for modifications affecting water supply, concealed work, or pressure-rated systems.
Minor surface repairs often need none, but landlords, HOAs, or local authorities may demand documentation.
Always verify local code, obtain necessary permits, and schedule inspections to guarantee compliance and avoid fines or rework.
Troubleshooting failed non-cut repairs
When a non-cut CPVC repair fails, the technician should first diagnose the cause by inspecting adhesive bonds, surface preparation, and pressure conditions.
If the issue is correctable, steps to reinforce or redo the repair—such as re-cleaning, re-priming, using the proper solvent cement, or adding a mechanical clamp—should be performed methodically.
If repeated attempts fail or the pipe is compromised, cutting out the damaged section and replacing it is the only reliable solution.
Diagnosing why a repair failed
Begin by systematically evaluating the repair site and surrounding conditions to identify why the non-cut CPVC fix did not hold.
Inspect for residual moisture, improper adhesive choice, inadequate surface preparation, chemical contamination, excessive pressure, thermal stress, or mechanical movement.
Note joint alignment, cure time adherence, and presence of pinholes or hairline cracks.
Document findings objectively to guide corrective decisions.
Steps to reinforce or redo the repair
Assess the failed non-cut CPVC repair methodically, starting with a clear plan to either reinforce the existing patch or remove and redo it; prioritize securing the water supply, drying the area, and verifying that conditions (pressure, temperature, and cleanliness) are suitable for a remedial procedure.
Inspect adhesive bonds, clean and abrade surfaces, apply compatible primer and cement, clamp or sleeve the joint, cure per manufacturer directions, and pressure-test cautiously.
When cutting and replacing is unavoidable
Cutting out and replacing a failed CPVC repair becomes necessary when leaks persist despite proper surface preparation, compatible adhesives, and adequate cure time; at that point the focus shifts from patching to restoring a reliable joint by removing the compromised section, installing a correct replacement, and reestablishing system integrity through proper alignment, solvent-welding technique, and pressure testing.
The technician measures, cuts squarely, deburrs, dry-fits, solvent-welds, cures, and pressure-tests.
Preventive maintenance to avoid future CPVC leaks
Preventive maintenance reduces the likelihood of future CPVC leaks by addressing wear, pressure anomalies, and environmental stresses before they cause failure.
Routine inspections should include pressure checks, assessment of temperature and chemical exposures, and evaluation of pipe age against recommended replacement intervals.
Implementing targeted upgrades and scheduled replacements can extend system life and minimize emergency repairs.
- Perform scheduled visual inspections and periodic pressure testing
- Monitor and control operating temperature and chemical contact
- Track service life and follow manufacturer replacement recommendations
- Upgrade fittings or pipe sections showing chronic stress or degradation
Regular inspections and pressure checks
Regular inspections and periodic pressure checks help detect early signs of CPVC degradation—such as hairline cracks, joint looseness, or softening—before they escalate into leaks.
Technicians visually examine fittings, run handheld pressure gauges, and note pressure drops during idle periods. Records track baseline readings and trends, prompting targeted repairs or reinforcement.
Routine checks reduce emergency failures and extend service life through timely, minimal interventions.
Temperature and chemical exposure management
After inspections and pressure checks identify vulnerable areas, attention turns to controlling temperature and chemical exposures that accelerate CPVC deterioration.
Install insulation and heat shields to limit thermal cycling, maintain water temperatures within manufacturer limits, and eliminate contact with solvents, oils, or corrosive cleaners.
Implement labeled routing to avoid hot surfaces and chemical storage, and document exposure risks for timely maintenance and targeted remediation.
Recommended replacement intervals and upgrades
When CPVC systems show age-related wear, implementing scheduled replacement intervals and targeted upgrades reduces the risk of unexpected leaks and system failures.
Recommended timelines should be based on manufacturer guidance, observed material condition, water chemistry, and service temperature.
Regular inspections identify brittle, discolored, or softened sections.
Replace stressed runs proactively, upgrade to higher-temperature or corrosion-resistant CPVC where conditions demand, and document intervals for future maintenance.
Quick comparison of repair options for CPVC
Although some fixes require cutting and replacement, several no-cut CPVC repair methods are available and vary substantially in cost, durability, skill required, and suitability for different leak types. A concise comparison helps choose between temporary patches, epoxy, repair clamps, heat-shrink sleeves, and silicone wraps based on severity, access, and longevity.
| Method | Skill | Durability |
|---|---|---|
| Tape/Wrap | Low | Short |
| Epoxy | Medium | Medium |
| Clamp | Low | Medium |
| Heat-shrink | Medium | Medium |
| Silicone | Low | Short |
Conclusion
When a CPVC leak appears, a homeowner must weigh fixes that preserve the pipe against full replacement. Non-cut repairs—epoxy putty, clamps, or sleeves—offer quick relief, like a bandage on a bruise, but they carry limits: temporary lifespan, pressure constraints, and code issues. Proper prep, correct materials, and safety guarantee success; persistent leaks, high pressure, or code requirements, however, still demand cutting and professional replacement for lasting safety and compliance.