How to Heat a Bathroom: Fast, Safe Methods for Warm Floors and Cozy Showers
To heat your bathroom quickly and safely, consider using instant electric options like portable fan or ceramic heaters, and low-glare infrared panels for immediate warmth. For added comfort, plug-in heated towel rails ensure cozy linens. For longer-term solutions, electric underfloor mats offer even heat and are easy to install, while hydronic loops are ideal for larger renovations. Always prioritize safety with GFCI protection, IP-rated fixtures, and energy-saving timers or thermostats. Proper maintenance and sizing will help prevent issues. Continue reading for practical choices, costs, and step-by-step guidance.
Quick overview fastest ways to heat a bathroom right now
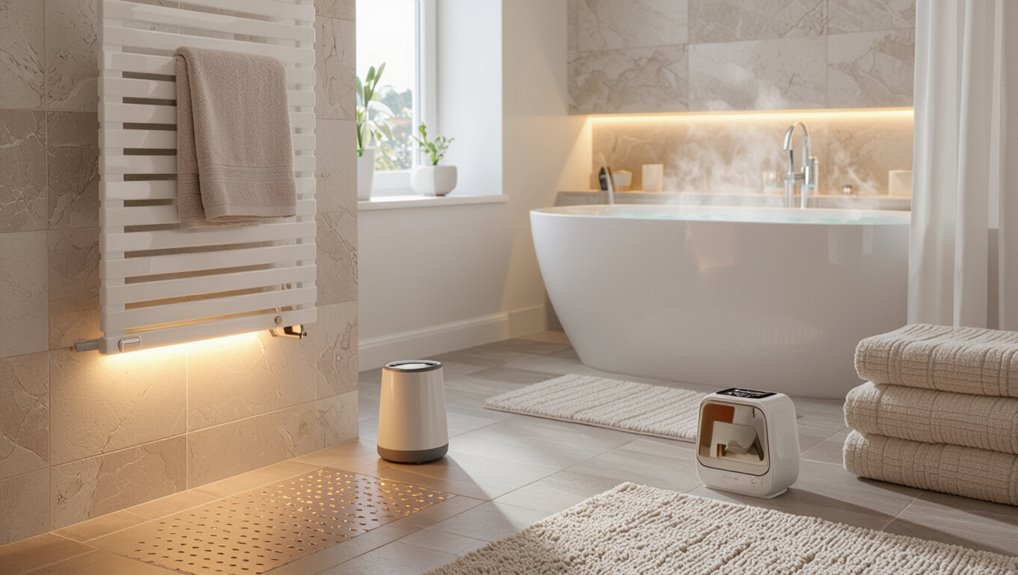
The section outlines instant options for immediate warmth, such as portable electric heaters and heated towels.
It also notes fast-install solutions that require minimal tools like plug-in wall heaters or adhesive radiant mats.
Additionally, it summarizes a brief safety checklist to follow before using any rapid heating method, including circuit capacity, proper ventilation, and distance from water.
The goal is to present practical, quick-to-implement choices and their essential precautions.
Instant options for immediate warmth
Reach for portable, rapid-heat solutions when immediate warmth is needed: space heaters, infrared panels, and heated towel racks deliver near-instant comfort with minimal setup.
For how to heat a bathroom quickly, choose a fan-forced ceramic unit for speed, a low-glare infrared panel for dry warmth, or a plug-in towel rack to warm linens.
Monitor ventilation and electrical load for safety.
Fast-install solutions that require minimal tools
Portable heaters and quick plug-in towel racks meet immediate needs, but sometimes a more permanent-feeling solution is desired without a full remodel.
Panel heaters, wall-mounted infrared units, and plug-in underfloor mats install fast with basic tools and minimal wiring.
Heated towel rails with simple hardwire or plug options add warmth and drying.
These approaches boost comfort quickly while preserving flexibility for future upgrades.
Safety checklist before using any fast heating method
Before using any fast heating method, users should run a quick safety checklist to prevent fire, shock, and moisture-related hazards.
Inspect wiring, cords, and plugs for damage. Confirm GFCI protection on bathroom circuits. Maintain clearances from combustibles and water sources.
Use only bathroom-rated, IP-rated fixtures. Follow manufacturer load and ventilation guidelines.
Never leave portable heaters unattended.
How to choose the right heating method for your bathroom size and layout
Choosing the appropriate bathroom heating begins with calculating the heat load and the temperature required for comfort.
Solutions should then be matched to room size—compact heaters or heated towel rails for small spaces, wall or ceiling units for medium rooms, and more powerful radiant or forced-air systems for large bathrooms.
Ventilation, insulation quality, and ceiling height must also be considered to guarantee efficient, even warmth and prevent moisture-related issues.
Determining heat load and desired temperature
How warm should a bathroom feel, and what size heater will reliably provide that comfort?
The writer recommends defining target temperatures (typically 21–24°C for living spaces, 24–30°C for brief use such as showers), calculating heat loss from walls, windows, ceilings, and ventilation, then adding a safety margin.
Use room volume and insulation factors to compute required watts, adjusted for humidity and usage patterns.
Match solutions to bathroom size: small, medium, large
When sizing a bathroom heating system, room footprint and layout determine which methods are practical and effective: compact bathrooms favor localized solutions (towel warmers, wall-mounted infrared panels, or small electric convectors).
Medium-sized rooms benefit from combinations (underfloor heating paired with a central radiator or a higher-capacity wall heater).
Large or open-plan bathrooms typically require distributed heat sources or a dedicated hydronic circuit to secure even temperature and quick recovery after ventilation.
Select controls, capacity, and placement to match load, avoid cold spots, and facilitate rapid warming without oversizing equipment.
Considerations for ventilation, insulation, and ceiling height
Several practical factors—ventilation rates, insulation quality, and ceiling height—directly influence which heating method will perform efficiently in a bathroom.
High ventilation or poor insulation favors continuous radiant options (in-floor or wall panels) over intermittent space heaters.
Low ceilings improve convective effectiveness; tall rooms benefit from radiant systems to avoid heat stratification.
Moisture control and extractor placement also affect durability and safety of heating choices.
Electric space heaters and wall-mounted radiant heaters
Electric space heaters and wall-mounted radiant units come in convection, radiant panel, infrared, and fan-driven designs, each with distinct performance and water-resistance implications for bathrooms.
Considerations include installation location, wiring and mounting requirements, appropriate power rating for room size, and compliance with IP ratings and GFCI protection.
A comparison of pros and cons and clear safety precautions will guide suitable selection and safe operation.
Types: convection, radiant panel, infrared, fan heaters
Although bathroom heating choices share the goal of comfort and safety, they differ considerably in how they deliver warmth—convection heaters warm air that circulates through the room, radiant panels and infrared units heat surfaces and occupants directly, and fan-assisted or electric space heaters combine forced airflow with resistive elements for rapid temperature rise.
Models vary by mounting, response time, coverage, and electrical requirements; selection hinges on room size and placement.
Pros and cons for bathroom use
When selecting between portable space heaters and wall-mounted radiant units for bathrooms, users should weigh immediate warmth and flexibility against safety, installation, and coverage trade-offs.
Portable electric space heaters provide rapid, adjustable heat and easy relocation but pose greater tipping, moisture, and surface-burn risks.
On the other hand, wall-mounted radiant heaters offer safer fixed placement, even radiant warmth to occupants and surfaces, and lower clutter at the cost of permanent installation, limited directional coverage, and typically higher upfront wiring requirements.
Installation, placement, and wiring safety
Having weighed portability and safety trade-offs, attention shifts to proper installation, placement, and wiring safety for both portable space heaters and wall-mounted radiant units.
Install wall units per manufacturer instructions, secure clearances, and mount above splash zones. Use GFCI-protected circuits, dedicated breakers when required, and correct gauge wiring.
Position portable heaters away from water, combustibles, and traffic paths; never block vents or use damaged cords.
Recommended power ratings and usage scenarios
Power needs for bathroom heating vary by room size, insulation, and use pattern; generally, small bathrooms (up to about 50 sq ft) require roughly 750–1500 watts from an electric space heater, while larger or poorly insulated rooms often need 1500–3000 watts or a wall-mounted radiant unit rated to deliver equivalent heat output.
Tuned choices: portable 750–1500W for quick warm-up; 1500–3000W fixed units for sustained comfort.
Safety precautions and required certifications (IP ratings, GFCI)
Prioritize verified safety features and certifications before installing or operating any bathroom heater.
The user must confirm IP ratings for splash resistance and a GFCI-protected circuit; certified units reduce shock and fire risk.
Follow manufacturer clearances and mounting instructions. Regular inspections and professional wiring are recommended.
- Check IP44 or higher
- Verify GFCI protection
- Use certified fixtures
- Maintain clearances
- Schedule inspections
Towel warmers and heated rails for dual warmth
Towel warmers and heated rails offer both towel-drying and supplemental room heat. Electric models provide easy plug-in control, while hydronic versions integrate with existing central heating for steady warmth.
Installation ranges from simple wall-mounting that can be completed in a few hours to plumbing-connected hydronic fittings that may require a plumber and a day or more.
Users should consider wattage, timer or thermostat controls, and placement to balance quick pre-warm cycles with overall energy use.
Electric vs hydronic towel warmers: pros and cons
Many bathrooms use either electric or hydronic towel warmers, each offering distinct benefits: electric models are easy to retrofit and provide rapid, controllable heat, while hydronic systems integrate with existing hot-water plumbing for continuous, energy-efficient warmth.
Electric units suit occasional use and simple controls but can be costlier to run continuously; hydronic units offer lower operating costs and seamless aesthetics but require plumbing access.
Typical installation options and timelines
After choosing between electric and hydronic units, homeowners must consider how those choices affect installation options and timelines.
Electric towel warmers typically require simple wall mounting and a dedicated outlet or hardwire, completed in a few hours to a day.
Hydronic rails tie into existing plumbing or radiators, needing pipework and possible system shutdowns, often taking one to two days for installation and testing.
Energy use and operation tips for quick warmth
How quickly a bathroom can feel warm depends largely on the type and power of the chosen warmer and how it is operated.
Towel warmers and heated rails heat rapidly, using 50–200W typically; timers, thermostats, and zoning cut consumption by running only when needed.
Preheat before peak use, hang damp towels for latent heat, and choose efficient electric or hydronic models matched to room size for ideal warmth per watt.
Heated floors (electric and hydronic) for consistent warmth
Heated floors, available as electric mats or hydronic piping, provide consistent ambient warmth and differ in components, operation, and ideal use cases.
The discussion covers how each system works, retrofit versus new-build installation steps, expected warm-up times and thermostat control, and a practical comparison of cost, warmth, installation time, and maintenance.
Guidance highlights when hydronic systems are preferable and when electric underfloor heating is the more straightforward choice.
Electric underfloor heating: components and how it works
When installed beneath tile or stone, electric underfloor heating uses thin resistive cables or mats embedded in the floor to convert electricity into even, radiant warmth across the surface. A thermostat controls temperature and timing while insulation and proper subfloor preparation maximize efficiency.
Components include heating cable or mesh, a dedicated circuit and RCD, a programmable thermostat with floor sensor, and professional installation for safety.
Hydronic underfloor heating: when to choose it
Electric systems suit smaller bathrooms and straightforward retrofits, but hydronic underfloor heating becomes the better choice for larger areas, whole-house integration, or where long-term operating cost is a priority.
It excels with tile or concrete floors, provides even heat distribution, and pairs well with boilers or heat pumps. Higher upfront complexity and installation time are offset by efficiency, scalability, and comfort in extensive projects.
Retrofit vs new-build installation steps
Compare the two approaches by outlining the distinct steps, constraints, and trade-offs involved in retrofitting versus installing underfloor heating in new construction.
Retrofitting often requires removing finishes, using slim electric mats or thin wet systems, and addressing floor height.
New-build allows embedding hydronic loops in screed, optimized insulation and layout.
Costs, disruption, and thermal performance determine choice.
Expected warm-up times and thermostat control
Estimating warm-up times and selecting appropriate thermostat controls hinge on system type, floor construction, and desired temperature rise: electric mats and cables typically bring a tiled bathroom to a comfortable level in 15–45 minutes, while hydronic systems embedded in screed can take 30 minutes to several hours depending on screed thickness and water temperature.
Programmable thermostats, floor sensors, and PID control optimize comfort, efficiency, and preheat scheduling.
Comparison: electric vs hydronic underfloor heating (cost, warmth, install time, maintenance)
While both systems deliver steady radiant warmth, their trade-offs in upfront cost, running expense, installation complexity, and long-term maintenance differ markedly: electric mats and cables are cheaper and quicker to install for retrofit or small rooms but incur higher operating costs, whereas hydronic circuits demand greater initial investment and longer installation times—especially when embedded in screed—but yield lower energy costs for larger areas and offer easier compatibility with multiple heat sources and zoned control.
| Aspect | Electric | Hydronic |
|---|---|---|
| Upfront cost | Low | High |
| Running cost | Higher | Lower |
| Install/maintenance | Quick, simple | Slower, more involved |
Bathroom-safe heat lamps and ceiling-mounted heaters
Bathroom-safe heat lamps and ceiling-mounted heaters use infrared or radiant elements to provide focused warmth, making them ideal for quick heating over sinks and shower areas.
Proper installation requires attention to mounting height, spacing from combustible materials, and the use of splash-rated fixtures and guards to prevent moisture and contact hazards.
Combined light-and-heat fixtures designed for showers offer integrated solutions but must be rated for wet locations and installed according to local electrical and building codes.
How heat lamps work and best use cases
Heat lamps deliver focused infrared warmth by converting electrical energy into radiant heat that objects and skin absorb directly, making them effective for quick, localized heating in bathrooms.
They heat people and surfaces rapidly, reducing chill during showers.
Best use cases include spot warming over tubs or near mirrors, temporary preheating, and supplementing central heating in small bathrooms where instant comfort is desired.
Mounting, spacing, and protective measures
Several sensible guidelines govern the mounting, spacing, and protective measures for bathroom-safe heat lamps and ceiling-mounted heaters to guarantee effective warmth while minimizing hazards.
Fixtures require moisture-rated housings, GFCI-protected circuits, and secure mounting to structural framing.
Maintain manufacturer-recommended clearances from combustibles and shower zones, position multiple units for even coverage, and install tempered glass or guarded diffusers to prevent burns and water ingress.
Combined light-and-heat fixtures for showers
When installed over or adjacent to a shower, combined light-and-heat fixtures must balance warmth, illumination, and safety by using moisture-rated housings, tempered or guarded coverings, and GFCI-protected circuits.
These units should be positioned per manufacturer clearances, mounted to junction boxes or dedicated supports, and use bulbs or elements rated for wet locations.
Regular inspections prevent corrosion, overheating, and electrical faults.
Short-term solutions for warming floors and showers
Short-term measures can make a bathroom feel noticeably warmer by focusing on floors and immediate heat sources.
Portable heated mats and rugs should be chosen for waterproofing, certified electrical safety, and non-slip backing, while temporary radiators are best positioned to promote airflow without obstructing exits.
Quick insulation fixes—sealing door gaps and adding heavy window coverings—help retain that heat between uses.
Portable heated mats and rugs: selection and safety
Portable heated mats and rugs offer a quick, nonpermanent way to warm bathroom floors and provide a cozy surface for bare feet, especially useful in rentals or during seasonal cold snaps.
Choose UL- or ETL-listed models with waterproofing, low-voltage options, and automatic shutoff.
Place on dry, flat surfaces away from water pools, avoid folding, inspect cords regularly, and follow manufacturer installation and cleaning instructions.
Temporary radiator placement and airflow tips
A few well-placed temporary radiators can raise floor and shower-area temperatures quickly without major modifications; positioning near doorways, under towel racks, or adjacent to shower enclosures maximizes heat delivery while keeping airflow unobstructed.
Units should face open space, avoid blocking vents, and sit on heat-resistant mats.
Rotate placement to reduce cold spots, maintain clearance from water, and monitor for overheating or tripping hazards.
Quick insulation hacks: doors, drafts, and window coverings
After placing temporary radiators, attention to simple insulation measures can further trap that heat where it’s needed most.
A door sweep and towel at the sill block cold air. Apply removable draft tape to gaps and use insulating window film or thick thermal curtains.
Lay down a rubber-backed bath mat or temporary foam underlayment to reduce floor heat loss and improve immediate comfort.
Integrating heating with showers and bathtubs
Attention to shower and bathtub heating improves comfort and safety by combining preheat strategies, precise mixing, and room retention.
Practical preheat options include rapid water heaters or timed radiant floor warming to guarantee a warm stall on demand.
Thermostatic mixing valves with anti-scald limits and measures to reduce heat loss in open-plan or en-suite layouts help maintain stable, efficient temperatures.
Warm-preheat strategies for shower stalls
When preparing a bathroom for a warm shower, integrating preheat strategies directly into the shower or tub area minimizes heat loss and improves comfort from the first splash.
Options include low-profile electric radiant mats beneath tile, heated bench or niche elements, and controlled warm-air preblowers.
Timers or smart controls schedule preheat, conserving energy while delivering instant warmth when the shower starts.
Using thermostatic mixing valves and anti-scald settings
Preheating a shower enclosure improves initial comfort but must be paired with reliable temperature control at the fixture to prevent sudden scalding or cooling as flow and supply temperatures change.
Thermostatic mixing valves maintain set outlet temperatures despite inlet fluctuations, while built-in anti-scald limits cap maximum delivery.
Proper installation, regular maintenance, and adherence to local plumbing codes guarantee safety and consistent user comfort.
Minimizing heat loss in open-plan or en-suite bathrooms
Because open-plan and en-suite bathrooms expose wet zones to the rest of the room, targeted strategies are required to reduce heat loss around showers and bathtubs.
Use glass enclosures, partial screens, or sliding doors to contain warmth without closing sightlines.
Insulate external walls, install underfloor heating with zoning, and position radiators or heated towel rails near fixtures to maintain comfortable temperatures and limit drafts.
Energy efficiency and operating cost strategies
Energy efficiency and operating costs can be reduced by combining smart thermostats and timers with targeted scheduling to run heating only when needed.
Zoning the bathroom separately from adjacent spaces limits runtime and prevents wasting heat.
Upgrading insulation and sealing gaps further lowers demand, making shorter, less frequent heating cycles effective.
Smart thermostats and timers for bathroom heating
While bathrooms are often used intermittently, smart thermostats and timers can precisely align heating with occupancy to cut waste and lower operating costs.
They enable temperature setbacks, quick preheat, and integration with humidity or motion sensors. Remote control and usage analytics optimize performance.
Compatibility with underfloor heating or electric heaters simplifies implementation, reducing runtime without sacrificing comfort.
Scheduling and zoning to reduce runtime
When bathrooms are grouped into distinct heating zones and assigned tailored schedules, overall runtime drops without compromising comfort.
Occupancy patterns, peak usage times, and recovery rates guide programming. Zoning isolates demand so unused areas remain off.
Short preheat cycles before typical use replace continuous operation. Combined with setback temperatures and adaptive schedules, this minimizes energy waste and lowers operating costs effectively.
Insulation and sealing upgrades that lower heating needs
Reducing a bathroom’s heat demand begins with tightening the building envelope: improved insulation and meticulous air sealing cut heat loss so heating systems run less and recovery times shorten.
Target exterior walls, ceilings above unheated spaces, and the floor cavity. Seal gaps around windows, doors, vents, and plumbing penetrations.
Upgrade to insulated access panels and consider vapor control to prevent moisture compromise of thermal performance.
Common problems and how to avoid them
Common problems with bathroom heating include overheating, moisture damage that can lead to mold, and electrical hazards from faulty installations.
Clear guidance on spotting undersized or poorly placed heaters helps prevent cold spots and unnecessary energy use.
Routine inspection and proper placement mitigate moisture buildup, reduce fire risk, and extend equipment life.
Overheating, moisture damage, and mold prevention
Prevent overheating and excess humidity by balancing heat output with ventilation and insulation: too much localized heat accelerates moisture evaporation from showers and sinks, which then condenses on cooler surfaces and creates conditions for mold growth and material deterioration.
Monitor RH, install timed or humidity-controlled exhaust fans, guarantee adequate insulation and vapor barriers, use mold-resistant materials, and dry wet areas promptly to prevent damage.
Electrical hazards and how to spot faulty installations
Moisture control and proper heating reduce the risk of mold, but they do not eliminate the electrical dangers that can arise in a wet room.
Faulty wiring, improper grounding, non–IP-rated fixtures, and overloaded circuits are common culprits. Inspect for scorch marks, loose fittings, flickering lights, or tripped breakers.
Engage certified electricians, use GFCI/RCD protection, and follow local codes to mitigate risk.
Signs your heater is undersized or poorly placed
An undersized or poorly positioned bathroom heater reveals itself through uneven warmth, persistent cold spots, long recovery times after use, and complaints of draftiness near fixtures and towel rails.
Other signs include low air circulation, condensation or mildew in corners, frequent thermostat cycling, and high energy bills with inadequate comfort.
Remedies involve recalculating load, relocating or adding units, improving insulation, and enhancing ventilation.
Maintenance, troubleshooting, and longevity tips
Routine checks for electric heaters and towel rails include inspecting wiring, controls, and mounting for wear or damage.
Underfloor systems and hydronic loops require periodic flushing, thermostat calibration, and checks for leaks or airlocks.
Simple troubleshooting steps for no-heat scenarios—resetting breakers, confirming power or fuel supply, and bleeding radiators or loops—can resolve many issues quickly.
Routine checks for electric heaters and towel rails
How should homeowners approach regular checks on electric heaters and towel rails to confirm safety and performance?
Inspect for loose connections, damaged cords, corrosion, and secure wall or floor mounts.
Test thermostats and timers for proper operation, verify surface temperatures remain safe, and ascertain IP-rated fittings in wet zones.
Replace worn components, record checks, and consult a qualified electrician for faults or periodic safety certification.
Maintenance for underfloor systems and hydronic loops
Maintain underfloor heating and hydronic loops with scheduled inspections and simple preventive actions to guarantee reliable warmth and extend system life.
Flush circuits periodically, check expansion vessels and pressure, bleed air from manifolds, and inspect pumps and valves for leaks or noise.
Verify thermostat calibration and insulation integrity.
Keep records of service dates and component replacements to anticipate wear and plan timely professional maintenance.
Troubleshooting quick fixes for no-heat scenarios
Start by confirming basic power and thermostat settings: the circuit breaker and any system switches should be on, thermostats set above room temperature, and batteries replaced if needed.
Then check fuses, reset GFCI outlets, inspect visible wiring and connections, and look for tripped relays or blown thermal cutouts.
If electric mat or heater remains cold, contact a certified technician for safe diagnosis and repair.
Cost estimates and project timelines
A summary of typical price ranges contrasts lower-cost DIY retrofits with higher-priced professional installations to help readers set a realistic budget.
Estimated installation times are presented by method, from a few hours for plug-in heaters to several days for full radiant-floor systems.
Long-term ROI considerations, including energy savings and maintenance costs, are highlighted to inform investment decisions.
Typical price ranges: DIY retrofits vs professional installs
How much a bathroom heating upgrade will cost depends largely on whether the homeowner does a DIY retrofit or hires professionals, with typical price ranges reflecting differences in materials, labor, and complexity.
DIY electric mats or radiator swaps often cost $150–$800 for materials; professional installs, including hydronic systems or full-floor work, commonly run $1,200–$6,000+, factoring permits and skilled labor.
Time required for installation by method
Having outlined typical costs for DIY versus professional bathroom heating upgrades, attention turns to the time each method requires.
DIY electric mat or film underfloor systems often take a weekend (1–3 days) for experienced homeowners.
Professional underfloor or hydronic installs usually require 2–5 days, including substrate work.
Wall-mounted or towel-radiator installs commonly complete within 2–8 hours to a day for licensed installers.
Long-term ROI considerations
Although upfront expenses vary by system, long-term return on investment hinges on comparing installed cost, operating efficiency, maintenance needs, and expected service life.
Estimates: electric towel warmers or space heaters cost less to install but run higher energy bills; radiant floor systems require larger initial outlay and installation time yet deliver lower operating costs and longevity.
Calculate payback periods and include potential rebate or resale value.
Decision checklist and recommended setups by scenario
A concise checklist helps match heating choices to bathroom size, use patterns, and budget. The following points summarize recommended setups for common scenarios and priorities. Review each item to pick the best-fit approach.
- Small half-bath: fastest, cheapest options
- Family bathroom with frequent showers
- Luxury remodel with radiant floors and integrated controls
- Energy efficiency and operating cost considerations
- Installation complexity and maintenance needs
Small half-bath: fastest, cheapest options
For a small half-bath where speed and cost matter most, prioritize compact, low-installation solutions that deliver immediate warmth without major electrical or plumbing work.
Recommend a plug-in wall or tabletop ceramic heater with tip-over and overheat protection, a heated towel rail if space allows, and thick washable rugs.
Guarantee proper ventilation, GFCI-protected outlets, and do not obstruct airflow for safety and efficiency.
Family bathroom with frequent showers
When a family bathroom sees frequent showers, selecting heating solutions requires balancing rapid warmth, moisture management, safety, and energy use.
Prioritize corrosion-resistant electric towel warmers, wall-mounted infrared panels, and timed extractor fans.
For larger spaces, combine zoned electric underfloor mats with a humidity-sensing thermostat.
Guarantee IP-rated fixtures, GFCI protection, and easy-to-clean finishes.
Recommend programmable schedules to limit costs and maintain comfort.
Luxury remodel with radiant floors and integrated controls
Consider projects that pair hydronic or electric radiant floors with centralized or room-specific controls. Then use a decision checklist to match system type, heat load, zoning, controls, and maintenance to user priorities.
Evaluate floor covering, insulation, and subfloor depth. Choose hydronic for large areas and efficiency, and electric for retrofit or small zones.
Prioritize programmable thermostats, smart integration, isolation valves, and accessible manifolds for serviceability.
Safety summary and final recommendations
The summary highlights mandatory electrical and building code requirements that govern bathroom heating installations and protect against shock and fire hazards.
It notes clear signs and situations—complex wiring, gas connections, or unclear permits—when a licensed electrician or plumber must be engaged.
It closes with three prioritized actions to get a warmer bathroom today:
- install a safe plug-in heat source rated for bathrooms,
- improve insulation and sealing,
- and schedule professional service for permanent or hardwired solutions.
Mandatory electrical and building code considerations
How should compliance and safety guide any bathroom heating project?
Installations must follow local electrical and building codes, including GFCI protection, proper circuit sizing, and moisture-rated fixtures.
Permits and inspections guarantee compliance; documentation should be retained.
Products must carry relevant certifications (UL/ETL).
Clearances, bonding, and ventilation requirements prevent hazards.
Adherence minimizes risk and liability while preserving occupant safety and system reliability.
When to call a licensed electrician or plumber
When should a licensed electrician or plumber be engaged for a bathroom heating project?
A professional is required for wiring changes, circuit capacity upgrades, hardwired towel warmers, electric radiant mats tied to fixed wiring, or any work affecting water supply, drainage, gas connections, or venting.
Hire a licensed tradesperson for inspections, permits, complex installations, or when local codes mandate certified execution and sign-off.
Quick prioritized action steps for a warmer bathroom today
Start by prioritizing immediate, low-risk steps that raise comfort without altering electrical or plumbing systems:
use a high‑efficiency space heater rated for bathrooms (IP24) or a moisture‑rated towel warmer on a plug, add thick bath mats and a shower curtain to reduce drafts, run an exhaust fan briefly after showering to remove humid air then close the door to trap warmth, and check that vents and radiators are unobstructed—call a licensed electrician or plumber for any hardwiring, gas, or fixed‑water work.
Use timers, keep combustibles away, test GFCI outlets, and schedule professional upgrades only when necessary.
Conclusion
Like stepping into a mythic bathhouse where practical gods preside, the reader is guided to choose warmth that fits space, budget, and safety. Fast electric heaters answer immediate chill; radiant floors promise enduring comfort; towel rails combine luxury and function. With basic maintenance and sensible installation, each method becomes reliable rather than risky. The right selection transforms a cold room into a ritual space—inviting, safe, and tailored to household needs.