How to Keep Water Pipes in a Crawl Space From Freezing: Proven Prevention Tips
To prevent water pipes in a crawl space from freezing, insulate them with foam or wrap, seal gaps and vents to reduce cold air exposure, and use heat tape or a thermostatic space heater as needed. During cold snaps, open faucets slightly or drain vulnerable lines. Additionally, inspect and map your pipes, install vapor barriers, and consider professional encapsulation for ongoing issues. Below, you’ll find more detailed steps and product recommendations.
Why Pipes in Crawl Spaces Freeze and Why It Matters
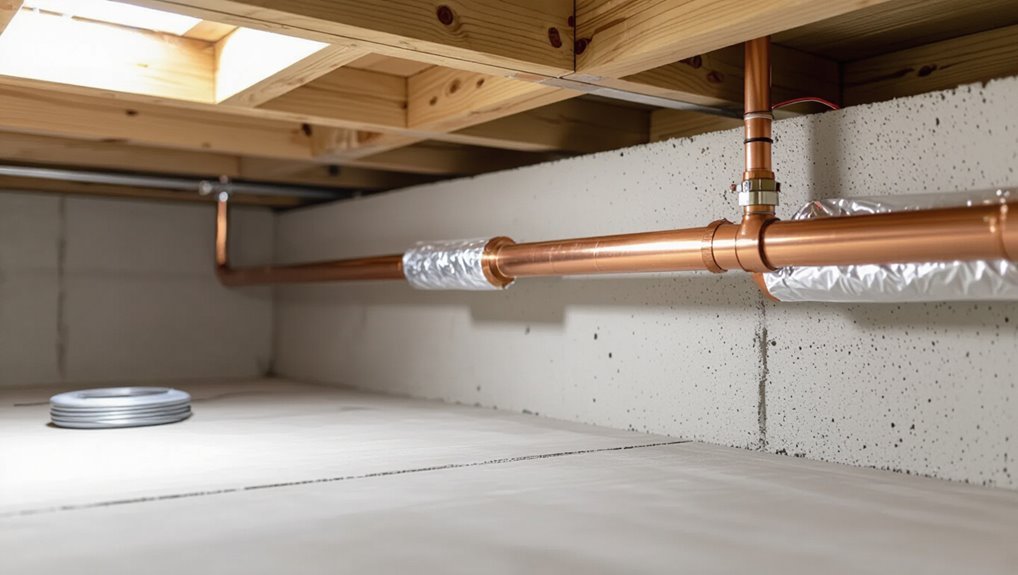
In crawl spaces, cold air and inadequate insulation allow water in exposed pipes to freeze, creating pressure that can crack lines.
Indicators of freezing or rupture include reduced or no water flow, visible frost on pipes, and unexplained wet spots or pooling.
Frozen or burst pipes in crawl spaces can lead to costly repairs, water damage to structural components, and mold growth if not addressed promptly.
How freezing occurs in crawl spaces
Beneath a home’s floor, crawl spaces often become cold traps where limited insulation, poor air sealing, and proximity to the ground combine to drop temperatures enough to freeze exposed water pipes.
When ambient air reaches or falls below 32°F (0°C), standing water in pipes can solidify, expand, and block flow.
Understanding heat loss, airflow patterns, and pipe material helps explain how to keep water pipes in crawl space from freezing.
Common signs of frozen or burst pipes
When temperatures in a crawl space drop low enough to freeze standing water, signs of frozen or burst pipes typically appear quickly and can be both visible and audible: faucets may sputter or deliver reduced flow, pipe fittings can show frost or bulging, and the sound of cracking or hammering may indicate ice expansion or ruptures.
Additional indicators include localized cold spots, damp insulation, unexplained water stains, and decreased water pressure.
Risks and costs of frozen pipes in crawl spaces
Following those warning signs, the consequences of frozen pipes in crawl spaces extend beyond temporary water loss to significant structural, health, and financial impacts.
Burst pipes cause flooding, rot, mold growth, compromised insulation, and weakened foundations.
Repair and remediation costs, emergency plumbing, increased insurance premiums, and potential displacement create substantial financial strain.
Preventive measures are typically far less costly than restoration and liability expenses.
Quick Actions to Prevent Immediate Freezing
Short-term measures can keep water moving in at-risk lines, such as opening faucets slightly or running warm water intermittently.
If freezing is imminent, shutting off the main and draining exposed lines prevents pressure build-up and burst pipes.
Temporary heat sources—space heaters, heat tape, or a hair dryer used at safe distances—can thaw or warm pipes when used according to safety guidelines.
Short-term solutions to keep water flowing
Act quickly to keep water moving through vulnerable pipes by applying targeted, temporary measures that buy time until longer-term fixes are possible.
Increase flow by opening faucets slightly, focusing on the farthest fixture.
Add safe localized heat—portable heaters aimed at access points or hair dryers used intermittently.
Insulate exposed sections with towels or pipe wrap.
Monitor regularly and restore normal settings when risk subsides.
When to shut off water and drain lines
When is shutting off the water and draining lines the safest immediate response? It is appropriate when temperatures drop rapidly, insulation gaps expose pipes, or freezing is imminent and heating cannot be restored.
Shut the main, open faucets to drain pressure, and flush low points and outdoor spigots. This prevents rupture risk and limits water loss until permanent measures or professional repair can be arranged.
Temporary heat sources and safe usage
After shutting off and draining vulnerable lines, attention can turn to supplying temporary heat to exposed pipes to prevent immediate freezing.
Use thermostatically controlled space heaters, heated cables rated for plumbing, or insulated heating tape.
Place heaters safely on stable surfaces, maintain clearance from combustibles, and avoid extension cords when possible.
Monitor devices regularly and never leave them unattended for prolonged periods.
Crawl Space Assessment Checklist Before Winter
Before winter, a crawl space assessment should confirm insulation levels, locate gaps, and map pipe positions and materials.
The inspector should also verify ventilation, grading, and moisture control to reduce freeze and rot risks.
Finally, access points and doors must be evaluated for proper sealing and ease of maintenance.
Inspecting insulation levels and gaps
Many crawl spaces show uneven or missing insulation that allows cold air to reach water pipes. A focused inspection identifies material type, thickness, and gaps around joists, vents, and penetrations.
Note compressed, displaced, or deteriorated batts and absent foam or board insulation. Measure R-value where possible, record gaps over pipe runs, and prioritize sealing and topping up insulation to maintain continuous thermal protection.
Identifying pipe locations and materials
A clear map of pipe locations and an inventory of materials provide the foundation for effective winterization in a crawl space.
Inspect and note run lengths, elevations, joints, valves, and proximity to exterior walls.
Record pipe materials (copper, PEX, PVC), diameters, and insulation type or absence.
Prioritize exposed, uninsulated, or metal runs for targeted protection and repair planning.
Checking ventilation, grading, and moisture issues
Having mapped pipe routes and materials, the assessor next evaluates crawl-space ventilation, grading, and moisture because these factors directly affect freeze risk and pipe longevity.
Inspect for blocked vents, inadequate air exchange, and signs of standing water or poor slope. Measure humidity, locate condensation sources, verify vapor barrier integrity, and note soil erosion or downspout discharge that directs water toward the foundation.
Evaluating access points and crawl space doors
Several access points and the crawl-space door(s) deserve careful inspection before cold weather arrives to confirm secure, insulated, and weather-tight entry that won’t compromise pipe protection.
The assessment should verify tight seals, functioning latches, intact weatherstripping, and absence of gaps.
Consider adding insulated panels, draft stoppers, or perimeter foam.
Ascertain exterior openings are locked and vents closed or sealed as appropriate.
Insulation and Air-Sealing Strategies
Effective insulation and targeted air-sealing are primary defenses against frozen pipes, with choices like foam, fiberglass, and rubber varying in R-value and suitability for different pipe locations.
Attention to crawl space walls and floors, plus properly installed vapor barriers, preserves insulation performance and limits moisture-related degradation.
Identifying and sealing air leaks and draft paths that reach pipes completes the strategy to maintain warm, dry conditions around vulnerable plumbing.
Types of pipe insulation and R-values
When selecting insulation for water pipes, homeowners and professionals should consider material type, thickness, and R-value to match the pipe location and expected temperature drop.
Common options include foam sleeves (closed-cell, R‑3 to R‑6), fiberglass wrap (higher temperature tolerance, R‑2 to R‑4 per inch), and rubber foam (flexible, moisture-resistant).
Choose higher R-values for colder, exposed runs and guarantee proper fit and seals.
Insulating crawl space walls and floors
After selecting appropriate pipe insulation, attention should shift to the surrounding crawl space, since its thermal and moisture conditions directly affect pipe freeze risk.
Insulate walls with rigid foam or spray foam to form a continuous thermal barrier.
Add insulated vapor-retardant flooring or sealed crawl space covers to reduce ground heat loss.
Guarantee insulation is installed to manufacturer specifications and remains dry.
Sealing air leaks and draft paths to pipes
Seal gaps and block drafts that carry cold air to exposed piping, because even well-insulated pipes will freeze if chilled by continuous airflow.
Identify openings around vents, foundation seams, utility penetrations and rim joists.
Use caulk, spray foam, weatherstripping and rigid foam inserts to seal voids.
Confirm access panels remain airtight and pipe collars are snug to prevent cold airflow pathways.
Vapor barriers and moisture control to protect insulation
Control moisture to preserve insulation performance and prevent ice buildup on cold pipes.
Install continuous vapor barriers on crawl space floors and walls, sealing seams and penetrations.
Maintain proper drainage and gutters to limit ground moisture.
Use vapor-retardant insulation types and avoid direct contact with wet soil.
Monitor humidity with a gauge and employ ventilation or dehumidification to keep relative humidity below 60%.
Heating Options for Crawl Spaces
Heating options for crawl spaces range from passive measures that retain warmth to active systems that directly heat vulnerable areas.
Choices include electric heat tape and cable—selected and installed to match pipe size and power limits—portable or fixed space heaters with thermostat control, and routing conditioned air or ducts into the crawl space.
Each approach has trade-offs in cost, safety, and effectiveness that warrant careful comparison before implementation.
Passive heat retention methods
Although crawl spaces are often overlooked, retaining heat passively can substantially reduce freeze risk for exposed pipes.
Strategies include adding insulation to rim joists and pipe runs, installing vapor barriers to limit moisture loss, sealing leaks and vents to prevent cold drafts, and using thermal mass (e.g., concrete or stone) to moderate temperature swings.
Proper air sealing and continuous insulation are essential.
Electric heat tape and cable: selection and installation
Many crawl-space pipe freeze problems can be prevented with properly selected and installed electric heat tape or self-regulating cable; these systems provide direct, controllable warmth along vulnerable runs.
Choose UL-listed, moisture-resistant products matched to pipe material and diameter. Follow manufacturer routing, spacing, and bonding instructions, secure with approved tape or clips, and connect to GFCI-protected circuits.
Inspect periodically for damage and proper operation.
Space heaters and thermostat control considerations
Several options exist for using space heaters in crawl spaces, but choosing the right type and integrating reliable thermostat control are essential to prevent pipe freezing without wasting energy.
Portable electric or low-profile fixed heaters with built-in safety features suit many installations.
Thermostats should be rated for damp locations, use tight deadband settings, and include high-limit cutoffs and remote temperature sensors near pipes for accurate, efficient operation.
Using HVAC ducts and conditioned air to warm crawl space
Beyond portable heaters and thermostats, integrating the building’s HVAC to circulate conditioned air into a crawl space provides an alternative that can maintain pipe temperatures with less direct electrical heat.
Supply or return ducts, dedicated vents, or booster fans can introduce warm air; dampers and thermostatic controls manage flow.
Guarantee proper insulation, sealed ductwork, and consult an HVAC professional to balance energy use and moisture control.
Plumbing-specific Preventive Measures
Practical plumbing measures focus on reducing exposure and providing control at vulnerable points. These include relocating exposed pipes above the frost line, draining or winterizing exterior and infrequently used lines, and adding shutoff valves and access points for quick isolation and maintenance.
In systems like irrigation, using appropriate antifreeze formulations can prevent freeze damage where draining is impractical.
Relocating vulnerable pipes above frost line
One effective preventive step is to relocate susceptible water lines so they sit above the local frost line, reducing the risk of freeze-induced damage.
This requires mapping pipe routes, confirming frost depth for the region, and rerouting or raising lines within the crawl space.
Professionals should secure insulation continuity, support pipes to prevent sagging, and verify slope and access for maintenance to guarantee long-term protection.
Draining and winterizing exterior and infrequently used lines
Prepare exterior and seldom used lines for cold weather by fully draining and winterizing them to prevent freezing and pipe damage.
Shut off supply to outdoor faucets, open valves and drain water, then blow out remaining water with compressed air where appropriate.
Add approved antifreeze to traps and irrigation zones.
Insulate exposed sections and cap openings to keep moisture and cold out.
Installing shutoff valves and access points
Install shutoff valves and convenient access points at strategic locations to isolate sections of plumbing quickly and minimize water loss during a burst or freeze.
Place valves where lines enter the crawl space, near major fixtures, and at branch junctions.
Add labeled, insulated access panels for easy valve operation and temporary repairs.
Test valves seasonally and guarantee clear, illuminated access paths for rapid response.
Using antifreeze in specific systems (e.g., sprinkler lines)
When outdoor or seasonal systems face prolonged subfreezing temperatures, adding the correct type and concentration of antifreeze to sprinkler lines, chilled-water loops, or ornamental water features prevents freeze damage and costly ruptures.
Only propylene glycol or glycerin-based antifreeze labeled for potable or irrigation systems should be used, and concentrations must match expected low temperatures per manufacturer charts.
Technicians flush, fill, and winterize per local codes, avoiding automotive ethylene glycol.
Professional Solutions and When to Hire Help
A homeowner should call a plumber for frozen or leaking pipes and a crawl-space contractor for structural access, dampness, or widespread insulation needs.
Professionals can install targeted pipe insulation, whole-crawlspace encapsulation, or heat-tracing systems and will provide assessments of moisture and ventilation.
Typical costs vary by scope: small repairs and pipe insulation can be under a few hundred dollars, encapsulation and extensive insulation often run into the low thousands, and heat-trace or major remediation can be higher.
When to call a plumber vs. a crawl-space contractor
How can a homeowner determine whether frozen or burst pipes require a plumber’s expertise or a crawl-space contractor’s specialized access?
A plumber handles leaks, burst pipes, valve repairs, and safe thawing.
A crawl-space contractor addresses access, structural clearance, moisture control, and routing obstructed lines for long-term protection.
Choose based on immediate repair needs versus access, structural concerns, or recurring environmental problems.
What to expect from professional insulation and encapsulation
Professional insulation and encapsulation services typically begin with a site assessment to identify heat loss points, moisture sources, and access challenges.
This is followed by a tailored plan that specifies materials (spray foam, rigid board, vapor barrier), R-values, ventilation adjustments, and a timeline for installation.
Technicians seal gaps, install insulation, add vapor barriers, and address drainage or HVAC ties.
Post-installation inspection and moisture monitoring guarantee long-term pipe protection.
Cost ranges for common professional fixes
Following the site assessment and installation plan, homeowners often ask about likely costs for common fixes to prevent frozen pipes.
Typical ranges:
- pipe insulation $100–$400,
- crawl space encapsulation $1,500–$6,000,
- targeted heat cable installation $50–$300 per run,
- minor plumbing repairs $150–$600, and
- adding vents or mechanical ventilation $500–$2,500.
Estimates vary by region, access, and material quality.
Maintenance Plan for Long-Term Prevention
A seasonal inspection schedule should be established to check insulation, heat sources, and vulnerable fittings before cold weather.
Monitoring systems such as temperature sensors and remote alerts can provide early warnings of drops that risk freezing.
Detailed record-keeping — including pipe maps, past repairs, and planned upgrades — guarantees targeted maintenance and faster response.
Seasonal inspection schedule and tasks
Because seasonal temperature shifts and weather events directly affect pipe vulnerability, a concise inspection schedule guarantees timely preventative actions.
Inspect before winter, mid-winter after storms, and in spring for damage. Check insulation integrity, vapor barriers, vent seals, and drainage.
Note signs of condensation, frozen nipples, or pest entry. Record findings, prioritize repairs, and schedule professional assessments annually to maintain long-term freeze protection.
Monitoring systems: sensors and remote alerts
Regularly integrating sensors and remote alerts into a freeze-prevention strategy provides continuous oversight of pipe conditions and rapid notification of anomalies.
Wireless temperature and moisture sensors placed near vulnerable runs detect drops and leaks. Alerts send notifications via phone, email, or hub.
Automated actions—like triggering heaters or shutting valves—reduce response time.
Routine testing and battery checks guarantee reliable long-term monitoring.
Record-keeping: pipe maps, repairs, and upgrades
When a systematic record‑keeping practice is established, property managers and homeowners gain a clear, long‑term view of pipe layouts, past repairs, and upgrades that affect freeze risk.
Maintain updated pipe maps, label insulation types and thickness, log repair dates, causes and materials, and note heating or drainage changes.
Regularly review records to prioritize preventive upgrades, budget replacements, and verify warranty coverage.
Common Mistakes and How to Avoid Them
The article highlights common mistakes that compromise pipe protection, including unsafe heating methods that create fire risks and improper insulation that traps moisture and promotes mold.
It also warns against neglecting secondary freeze points such as exterior hose bibs, crawl spaces, and concealed lines.
Practical alternatives and simple checks are suggested to prevent these errors.
Unsafe heating practices to avoid
Using unsafe heating methods can create serious fire and carbon monoxide risks while offering only temporary relief for frozen pipes.
Portable space heaters, unvented propane torches, and open flames should never be used in crawl spaces. Extension cords and overloaded circuits increase hazards.
Instead, recommend certified electric heaters with thermostats, professional HVAC adjustments, or safe pipe heat tapes installed per manufacturer instructions to prevent recurrence.
Insulation errors that trap moisture or cause mold
Many common insulation mistakes—overpacking batts, sealing vents, or wrapping damp material—can trap moisture against pipes and structural wood, fostering mold and rot.
Install vapor-permeable insulation, maintain ventilation paths, and avoid compressing batts. Make certain materials are dry before installation and use proper vapor barriers where recommended.
Inspect periodically for condensation, mold stains, or sagging insulation and correct issues promptly to protect pipes and framing.
Overlooking secondary freeze points
Although primary pipe runs often receive the most attention, secondary freeze points—short runs, dead-end spurs, exterior wall connections, and fittings near vents—are frequently overlooked and freeze first.
Inspectors should map and label all branches, insulate and heat-trace vulnerable segments, seal nearby drafts, and maintain consistent crawl space temperatures.
Regular checks after storms or cold snaps prevent surprises and costly repairs.
Comparison of Popular Prevention Methods
A concise comparison of popular prevention methods highlights differences in effectiveness, upfront cost, installation difficulty, and ongoing maintenance to guide selection. The following table summarizes key attributes for common options. Readers can use this overview to weigh trade-offs before choosing a solution.
| Method | Key considerations |
|---|---|
| Heat tape | High effectiveness; moderate cost; moderate installation difficulty; periodic inspection required |
| Pipe insulation | Moderate effectiveness; low cost; easy installation; minimal maintenance |
| Controlled heating (space heaters/infrared) | High effectiveness; higher cost; easy to moderate installation; regular monitoring needed |
| Smart thermostatic controls | High effectiveness; moderate to high cost; professional installation often required; firmware/periodic checks needed |
| Water drip/ongoing flow | Moderate effectiveness; negligible cost; simple setup; continuous monitoring of water use |
Effectiveness, cost, installation difficulty, and maintenance
Compare common freeze-prevention methods by evaluating four key factors: effectiveness at preventing frozen pipes, upfront and ongoing costs, installation difficulty, and required maintenance.
Insulation is low-cost, easy to install, moderate effectiveness, minimal upkeep.
Heat tape offers high effectiveness, moderate cost, careful installation, periodic inspection.
Space heating is very effective, high cost, professional install, ongoing energy maintenance.
Drain-down is low cost, moderate difficulty, seasonal effort.
Step-by-Step Weekend Project: Insulate and Protect a Crawl Space Water Pipe
A concise weekend plan outlines the required tools and materials, the stepwise execution from preparation through verification, and essential safety precautions for insulating a crawl space water pipe.
The outline frames what to gather, how to proceed safely during installation, and how to confirm the job prevents heat loss and leaks. Following the steps guarantees a reliable, low-cost defense against freezing.
- Tools and materials needed
- Execution steps from prep to verification
- Safety precautions during the project
Tools and materials needed
Tools and materials for insulating and protecting a crawl space water pipe include items for measurement, cutting, sealing, and safety to guarantee a durable result.
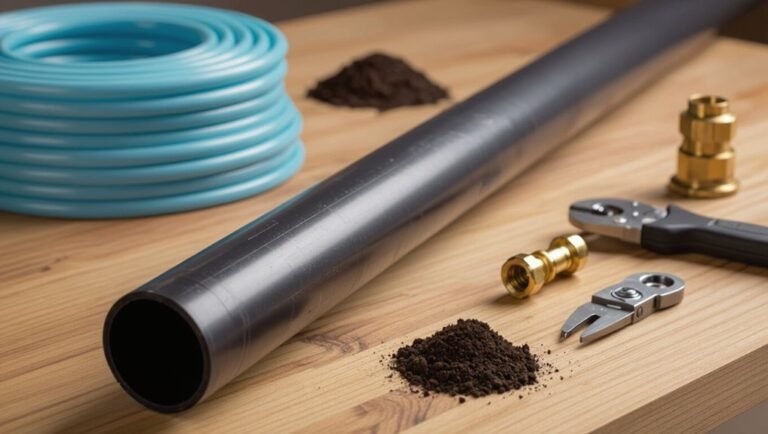
Required supplies: foam pipe insulation or fiberglass wrap, pipe sleeves, waterproof tape, silicone caulk, pipe insulation adhesive, utility knife, measuring tape, gloves, safety glasses, dust mask, flashlight, and a small pry bar for routing and securing materials.
Execution steps from prep to verification
Begin by confirming the work area is safe and accessible: shut off water to the section being worked on if possible, turn on a light, don protective gear, and clear debris from the crawl space to create a stable workspace.
Measure and cut insulation, wrap pipes snugly, seal seams with tape, add heat tape where needed, secure supports, restore water, check for leaks, and verify temperature stability over 24–48 hours.
Safety precautions during the project
Prioritize safety before entering the crawl space: guarantee electricity to nearby circuits is off, confirm the water supply is isolated for the work area, and verify stable footing and ventilation to prevent slips, inhalation hazards, or accidental activation of equipment.
Use gloves, eye protection, and a dust mask; inspect for pests, sharp objects, and mold; keep a charged phone and an exit plan; work with a partner when possible.
Signs a Freeze Problem Is Developing and Emergency Response
Early warning signs of a freezing problem include unusually cold fixtures, reduced or sputtering water flow during night or cold snaps, and frost or condensation on exposed pipes.
Immediate safe actions include shutting off the water main if a freeze is suspected, applying gentle heat with a hair dryer or heat tape to thaw the affected section, and avoiding open flame or electrical hazards.
If a pipe bursts, the procedure shifts to stopping the water, isolating damaged areas, documenting damage, and beginning water removal and drying to limit further loss.
How to detect early freezing at night or in cold snaps
How can one tell when a pipe is about to freeze during a cold snap? Indicators include reduced faucet flow, intermittent sputtering, unusual clanking, condensation or frost on exposed pipes, and a sharp temperature drop in the crawl space.
Early detection also relies on installed temperature sensors or smart water-flow monitors that alert occupants. Promptly investigate any alerts or abnormal sounds for potential icing.
Immediate steps to thaw pipes safely
Act quickly when signs of a developing freeze appear: reduced or no water flow, ice-sounding clanks, visible frost on exposed pipes, or sudden temperature drops in utility spaces.
Open faucets to relieve pressure, apply safe heat sources (hair dryer, heat tape, portable space heater) gradually along the pipe toward the frozen section, monitor for leaks, keep the area ventilated, and call a professional if thawing fails or damage is suspected.
Handling burst pipes and water damage mitigation
When pipes rupture from freezing, water can flood walls, floors, and belongings within minutes, so identifying clear warning signs and initiating an emergency response immediately is critical.
Signs include damp spots, reduced pressure, and visible leaks.
Shut off the main water, cut power to affected areas, document damage, and call a plumber and restoration service.
Dry, disinfect, and inspect for mold promptly.
Resources and Product Recommendations
A concise set of resources helps homeowners choose effective products and qualified professionals when winter risks threaten pipes.
The following list highlights recommended insulation types and brands, approved heat tapes and control devices, and where to locate certified service providers.
Practical guidance and vetted product options are presented to support safe, code-compliant decisions.
- Trusted insulation materials and brands
- Recommended heat tapes, thermostats, and sensors
- Where to find professional services and certifications
Trusted insulation materials and brands
Insulation choices determine how effectively pipes resist freezing and how easily homeowners can install, maintain, and replace protection.
Closed-cell foam pipe sleeves (Armaflex, Frost King) provide high R-value and moisture resistance.
Fiberglass wraps with vapor barriers (Owens Corning) suit larger lines.
Spray foam (Great Stuff Pro) seals gaps and anchors insulation.
Choice depends on pipe size, accessibility, and crawl space humidity.
Recommended heat tapes, thermostats, and sensors
Several reliable heat tapes, paired thermostats, and freeze sensors form a practical multilayer defense for vulnerable pipes.
Recommend self-regulating heat tape (e.g., Raychem), UL-listed plug-in models, and mineral-insulated options for long runs.
Use adjustable thermostats with temperature probes and automatic on/off control.
Add moisture-resistant freeze sensors with alarm capability.
Install per manufacturer instructions and local electrical codes for safety and effectiveness.
Where to find professional services and certifications
Directories and credentialed specialists provide the most reliable route to professional pipe-freezing prevention services.
Consumers should consult licensed plumbers, HVAC contractors, and insulation professionals listed by state licensing boards, Better Business Bureau, and trade associations (PHCC, ASHI).
Verify certifications, insurance, and references.
Seek specialists experienced with crawl-space solutions, request written estimates, warranties, and energy-efficient recommendations to guarantee code-compliant, durable results.
Conclusion
Keeping crawl-space water pipes from freezing is essential to avoid costly damage and disruption. With simple assessments, targeted insulation, air-sealing, and selective heating, homeowners can safeguard plumbing before cold arrives. Should one picture warm, wrapped pipes instead of jagged ice and burst fittings? Proactive maintenance—monitoring temperatures, installing pipe sleeves or heat tape, and addressing moisture—offers reliable protection, reducing emergency repairs and preserving home comfort through winter’s worst.