How to Turn On a Crown Boiler: Quick Step-by-Step Guide for Homeowners
To turn on a Crown boiler, start by verifying the model, fuel type, and ventilation, and check the low-water cutoff. Inspect for leaks and consult the manual. Restore main power, set control parameters, and open the fuel valve. Purge air from the lines as instructed. Next, initiate the control-panel startup sequence, confirm ignition and a steady blue flame, and check the pump flow, pressure, and temperature. Monitor the safety cutouts, log your readings, and address any faults. Follow the manual for model-specific steps and troubleshooting guidance.
How to Safely Prepare Before Turning On a Crown Boiler
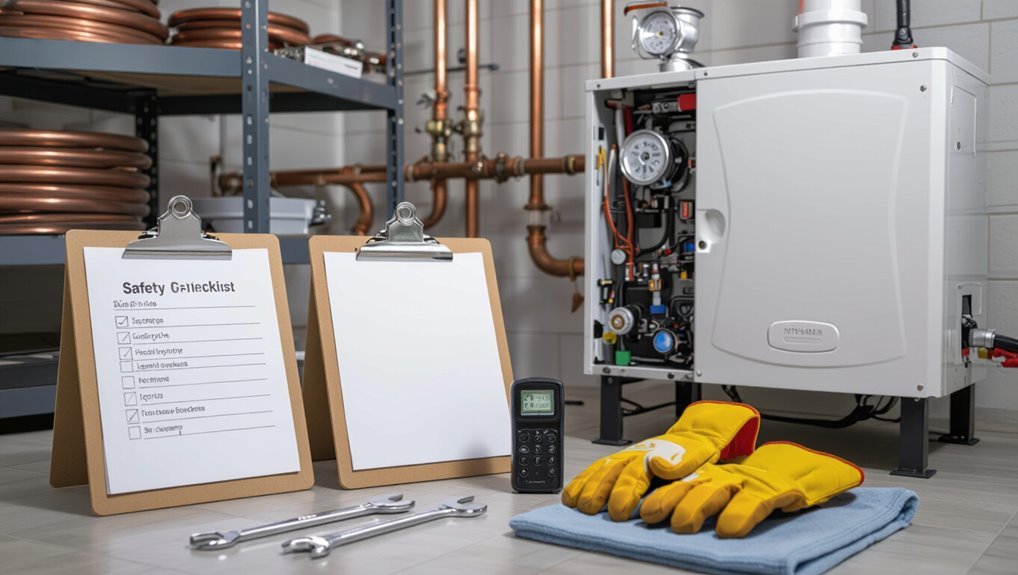
Before powering a Crown boiler, the technician verifies the model and electrical requirements and confirms the correct fuel type and an adequate supply.
They inspect the boiler room for proper ventilation and required clearances, and examine visible components for leaks, corrosion, or other damage.
Finally, they review the manufacturer’s manual and applicable local codes to guarantee all preparatory steps and safety measures are followed.
Verify model and power requirements
Which Crown model is involved and what power does it require are essential questions to resolve before any startup procedure.
The homeowner should locate the nameplate, verify model number, serial, voltage, amperage, and phase.
Cross-check manual specifications for electrical connections and required breaker size.
Verifying these details prevents damage and guarantees safe, code-compliant steps when learning how to turn on Crown boiler.
Confirm fuel type and supply (natural gas, propane, oil, or electric)
With the model and electrical requirements confirmed, the next step is to identify the boiler’s fuel type and secure the supply is correct and operational.
Inspect labels and the installer’s paperwork to confirm natural gas, propane, oil, or electric.
Verify valve positions, tank levels, regulator settings, and meter/service status.
Repair leaks, top off fuel, and ascertain shutoff valves function before powering the unit.
Check boiler room ventilation and clearance
Adequate ventilation and clearances are essential for safe operation, so the boiler room should be inspected to confirm unobstructed airflow, proper fresh-air intake, and compliance with the manufacturer’s required clearances around the appliance.
Verify vents and louvers are open, combustion air pathways unobstructed, and room size meets code.
Remove stored items from clearance zones and ascertain exhaust flues and combustion openings are free for safe operation.
Inspect visible components for leaks, corrosion, or damage
Before powering the boiler, a visual inspection of all accessible components should be performed to identify leaks, corrosion, or mechanical damage that could compromise safe startup.
Check pipes, fittings, valves, gauges, boiler jacket, and visible heat exchanger surfaces.
Note wet spots, rust, bulging, or loose connections. Photograph issues and tag unsafe components.
Do not attempt repairs beyond homeowner competence.
Review manufacturer’s manual and local codes
Although experienced technicians may feel familiar with boiler startup, the manufacturer’s manual and applicable local codes must be consulted to confirm procedures, clearances, fuel and venting requirements, safety controls, and testing protocols match the specific Crown boiler model and installation.
The installer verifies model-specific startup steps, required permits, inspection schedules, combustion air and vent sizes, electrical connections, and documented safety checks before energizing or firing the unit.
Quick Step-by-Step: Turning On a Crown Boiler (Typical Procedure)
Before initiating the Crown boiler, the operator performs safety shutdown checks and verifies system readiness.
Power and control panel settings are restored, fuel supply is opened and air purged if required, and thermostat and control parameters are set.
Startup is then initiated from the control panel or by manual ignition according to the manufacturer’s procedure.
Initial safety shutdown checks
Several quick checks confirm the boiler’s safety interlocks and shutdown systems are ready for operation.
The technician verifies low-water cutoff functionality, pressure and temperature safety limits, combustion air and venting sensors, flame safeguard status, and emergency stop circuit continuity.
Any fault indicators are logged and cleared only after inspection.
Confirmed, functional shutdown devices remain a prerequisite before proceeding with power restoration and control setup.
Restore power and control panel setup
Reapply main power to the boiler and configure the control panel according to the manufacturer’s startup sequence, ensuring each switch, breaker, and fuse corresponds to the documented wiring and labeling.
Verify control settings: temperature setpoints, pump timers, safety cutouts, and low-water cutoff.
Inspect for fault indicators or diagnostic codes.
Log initial readings and confirm responsive controls before proceeding to subsequent operational steps.
Open fuel supply and purge air if required
Open the fuel supply valve and, if the system uses gas or oil lines susceptible to entrained air, perform a controlled purge following the manufacturer’s procedure to prevent flame instability or ignition failure.
Confirm all service valves are properly positioned, monitor pressure and flow indicators, and vent trapped air from fuel lines and filters until steady, bubble-free flow is achieved.
Verify no leaks before proceeding.
Set thermostat and control parameters
Set the thermostat and controller parameters to match the system’s design and the immediate heating requirements before initiating burner operation.
Verify setpoint, differential, and schedule settings; confirm outdoor reset curve and priority zones if applicable.
Guarantee safety limits, high-temperature cutoffs, and low-water or pressure interlocks are enabled and calibrated.
Document values and notify household occupants of expected temperature behavior.
Initiate startup from control panel or manual ignition
Begin the startup sequence by selecting the appropriate mode on the control panel or preparing the burner for manual ignition, following the manufacturer’s checklist.
Verify safety interlocks, confirm fuel supply and pilot gas pressure, and guarantee venting pathways are clear.
If using manual ignition, follow prescribed spark or pilot lighting steps while observing lockouts.
Log settings and time of initiation for records.
Observe ignition sequence and flame stability
With startup actions complete and safety checks verified, attention shifts to initiating the ignition cycle and confirming a stable flame.
The operator watches the control panel for spark and fuel valve signals, then observes the burner through a viewing port for steady, blue combustion.
Any irregular flame, delayed ignition, or fault indicators prompts immediate shutdown and technician consultation before proceeding.
Confirm water pressure, temperature rise, and pump operation
Verify system hydraulics before advancing: confirm the boiler’s water pressure matches the manufacturer’s recommended operating range, check that calculated temperature rise across the boiler aligns with design specifications, and guarantee the circulation pump runs smoothly with correct flow direction and no cavitation or unusual vibration.
Record pressure and temperature readings, compare against setpoints, inspect pump bearings and seals, and correct any deviations before placing the system into full operation.
Model-Specific Variations and Controls
Control layouts and display readouts vary across Crown models, so the operator should first identify the specific control panel and its indicators.
Fuel type introduces procedural differences—gas and oil-fired units require burner and safety checks that differ from the simpler sequencing of electric boilers.
High-efficiency modulating burners and advanced controls may also require specific reset or commissioning steps distinct from basic startups.
Common Crown control panels and displays
Crown boilers use a range of control panels and displays that vary by model, from basic analog gauges and simple LED indicators to full-featured digital touchscreens and network-capable interfaces.
Common elements include temperature and pressure readouts, status LEDs, diagnostic codes, and mode selectors.
Advanced panels offer programmable schedules, remote access, and alarm logs; basic units rely on manual adjustments and local indicators.
Differences for gas vs. oil-fired Crown boilers
Many models share basic operating principles, but gas- and oil-fired Crown boilers differ in ignition, safety interlocks, fuel delivery components, and control logic.
Gas units use pilot or electronic spark ignition, gas valves, and specific flame sensors.
Oil boilers require burners, pumps, and oil lines with different safety shutoffs and pre/post-purge sequencing.
Control menus and troubleshooting steps vary accordingly.
Electric boiler startup nuances
Several electric Crown boiler models share core startup steps, but model-specific controls, relay configurations, and safety interlocks require careful attention during initial power-up.
Consult the unit’s wiring diagram and manual for correct breaker sizing, control board jumpers, and thermostat interfaces.
Verify pump sequencing, element energization limits, and fault indicator meanings.
Record settings, test safety cutouts, and contact Crown support for ambiguous or locked configurations.
High-efficiency modulating burners and reset procedures
After addressing electric boiler startup and control verifications, attention shifts to high-efficiency modulating burners and their model-specific reset procedures.
Technicians consult the manual for OEM reset steps, observing lockout indicators, purge sequences, and fuel valve checks.
Modulation settings require verified sensor inputs and proper communication with the control board.
Only qualified personnel should perform resets, documenting actions and testing safe restart functions.
How to Troubleshoot Common Startup Problems
Common startup problems are examined by noting symptoms and matching them to likely causes: no ignition or pilot failures, flame instability or frequent lockouts, and unusual noises during startup.
Low water pressure or circulation issues and recorded error codes are used to prioritize safe corrective steps.
The following guidance explains typical indicators, basic checks, and when to escalate to professional service.
No ignition or pilot failures
When a Crown boiler fails to light or its pilot will not stay lit, the issue typically stems from one of a few identifiable sources: ignition system faults, gas supply interruptions, or safety interlocks preventing ignition.
Technicians check the spark/igniter, electrode gap, flame sensor cleanliness, gas valve operation, and supply pressure.
Faulty thermocouples, clogged pilot orifices, or tripped safety switches are common culprits.
Low water pressure or circulation issues
Faults that prevent ignition can be resolved electrically or by restoring gas flow, but boilers that light and then exhibit weak heat often point to low water pressure or poor circulation.
Check gauge and refill via the feed valve to recommended PSI.
Inspect pump operation, airbound radiators, closed zone valves, and trapped air.
Bleed radiators and confirm proper pump rotation and flow rates before calling a technician.
Flame instability or frequent lockouts
Addressing flame instability or frequent lockouts requires a systematic check of fuel delivery, ignition components, and combustion sensing to isolate the root cause quickly.
Inspect fuel valves, pressure, filters, and regulators; verify electrode condition, spark strength, and igniter timing; clean or replace the flame sensor and guarantee proper grounding.
Confirm venting integrity and combustion air supply before resetting lockouts and testing safe operation.
Unusual noises during startup
Listen for abnormal sounds during startup, as they often pinpoint mechanical or combustion issues that need prompt attention.
Pinging, kettling, grinding, or rattling suggests scale, trapped air, loose components, or failing pumps and fans.
Soft hissing may indicate combustion leaks or pressure irregularities.
Document noises, shut the unit if unsafe, and contact a qualified technician for diagnosis and corrective service.
Error codes and what they typically indicate
Error codes provide a concise snapshot of what the boiler’s control system has detected and guide troubleshooting by narrowing the likely causes.
Common codes often signify ignition failure, low water pressure, flame loss, or sensor faults. Technicians consult the manual for exact definitions, then verify power, gas supply, pressure, and wiring.
Typical indicators:
- Ignition/fuel
- Low pressure
- Flame failure
- Sensor/error board
Safety Devices, Alarms, and Reset Procedures
The section reviews key safety components and alarm responses relevant to starting a Crown boiler, including pressure relief valve operation and expansion tank condition.
It also covers flame rollout and high-limit switch behavior, plus procedures for safe reset of lockouts and alarms.
Guidance is provided on signs that require immediate shutdown and contacting a qualified technician.
Pressure relief valve and expansion tank checks
Before powering the boiler, inspect the pressure relief valve and expansion tank to confirm they are functional and correctly set, since these components prevent dangerous overpressure and thermal expansion issues.
Verify the relief valve is free of leaks, test its manual lift briefly, and guarantee tank pressure matches system fill pressure.
Replace corroded valves or waterlogged tanks before startup to maintain safe operation.
Flame rollout and limit switches
Having confirmed the pressure relief valve and expansion tank are serviceable, attention shifts to flame rollout and limit switches, which protect against flame spill and overheating.
Inspect visible sensors and wiring for damage or soot. Ascertain vents and combustion chamber are clear.
Verify switches are seated and not tripped; note any fault indicators.
Do not attempt internal repairs—contact a qualified service technician.
How to safely reset lockouts and alarms
Resetting lockouts and alarms requires a methodical approach that prioritizes safety and documentation.
The operator inspects indicators, records error codes and conditions, vents combustion air if required, and verifies fuel and electrical supplies.
After addressing root causes, a single reset is attempted per manufacturer instructions.
If alarms recur, repeated resets are avoided and service by a qualified technician is arranged.
When to shut down immediately and call a professional
When should the boiler be shut down immediately and a professional called?
Immediate shutdown and service are required for gas smell, sustained flame loss, visible leaks, unusual banging, white or black smoke, rising pressure beyond safe limits, repeated safety device trips, or electrical faults.
Occupants should evacuate if gas odor is present, shut fuel supply if safe, and contact a licensed HVAC or gas technician without delay.
Routine Maintenance to Ensure Reliable Startups
A concise seasonal maintenance checklist helps guarantee reliable startups by scheduling inspections and servicing before peak use.
Regular cleaning of burners, heat exchangers, and vents, along with timely replacement of filters, gaskets, and sensors, prevents performance degradation and unsafe conditions.
Recommended service intervals for Crown boilers should be followed and documented to maintain warranty coverage and operational consistency.
Seasonal maintenance checklist
Before each heating season, owners should follow a concise checklist that addresses key systems and components to guarantee reliable startups and safe operation.
- Inspect system pressure, expansion tank, and relief valve.
- Confirm thermostat calibration and controls.
- Test safety interlocks, low-water cutoff, and limit switches.
- Verify fuel supply, shutoff valves, and combustion air pathways for obstructions or damage.
Cleaning burners, heat exchangers, and vents
Routine cleaning of burners, heat exchangers, and vents preserves combustion efficiency and prevents soot buildup that can impair performance or create safety hazards.
Inspect for corrosion, cracks, and soot deposits; remove debris with brushes and vacuum rated for fine particles.
Verify vent paths are clear and flues free of obstructions.
Schedule professional combustion analysis after cleaning to confirm proper flame pattern and safe venting.
Replacing filters, gaskets, and sensors
Following burner and vent cleaning, attention turns to replaceable components that directly affect startup reliability: filters, gaskets, and sensors.
Technicians inspect and replace clogged fuel and air filters, brittle or leaking gaskets, and faulty flame, temperature, or pressure sensors. Proper replacements restore correct combustion, sealing, and control signals.
Use manufacturer-approved parts and document part numbers and installation dates for service records.
Recommended service intervals for Crown boilers
A simple, consistent schedule of inspections and preventive maintenance maximizes Crown boiler uptime and reduces startup failures.
Annual professional tune-ups, including combustion analysis and safety checks, are recommended.
Semiannual visual inspections, filter and gasket checks, and sensor verification keep performance steady.
Monthly owners’ checks for leaks, pressure, and burner operation catch issues early.
Follow manufacturer intervals for components and record all service.
When to Hire a Licensed Technician
Legal and warranty requirements often mandate certified service for certain repairs and inspections, and homeowners should be aware of those obligations.
Complex mechanical issues, combustion analysis, or gas-system work are best left to licensed technicians with the proper tools and training.
Immediate professional service is warranted when there are signs of gas leaks, persistent carbon monoxide alarms, unusual odors, or sudden loss of heating.
Legal and warranty considerations
Many municipalities and manufacturers require certified technicians for boiler repairs, installations, and safety-related adjustments. Homeowners should confirm local codes and warranty terms before attempting work.
Voiding warranties can occur if unauthorized repairs or noncompliant parts are used. Documentation of service by licensed professionals preserves coverage and liability protection.
When in doubt, consult the manufacturer and local authorities to verify compliance and maintain warranty validity.
Complex repairs and combustion analysis
Recognize that complex repairs and combustion analysis require specialized training, tools, and certification beyond typical homeowner capabilities.
Licensed technicians should handle burner adjustments, gas pressure calibration, combustion efficiency testing, heat exchanger inspection, and any work involving fuel or venting systems.
Professional service guarantees safety, code compliance, accurate diagnostics, and preserved warranties, reducing risk of carbon monoxide, inefficient operation, or further equipment damage.
Signs that require immediate professional service
Safety dictates that any of the following warning signs prompt immediate contact with a licensed technician: persistent gas smell, repeated pilot failures, loud or unusual combustion noises, sustained pressure or temperature spikes, visible leaks from heat exchanger or connections, yellow combustion flame, carbon monoxide alarm activation, or boiler shutdowns with error codes.
These indicate hazardous conditions or major component failure requiring professional diagnosis and repair.
Quick Reference Checklist for Homeowners
A concise checklist helps homeowners confirm safe startup and know when to stop and call for help.
Recommended items to review include:
- Verify safety valves, pressure, and fuel supply
- Follow the manufacturer’s step-by-step startup sequence
- Note emergency shutdown procedure
- Keep licensed technician and emergency contact information handy
This checklist is designed as a quick reference, not a substitute for professional service or the owner’s manual.
Pre-start safety items
Before powering the Crown boiler, homeowners should complete a brief pre-start checklist to confirm the system and surrounding area are safe for operation.
Verify no gas or fuel odors; guarantee ventilation and combustion air are unobstructed.
Check for visible leaks, loose wiring, or damaged pipes.
Confirm area is clear of combustibles and that carbon monoxide and smoke detectors are operational.
Step-by-step startup checklist
One clear, concise checklist guides homeowners through each essential step to start a Crown boiler safely and correctly.
Verify power and fuel supply, confirm valves and vents are open, check water level and pressure, reset controls per manufacturer, set thermostat, perform a brief pilot/light sequence, monitor for normal operation and leaks, record initial readings, and observe for five minutes to guarantee stable performance.
Emergency shutdown steps and contact info
Shut down the Crown boiler immediately if unusual noises, strong odors, visible leaks, or flame instability occur; cut power at the main switch, close the fuel supply valve, and turn off the thermostat to prevent automatic restarts.
Evacuate the area, ventilate if safe, and do not attempt repairs.
Contact a licensed HVAC technician or Crown Boiler support; keep emergency numbers and serial/model info accessible.
Comparison of Common Crown Boiler Models and Startup Features
Although Crown offers several boiler lines that share core engineering principles, their models differ in capacity, control features, and startup procedures; this comparison highlights those practical distinctions to help users select the right unit and understand what to expect during initial power-up. A concise table follows, summarizing capacity, startup controls, and typical user steps.
| Model | Capacity | Startup Feature |
|---|---|---|
| Performer | Low–mid | Manual ignition, simple dial |
| BoilerMate | Mid | Sequenced electronic start |
| ElitePro | High | Touch controls, diagnostics |
Conclusion
In conclusion, the homeowner is gently reminded that coaxing a Crown boiler to life is best approached with a respectful routine rather than blunt force. By attending to safety checks, following model cues, and addressing minor hiccups with calm persistence, the unit will usually respond as hoped. When uncertainties linger or warning lights persist, calling in a licensed professional is the discreet way to guarantee the system receives the careful attention it deserves.