How to Install a Roman Tub Faucet: Step-by-Step Guide for DIY Success
Installing a Roman tub faucet involves several key steps to ensure a successful setup. Start by measuring the deck thickness and confirming the compatibility of the valves and hole spacing. After shutting off the water supply and draining the lines, you can remove the old faucet. Carefully dry-fit the new components, seal the escutcheons, and secure the faucet bodies. Connect the supply hoses and cartridges, then perform pressure tests and alignment checks. Finally, install the trim and handles, applying final seals to complete the process. Follow the detailed steps, tips, and troubleshooting advice for a smooth installation.
What a Roman Tub Faucet Is and When to Install One
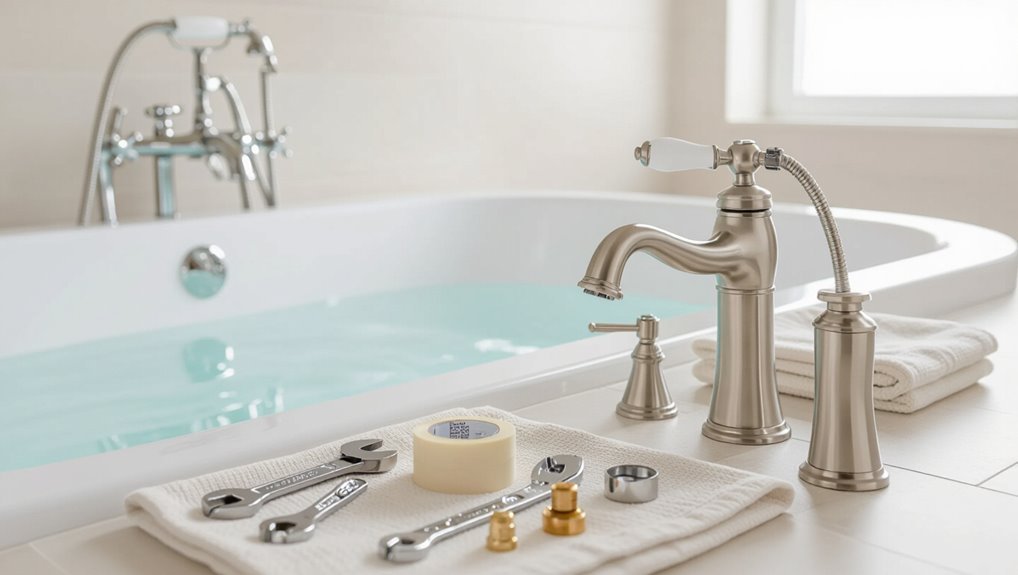
A Roman tub faucet is a deck-mounted fixture with separate hot and cold controls and a spout designed to sit on the tub rim or surrounding deck, often with multiple holes for valve and accessory placement.
It is typically used with large, alcove or drop-in tubs that have sufficient deck space and underlying plumbing to accommodate valves and escutcheons.
Compared with wall-mounted or freestanding faucets, Roman tub faucets offer a streamlined look and greater control options but require more deck space and more complex installation and sealing.
Definition and distinguishing features of Roman tub faucets
Roman tub faucets are wide, deck-mounted fixtures designed to deliver high flow directly into a freestanding or decked tub. They are distinguished by their low profile, separate handles or levers, and often a separate hand shower.
These faucets feature multiple holes, robust spouts, and durable materials. Identifying valve type, hole spacing, and mounting style streamlines planning and informs how to install a roman tub faucet correctly.
Typical use cases and layout requirements for tubs and decks
When bathtub placement allows for a wide deck and unobstructed plumbing access, homeowners and designers often choose a roman tub faucet for its high flow rate and coordinated controls.
These faucets suit freestanding tubs with surrounding platforms, built-in alcoves with ample rim depth, or custom decks that accommodate multiple mounting holes and a separate hand shower.
Planning must include deck thickness, hole spacing, valve access, and clearances for spout reach and hand shower routing.
Pros and cons compared with wall-mounted and freestanding faucets
Though often chosen for decks that can house multiple components, a roman tub faucet differs from wall-mounted and freestanding options in installation complexity, aesthetic impact, and functional trade-offs.
Deck mounts demand deck space, concealed plumbing, and precise drilling; wall-mounted units simplify tub deck but require in-wall supply rerouting.
Freestanding faucets offer flexibility and drama but need floor reinforcement and visible connections.
Choose by space, style, and plumbing access.
Tools, Materials, and Pre-Installation Checklist
Before beginning work, the installer should assemble the required tools and purchase all materials and parts, including the faucet, valves, and supply hoses.
Exact measurements and compatibility checks—deck thickness, hole spacing, and valve type—must be verified against the product specifications.
Finally, confirm safety practices and whether local plumbing permits or inspections are required.
Required tools
A concise inventory of tools and materials guarantees the Roman tub faucet installation proceeds smoothly and safely.
Required tools focus on access, secure fastening, and leak testing: adjustable wrench, basin wrench, Phillips and flat screwdrivers, plumber’s tape, silicone sealant, utility knife, bucket, flashlight, and safety gloves.
Essential checklist highlights readiness and proper tool condition.
- Wrenches and pliers
- Sealants and tapes
- Access and safety tools
Materials and parts to buy (faucet components, valves, hoses)
Selecting the correct materials and parts guarantees the Roman tub faucet functions reliably and fits the existing rough-in; this includes the faucet body and trim, compatible deck- or Roman-style valve bodies (typically 1/2″ or 3/4″ ports), hot and cold supply hoses or rigid supply lines, mounting hardware and escutcheons, threaded adapters or unions as needed, compression or sweat fittings depending on home plumbing, and replacement cartridge(s) if not included.
- Verify valve type and inlet size.
- Choose corrosion-resistant hoses and fittings.
- Keep spare seals, cartridges, and mounting screws.
Measurements and compatibility checks (deck thickness, hole spacing, valve type)
Measure the deck thickness, hole spacing, and valve type to confirm compatibility with the Roman tub faucet and its rough-in.
Verify deck thickness against faucet shank and escutcheon limits, confirm center-to-center hole spacing matches handles/spout, and guarantee the rough-in valve type (shared, diverter, or separate) matches required connections.
Record measurements and compare manufacturer specifications before purchase or installation.
Safety and plumbing permits to consider
Having recorded deck thickness, hole spacing, and valve type, attention turns to safety protocols and necessary permits before beginning work.
Verify local plumbing codes and obtain permits if required.
Shut off water, relieve pressure, and isolate electrical sources near the tub.
Use proper PPE: gloves, eye protection, and non-slip footwear.
Confirm venting and backflow prevention requirements to guarantee code-compliant, safe installation.
Preparing the Worksite and Existing Plumbing
Before beginning, the water should be shut off at the house or fixture shutoffs and residual pressure relieved by opening faucets.
The old faucet is removed and the mounting surface cleaned and inspected while supply and drain lines are checked for corrosion, leaks, and proper connections.
Any damaged valves, rough-in boxes, or deteriorated supply lines should be identified and replaced before installing the new Roman tub faucet.
How to shut off water and relieve system pressure
Shut off the water supply to the tub at the nearest isolation valve, typically located under the sink, in the crawlspace, or at the main shutoff, and close both the hot and cold lines to prevent flow.
Open the tub spout and handles to drain residual water.
Depress any nearby fixture valves or bleed screws to relieve pressure.
Verify zero flow before proceeding.
Removing an old faucet and cleaning mounting surface
Remove the old faucet assembly by first disconnecting supply lines and any mounting nuts beneath the deck. Then lift the fixture free and clear the area of remaining hardware.
Scrape away old sealant, mineral deposits, and corrosion with a plastic scraper and mild cleaner.
Sand uneven spots lightly, wipe with a solvent, and guarantee the mounting surface is dry, flat, and debris-free before installing new components.
Inspecting and preparing supply and drain lines
Begin by visually and manually inspecting the hot and cold supply lines and the tub drain assembly for corrosion, leaks, rigidness of fittings, and proper alignment with the new faucet inlet locations.
Verify shutoff accessibility, test for residual moisture, confirm thread type and size, and guarantee drain flange and tailpiece sit flush.
Note any necessary adapters, clean connection surfaces, and remove debris before installation.
When to replace valves, rough-in boxes, or supply lines
When should existing valves, rough-in boxes, or supply lines be replaced rather than reused?
Replacement is recommended if components show corrosion, leaks, damaged threads, or plastic brittleness; if materials are incompatible with the new faucet or local code; when shutoff valves fail to fully seal; if fittings are hard to access or nonstandard; or after extensive past repairs that compromise reliability and future serviceability.
Step-by-Step Installation Process
The installation proceeds by first dry-fitting components to confirm orientation and fit before permanent attachment.
Next steps include securing the deck escutcheon and faucet body, mounting handles, spout, and any diverter, then making supply and under-deck connections.
Finally, the valve cartridge and trim are installed and set to guarantee proper operation and leak-free performance.
Dry-fitting components and verifying orientation
Dry-fit all faucet parts on the deck to confirm proper spacing and alignment before applying any sealant or tightening fasteners.
Position handles, spout, and valve bodies, checking orientation relative to tub and each other. Verify hole centers, hose clearances, and lever travel.
Adjust offsets or shims for level and symmetry. Note thread types and access for future maintenance before final assembly.
Installing the deck escutcheon and faucet body
Begin by placing the deck escutcheon over the prepared holes to confirm fitment and orientation.
Once aligned, apply plumber’s putty or manufacturer-recommended gasket beneath the escutcheon, set it in place, and tighten mounting nuts from below.
Position the faucet body, feed supply lines through holes, secure the body with its mounting hardware, and torque evenly.
Wipe excess sealant and inspect for proper alignment.
Mounting handles, spout, and diverter (if present)
Carefully align each handle, spout, and diverter with its respective hole and verify that internal cartridges and seals are correctly seated before final mounting.
Secure components from underside with provided nuts or mounting plates, hand-tightening then torquing to manufacturer specs.
Confirm trim pieces sit flush and operate smoothly.
Install set screws or decorative caps, check for smooth rotation and proper diverter action before final cosmetic adjustments.
Connecting supply lines and underground/under-deck connections
Proceed to route the hot and cold supply lines from their shutoff valves to the faucet assemblies, ensuring each line follows the shortest practical path without kinks and maintains proper slope for any under-deck runs.
Secure lines with clips or straps, trim to length, deburr ends, and install appropriate fittings and compression or flex connectors.
Pressure-test connections and inspect for leaks before finalizing.
Installing and setting the valve trim and cartridge
With supply lines secured and pressure-tested, attention shifts to installing the valve trims and cartridges that control flow and temperature.
Technicians seat cartridges into valve bodies, aligning tabs and stops per manufacturer marks. Retaining nuts or clips are tightened to specified torque.
Trim escutcheons and handle adapters are fitted, handles adjusted for symmetry, then functional checks confirm smooth operation and accurate hot/cold orientation.
Sealing fittings and applying plumber’s putty or silicone
Seal the fittings before final assembly to prevent leaks and guarantee a watertight bond between fixtures and deck.
Apply plumber’s putty or silicone per manufacturer instructions: use putty for non-porous surfaces, silicone for flexibility and durability.
Spread an even bead, seat components, wipe excess, and allow proper curing time.
Inspect seals visually; replace any compromised material before completing installation.
Reconnecting water, testing for leaks, and adjusting flow/temperature
After the seals have cured and excess material removed, the supply lines can be reattached and the main shutoff slowly opened to restore water to the Roman tub.
Inspect connections for drips, tighten fittings as needed.
Run both hot and cold, cycle handles to purge air.
Verify steady flow, adjust temperature stops for balance, and recheck leaks after several minutes of pressure.
Troubleshooting Common Installation Problems
Common installation problems can usually be traced to specific areas such as leaks at the base, spout, or supply connections and mismatched hole spacing.
Low water pressure or an uneven hot/cold balance often signals supply line issues or internal cartridge faults.
Stiff or loose handles and misaligned components typically require tightening, cartridge adjustment, or repositioning of the faucet or mounting hardware.
Fixing leaks at the base, spout, or supply connections
Diagnosing leaks at the base, spout, or supply connections begins with isolating the source: visually inspect for drips, feel for moisture around joints, and run the faucet to observe where water appears.
Tighten loose fittings, replace worn O-rings or cartridge seals, reseal the base with appropriate plumber’s putty or silicone, and verify supply line compression nuts or flex hoses are properly seated and leak-free.
Addressing low water pressure or uneven hot/cold balance
Once leaks at connections and seals have been ruled out, low water pressure or an uneven hot/cold mix typically points to flow restrictions, valve misalignment, or supply-side issues.
Inspect aerators and in-line debris screens, flush supply lines, verify shutoff valves are fully open, and confirm hot and cold feeds are correctly connected.
Replace clogged cartridges or adjust valve alignment to restore balanced flow.
Resolving handle stiffness or loose components
Tighten, lubricate, or replace—the most frequent causes of a stiff or loose roman tub handle are improper fastening, dried or missing lubrication, or worn internal parts.
Inspect mounting nuts and set screws, snugging to manufacturer torque.
Remove handle to clean and apply silicone or plumber’s grease to splines and cartridges.
Replace damaged cartridges, bushings, or O-rings to restore smooth, secure operation.
Dealing with misaligned holes or incorrect hole spacing
Measure the mounting points and compare them to the faucet’s template to determine whether hole misalignment or incorrect spacing is the issue.
If off by small margins, use adjustable mounting hardware or shims to realign components.
For larger discrepancies, consider relocating holes, installing a mounting plate, or selecting an adapter escutcheon.
Verify level and spacing before sealing to prevent leaks and rework.
Maintenance, Care, and Long-Term Considerations
Routine cleaning and mineral deposit prevention keep a Roman tub faucet operating smoothly and protect finishes.
Periodic inspection and timely replacement of cartridges, seals, and diverters prevent leaks and restore proper function.
For infrequently used tubs, winterizing and freeze-prevention measures safeguard internal components from cold damage.
Routine cleaning and mineral deposit prevention
Keep the faucet surfaces and internal passages free of buildup by establishing a simple, regular cleaning schedule that prevents mineral deposits from accumulating.
Use mild, nonabrasive cleaners and a soft cloth weekly; soak removable aerators in vinegar monthly to dissolve limescale.
Flush lines occasionally by running hot water.
For hard water, consider a water softener or inline filter to reduce mineral buildup and extend component life.
Replacing cartridges, seals, and diverters
Servicing a Roman tub faucet’s cartridges, seals, and diverter restores smooth operation and prevents leaks that can cause water waste or damage.
Replacement involves isolating water, removing handles and trim, inspecting worn parts, and installing manufacturer‑specified components. Proper lubrication and torque prevent premature failure.
Test for leaks and function before finishing.
- Inspect parts
- Use OEM replacements
- Test thoroughly
Winterizing and preventing freeze damage for infrequently used tubs
Prepare a Roman tub and its supply lines for winter by draining water from the faucet, valves, and any exposed piping.
Then, isolate and insulate remaining components to prevent freeze damage. Close shutoff valves, open drain plugs, and remove detachable components.
Apply foam insulation or heat tape to vulnerable pipes, check seals, and periodically inspect during cold snaps to guarantee no freezing or leaks develop.
Cost, Time Estimates, and When to Hire a Professional
Typical DIY installation requires a few hours and modest parts costs, while more complex setups or replacement of old plumbing can raise both time and expense.
If leaks, inaccessible fittings, or municipal code concerns arise, a licensed plumber should be contacted.
When hiring, verify credentials, request written estimates and timelines, and ask for references and proof of insurance.
Typical DIY time and cost breakdown
A straightforward Roman tub faucet replacement commonly takes an experienced DIYer 3–6 hours and costs between $150 and $600 in parts and supplies, depending on fixture quality and whether new rough-in components or extra fittings are required. Time and cost vary by skill, access, and unexpected repairs.
| Item | Typical range |
|---|---|
| Faucet | $100–$500 |
| Valves | $30–$150 |
| Supplies | $10–$50 |
| Labor (DIY) | 3–6 hours |
Signs you should call a licensed plumber
Call a licensed plumber when complexities exceed routine replacement—such as persistent leaks, corroded or inaccessible valves, mismatched rough-in dimensions, or signs of water damage—because these issues often require specialized tools, experience, and code knowledge to diagnose and fix safely.
Hire a pro if rough carpentry, hidden piping, pressure problems, or fixture relocation is involved; expect higher labor costs and variable timelines depending on diagnostic findings.
How to vet installers and what to ask before hiring
When homeowners face choices about installing a Roman tub faucet, vetting installers carefully reduces the risk of delays, unexpected costs, and substandard workmanship.
Request licenses, insurance proof, references, and written estimates detailing labor, parts, permit fees, and timelines.
Ask about warranties, cleanup, and contingency plans for hidden issues.
Compare multiple bids and hire a licensed professional when complexity, custom fittings, or warranty concerns exceed DIY capability.
Quick Reference: Condensed Installation Checklist
A concise checklist summarizes the key pre-installation measurements and required materials to confirm readiness.
It then outlines the sequential installation steps in order, from rough-in to fixture mounting.
Finally, it lists final testing and handover items to verify leak-free operation and user instructions.
Pre-installation measurement and materials checklist
Measurements and a concise materials list guarantee the installation proceeds without delays: confirm deck thickness, spout and handle hole centers, and distance to the tub edge; verify supply line lengths, shutoff valve locations, and clearance under the deck; and gather the faucet, mounting hardware, escutcheons, supply hoses, plumber’s tape, sealant, and necessary wrenches.
- Verify measurements twice.
- Match fittings and hose lengths.
- Stage tools and parts nearby.
Sequential installation steps checklist
Begin the installation by laying out the condensed checklist in order of execution: secure the faucet body, mount handles and spout, connect supply hoses, test for leaks, and finish with escutcheons and sealant.
The installer follows each step sequentially, verifying alignments and torque.
Use the numeric list below to emphasize priorities:
- Structural anchoring
- Water connections
- Cosmetic finishes
Final testing and handover checklist
Complete the final testing and handover checklist by systematically verifying function, watertightness, and finish before leaving the site.
The installer inspects for leaks, tests hot and cold operation, confirms smooth handle and diverter action, checks mounting security, and polishes surfaces.
Document findings and brief the owner on operation and maintenance; provide warranty and contact details.
- Verify watertightness and operation.
- Confirm mechanical security.
- Deliver documentation and owner briefing.
Conclusion
A Roman tub faucet installation, when executed with care, transforms a bathroom into a spa-like retreat and rewards patience with lasting function. The guide’s clear steps serve as a compass through plumbing, sealing, and alignment challenges, while troubleshooting anticipates common pitfalls. Routine maintenance keeps the system humming for years. Like a well-orchestrated duet, correct installation and thoughtful upkeep guarantee the faucet performs reliably, blending form and function in enduring harmony.