How to Seal Pipes: Simple, Long-Lasting Methods for Leaks, Joints, and New Installations
To effectively seal pipes and address leaks, start by diagnosing the issue: identify the leak’s cause, shut off the water supply, and wear appropriate personal protective equipment (PPE). For threaded joints, use PTFE tape or pipe joint compound; apply the tape clockwise on male threads and tighten according to specifications. To patch small pinholes, use epoxy putty or rubber repair tape, securing with clamps if necessary. For larger cracks, cut out the damaged section and replace it or use mechanical couplings. Always clean and deburr new installations, conduct a pressure test, and schedule necessary inspections. Follow these step-by-step techniques, choose the right materials, and prioritize safety for effective pipe sealing.
How to Seal Pipes Quickly and Effectively
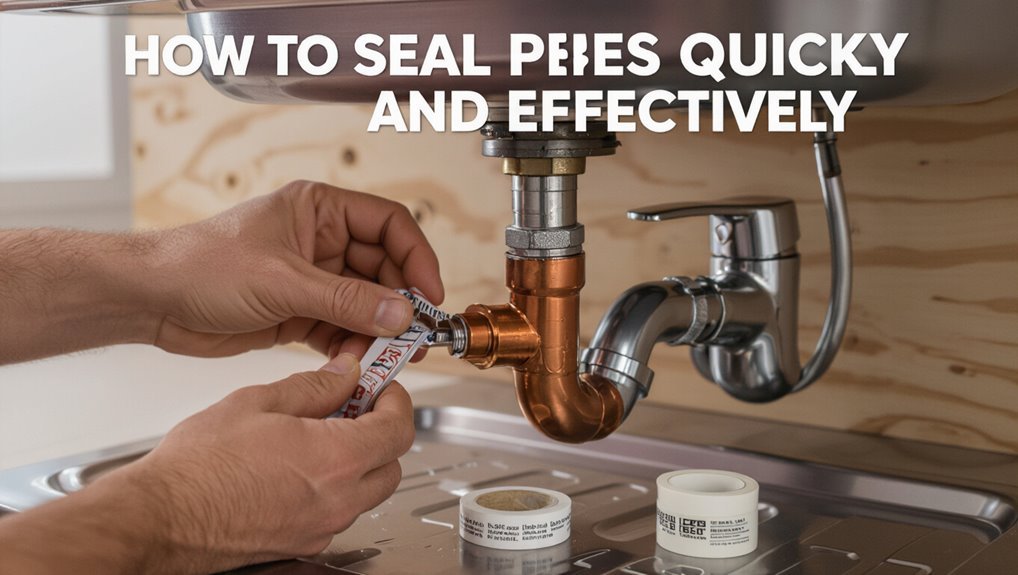
A concise overview explains common causes of pipe leaks—corrosion, loose fittings, and physical damage—and outlines when sealing is an appropriate response versus when replacement is required.
It contrasts fast temporary fixes with permanent sealing methods and gives criteria for choosing between them.
A brief safety and tools checklist is recommended before work begins, including shutoff procedures, protective gear, and necessary sealants and tools.
What causes pipe leaks and when sealing is appropriate
Many pipe leaks result from corrosion, mechanical stress, joint failure, or improper installation. Identifying the root cause determines whether a sealant or a more extensive repair is appropriate.
Inspection reveals hairline cracks, worn threads, or loose fittings. Understanding failure mode guides choices in how to seal pipes: adhesive compounds, replacement of damaged sections, or tightening and reseating joints to guarantee durable, compatible repairs.
Fast temporary fixes vs permanent sealing’ how to decide
When should a quick patch be chosen over a permanent repair depends on factors like leak severity, location, water pressure, and long-term access.
Temporary fixes suit small, low-pressure leaks, emergency containment, or when immediate professional repair is unavailable.
Permanent sealing is required for structural failures, recurring leaks, high pressure, or when access permits lasting work.
Choose based on risk, cost, and planned timeline.
Safety precautions and tools checklist before you start
Choosing between a quick patch and a lasting repair sets the context for preparing the workspace and safety measures before sealing pipes.
The technician verifies water and gas shutoffs, vents the system, and isolates electrical sources.
Required tools and PPE are gathered: gloves, eye protection, pipe cutter, emery cloth, flux, solder or sealant, tape, clamps, bucket, and work light.
Materials and Sealants for Different Pipe Types
A concise overview of common sealants—PTFE tape, pipe dope, epoxy putty, silicone, rubber repair tape, and pipe clamps—sets the stage for selecting the right product for each pipe material.
Recommendations differ for metal pipes (copper, steel, galvanized) versus plastics (PVC, CPVC, PEX), and must account for installation location (indoor, outdoor, buried, potable water).
Compatibility with pipe material, service temperature, and operating pressure will determine the safest and most durable choice.
Sealants overview: PTFE tape, pipe dope, epoxy putty, silicone, rubber repair tape, pipe clamps
Effective sealing requires selecting a material that matches the pipe’s material, joint type, pressure, and fluid being conveyed.
PTFE tape suits threaded connections; pipe dope offers thicker, reusable seals; epoxy putty patches holes and bonds to many substrates; silicone seals non-pressurized joints and resists moisture; rubber repair tape wraps emergency leaks; pipe clamps provide mechanical compression for temporary or permanent repairs.
Best options for metal pipes (copper, steel, galvanized)
Assess metal piping by matching sealant chemistry and application method to the pipe type, joint configuration, pressure, and conveyed fluid.
For threaded steel and galvanized fittings, use PTFE tape or anaerobic thread sealant.
For soldered copper joints, flux and proper soldering are primary, with epoxy or brazing for repairs.
Epoxy putty, silicone, or mechanical clamps suit temporary fixes; choose corrosion-resistant materials for longevity.
Best options for plastic pipes (PVC, CPVC, PEX)
Select sealants and joining methods that match plastic type, service conditions, and pressure class to guarantee durable, leak-free connections.
For PVC use solvent cement for schedule and DWV systems; primer where required.
CPVC requires compatible cement rated for higher temperatures.
PEX relies on crimp, clamp, or expansion fittings with manufacturer-approved rings.
Use thread sealant tape on compatible threaded plastic fittings; avoid aggressive sealants that soften polymers.
Choosing materials by location: indoor, outdoor, buried, and potable water lines
After matching sealants and joining methods to plastic type and operating conditions, attention turns to the installation environment, since location dictates material choices and protective measures.
Indoor lines favor low-VOC adhesives, accessible fittings, and aesthetic covers.
Outdoor exposed pipes require UV-resistant materials and weatherproof sealants.
Buried lines need corrosion-resistant coatings, mechanical protection, and proper bedding.
Potable water lines demand NSF/ANSI-approved materials and lead-free fittings.
Compatibility, temperature, and pressure considerations
Because pipes and sealants operate as a system, compatibility with base materials and rated temperature and pressure ranges must guide every selection. The author emphasizes matching chemical resistance, thermal expansion, and working pressure; verify manufacturer ratings and safety margins. Select adhesives or tapes rated above maximum operating conditions and avoid solvent attack on plastics; consult data sheets before installation.
| Pipe type | Recommended sealant/limit |
|---|---|
| PVC | Solvent weld / <60°C |
| Copper | PTFE/brazing / high pressure |
| Steel | Anaerobic/epoxy / high temp |
| PEX | Compression/heat-rated |
Step-by-Step: Sealing Threaded Joints and Fittings
The section outlines practical steps for sealing threaded joints, beginning with cleaning and inspecting threads for damage or debris.
It then explains correct application of PTFE tape and pipe joint compound, when to use each or both together, and the rationale for combining them.
Finally, it covers proper torque and tightening techniques to guarantee a leak-free connection without overstressing fittings.
Preparing threads: cleaning and inspection
Inspecting and cleaning threads guarantees a reliable seal and prevents leaks once joints are assembled.
The technician examines threads for nicks, cross-threading, corrosion, and burrs, removing debris with a wire brush or cloth.
Damaged threads are repaired with a die or replaced.
Surfaces are degreased and dried; thread condition is confirmed before applying any sealant or joining components.
How to apply PTFE (Teflon) tape correctly
Begin by wrapping PTFE tape around the male threads in the direction of tightening so the tape lies flat and will not unravel when the fitting is engaged.
Overlap each turn slightly, typically two to three wraps for standard pipe threads. Smooth the tape into crevices, avoid covering the first thread at the pipe shoulder, and tear cleanly.
Assemble fittings hand-tight plus a quarter turn with a wrench.
How to use pipe joint compound (pipe dope)
Apply pipe joint compound (pipe dope) to clean, dry male threads using a small brush or the applicator provided, working from the first full thread back toward the pipe to guarantee even coverage without excess build-up.
Spread thinly, avoiding the lead-in end. Hand-tighten fittings, then finish with the appropriate wrench torque.
Wipe any excess; allow cure time per manufacturer before pressurizing the system.
Combining tape and compound’ when and why
After the pipe joint compound is evenly spread and excess wiped away, many technicians choose to combine PTFE tape with compound for added leak resistance on threaded fittings.
This dual approach fills threads, lubricates during assembly, and provides backup sealing if one material shifts. It is favored on metal threads, aging seals, and critical water or gas lines where redundancy improves long-term reliability.
Torque and tightening guidance to avoid leaks
Proper torque and tightening technique is critical to form a reliable seal without damaging threads or distorting fittings.
Technicians should hand-tighten first, apply specified torque with a calibrated wrench, and follow manufacturer torque charts.
Over-tightening crushes seals or strips threads; under-tightening leaks.
For tapered threads, tighten to spec plus a limited number of turns; for straight threads use proper gasket compression.
Step-by-Step: Repairing Small Leaks in Smooth Pipes and Pinsholes
For small leaks and pinholes in smooth pipes, the text outlines practical repair options such as epoxy putty for filling holes and silicone or rubber-based sealants for surface sealing.
It also covers wrap solutions like rubber repair tape and self-fusing silicone tape for temporary or permanent reinforcement.
Guidance on curing times and performing pressure tests after repair is provided to confirm integrity before returning the pipe to service.
Using epoxy putty for pinhole repairs
Begin by gathering a compatible epoxy putty rated for plumbing use and the minimal tools needed—sandpaper, a rag, and gloves—so the repair can proceed without interruptions.
Dry and roughen the area, clean residue, knead putty until uniform, then press firmly over the pinhole and adjacent pipe.
Smooth edges, allow full cure per manufacturer, restore pressure gradually and inspect for leaks before finishing.
Applying silicone and rubber-based sealants
Select a silicone or rubber-based sealant specifically formulated for plumbing use and compatible with the pipe material before starting the repair.
Clean and dry the pipe, removing corrosion and residue.
Apply sealant neatly over the pinhole or seam, smoothing to guarantee full adhesion and no voids.
Allow recommended cure time under ambient conditions, then pressure-test for leaks before restoring service.
Wrap solutions: rubber repair tape and self-fusing silicone tape
Wrap solutions such as rubber repair tape and self-fusing silicone tape provide a quick, reliable method for sealing small leaks and pinholes on smooth pipes without disassembling the system.
Clean and dry the area, stretch and wrap rubber tape tightly overlapping by half, or wrap self-fusing silicone under tension until it bonds.
Trim edges and smooth layers for uniform contact.
Curing times and pressure-testing after repair
Allow adequate curing time before applying pressure: most rubber repair tapes and self-fusing silicone require 10–30 minutes of undisturbed setting for light handling and up to 24 hours for full bond strength, depending on product instructions, ambient temperature, and humidity.
After curing, perform a gradual pressure test from low to operational pressure. Inspect for seepage, recheck clamps and overlaps, and document results before normal use.
Sealing Large Cracks and Burst Sections
For large cracks or burst sections, the technician evaluates whether a mechanical repair (sleeves, clamps, compression couplings) can stabilize the pipe or if cutting out and replacing the damaged segment (PVC, copper, PEX) is required.
When replacement is chosen, the installer follows a clear sequence for removing the bad section and fitting repair couplings or slip fittings.
The discussion distinguishes temporary measures to stop active leaks from permanent repairs designed to restore long-term integrity.
When to use mechanical repair (sleeves, clamps, compression couplings)
When a pipe exhibits a large crack, split, or a localized burst that cannot be reliably sealed with epoxy or tapes, mechanical repairs such as sleeves, clamps, and compression couplings become the appropriate choice.
These devices provide immediate containment, restore pressure integrity, and suit varying pipe materials and diameters.
Choose stainless or coated components, guarantee proper sizing, torque to manufacturer specs, and test under operational pressure.
Cutting out and replacing damaged sections (PVC, copper, PEX)
Begin by isolating the damaged section and shutting off water to relieve pressure before cutting; removing the compromised length and installing a properly sized replacement restores integrity for large cracks or bursts.
Assess material (PVC, copper, PEX), cut squarely beyond damaged ends, deburr and clean pipe, prepare compatible connectors and solvent, solder or crimp as appropriate, test under pressure and inspect for leaks before restoring service.
Installing repair couplings and slip fittings step-by-step
Install repair couplings and slip fittings with a clear sequence: isolate and drain the line, cut back to sound pipe ends using a square, deburred cut, and clean the pipe surfaces; select the correct coupling type and size for the material (PVC, copper, or PEX) and the expected pressure;
slide the slip fitting or repair coupling into place, ensuring full engagement and proper alignment; apply solvent cement, solder, or push-fit/clampless retention per manufacturer instructions;
tighten clamps or crimp rings as required, allow cure or cool time, then restore water and inspect the joint under pressure for leaks before finalizing the repair.
Temporary vs permanent strategies for burst pipes
Assess the situation quickly to determine whether a burst pipe requires an immediate temporary stopgap or a permanent repair.
For temporary measures, employ shutoff valves, pipe clamps, rubber patches with hose clamps, or epoxy putty to limit damage until a plumber arrives.
Permanent solutions replace or splice with correct-diameter fittings, soldered or solvent-welded joints, or mechanical couplings rated for pressure and material.
Sealing New Installations and New Joints for Long-Term Reliability
For new installations, proper preparation of pipe ends and fittings—cleaning, deburring, and chamfering—ensures reliable seals at assembly.
The author recommends specific sealing methods by joint type (solvent-weld for PVC, tape/compound for threaded, manufacturer-specified seals for push-fit and crimp), followed by pressure testing and a careful leak inspection before burying or closing walls.
All sealed joints should be documented and labeled to aid future maintenance and traceability.
Best practices for prepping pipes and fittings before assembly
Preparing pipes and fittings before assembly guarantees reliable seals and prevents premature failure. Surfaces must be clean, dry, and free of burrs, oil, paint, and corrosion.
Deburr cut ends, chamfer edges, and remove extrusion flash. Verify dimensional fit and alignment. Use proper cleaning solvents and lint-free cloths.
Inspect threads, apply specified lubricants or primers where required, then assemble promptly.
Recommended sealing methods per joint type (solvent-weld, threaded, push-fit, crimp)
Select sealing methods that match the joint type, material, and service conditions to confirm long-term reliability.
For solvent-weld PVC/CPVC, use correct primer and solvent cement per manufacturer.
For threaded metal or plastic, apply PTFE tape or pipe dope rated for media and temperature.
For push-fit, ascertain clean ends and use manufacturer-approved seals.
For crimp systems, use specified rings and proper tooling to secure joints.
Pressure testing and leak inspection before burying or wall closure
Begin pressure testing and visual leak inspection before backfilling or closing walls to verify joint integrity and identify defects under realistic stress.
Apply specified test pressure for the required duration, monitor gauges, and inspect all joints and fittings for seepage.
Repair or replace any weak connections, retest until stable.
Record test parameters and results for quality assurance prior to concealment.
Documentation and labeling of sealed joints for future maintenance
When joints are sealed, clear documentation and durable labeling create an accessible record that supports future maintenance, troubleshooting, and warranty verification.
Records should note joint location, materials, sealant type, application date, technician, pressure test results, and photos.
Labels must resist moisture, chemicals, and UV, include unique IDs matching drawings and digital logs, and be placed for easy access without compromising the seal.
Specialized Situations and Materials
Different materials and systems require specific sealing approaches and compliant products.
Gas and fuel lines demand certified fittings and compounds, while hot-water and steam pipes need high-temperature-rated sealants and gaskets.
Sewer, drain, irrigation, and sprinkler systems each pose unique challenges—odor and waste containment for sewers, and UV and outdoor durability for irrigation components—that guide material choice and installation methods.
Sealing gas lines and fuel lines’ regulations and approved materials
Gas and fuel lines require strict adherence to codes and approved materials because leaks pose severe safety and legal risks.
Technicians must use listed fittings, approved pipe types (CSST, black iron, listed flexible connectors), compatible sealants (pipe dope rated for gas), and comply with local codes and utility provider rules.
Testing, permits, and certified inspection guarantee safe, compliant installation and repairs.
Sealing hot-water and steam pipes’ high-temperature solutions
Addressing high-temperature sealing for hot-water and steam pipes demands materials and methods rated for sustained heat, pressure, and potential thermal cycling.
Use high-temp PTFE tape, anaerobic sealants rated for steam, and silicone or graphite-based gaskets.
Apply heat-resistant pipe dope for threaded joints and brazing or mechanical couplings for permanent repairs.
Verify compatibility, pressure ratings, and routine inspection under operating temperatures.
Sealing sewer and drain pipes’ odor and waste considerations
When sealing sewer and drain pipes, consideration must extend beyond leak prevention to include odor control, backflow resistance, and safe handling of biological waste.
Products and methods should consequently block gases and liquids, resist microbial degradation, and be compatible with drain-cleaning chemicals and fats.
Use gas-tight gaskets, antimicrobial sealants, mechanical check valves, and corrosion-resistant couplings; guarantee accessible cleanouts and follow disposal regulations.
Sealing irrigation and sprinkler systems’ UV and outdoor durability
Moving from sewer and drain considerations to outdoor irrigation systems highlights different stresses: ultraviolet exposure, temperature cycling, and constant moisture demand.
Seals and materials must resist sunlight-driven degradation, freeze–thaw cracking, and biofouling. Suitable options include UV-stable PVC/HDPE, silicone or polyurethane sealants rated for exterior use, and wrap tapes with UV inhibitors.
Regular inspection and replacement extend longevity.
Tools, Supplies, and How Much to Buy
A concise toolkit and the right consumables are essential for effective pipe sealing and repair.
Guidance covers basic tools (wrenches, cutters, brushes), how to estimate quantities of tape, sealant, and fittings for typical jobs, and criteria for choosing reputable brands.
Practical tips help prevent under- or overbuying and guarantee durable results.
Essential tools for sealing and repairing pipes
Selecting the right tools and supplies is essential for effective pipe sealing and repair. Necessary items include hand tools, sealants, and safety gear.
Recommended essentials:
- Adjustable wrench, pipe cutter, pliers
- PTFE tape, pipe dope, epoxy putty
- Brush, cleaning solvent, rags
- Gloves, goggles, leak detection dye
Proper selection guarantees durable, professional results.
Estimating quantities of tape, sealant, and fittings for common jobs
For typical household repairs, estimating how much PTFE tape, sealant, and fittings are needed prevents wasted trips and excess cost.
Measure pipe diameters and thread lengths, then allot 2–3 tape wraps per joint and 10–20% extra for waste.
For sealant, plan 10–30 ml per small joint.
Count fittings: include spares (10–20%) for mismatches.
Pack common sizes rather than single pieces.
Recommended brands and product selection tips
Moving from quantity estimates to product choice helps guarantee materials perform as expected and last.
Recommended brands include RectorSeal, Oatey, Loctite, Permatex, and 3M for thread sealants, primers, adhesives, and tape.
Choose NSF/ANSI-certified, application-specific items (PVC, copper, gas).
Buy slightly more than calculated for waste and future repairs; prefer cartridge formats and reputable distributors for warranty and support.
Common Mistakes and How to Avoid Them
Common mistakes when sealing pipes include over-tightening that damages threads, choosing a sealant incompatible with the pipe material or system pressure, and skipping surface preparation or required curing times.
Technicians also risk hiding faults by failing to pressure-test or inspect repairs before restoring finishes.
Addressing these issues with correct techniques, materials, and testing prevents leaks and costly rework.
Over-tightening and thread damage
Over-tightening fittings can strip threads, crack joints, or warp seals, turning a minor leak into a serious repair.
Proper torque prevents damage: tighten by hand, then use a wrench for one-quarter to one-half turn only, following manufacturer specs.
Inspect threads before assembly, replace damaged components, and use proper tools.
Stop when resistance increases noticeably to avoid stress and distortion.
Using the wrong sealant for material or pressure
Many leaks and failures stem from choosing a sealant incompatible with the pipe material or the system’s operating pressure.
Selecting sealants requires matching chemistry—PTFE tape, pipe dope, anaerobic sealants, or silicone—to metal, plastic, or composite substrates and to static or high-pressure service.
Using rated products prevents chemical attack, extrusion, or blowout.
Consult specifications and pressure ratings before application.
Skipping surface preparation or curing times
Although surface preparation and full cure times can seem like expendable steps, neglecting them undermines seal integrity and shortens service life.
Dust, oil, rust, or moisture prevent adhesion; inadequate curing leaves tacky, weak joints. Proper cleaning, roughening, and drying plus observing manufacturer cure schedules guarantee bonds reach rated strength.
Skipping these steps causes premature leaks and increases maintenance frequency.
Failing to properly test repairs before restoration
After surface prep and cure times are observed, skipping proper testing before restoring finishes a common cycle of premature failure: a repair that looks sealed can still leak under pressure, vibration, or thermal change.
Technicians should perform pressure tests, inspect joints visually and with dye or electronic leak detection, and run systems through expected load and temperature ranges before closing walls or insulating lines.
Maintenance, Inspection, and When to Call a Professional
A regular inspection schedule helps identify failing seals early, with common warning signs including drips, corrosion, and dampness around joints.
Simple maintenance—such as cleaning, re-tightening connections, and replacing worn sealant—can extend repairs, but persistent or worsening leaks often signal broader system issues that warrant a professional.
Decisions about DIY versus hiring a pro should weigh repair complexity, safety risks, and comparative costs.
Routine inspection schedule and signs of failing seals
When establishing a routine inspection schedule for pipe seals, homeowners and maintenance personnel should adopt a predictable cadence—typically quarterly for visible connections and biannually for buried or hard-to-access joints.
Adjusting frequency based on system age, material, and environmental stressors is also important.
Inspectors should look for dampness, corrosion, softening or cracking of sealant, odor, pressure drops, and staining.
Record findings and escalate persistent or worsening signs to a professional.
Long-term maintenance tips to extend repair life
Building on routine inspections, long-term maintenance focuses on proactive steps that preserve seal integrity and delay repeat repairs.
Regular cleaning prevents buildup that degrades seals; controlled pressure fluctuations reduce stress; periodic re-tightening and sealant touch-ups address minor settling; corrosion inhibitors protect metal fittings; environmental controls limit freeze/thaw cycles; and detailed records of work and materials enable targeted future maintenance and effective warranty claims.
When a leak indicates a larger system problem’ hire a pro
Recognize that persistent or recurring leaks often signal underlying system failures rather than isolated seal issues.
A professional inspection can identify corrosion, pressure anomalies, failed fittings, hidden pipe fractures, or systemic design flaws.
Engage a licensed plumber when leaks reappear after repairs, when multiple leaks occur, or when water damage, mold, or structural impact is evident.
Prompt professional diagnosis prevents escalation and recurring costs.
Cost and safety considerations for DIY vs professional repair
How much should be attempted at the sink before calling a licensed plumber depends on balancing immediate expense, long‑term risk, and personal skill.
DIY fixes save labor costs but may void warranties, miss systemic issues, or create water damage.
Professionals cost more upfront yet guarantee code compliance, reliable seals, and liability coverage.
Prioritize safety, permit requirements, and potential replacement versus temporary repair.
Quick Reference Guides and Checklists
The article provides compact reference tools to speed decision-making and fieldwork.
Included are a quick-match chart linking pipe materials and common problems to the recommended sealant, a concise step-by-step checklist for sealing a typical threaded joint, and an emergency temporary-fix checklist for a burst pipe.
Each guide is formatted for rapid use and clear prioritization of safety and effectiveness.
Quick-match chart: best sealant by pipe material and problem
When a leak or joint issue arises, choosing the right sealant quickly can prevent further damage and simplify repairs; this quick-match chart pairs common pipe materials with the most effective sealants and typical problems to guide fast, confident decisions.
| Pipe material | Best sealant | Typical problem |
|---|---|---|
| PVC | PVC cement | Slip-fit joints |
| Copper | Solder/flux | Pinholes |
| Galvanized | Thread sealant | Corroded threads |
| PEX | Crimp rings | Loose fittings |
Step-by-step checklist for a typical threaded joint seal
One concise checklist outlines the essential steps for sealing a typical threaded pipe joint to guarantee a watertight, durable connection.
- Clean threads and remove old tape/sealant.
- Inspect for damage; replace fittings if cracked.
- Wrap PTFE tape clockwise or apply pipe thread compound evenly.
- Hand-tighten then wrench-turn per manufacturer, check for leaks, retorque after pressure test.
Emergency temporary fix checklist for a burst pipe
Several quick actions can limit water damage and buy time until a permanent repair is made:
- Shut off main water supply and drain affected lines.
- Contain flow with clamps, rubber and hose clamps, or pipe repair tape.
- Protect area: move belongings, use buckets and towels, elevate electrical items.
- Call a licensed plumber and document damage for insurance; keep temporary fixes visible for professional assessment.
Conclusion
Sealing pipes well preserves systems and prevents damage, so it should be approached thoughtfully and methodically. Like a skilled tailor mending fabric, the right sealant and technique restore integrity without excess. Regular inspection, correct material choice, and proper application extend service life and reduce emergency repairs. For complex damage or uncertain situations, a professional should be consulted to guarantee safety and compliance with codes, protecting property and occupants long-term.