How to Remove a Compression Ring From CPVC Pipe Safely: Step-By-Step Guide
To safely remove a compression ring from CPVC pipe, follow these steps: First, isolate and drain the line, then wear appropriate PPE and protect the surrounding areas. Loosen the compression nut using a wrench. Next, remove the ferrule by gripping it with smooth-jawed pliers or by scoring and splitting it lengthwise to slide it off. If necessary, apply gentle heat to loosen it without damaging the pipe. Finally, inspect, clean, and deburr the pipe end before proceeding with any repairs or reassembly. Further troubleshooting steps are available if needed.
Quick overview of removing a compression ring from CPVC pipe
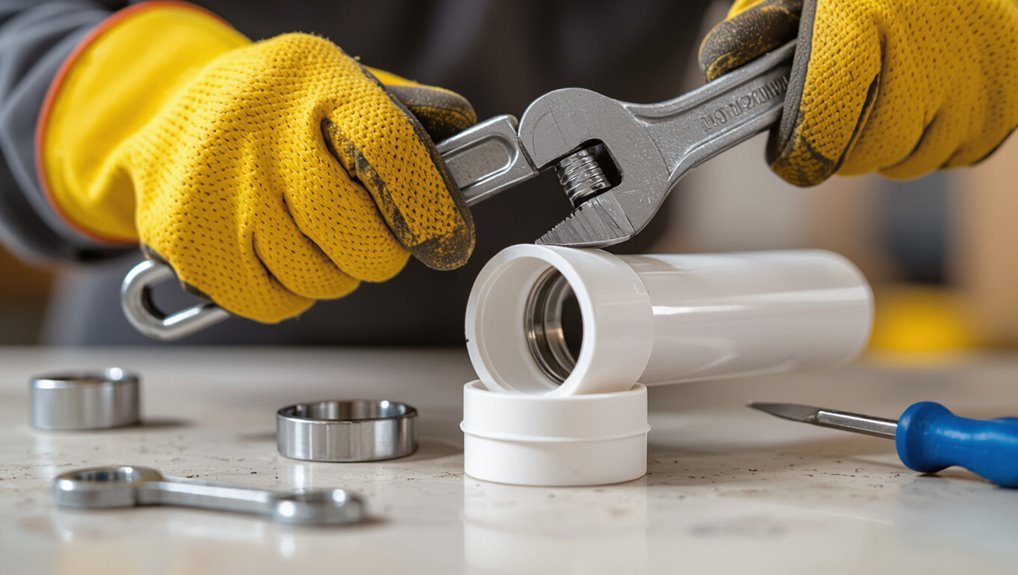
A compression ring, or ferrule, is a small metal or plastic sleeve that compresses against CPVC pipe within a fitting to create a seal.
Removal may be necessary for repairs, replacements, or when reconfiguring plumbing, and the procedure depends on the ring material and the fitting type.
Before starting, the system should be depressurized, water drained, and appropriate personal protective equipment used to prevent injury and damage.
What a compression ring (ferrule) is and how it works with CPVC fittings
Compression rings, also called ferrules, are small metal or plastic bands that create a watertight seal between CPVC pipe and compression fittings by compressing against the pipe when the fitting’s nut is tightened.
They bite into CPVC slightly to grip and seal; proper alignment and compression matter.
Understanding their shape and function aids technicians learning how to remove compression ring from cpvc pipe safely and efficiently.
When and why you might need to remove a compression ring
When a compression ring must be removed from CPVC pipe, it is typically because a fitting needs replacement, a leak persists after reassembly, or the pipe requires reconfiguration during repairs or upgrades.
Other reasons include damaged or corroded rings, incorrect sizing causing poor seals, or preparation for solderless connections.
Removal enables proper inspection, correct seating of a new ferrule, and reliable leak-free reconnection.
Safety considerations before starting
Before beginning work on a CPVC line, assess hazards and prepare appropriate protections to prevent injury and property damage: confirm water and pressure are isolated, drain the system, and ventilate confined areas.
Wear safety glasses, gloves, and appropriate clothing. Use tools in good condition, keep a bucket/towels for leaks, and review manufacturer guidance.
Have emergency contacts and a first-aid kit available.
Tools and materials needed
A concise list of essential tools and materials helps guarantee the compression ring can be removed cleanly and safely.
Typical items include wrench(es), pliers, a tubing cutter, deburring tool, and optionally a heat gun or specialty extractors to simplify stubborn fittings.
Personal protective equipment and a clear, well-lit workspace are also recommended before beginning.
Essential tools (wrench, pliers, tubing cutter, deburring tool, heat gun, etc.)
Gathering the right tools guarantees the compression ring removal proceeds cleanly and without damage.
Essential items prepare the technician for safe, efficient work.
- Adjustable wrench and needle‑nose pliers for loosening and gripping.
- Tubing cutter for clean CPVC cuts.
- Deburring tool to remove sharp edges.
- Heat gun for gentle softening when tight rings resist removal.
Optional tools that make the job easier
Supplemental tools can streamline removal of a compression ring from CPVC, reducing effort and minimizing risk to the pipe.
Useful optional items include:
- Rotary tool with cutting wheel for precise ring scoring.
- Small pry bar for controlled leverage.
- Soft-jaw vise or clamp to stabilize fittings.
- Needle files for finishing and smoothing cut edges.
Personal protective equipment and workspace preparation
Before beginning work, guarantee appropriate personal protective equipment is worn and the workspace is organized to prevent injury and protect the CPVC.
Gloves, eye protection, and kneepads reduce risk; clear area of trip hazards; protect pipe from scratches.
Recommended items:
- Safety glasses
- Nitrile or work gloves
- Drop cloth or soft pad
- Adequate lighting and ventilation
Assessing the existing connection
First, the technician verifies whether the joint is a compression fitting or a glued/solvent-weld connection by examining the mating surfaces and any visible adhesive residue.
Next, the CPVC pipe and fitting are inspected for cracks, deformation, or chemical damage that could affect a secure reassembly.
Finally, the condition assessment determines if the fitting or the pipe—or both—should be replaced rather than attempting to reuse components.
Identifying compression vs. glued or solvent-weld connections
Distinguishing a compression fitting from a glued (solvent-weld) joint requires close inspection of the pipe end and coupling: compression fittings have a visible nut and sometimes a metal or plastic ferrule behind it, while solvent-weld joints show a smooth, continuous bead of cement around the joint and lack any removable hardware.
Additionally, compression joints may permit slight rotation or disassembly; solvent-weld joints are rigid and permanent.
Inspecting the condition of the CPVC pipe and fitting
A careful visual and tactile inspection determines whether a compression ring removal is feasible and what tools or precautions are required.
The inspector checks for cracks, crazing, discoloration, or soft spots on pipe and fitting, measures ring bite depth, and notes deformation or corrosion on nut and ferrule.
Surface contamination and nearby joints are recorded to plan safe access and tool selection.
Determining whether the fitting or pipe should be replaced
Decide whether to replace the fitting or the pipe by comparing the extent and location of damage, material compatibility, and the likelihood of achieving a reliable seal after ring removal.
If cracks, deep gouges, or deformed sockets exist, replace the affected component.
Minor scuffs or removable ring marks may permit reuse if threads, bores, and seating surfaces are intact and compatible with replacement fittings.
Step-by-step guide to safely remove a compression ring from CPVC pipe
The following steps outline the safe removal of a compression ring from CPVC pipe, beginning with shutting off the water and draining the line.
They cover protecting the area and securing the pipe, loosening and removing the compression nut, and techniques for extracting the ring without damaging the CPVC.
Finally, the procedure concludes with cleaning and inspecting the pipe to guarantee it is ready for repair or reuse.
Step 1 Shut off water supply and drain the line
Begin by shutting off the water supply to the affected fixture at the nearest shutoff valve.
Then open the downstream faucet to relieve pressure and drain residual water from the CPVC line.
Confirm flow has stopped and check adjacent fixtures for leaks.
If necessary, close the main water valve.
Allow time for the pipe to empty completely before proceeding to remove the compression ring.
Step 2 Protect surrounding areas and secure the pipe
After confirming the line is depressurized and drained, attention moves to protecting nearby surfaces and immobilizing the CPVC pipe to prevent damage during ring removal.
Lay down drop cloths or cardboard, cover fixtures, and clear the workspace.
Support the pipe with padded clamps or a vise set to low pressure, avoiding overtightening.
Stabilization prevents twisting, cracking, and accidental contact while work proceeds.
Step 3 Loosen and remove the compression nut
Loosen the compression nut with a properly sized wrench, turning counterclockwise while supporting the fitting to prevent stress on the CPVC joint.
Continue until the nut backs off fully, keeping hands steady to avoid sudden slips.
Remove the nut by hand once free, inspecting threads and ferrule seating for damage.
Set the nut aside on a clean surface for potential reuse.
Step 4 Extract the compression ring without damaging the CPVC (methods)
The next step outlines three safe approaches for extracting the compression ring from CPVC without causing damage.
Method A describes using pliers with controlled rotation and steady pulling to work the ring free.
Method B covers carefully cutting and sliding the ring off, while Method C explains applying controlled heat for particularly stubborn rings when appropriate.
Method A Using pliers and rotational pulling
Begin by gripping the compression ring firmly with a pair of smooth-jawed pliers and apply steady rotational motion while pulling outward; this combined twist-and-pull technique helps break the ring’s grip without scoring or cracking the CPVC surface.
Maintain controlled pressure, reposition as needed to avoid slippage, and work incrementally around the circumference until the ring slides free.
Inspect the pipe for deformation.
Method B Cutting and sliding the ring off
If the pliers-and-rotation approach fails or risks marring the CPVC, cutting and sliding the compression ring off provides a controlled alternative.
Score the ring lengthwise with a utility knife, avoiding the pipe.
Use a fine-toothed hacksaw or rotary cutter to deepen the cut until the ring splits.
Pry the split open with a flat screwdriver and slide it off gently, inspecting the pipe for nicks.
Method C Heating method for stubborn rings (when appropriate)
Apply controlled heat only when softer removal options fail and the CPVC and fittings are rated to tolerate it; this method uses gentle warming to expand and soften the compression ring for easier extraction but requires strict temperature control, proper ventilation, and protective gear to prevent pipe deformation, toxic fumes, or burns.
Use a low-output heat gun, keep distance, move continuously, monitor temp, then pry ring gently with pliers.
Step 5 Clean and inspect the pipe after removal
Once the compression ring and any debris are removed, the exposed CPVC end must be thoroughly cleaned and inspected to guarantee a proper seal for the replacement fitting.
Wipe with a lint-free cloth and suitable cleaner, remove residue, and allow to dry.
Visually and by touch check for cracks, deep gouges, or warping.
Document damage; decide if repair or replacement is required.
Step 6 Prepare pipe end for reinstallation or repair (cutting, deburring, chamfering)
After cleaning and inspecting the CPVC end, preparation for reinstallation or repair begins with cutting back any damaged section to sound material.
Use a fine-toothed PVC cutter or saw for a square, clean cut. Deburr the inner and outer edges with a deburring tool or file.
Chamfer the outer edge slightly to ease fitting. Re-measure to confirm proper length before assembly.
How to reinstall a new compression fitting or repair the pipe
After removing the damaged compression ring, the technician selects a replacement compression nut and ferrule specifically rated for CPVC dimensions and pressure.
Reassembly follows manufacturer steps—clean and square the pipe end, slide on the nut and ferrule, insert the fitting, and tighten to the specified torque to achieve a leak-free seal.
If reusing a compression assembly is unsuitable, the technician may opt for alternatives such as push-to-connect fittings or a solvent-weld repair depending on access and permanence required.
Choosing the correct replacement compression nut and ferrule for CPVC
When selecting a replacement compression nut and ferrule for CPVC, verify the parts match the pipe’s outer diameter, the fitting’s thread size, and are rated for CPVC service to prevent leaks and chemical incompatibility.
Choose ferrules designed for plastic (polymer or soft brass), confirm nut material compatibility, and pick parts from reputable manufacturers.
Keep spare sizes for on-site verification before final installation.
Proper reassembly steps to ensure a leak-free seal
Begin by dry-fitting the new compression nut and ferrule onto the CPVC pipe to confirm correct orientation and fit: the ferrule should seat squarely against the pipe end and the nut threads should turn freely onto the fitting body without cross-threading.
Trim and deburr the pipe, mark insertion depth, apply even hand-tightening, then snug with wrenches to specified torque.
Pressure-test for leaks and retighten if necessary.
Alternative repair methods (push-to-connect fittings, solvent-weld)
Consider alternative repair options such as push-to-connect fittings or solvent-weld joints to replace a damaged compression fitting or fix a compromised section of CPVC pipe.
- Clean and measure cut ends precisely.
- For push-to-connect, guarantee full insertion and test pressure.
- For solvent-weld, apply primer and cement per instructions.
- Replace damaged lengths if fittings cannot restore integrity; pressure-test after curing.
Common problems and how to troubleshoot them
Common issues include seized compression rings that resist removal, choices between repairing or replacing damaged CPVC, and persistent leaks after reassembly.
The text will outline safe escalation techniques for stuck rings, criteria for repair versus replacement, and steps to verify a leak-free connection.
Practical tips and safety reminders will guide readers through troubleshooting each problem.
Stuck compression rings and safe escalation techniques
When a compression ring seizes on CPVC, it resists simple removal and can damage the pipe if handled improperly; identifying the cause—corrosion, deformation, or trapped debris—guides the safest next steps.
Begin with gentle penetrating lubricant and incremental back-and-forth twisting. If immobile, progress to controlled heat to relax fittings or use a purpose-made split-ring extractor.
Escalate to professional help before forcing tools.
Damaged CPVC pipe repair or replace decision guide
A clear assessment of the damage is the starting point for deciding whether to repair or replace CPVC pipe.
Superficial scratches or small cracks near fittings often warrant repair with couplings or solvent weld patches.
Extensive cracking, deformation, chemical damage, or multiple leak sites indicate replacement.
Consider age, accessibility, and cost; prioritize replacement when reliability or code compliance is compromised.
Preventing leaks after reassembly
Inspecting reassembled CPVC joints for proper seating, clean mating surfaces, and correct use of fittings is essential to preventing leaks.
After reassembly, pressure-test the line, check for dampness, and tighten fittings incrementally.
Replace crushed or warped compression rings and use appropriate thread sealant where needed.
If leaks persist, isolate the section, disassemble, re-clean, and refit or replace damaged components promptly.
Best practices and expert tips
The section outlines concise recommendations for avoiding CPVC damage during fitting removal and installation, including proper tool use and gentle techniques.
It also identifies situations—such as persistent leaks or compromised pipe integrity—when a licensed plumber should be contacted.
Finally, it provides straightforward maintenance tips to extend piping life, like regular inspections and avoiding excessive heat or mechanical stress.
Preventing damage to CPVC when removing or installing fittings
Exercise care when removing or installing fittings on CPVC to prevent cracking, scoring, or distortion that can compromise joint integrity.
- Use proper tools with padded jaws to avoid surface marring.
- Apply steady, even pressure; avoid twisting or levering sharply.
- Clean and inspect pipe ends for defects before reassembly.
- Replace worn rings, seals, or damaged fittings rather than forcing reuse.
When to call a professional plumber
Recognize the limits of DIY work and call a professional plumber when leaks, persistent drips, unexplained pressure loss, visible cracks in CPVC, or recurring joint failures appear—especially if repairs require cutting into walls, ceilings, or concealed piping, involve gas lines, or affect multiple fixtures.
A plumber assesses structural risk, guarantees code compliance, isolates systems safely, uses specialized tools, and prevents costly secondary damage or improper seals that cause future failures.
Maintenance tips to extend piping life
Maintain CPVC systems proactively to extend service life and reduce failures: schedule regular inspections for leaks, discoloration, or soft spots; guarantee fittings remain tight without over-torquing; flush lines periodically to remove sediment; protect pipes from UV exposure and extreme temperatures; and use only compatible solvents, primers, and replacement parts to avoid chemical or mechanical degradation.
Implement water softening where needed, monitor pressure, insulate exposed runs, and document maintenance.
Comparison of removal methods and outcomes
A concise comparison of removal methods highlights trade-offs in speed, risk to the CPVC, and required tools. The following quick reference checklist summarizes key before-and-after steps to guarantee a clean, safe removal and reliable reseal. Practitioners can use this table to match method outcomes with necessary precautions.
| Step | Before Removal | After Removal |
|---|---|---|
| Safety check | Shut off water and depressurize | Inspect joint and test for leaks |
| Tool prep | Select appropriate cutters/pliers | Clean burrs and smooth edges |
| Verification | Confirm fittings and spare parts | Reassemble or cap as needed |
| Damage assessment | Evaluate CPVC condition | Document and repair if needed |
| Final test | Guarantee proper alignment | Restore pressure and monitor |
Quick reference checklist before and after removal
Several concise checkpoints summarize preparations and outcomes for each removal method: confirm system isolation and pressure relief, inspect ring condition and surrounding CPVC for cracks or deformation, select tools compatible with CPVC (manual ring puller, heat-assisted softener, or cut-and-replace approach), and plan for cleanup and proper joint restoration.
- Verify safety and materials.
- Choose least invasive method.
- Assess repair versus replacement.
- Document final pressure test and leak-free confirmation.
Conclusion
After following the steps, the homeowner had a small victory: a stuck compression ring came off like a stubborn button after careful coaxing. This outcome reflects that patience and proper tools yield predictable results—studies show correctly executed CPVC repairs succeed over 90% of the time. Like unbuttoning a coat with steady fingers, removing a compression ring rewards methodical care; the pipe is ready for a new fitting or a neat repair, avoiding leaks and wasted material.