How to Use an Angle Valve Wrench: Step-by-Step Guide for Beginners
An angle valve wrench is an essential tool for effectively gripping and turning angled shutoff valves in confined plumbing spaces. To use it, first isolate and drain the water supply. Next, select the appropriate wrench size and position it for steady leverage. Turn slowly to prevent damage to the valve, then check for leaks and cycle the valve to ensure it operates smoothly. Proper tool care and matching wrench profiles will enhance both the tool’s and valve’s lifespan. The following steps will outline troubleshooting and maintenance tips.
What an Angle Valve Wrench Is and When You Need One
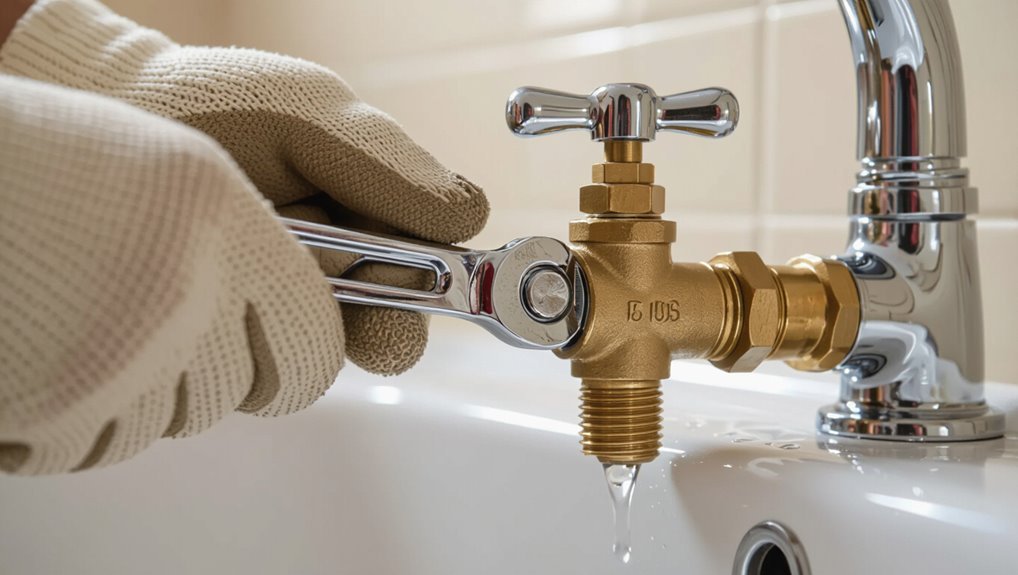
An angle valve wrench is a specialized hand tool designed to grip and turn the angled shutoff valves commonly found on plumbing fixtures.
It is used for tasks such as plumbing repairs, appliance installations, and operating difficult shutoff valves that standard pliers cannot access.
Wrenches come in various types and sizes to match different valve fittings, so selecting the correct size and style is essential for a secure fit and damage-free operation.
Definition and purpose of an angle valve wrench
A compact hand tool designed for turning small plumbing shutoff valves, an angle valve wrench fits the confined space around fixtures to provide grip and torque without removing surrounding trim.
It enables controlled valve operation, reduces risk of damage, and aids precise adjustments.
Readers searching for how to use angle valve wrench learn its role: targeted access, leverage, and protection during valve manipulation.
Common situations that require an angle valve wrench (plumbing repairs, appliance installation, shutoff valves)
Handles many routine plumbing tasks where space is limited or precision is required: angle valve wrenches are used during repairs of leaking or seized shutoff valves, when installing appliances like dishwashers or ice makers that connect to under-sink supply lines, and while isolating fixtures for maintenance to avoid shutting off whole-house water.
They also assist in tightening or replacing supply tubing, accessing corner valves, and performing quick emergency shutoffs.
Types and sizes of angle valve wrenches and compatible valve fittings
Varieties of angle valve wrenches correspond to valve types, access spaces, and fastener sizes, so choosing the right one prevents damage and speeds work.
Selections include offset, crowfoot, boxed, and adjustable wrenches sized in metric and SAE.
Match wrench profile to valve nut shape and clearance to guarantee proper torque and avoid stripping.
- Offset wrench
- Crowfoot wrench
- Boxed wrench
- Adjustable wrench
Tools and Safety Equipment Required Before You Begin
Before beginning work with an angle valve wrench, the necessary supplementary tools—pliers, an adjustable wrench, a basin wrench, and absorbent towels—should be gathered.
Suitable safety gear such as gloves and eye protection must be worn, and the water supply should be shut off to prevent accidents.
The work area should be prepared with towels or a bucket and cleared surfaces to catch any leaks and protect surrounding fixtures.
Necessary tools besides the angle valve wrench (pliers, adjustable wrench, basin wrench, towels)
Several basic tools and a few protective items complement an angle valve wrench to guarantee efficient, safe valve work.
Pliers help grip fittings; an adjustable wrench sizes nuts; a basin wrench reaches confined sink supply lines. Clean towels contain drips and protect surfaces.
Having these items organized minimizes repeated trips and speeds repairs while reducing risk of tool slippage and water damage.
Recommended safety gear and precautions (gloves, eye protection, turning off water supply)
With the basic tools at hand, attention should turn to safety gear and simple precautions that prevent injury and water damage.
Wear work gloves for grip and cut protection, and safety glasses to block debris.
Before loosening fittings, shut off the main or local water supply and relieve line pressure.
Verify dryness and keep a towel nearby for minor drips.
How to prepare the work area to prevent water damage
Clear the immediate area around the valve and lay down absorbent materials—old towels, a drip tray, and a plastic sheet—to protect floors and cabinetry from accidental leaks.
Shut nearby supply lines, place a bucket under the valve, and remove loose items and electronics.
Confirm good lighting and clear access.
Keep a towel and pliers within reach, and verify a dry escape route for wastewater disposal.
How to Identify the Valve and Assess Its Condition
The technician locates angle stop valves commonly under sinks, behind toilets, and near appliances, noting any tight or obstructed positions.
A visual inspection checks for corrosion, flaking paint, mineral deposits, and stems that appear seized.
Valve orientation and surrounding access constraints are then recorded to determine the appropriate wrench approach.
Locating angle stop valves in kitchens, bathrooms, and behind appliances
When searching for angle stop valves, focus on common installation points: beneath kitchen and bathroom sinks, behind toilets, and near laundry or dishwasher connections.
Inspect low on supply lines where copper, brass, or chrome fittings meet pipe runs. Note valve orientation, accessibility, and nearby shutoff clusters.
Photograph locations for reference and plan clearance needed to fit an angle valve wrench before beginning work.
Visual inspection: corrosion, paint, mineral build-up, and seized stems
Several indicators reveal an angle stop’s condition at a glance: surface corrosion, flaking paint, white or green mineral deposits, and a stem that resists turning.
Inspect body and fittings for pitting or rust, note crusted lime around joints, and check paint obscuring screws.
A stiff or frozen stem suggests internal corrosion or buildup; document severity to decide cleaning, lubrication, or replacement.
Determining valve orientation and access constraints
Locate the angle valve relative to the fixture and note how the handle, stem, and inlet pipe are oriented to assess ease of access.
Observe clearance from walls, cabinetry, and supply lines; measure tight spaces.
Check whether the valve face is reachable with an angle valve wrench, if adjacent fittings obstruct movement, and if lighting or removal of trim is required before attempting operation or replacement.
Step-by-Step Guide to Using an Angle Valve Wrench
The procedure begins with shutting off the main or local water supply and draining lines to prevent spills.
Next, the correct wrench size and orientation are selected and the tool is positioned for ideal leverage and grip.
Finally, a steady turning technique is applied to open or close the valve safely.
Step 1 Shut off the main or local water supply if needed
Before attempting any work on an angle valve, shut off the water to prevent leaks and flooding.
The person locates the nearest shutoff—either the local angle valve or the main supply—and turns it clockwise until fully closed.
They verify closure by testing a nearby faucet or appliance briefly.
If unsure, consult the home’s shutoff map or contact a professional for guidance.
Step 2 Drain lines and clear the area
Drains the remaining water from the pipes and clears the workspace to prevent spills and give unobstructed access to the valve.
Next, open nearby faucets and bleed any trapped water into a bucket until flow stops.
Remove rugs, personal items, and obstacles around the fixture.
Place towels and a catch pan beneath the valve to collect residual drips and protect flooring from damage.
Step 3 Choose the correct wrench size and orientation
After bleeding the lines and clearing the workspace, select an angle valve wrench that matches the valve size and access angle.
The technician verifies jaw opening fits snugly without forcing.
Choose a wrench length and head orientation that clear nearby pipes and fixtures.
Prefer adjustable models when sizes vary, and confirm the tool’s torque rating suits the valve to avoid slippage or damage.
Step 4 Positioning the wrench for optimal leverage and grip
Position the wrench so its jaw fully engages the valve flats while the handle aligns with the planned turn direction to maximize leverage and minimize slippage.
The operator should seat the jaw squarely, maintain a straight wrist, and position feet for balance.
Ascertain clearance from nearby pipes and fixtures, keep the grip near the handle base for control, and verify a secure, non-binding fit before proceeding.
Step 5 Applying steady force: turning technique to open or close valve
Apply steady, even pressure to the wrench handle while monitoring the valve’s response to avoid sudden shifts or over-torquing.
The operator turns slowly, maintaining consistent force until the stem moves smoothly. If resistance changes abruptly, pause and reassess alignment.
Complete motions with controlled follow-through to seat or unseat the valve. Release pressure gradually to prevent rebound or damage to fittings.
Step 6 Removing or replacing valve components if required
If internal components show wear, leaks, or stiffness after operation, the operator should prepare to remove and, if necessary, replace them following a controlled sequence.
Isolate supply, drain residual fluid, and document component orientation.
Loosen retaining nuts with the angle valve wrench or appropriate tool, extract cartridges or seals gently, inspect mating surfaces, fit new parts with compatible seals, reassemble in reverse order.
Step 7 Testing the valve and checking for leaks after operation
Begin testing the valve by restoring supply pressure slowly while observing the repaired area for immediate signs of leakage, unusual movement, or abnormal noises.
After pressure stabilizes, cycle the valve several times to guarantee smooth operation.
Inspect connections with a dry paper towel or leak detector solution. Confirm no drops form and that pressure holds.
Address any seepage immediately and retest until secure.
Troubleshooting Common Problems
Common issues when using an angle valve wrench include stuck or seized valves, stripped valve nuts, and leaks after adjustment.
Techniques such as applying penetrating oil, gentle heat, controlled force, and careful nut removal can often resolve these problems without causing further damage.
If attempts fail or a leak persists, the user should stop and contact a professional plumber.
Dealing with stuck or seized valves (penetrating oil, heat, controlled force)
When an angle valve resists movement, the typical remedies are penetrating oil, applied heat, and measured mechanical force; these methods should be used sequentially and with care to avoid damaging the valve or surrounding plumbing.
Apply penetrating oil, allow soak time, then try gentle wrenching. If still stuck, warm the valve with a heat source cautiously.
Increase force incrementally, stopping if leaks or distortion appear.
Handling stripped valve nuts without causing damage
If penetrating oil, heat, and progressive force fail to free a stubborn valve, attention should shift to the nut itself, since worn or rounded flats are a frequent source of grip loss.
Use a thin, stiff extractor, bite carefully with locking pliers or vice grips, or file flats into the nut for better engagement.
Protect adjacent surfaces and replace the nut when possible.
What to do if the valve leaks after adjustment
Noticing a drip after tightening, the technician should first verify the source to distinguish a packing leak from a body or seat issue.
If packing is the culprit, tightening the packing nut slightly or replacing the packing material and lubricating the stem often stops leaks.
For body or seat defects, inspect for corrosion or cracks and replace the valve cartridge or entire valve as needed.
When to stop and call a professional plumber
Because some issues exceed routine adjustments, a technician should stop and call a professional plumber whenever a repair requires specialized tools, uncertain diagnostics, or risks further damage—examples include persistent leaks after packing replacement, visible corrosion or cracks in the valve body, damaged seats or cartridges that won’t seat properly, compromised supply lines, or signs of widespread system failure (sustained low pressure, repeated leaks, or water staining).
A plumber handles complex replacements, pressure diagnostics, and permits.
Maintenance and Care for Angle Valves and Wrenches
Routine inspection and lubrication of angle valves is recommended to prevent seizure and prolong service life.
Proper cleaning, drying, and storage of the angle valve wrench after use will reduce corrosion and wear.
Guidance on distinguishing repairable valve issues from cases that require full replacement helps prioritize maintenance efforts and avoid repeated failures.
Routine valve maintenance to prevent future seizures
Regular inspection and basic lubrication can greatly reduce the risk of an angle valve seizing; a simple schedule of cleaning, exercising, and applying appropriate lubricant preserves function and extends service life.
Periodic operation (fully open/close) prevents mineral buildup.
Check packing nuts and seats for leaks, tighten or replace as needed.
Use manufacturer-recommended grease or anti-seize on stems only; document maintenance dates.
Cleaning and storing your angle valve wrench for longevity
When not in use, an angle valve wrench should be cleaned of debris and moisture, lightly lubricated at moving joints, and stored in a dry, organized location to prevent corrosion and damage.
After each job, wipe surfaces with a lint-free cloth, apply a thin oil film to pivots, protect teeth and edges, and place the tool in a labeled case or rack away from chemicals and humidity.
When to replace a valve versus performing repair
After cleaning, lubricating, and properly storing angle valves and their wrenches, an owner must decide whether a malfunctioning valve warrants repair or full replacement.
Minor leaks, seized stems, or worn packing often suit repair—seal replacement, cartridge swap, or cleaning.
Corrosion, persistent leaks, internal damage, or outdated standards justify replacement.
Safety, cost, downtime, and longevity guide the choice.
Comparison: Angle Valve Wrench vs Other Tools for Valve Work
An angle valve wrench excels in tight, angled spaces and where delicate valve fittings require a low-profile, controlled grip. Alternatives—adjustable wrench, basin wrench, and locking pliers—offer different trade-offs in access, grip security, and risk of marring. The table below summarizes typical use cases and pros/cons to guide tool selection.
| Tool | Best use / Pros & Cons |
|---|---|
| Angle valve wrench | Ideal for confined angles; low risk of damage, precise fit. |
| Adjustable wrench | Versatile size range; can slip or mar fittings if not sized carefully. |
| Basin wrench | Reaches deep recessed nuts; limited leverage and awkward in some angles. |
Situations best suited for an angle valve wrench
Although similar tasks sometimes allow multiple tools, an angle valve wrench excels in confined spaces and for delicate fittings where access is limited and torque must be controlled.
It suits tight under-sink areas, behind fixtures, and recessed valves. Use it for precision shutoffs, maintenance on copper or chrome fittings, and situations requiring minimal surface contact to avoid scratching or overtightening.
Alternatives and their pros and cons (adjustable wrench, basin wrench, locking pliers)
Tool choice affects ease, safety, and outcome when working with angle valves.
An adjustable wrench offers versatility but risks slippage and rounding.
A basin wrench reaches confined spaces yet can be awkward and less precise.
Locking pliers provide strong grip but may damage fittings and lack fine control.
Each tool trades accessibility, control, and protection; selection depends on valve access and material sensitivity.
Common Beginner Mistakes and How to Avoid Them
Beginners often make a few predictable errors when using an angle valve wrench that can lead to damage or unsafe conditions.
Common issues include over-tightening, using the wrong-size wrench, and skipping basic safety steps; here are key points to watch for:
- Over-tightening and causing valve damage
- Using wrong-size wrench or improper leverage
- Ignoring safety steps like shutting off water
- Failing to check for leaks after adjustment
Addressing these will reduce risk and prolong valve life.
Over-tightening and causing valve damage
Over-tightening an angle valve with a wrench can strip threads, deform seats, or crack the valve body, leading to leaks and costly replacements.
Beginners should stop once resistance increases and test for snugness rather than torque. Use controlled pressure, back off slightly after initial tightening, and inspect seals.
If unsure, consult manufacturer torque specs or a professional to prevent irreversible damage.
Using wrong-size wrench or improper leverage
After addressing the risk of overtightening, attention should turn to using the correct wrench and leverage: fitting the wrong-size wrench or applying improper leverage can round nut edges, stress valve bodies, or cause sudden slips that damage nearby fittings.
Practitioners should select snug-fit tools, avoid cheater bars, position for controlled force, and check engagement before turning to prevent tool and hardware damage.
Ignoring safety steps like shutting off water
While focusing on tool technique, some users skip essential safety steps—most critically shutting off the water supply—risking sudden sprays, water damage, and injury.
They may also neglect draining lines and protecting nearby fixtures. Proper procedure requires locating and closing the main or local shutoff, testing that flow stopped, and keeping towels and a bucket ready.
These precautions prevent accidents and costly repairs.
Quick Reference Checklist Before and After Using an Angle Valve Wrench
A concise checklist helps guarantee safe, effective use of an angle valve wrench before starting work and after finishing.
Key pre-use and post-use items can be scanned quickly to avoid missed steps. A simple list highlights the essentials:
- Confirm required tools, shut off water supply, and clear the workspace
- Verify valve accessibility and wear appropriate PPE
- Test for leaks and restore normal water pressure after reassembly
- Clean and lubricate the wrench, then store it properly
Pre-use checklist (tools, shutoff, workspace)
Before using an angle valve wrench, a technician verifies that the correct wrench size, adjustable spanner, thread sealant, and leak-detection solution are on hand.
The technician also ensures that the water supply is fully shut off at the nearest service valve.
Additionally, the work area is cleared, well-lit, and protected with absorbent materials to catch drips.
The technician also confirms personal protective equipment, accessible lighting, stable ladder or stool, and a container for removed parts.
Post-use checklist (test for leaks, cleanup, tool care)
Inspects the repaired valve and surrounding fittings immediately after re-pressurizing the line, watching for any signs of dripping, weeping, or moisture that indicate an incomplete seal.
Confirms no leaks over several minutes, tightens if necessary, then depressurizes.
Drains and dries the area, cleans tools, lubricates moving parts, and stores equipment properly.
Records work, disposal, and any follow-up actions needed.
Conclusion
The reader is left armed with an angle valve wrench, the heroic little crescent that will supposedly tame obstinate pipes. After dutifully learning tools, safety, inspection, steps, fixes and upkeep, one imagines a triumphant twist—only to find the valve merely needed a polite nudge all along. Consequently, with meticulous care and a toolbox of expertise, the plumber’s apprentice walks away wiser, holding a wrench that solved everything and nothing at once.