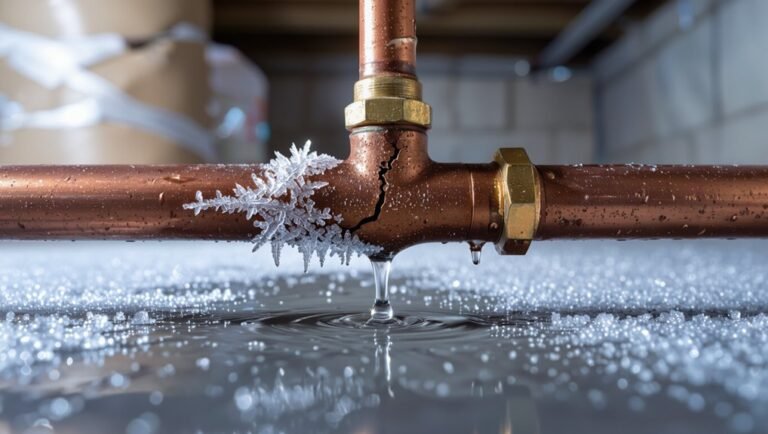
How to Install Copper Pipes: Step-by-Step Guide for DIY Beginners
Installing copper pipes is a straightforward process that involves measuring, cutting, and joining the pipes using solder, compression, or flare fittings. To get started, you’ll need to select the appropriate type of copper pipe (K, L, or M) and gather essential tools like a pipe cutter, torch, flux, and safety gear. Before beginning, be sure to isolate and drain the lines. Proper joint preparation and even heating are crucial for creating strong, leak-proof seals. Additionally, using the right adapters and dielectric unions will help prevent corrosion when connecting to different metals. Follow this step-by-step guide for techniques, tips, and cost considerations to successfully install copper pipes.
What Installing Copper Pipes Involves and When to DIY
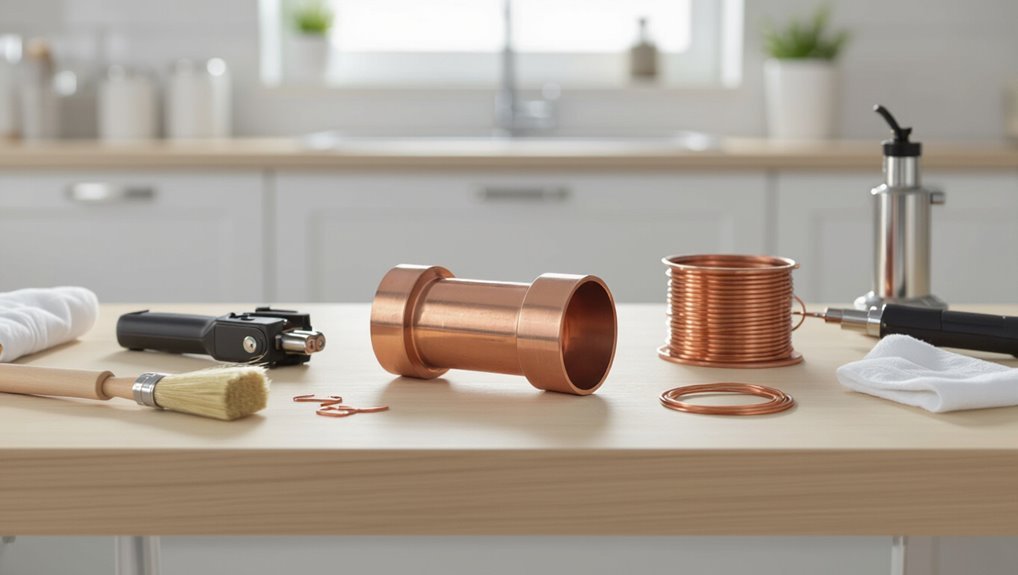
Installing copper pipes generally involves measuring and cutting tubing, fitting and soldering or crimping joints, and pressure-testing systems to guarantee leak-free connections.
Copper is commonly used for potable water lines and refrigerant lines where corrosion resistance and thermal properties are needed, but complexity, accessibility, and local code requirements can dictate whether a job is appropriate for a homeowner.
Simple repairs and short runs in accessible areas may be suitable for DIY, while extensive re-piping, work requiring permits, or installations subject to inspections are best handled by licensed professionals.
Overview of copper pipe installation process
Begin by evaluating the scope of the job: running supply lines, connecting fixtures, and routing drains determine the materials, fittings, and tools required.
The overview outlines planning, measuring, cutting, deburring, joining (soldering or compression), support and pressure testing.
It explains safety, permits, and when to hire a pro versus a DIY approach.
Practical sequencing minimizes rework and guarantees code compliance when learning how to install copper pipes.
Common applications and where copper is ideal (water supply, refrigerant lines)
Copper piping excels for potable water distribution, hydronic heating, and refrigerant lines because of its durability, corrosion resistance, and predictable joining methods.
It suits domestic hot and cold supply, boilers, and chilled‑water coils, plus refrigeration and air‑conditioning circuits.
Its thermal conductivity, pressure tolerance, and long service life favor permanent installations where reliability and code compliance are priorities.
When to hire a professional vs. when DIY is appropriate
When should a homeowner tackle pipework themselves and when is a pro required?
Simple repairs, short runs, and soldering practice suit competent DIYers with proper tools.
Complex tasks—moving main lines, gas or mixed‑material changes, large systems, hidden access, or uncertain pressure issues—warrant professionals.
Safety, leak prevention, and system testing guide the choice; time, confidence, and experience determine DIY suitability.
Local code, permit, and inspection considerations
Why check local codes and permits before cutting into walls or floors? Local regulations dictate pipe materials, installation methods, and required permits; failures risk fines, forced rework, or voided insurance.
Inspectors verify compliance with venting, slope, and backflow rules.
Before DIY, contact the building department, obtain permits, schedule inspections, and retain documentation to guarantee legal, safe, and code-compliant copper plumbing work.
Types and Sizes of Copper Pipe and Fittings
The section outlines common copper pipe types—Type K, L, and M—with notes on their typical pressure and burial uses.
It contrasts rigid and flexible options (ACR and soft copper), summarizes common fittings and valves such as couplings, elbows, tees, adapters, and shutoffs, and weighs basic pros and cons.
It then covers pipe sizing, flow capacity, and guidance for selecting the correct diameter for a given application.
Kinds of copper pipe (Type K, L, M) and typical uses
Copper pipe is manufactured in three common wall-thickness grades—Type K, Type L, and Type M—each designed for specific pressures, burial depths, and plumbing roles.
Type K has the thickest wall for underground service and high-pressure mains.
Type L suits interior water supply, mains, and some HVAC.
Type M, with the thinnest wall, is for low-pressure residential water lines and heating return.
Rigid vs. flexible (ACR, soft copper) and pros/cons
Plumbing projects often require a choice between rigid hard-drawn tubing and softer, flexible ACR (air-conditioning/refrigeration) or annealed copper, each offering distinct installation and performance trade-offs.
Rigid copper holds shape, resists kinking, suits long straight runs and pressurized systems.
Flexible ACR eases bends, reduces fittings, and speeds installation but kinks more easily and may need protection and supports for long-term durability.
Common fittings and valves (couplings, elbows, tees, adapters, shutoffs)
After choosing between rigid and flexible tubing, attention turns to the fittings and valves that join, redirect, and control flow through a system.
Common fittings include couplings, elbows, tees, and adapters, available in sweat, compression, and push-fit styles.
Valves—ball, gate, and angle stop—permit isolation and maintenance.
Material and connection type must match pipe and application for reliable, leak-free joints.
Pipe sizing, flow capacity, and selecting the right diameter
Several factors determine the appropriate copper pipe diameter for a given installation: required flow rate, fixture unit demand, pressure loss over distance, and system layout. Proper sizing balances performance and cost; undersized pipes cause low pressure, oversized ones waste materials. Refer to charts and local codes, consider future demand, and verify pump or heater specs.
| Size | Emotion |
|---|---|
| 1/2″ | Relief |
| 3/4″ | Confidence |
| 1″ | Assurance |
| 1¼” | Pride |
Tools, Materials, and Safety Equipment Needed
A clear inventory of tools, consumables, and safety equipment is essential before beginning copper pipe work.
Typical tools include a pipe cutter, torch and soldering kit, deburring and flaring tools, and a tubing bender, while consumables cover solder, flux, sealing compounds, and compression fittings.
Personal protective equipment and fire-prevention items—gloves, goggles, heat shields, and a nearby fire extinguisher—should be in place and ready to use.
Essential tools (pipe cutter, torch, soldering kit, deburring tool, flaring tool, tubing bender)
Essential tools for installing copper piping include a pipe cutter, torch and soldering kit, deburring tool, flaring tool, and tubing bender, each serving a specific role in cutting, prepping, joining, and forming the pipe.
A quality pipe cutter guarantees square cuts; a deburring tool removes burrs; a torch and soldering kit create reliable joints; a flaring tool and tubing bender shape ends and curves accurately.
Consumables and fittings (solder, flux, sealing compounds, compression fittings)
Prepare a concise inventory of consumables and fittings before beginning work:
solder and flux for brazed or sweat joints, sealing compounds (pipe dope or PTFE tape) for threaded connections, and compression or push-fit fittings where soldering is impractical.
Include spare coupling, elbows, tees, end caps, and appropriate-sized rings or olives.
Select lead-free solder for potable water and compatible flux; keep extra seals and cleaning cloths.
Safety gear and fire prevention (gloves, goggles, fire extinguisher, heat shields)
Several pieces of personal protective equipment and fire-prevention items are required before beginning copper-pipe work: heat-resistant gloves, safety goggles, long-sleeve clothing, and a Class B/C fire extinguisher positioned nearby.
Heat shields or flame-resistant pads protect surrounding materials during soldering. Keep a bucket of water or sand and a fire blanket accessible.
Inspect gear for damage, verify proper ventilation, and follow manufacturer safety guidelines.
Preparing the Job Site and Existing Plumbing
Before any work begins, the water supply is shut off and the system drained to prevent leaks and pressure hazards.
The installer locates and maps existing runs, then removes old piping and cleans connection points to guarantee sound joints.
Finally, precise measurements are taken to plan pipe routes, supports, and clearances for a code-compliant installation.
Shutting off water and draining the system
Shut off the main water supply and relieve pressure before cutting or removing any fittings.
Next, open lowest and highest faucets to drain lines; flush toilets and run hose bibs.
Close isolation valves for branch circuits if present.
Use buckets and rags to catch residual water.
Verify flow has stopped with a pressure gauge or by observing dry pipe ends before proceeding with pipe removal or soldering.
Locating and mapping existing plumbing runs
With the water off and lines drained, the technician should locate and map existing plumbing runs to plan cuts and tie-ins accurately.
Trace visible pipes from fixtures, noting material, size, direction, and support locations. Use stud finders, inspection cameras, and tracer dyes as needed.
Mark routes on plans and walls, identify shutoffs and vents, and record clear access points for future work.
Removing old piping and cleaning connection points
Begin by isolating the work area and confirming all water supply lines are fully drained and tagged; then remove fixtures, valves, and accessible sections of old piping using appropriate cutters or saws to expose sound metal for tie-ins.
Deburr cut ends, remove corrosion and old solder with emery cloth or a rotary tool, clean fittings, and verify joints are free of debris and oil before fluxing and fitting new copper.
Measuring and planning pipe routes, supports, and clearances
After exposed connections are cleaned and prepared, measurements and routing plans are laid out to guarantee new copper runs fit the space and meet code.
The installer marks routes, notes obstacles, and measures lengths including allowances for fittings.
Support spacing, thermal expansion, clearance from combustibles, and access for future maintenance are recorded.
Materials and fastener types are selected to match load and local regulations.
Step-by-Step Installation Using Sweat (Soldered) Joints
The technician begins by measuring and cutting copper pipe to length. Then, deburrs and thoroughly cleans each pipe end and fitting.
Flux is applied before assembling the joint, which is heated correctly and soldered to create a secure seal.
After cooling, excess flux is cleaned off and the new section is pressure tested for leaks.
Cutting and measuring pipes accurately
Measure each run carefully and mark pipe lengths with a fine-tip marker, allowing for fittings, solder joints, and required clearances.
Use a tape measure and square to guarantee straight cuts; double-check dimensions against the layout. Score cut lines visibly.
Select a tubing cutter sized for the pipe diameter, tighten incrementally, and rotate smoothly to avoid crushing.
Keep spare lengths for adjustments.
Deburring and cleaning pipe ends and fittings
Deburr and clean each cut end and corresponding fitting to confirm a reliable solder joint: remove burrs from the inside and outside of the pipe with a reamer or fine file, then clean surfaces with an abrasive cloth or emery paper until bright copper is visible.
Wipe away filings and dust, inspect for nicks or deformities, and verify mating surfaces are smooth and oil-free before proceeding.
Applying flux and assembling joints
Apply flux evenly to the cleaned pipe ends and fitting interiors, covering all mating surfaces with a thin, continuous layer to promote capillary flow and help prevent oxidation during heating.
Insert pipe fully into fittings, ensuring alignment and correct depth. Twist slightly to distribute flux.
Secure assemblies with supports or clamps to maintain position. Wipe away excess flux before proceeding to heating and soldering.
Proper heating technique and solder application
With assemblies held and excess flux removed, heating and soldering can begin.
The plumber applies heat evenly to the joint, warming both fitting and pipe until flux sizzles.
Solder is touched to the heated seam; capillary action draws it into the gap.
Heat is removed once solder flows continuously.
Excess solder is avoided to guarantee neat, reliable joints ready for subsequent cooling and testing.
Cooling, cleaning joints, and pressure testing the section
Allow the joint to cool naturally for a few minutes, then wipe away remaining flux and solder residue with a clean, damp cloth to prevent corrosion.
Once cooled, visually inspect each seam for complete solder coverage and smooth fillets before proceeding to pressure testing.
Seal test fittings, apply water or air at recommended pressure, monitor for leaks and steady gauge readings, and repair any defects found.
Step-by-Step Installation Using Compression and Flare Fittings
Compression and flare fittings offer reliable alternatives to soldering when heat is impractical, on soft metals, or near finished surfaces.
The section will cover cutting and preparing tubing for compression joints, correct assembly and tightening to the recommended torque, and the process of flaring copper tubing for flare fittings.
It will conclude with leak testing procedures and guidance on proper torque to prevent leaks or damage.
When to use compression or flare fittings instead of soldering
When a plumbing run requires frequent disassembly, restricted heat access, or is made from coated or thin-walled tubing, choosing compression or flare fittings provides a reliable, solder-free connection.
Use compression for moderate pressure potable lines and tight spaces; use flare fittings for high-pressure, gas, or appliance service connections.
Both suit repairs, retrofit work, and situations where open flame is unsafe or permits are limited.
Preparing and cutting pipe for compression joints
With fittings and tubing selected, the installer moves on to preparing the pipe for compression joints.
The pipe is measured and marked, cut squarely with a tube cutter, and deburred inside and outside with a reamer or file.
Ends are cleaned with emery cloth to remove oxidation and guarantee a smooth surface.
The pipe is then checked for proper length and alignment before fitting.
Assembling and tightening compression fittings correctly
Several clear steps guide the proper assembly and tightening of compression fittings to guarantee a leak-free joint.
The installer slips the nut and ring onto the tube, inserts the tube fully into the fitting body, then slides the ring into place.
Hand-tighten the nut, then use wrenches to turn one additional half to three quarters of a turn while holding the fitting body steady.
Preparing, flaring copper tubing, and installing flare fittings
Begin by cutting, deburring, and measuring the copper tubing to guarantee clean, square ends and the correct length for flare fittings; proper preparation prevents leaks and facilitates a reliable flare connection.
Clamp the tubing in a flaring tool, form a 45° flare, inspect for cracks or uneven lips, slip on the flare nut, align mating surfaces, and hand-start then tighten the flare nut to secure the joint.
Leak testing and torque guidance
After the flare nut is tightened and the joint visually inspected for proper seating, the installer proceeds to leak testing and torque guidance to confirm a secure, watertight connection.
The system is pressurized gradually, checked for drops or audible leaks, and fittings re-torqued to manufacturer specs if needed. Soap solution highlights tiny leaks.
Final verification includes pressure-hold duration and documentation of applied torque values.
Joining Copper to Other Pipe Materials
Connecting copper to PEX, PVC, CPVC, or galvanized steel typically requires the correct adapters and compatible joining methods to guarantee a secure seal.
Attention to dielectric unions and proper isolation techniques prevents galvanic corrosion where dissimilar metals meet.
Compatible sealants and PTFE tape should be selected based on the materials and threads involved to maintain leak-free connections.
Using adapters to connect copper to PEX, PVC, CPVC, and galvanized steel
Adapters bridge copper with PEX, PVC, CPVC, and galvanized steel by providing compatible fittings and connections that preserve flow, pressure, and code compliance.
Suitable adapters include press, compression, soldered, crimp, and threaded types selected for materials and system demands.
Proper sizing, correct installation tools, and manufacturer instructions guarantee leak-free joints and maintain system integrity without altering existing piping layouts or performance.
Best practices for dielectric unions and preventing corrosion
When copper must join dissimilar metals—such as galvanized steel or iron—dielectric unions are used to prevent galvanic corrosion by electrically isolating the metals while maintaining a watertight mechanical connection.
Install unions per manufacturer torque specs, verify insulating washers and sleeves are intact, avoid conductive sealants or clamps across the joint, angle supports to prevent strain, and periodically inspect for leaks or corrosion signs.
Sealants and thread tape compatibility
Select sealants and thread tapes that are chemically compatible with both copper and the mating pipe material to guarantee a reliable, leak-free joint.
Use PTFE tape rated for potable water on threaded fittings, avoiding petroleum-based pipe dope on rubber or plastic components.
For dissimilar metals, prefer non-conductive, NSF-approved compounds and follow manufacturer cure times to prevent leaks and corrosion at interfaces.
Routing, Supports, and Thermal Considerations
Routing and support of copper piping require selecting appropriate hangers and spacing to prevent sagging and stress at joints.
Installers must allow for thermal expansion and contraction with offsets or slip connections where runs cross structural elements.
Insulating hot and cold lines both preserves temperature and prevents condensation, using materials suited to the application and exposure.
Proper pipe supports, hangers spacing, and securing methods
Although routing choices are dictated by building layout and system function, proper pipe supports and hanger spacing are critical to maintaining alignment, preventing sag, and accommodating thermal movement.
Supports should be corrosion-resistant, cushioned where contacting copper, and placed per code—typically 3–4 ft for horizontal 1/2–1 in, closer for larger sizes.
Secure fittings and avoid overtightening to prevent deformation.
Allowing for thermal expansion and contraction
Because copper expands and contracts noticeably with temperature changes, installers must plan routes and supports that accommodate movement without stressing joints or fixtures.
Allow for linear expansion by including loops, offsets, or expansion joints where runs are long.
Use sliding hangers or cushioned supports at fixed points, maintain short unsupported spans, and position anchors to control movement while preventing shear on fittings.
Insulation options for hot and cold lines and condensation prevention
Proper insulation selection and placement are essential to maintain thermal performance and prevent condensation on both hot and cold copper lines.
Closed-cell foam sleeves suit hot lines; elastomeric or polyethylene insulation works for cold lines. Joints and fittings require preformed pieces and sealed seams. Insulation thickness matches temperature and local code.
Vapor barriers and adequate air circulation prevent moisture accumulation and mold.
Common Problems, How to Diagnose, and Fixes
Common problems with copper piping include leaks at joints and fittings, pinhole corrosion in older runs, low water pressure, noise, and discoloration.
Technicians should inspect fittings, check for corrosion or erosion, test pressure and flow, and sample discolored water to narrow causes.
Repairs range from tightening or re-soldering joints and patching small pinholes to replacing degraded sections when damage is extensive or recurrent.
Identifying and repairing leaks at joints and fittings
Inspecting joints and fittings is the first step in diagnosing leaks in copper piping, since most failures occur at soldered connections, compression fittings, or threaded joints.
Moisture, corrosion, mineral buildup, or movement indicate the source.
Repair options include re-soldering cleaned joints, tightening or replacing compression rings and nuts, and applying appropriate thread sealant or replacing damaged fittings.
Test under pressure after repairs.
Dealing with pinhole leaks in older copper
Older copper pipes often develop pinhole leaks—tiny perforations caused by corrosion, water chemistry, or physical wear—that can lead to slow drips, staining, and eventual larger failures if left unaddressed.
Diagnose by isolating sections, drying surfaces, and applying leak-detection dye or tissue.
Temporary fixes include epoxy putty or compression sleeves; long-term repair requires cutting out affected runs and replacing with new copper or approved alternatives.
Troubleshooting low pressure, noise, and water discoloration
Identify and address low pressure, unusual noises, and discoloration promptly, as they often indicate distinct but related issues in a copper plumbing system.
Check supply valves, aerators, and mains for obstructions to diagnose pressure loss.
Investigate water hammer, loose supports, or air for noise.
For brown or green tint, flush lines, inspect for corrosion, and replace affected fittings or clean sediment traps to restore quality.
When to replace sections versus patching
When signs of failure appear—pinholes, extensive corrosion, multiple soldered joints leaking, or structural damage from freezing—deciding between a localized patch and replacing a section hinges on extent, location, and long-term reliability; small isolated pinholes or a single failed fitting can often be repaired quickly with compression fittings, epoxy, or soldered sleeves.
In contrast, widespread pitting, copper thinning, hard-to-access runs, or recurrent leaks indicate replacement is the safer, more cost-effective choice.
Inspection should assess wall thickness, proximity to joints, water quality, and future access; prioritize replacement when visual thinning, multiple defects, or recurring repairs predict failure.
Testing, Commissioning, and Final Checks
The installer performs pressure testing according to code, holding the specified test pressure for the required duration to confirm system integrity.
All joints and fittings are inspected for leaks, the pipe slope is verified for proper drainage, and mounting straps are checked for secure support.
Once tests pass, final documentation is completed and drywall or insulation is restored.
Pressure testing procedures and acceptable durations/pressures
A clear, methodical pressure test validates the integrity of installed copper piping by exposing joints and fittings to controlled pressures for specified durations.
Procedures typically specify test medium, target pressure, acceptable hold time, and permissible pressure drop limits to detect leaks before commissioning.
Technicians commonly use water or air, apply industry or local code pressures (often 1.5–3 times operating pressure), hold for 15–30 minutes, and record results.
Inspecting for leaks, proper slope, and secure mounting
Inspectors verify leaks, slope, and mounting systematically to secure a copper piping system functions reliably and meets code requirements.
They examine joints and soldered connections under pressure, check for hairline seepage, confirm recommended slope for drainage, and make certain hangers support pipe every specified interval without compressing insulation.
Any movement, misalignment, or wetness triggers repairs and retesting before concealment.
Final steps before restoring drywall or insulation
Before drywall or insulation is replaced, a final round of testing and commissioning confirms the copper system is watertight, properly purged, and operating as designed.
Pressure-test at recommended psi for the specified duration, inspect all joints for seepage, verify flow and hot-water circulation, check valve function, and bleed air from high points.
Document results and correct any defects before closure.
Time-Saving Tips, Best Practices, and Common Mistakes to Avoid
The section outlines practical strategies to speed up installation while preserving quality and code compliance.
Recommended focal points include:
- Quick techniques for cleaner solder joints and consistent bends
- Mistakes that cause leaks or code failures and how to avoid them
- Maintenance tips to prolong copper pipe life
- Time-saving tools and workflow adjustments to reduce rework
Readers are encouraged to apply these best practices and learn the common pitfalls to prevent costly repairs.
Quick techniques for cleaner solder joints and consistent bends
Mastering a few concise techniques yields cleaner solder joints and more consistent copper bends, saving time and preventing rework.
Prepare surfaces by cleaning with emery cloth and flux; heat evenly and feed solder to the joint, not the flame.
Use a proper bending spring or tubing bender to avoid kinks.
Support work, measure twice, and practice steady heat control for repeatable results.
Mistakes that cause leaks or code failures and how to avoid them
After outlining techniques for clean joints and consistent bends, attention shifts to common errors that lead to leaks or code violations and how to prevent them.
Improper cleaning, insufficient flux, incorrect solder temperatures, and loose fittings cause leaks.
Unsupported runs, improper spacing from combustibles, and using wrong pipe type trigger code failures.
Follow manufacturer specs, use proper tools, and verify clearances and supports.
Maintenance tips to prolong copper pipe life
Longevity depends on regular inspection and simple preventive actions to keep copper piping functional and code-compliant.
Schedule visual checks for corrosion, pinholes, and joint integrity; flush lines annually to remove sediment; maintain proper insulation to prevent freezing and condensation; control water chemistry to reduce erosion and scale; tighten fittings gently and replace worn solder or seals; document maintenance and address issues promptly to avoid costly repairs.
Material Cost Estimates and Project Planning
Typical material cost breakdowns are provided for common residential jobs—minor repairs, short reroutes, and full bathroom or kitchen runs—so readers can compare pipe, fittings, solder, flux, and ancillary supplies.
The guide outlines methods for estimating quantities and labor time based on run length, complexity, and access.
Clear cost and time estimates support realistic scheduling and budgeting before work begins.
Typical cost breakdowns for common residential jobs (repair, short reroute, full bathroom/kitchen run)
A clear cost framework helps homeowners and tradespeople estimate expenses for common copper-piping jobs: simple repairs, short reroutes, and full bathroom or kitchen runs each have distinct material and labor profiles.
Typical repair costs cover a few fittings, small pipe lengths, flux/solder and minimal labor.
Short reroutes add additional fittings and moderate labor.
Full runs require substantial pipe, fixtures, connectors and higher labor and permit fees.
Estimating time and materials for planning
After outlining common cost breakdowns for repairs, reroutes, and full runs, estimating time and materials becomes the next planning step. The installer lists lengths, fittings, flux, solder, and tools, then allocates hours per task, factoring accessibility and inspections. Contingency of 10–20% for materials and time is recommended.
| Item | Estimate |
|---|---|
| Materials | Linear feet, fittings |
| Time | Hours per section |
Resources, Further Learning, and Tools for Prospective DIYers
Prospective DIYers should consult trusted tutorials, manufacturer installation guides, and local plumbing codes to build confidence and avoid costly mistakes.
When complex situations or permits arise, guidance on when to call a licensed plumber and how to vet contractors is essential for safety and peace of mind.
Suggested starting resources include:
- Official manufacturer installation manuals
- Local building code websites
- Accredited online tutorials and courses
- Licensing boards and consumer review sites
Recommended tutorials, manufacturer guides, and code references
When seeking reliable instruction on copper pipe installation, homeowners and tradespeople should prioritize materials that combine step-by-step procedures with code-aligned explanations.
Authoritative resources include manufacturer installation guides, trade association tutorials, and local plumbing code references.
Recommended sources: manufacturer product manuals (soldering, fittings, pressure ratings), instructional videos from certified trainers, ANSI/ASME/UPC code excerpts, and trade organization publications for best practices and safety standards.
When to call a licensed plumber and how to vet contractors
Guidance on manufacturer manuals and code references helps identify which copper pipe tasks are reasonable for a skilled DIYer and which exceed safe, legal, or practical limits.
Complex jobs—such as mains tie-ins, gas piping, water heater replacements, work that affects multiple units, or anything requiring permits—should be left to a licensed plumber.
Check licenses, insurance, local references, written estimates, warranty terms, and permit handling before hiring.
Conclusion
The finished copper runs like a quiet river through a house, its joints the small bridges that keep flow steady and safe. For the careful DIYer, patience, correct tools, and clean technique transform raw metal into reliable plumbing. Mistakes leave ripples; good practice brings calm. With planning, testing, and respect for codes, a novice can turn learning into lasting craft—each soldered seam a quiet tribute to skill and care.