How to Know What Size Toilet Flapper You Need: Quick Guide to Measuring and Replacing
To find the right toilet flapper size, measure the flush valve opening inside the tank; you’ll typically need a 2-inch or 3-inch flapper. Be sure to note whether the valve is open-bottom or closed-bottom, record the chain length, and check the seat for any wear or mineral buildup. If you’re uncertain, a universal adjustable flapper can work, but original equipment manufacturer (OEM) parts usually provide the best fit. Before replacing the flapper, shut off the water and drain the tank. Follow along for detailed measuring, installation, and troubleshooting tips.
How to Quickly Identify the Right Toilet Flapper Size for Your Toilet
A quick rule of thumb is to try the most common flapper sizes first: 2-inch and 3-inch.
Measuring the flush valve opening will confirm which fits, but starting with a 3-inch model is often successful for modern toilets.
If that fails, a 2-inch flapper or an adjustable universal flapper is the next logical option.
One-sentence quick answer: the most common flapper sizes and which to try first
Most household toilets use either a 2-inch or 3-inch flapper, so trying a 3-inch first is often the fastest approach; if that doesn’t seal properly, switch to a 2-inch before exploring less common sizes or specialty designs.
For readers learning how to know what size toilet flapper, start with universal 3-inch then 2-inch; measure seat diameter only if those fail.
Why Flapper Size Matters for Flush Performance and Water Use
An incorrectly sized flapper can prevent a full flush or fail to seal, causing weak flushes, continuous leaks, and extended tank refill cycles.
These performance issues directly affect water use by increasing consumption or reducing flushing efficiency.
Choosing a flapper that matches the toilet’s design and any water-saving features helps maintain proper flush performance and conserve water.
How an incorrectly sized flapper affects flushing, leaks, and tank refill
When a toilet flapper is the wrong size, it disrupts the sequence of seal, release, and refill that controls flushing efficiency and water consumption.
A too-small flapper may fail to seat, causing continuous leakage and weak flushes; a too-large flapper can restrict water flow, shortening flush force and delaying refill.
Both lead to waste, inconsistent performance, and premature component wear.
Water-saving considerations and toilet compatibility
Mis-sized flappers not only disrupt seal and refill timing but also directly affect water use and fixture compatibility.
Properly sized flappers guarantee desired flush volume and efficient bowl siphoning; oversized openings waste water, undersized restrict flow and cause weak flushes.
Modern low-flow toilets and dual-flush systems require compatible flapper design to meet performance standards and conserve water effectively.
Basic Toilet Tank Parts Relevant to Flapper Sizing
The tank’s flapper, flush valve seat, overflow tube, and chain work together to control water release and determine which flapper sizes will fit and seal properly.
Compatibility also depends on whether the flush valve is open-bottom or closed-bottom, since each design uses different flapper shapes and mounting methods.
Understanding these parts and their interactions simplifies selecting the correct flapper size.
Flapper, flush valve seat, overflow tube, and chain interactions
Although often unseen, the flapper, flush valve seat, overflow tube, and chain operate as an interdependent system that determines how effectively a toilet seals and releases water during each flush.
Proper chain length guarantees full lift without preventing reseal; a worn seat causes leaks despite a good flapper; overflow height limits water level and influences flush volume; alignment and material compatibility optimize reliable sealing.
Difference between open-bottom and closed-bottom flush valve designs
A clear understanding of how the flapper, flush valve seat, overflow tube, and chain interact leads naturally to examining the flush valve itself, where two common designs—open-bottom and closed-bottom—affect flapper selection and performance.
Open-bottom valves expose the drainage opening; flappers must seal directly against the seat. Closed-bottom valves have a housing that guides the flapper; compatible models and mounting methods differ accordingly.
Tools and Materials You Need Before Measuring
A few basic tools and materials make measuring a toilet flapper quick and accurate. Recommended items include a ruler or caliper, a tape measure for tank dimensions, and a couple of likely replacement flappers to test fit.
Simple safety steps—shutting off the water and wearing gloves—help prevent spills and contact with tank residue.
Measuring tools, replacement flappers to have on hand, and safety tips
Before measuring the flapper, gather a few essential tools and replacement options so the job proceeds efficiently and safely: a tape measure or ruler accurate to 1/8 inch, needle-nose pliers, a small screwdriver, and disposable gloves; additionally, keep common replacement flappers on hand—3-inch and 2-inch—plus an adjustable or universal model and a toilet-specific kit if the tank uses a proprietary design.
Wear gloves, shut off water, and drain tank.
Step-by-step Measuring Guide to Determine Flapper Size
The following steps explain how to measure the flush valve diameter, chain length and hinge or clip spacing, and how to distinguish one-piece from two-piece flapper mounts.
Begin by measuring the inner seat diameter at the flush valve to determine the flapper size.
Then record the chain length and the distance between hinge points or clips, and check the mounting style to confirm compatibility.
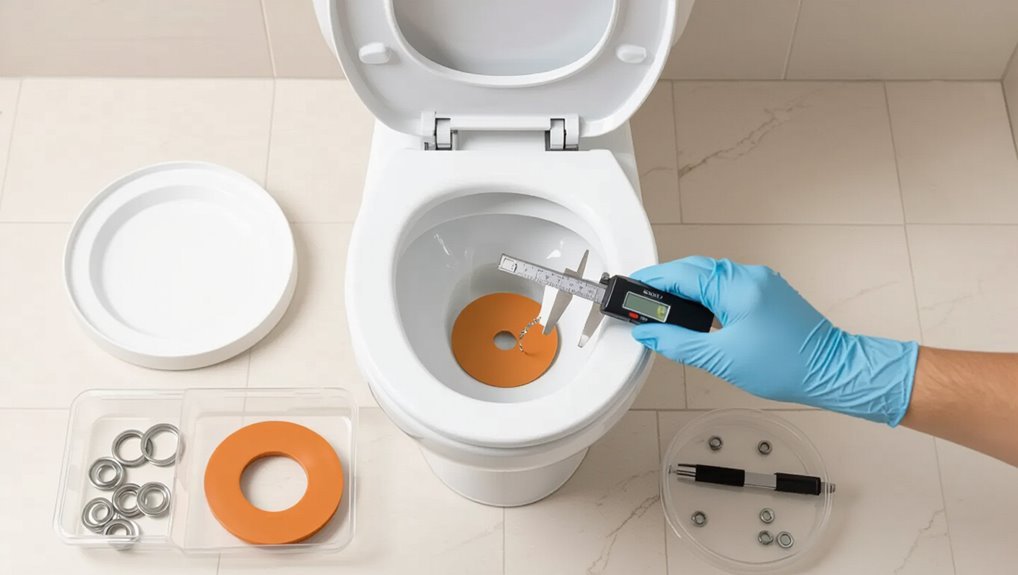
How to measure the flush valve diameter (inner seat) accurately
Measuring the flush valve diameter requires a few precise, simple steps to confirm the replacement flapper seats correctly.
A clear, detached procedure assures correct fit and prevents leaks.
- Empty tank and dry valve seat
- Use calipers or a ruler across inner seat
- Measure inside edge to inside edge
- Record to nearest 1/8 inch (or mm)
- Compare with flapper specifications
Measuring chain length and hinge/clip spacing
Several simple measurements determine whether a replacement flapper will operate smoothly: chain length from the flush lever to the flapper eye, and the spacing and type of the hinge or clip that anchors the flapper to the overflow tube or flush valve.
Measure chain slack so the flapper rests sealed yet lifts fully when flushed.
Measure hinge pin spacing and clip width to match replacement mounting dimensions.
How to identify one-piece vs. two-piece flapper mounts
After confirming chain length and hinge or clip spacing, attention turns to whether the flapper mounts as a one-piece or two-piece unit.
One-piece mounts integrate the flapper and hinge into a molded assembly that snaps over the overflow tube.
Two-piece systems use separate hinges or clips attaching a discrete flapper.
Inspect the rim area: molded ring indicates one-piece; separate clip points indicate two-piece.
Common Flapper Sizes and How to Match Them to Measurements
Common toilet flapper sizes—2-inch, 3-inch, and 4-inch—correspond to different drain openings and typical toilet models, so matching measurements is essential. The table below summarizes nominal diameters, common compatible toilet types, and typical model examples to help identify the right flapper. Readers can measure the flush valve opening and compare it to these categories to select the correct size.
| Flapper Size | Compatible Toilet Type | Common Model Examples |
|---|---|---|
| 2-inch | Older two-piece and some low-flow toilets | Older Kohler, American Standard older lines |
| 3-inch | Most modern two-piece toilets | Many Toto, American Standard modern models |
| 4-inch | Commercial and high-flow toilets | Commercial wall-hung or flushometer-style units |
2-inch vs 3-inch vs 4-inch flappers dimensions and common toilet models
Which size fits a toilet depends primarily on the flush valve diameter: most modern toilets use either a 2-inch, 3-inch, or 4-inch flapper, each corresponding to specific valve openings and mounting styles.
2-inch flappers suit older or compact toilets; 3-inch is most common on many residential models; 4-inch appears on high-flow or commercial bowls.
Verify valve diameter and mounting type before purchasing.
How to Identify Your Toilet Model and Manufacturer to Confirm Fit
The reader should first locate model numbers or manufacturer stamps, typically found on the inside tank wall, under the tank lid, or on the bowl rim.
These identifiers can be checked against online resources or parts guides to confirm compatible flapper sizes and styles.
If identification is unclear or the toilet is uncommon, consulting the manufacturer’s specifications or customer support guarantees a proper fit.
Finding model numbers, stamps inside the tank, and online resources
When trying to confirm a replacement flapper will fit, locating the toilet’s model number or manufacturer stamp inside the tank is the fastest way to get a precise match.
Inspect under the tank lid, near the bowl rim, and on the overflow tube for stamped or printed IDs.
Note numbers, then search manufacturer sites, parts diagrams, or retailer databases to locate compatible flappers quickly.
When to consult manufacturer specifications
Why consult the manufacturer’s specifications before buying a flapper?
Manufacturer specifications confirm model-specific dimensions, recommended materials, and compatible part numbers. Consulting them prevents mismatched seals, premature wear, and flushing issues.
When markings are unclear or aftermarket options conflict, refer to the manufacturer’s manual or website.
Exact fit guarantees reliable operation, preserves warranty, and avoids repeated replacements or costly repairs.
Buying Options: Universal vs. Brand-Specific Flappers
Consumers weigh universal adjustable flappers against OEM or model-specific replacements based on fit, ease of installation, and adjustability.
Universal flappers offer flexibility and stock availability but may require fine-tuning and sometimes compromise on seal or durability.
Brand-specific flappers guarantee precise fit and original performance, making them preferable when exact compatibility and long-term reliability are priorities.
Pros and cons of universal adjustable flappers
Although universal adjustable flappers aim to fit a wide range of toilets, they present a distinct balance of advantages and trade-offs.
Benefits include broad compatibility, adjustable flush volume for water savings, and easy availability.
Downsides involve potential fit issues, less precise sealing than OEM parts, durability variations, and occasional need for trial-and-error adjustments.
Buyers should weigh convenience against ideal performance and longevity.
When to choose OEM or model-specific replacements
When a toilet requires a reliable seal and long-term performance, choosing an OEM or model-specific flapper is often the better option.
These replacements match original dimensions, materials, and valve geometry, minimizing leaks and fit issues.
Choose model-specific parts for older, high-end, or proprietary flush mechanisms, or when repeated failures occur with universal flappers; expect higher cost but greater compatibility and warranty support.
How to Replace a Flapper: Quick Installation Steps
Before beginning, the tank should be shut off and partially drained so the old flapper can be detached from the flush lever and seat.
The replacement flapper is then seated and its chain length adjusted so the valve lifts fully without restricting the lid or keeping the flapper open.
Finally, the tank is refilled and the flush is tested to confirm a proper seal and no leaks.
Preparing the tank and removing the old flapper
Shut off the water supply and flush the toilet to lower the tank water level.
Then sponge or towel any remaining water to keep the work area dry.
Inspect the flapper, chain, and seat for mineral buildup or cracking.
Disconnect the chain from the flush lever.
Unhook the flapper’s ears or remove the ring from the flush valve.
Clean the sealing surface before installing.
Installing the new flapper and adjusting chain length
Fit the new flapper onto the flush valve by aligning its ears or sliding the mounting ring into place.
Then reconnect the chain to the flush lever.
Adjust chain length so there is slight slack when the flapper rests closed, avoiding too tight or too loose connections.
Clip or reposition links as needed, ensuring smooth lift without binding during handle operation.
Testing for proper seal and leak-free operation
With the flapper seated and the chain adjusted, the next step is to verify the seal and confirm there are no leaks.
Close the lid, wait five minutes, then observe the water level for drop.
Add a few drops of dye or food coloring to the tank; if color appears in the bowl within ten minutes, the flapper leaks.
Readjust or replace as needed.
Troubleshooting Common Flapper Problems
Common flapper problems include a seal that will not seat, often caused by warped or torn rubber or mineral deposits that prevent a watertight fit.
Chain length errors—either too short (preventing the flapper from closing) or too long (allowing it to get caught under the flapper)—can usually be corrected by adjusting or reattaching the chain to the proper link.
Signs that cleaning may help include visible mineral buildup, while cracked, stiff, or permanently deformed rubber indicate the flapper should be replaced.
Flapper not sealing causes and fixes
Diagnose a flapper that won’t seal by inspecting the seat, the flapper itself, and the lift chain for obvious defects or misalignment.
Clean mineral deposits from the seat with a nonabrasive cleaner, replace warped or hardened flappers, and realign the flapper so it seats evenly.
Check for debris in the valve opening and replace degraded seals to restore watertight contact and stop leaks.
Chain too short/long how to adjust
After checking the seat and flapper condition, the next check should be the lift chain length: too short a chain can prevent the flapper from seating fully, while too long a chain can get caught under the flapper or allow incomplete opening.
Adjust by selecting a middle length so the flapper rests snugly with slight slack, then secure the clip or hook to the overflow tube at that position.
Mineral buildup and aging rubber cleaning and replacement signs
Inspect the flapper for white or crusty deposits and for rubber that has lost elasticity—mineral buildup from hard water will stiffen and lift edges, while aging rubber becomes brittle, warped, or develops surface cracks that prevent a tight seal.
Clean mild deposits with vinegar; replace flappers showing deep pitting, persistent leaks, or loss of flexibility.
Regular inspection prevents continuous phantom flushing and saves water.
Water Efficiency and Upgrades Related to Flappers
When considering flapper replacement, attention should also be given to retrofit options that reduce gallons per flush, such as adjustable or partial-flush-compatible flappers.
Upgrading the fill valve or refill tube at the same time can optimize tank refill volume and timing for the new flapper.
Coordinating these changes yields measurable water savings and more reliable performance.
Retrofit options to reduce water per flush
Consider retrofit options that reduce water per flush by altering or replacing flapper-related components to improve seal efficiency and control flush volume.
Options include adjustable or smaller-diameter flappers, restrictor collars, and adjustable lift chains or brackets to limit opening height.
High-efficiency flappers and precision seals reduce leakage and overflush without changing the tank’s fill mechanism, saving water while maintaining reliable performance.
Combining flapper replacement with fill-valve or refill tube upgrades
Having addressed flapper-focused retrofits that limit flush volume, attention shifts to pairing flapper replacement with upgrades to the fill valve and refill tube to optimize overall tank performance.
Coordinated upgrades prevent short cycling, guarantee correct refill height, and reduce water waste. Choosing compatible parts—pressure-assisted or quiet-fill options—and adjusting refill tube placement yields reliable seals, consistent flushes, and improved efficiency with minimal plumbing skill.
When to Call a Plumber: Signs You Need Professional Help
Persistent leaks, persistent or new unusual sounds, and complicated or unfamiliar tank mechanisms often indicate that replacement of the flapper alone may not resolve the issue.
A professional plumber can diagnose underlying causes such as worn seals, faulty fill valves, or hidden cracks. Homeowners should consider calling a plumber when these problems continue after basic troubleshooting or when the tank’s components appear too complex to adjust safely.
Persistent leaks, unusual sounds, or complex tank mechanisms
When a toilet continues to run despite replacing the flapper, emits unexpected gurgling or hissing noises, or contains a tank filled with intricate or corroded mechanisms, the issue may exceed routine DIY repairs.
A professional evaluates valve assemblies, fill valves, overflow integrity, and hidden leaks, diagnosing worn seals, mineral buildup, or pressure problems and performing targeted repairs or replacements to prevent water waste and recurring failures.
Quick Reference Checklist Before You Buy or Replace a Flapper
Before purchasing or replacing a toilet flapper, gather a few key facts: the toilet model or manufacturer (if known), the flapper diameter required (commonly 2″, 2 3/8″, or 3″), the flush valve type (standard, integrated, or canister), material preference (rubber vs. silicone), and whether a universal fit or OEM part is desired.
- Measure diameter accurately
- Note chain length and clip type
- Inspect valve seat condition
- Check tank space and overflow height
- Confirm warranty and return policy
Conclusion
A homeowner can measure, compare, and replace a toilet flapper; a DIYer can verify fit, test seal, and adjust chain length; a saver can choose smaller, efficient models, compare materials, and track leaks. With a ruler in hand, a clear tank lid, and a compatible replacement, one can stop phantom flushes, restore full flushes, and reduce water waste. When uncertainty persists, calling a plumber is prudent, timely, and cost‑effective.