How to Connect Brass Fittings: A Step-by-Step Guide for Leak-Free Joints
To connect brass fittings for leak-free joints, start by preparing clean pipe ends and selecting the appropriate fitting type—compression, flare, or threaded. Use a suitable sealant like PTFE tape or pipe dope. Measure and cut the tubing square, then deburr and chamfer the ends. Assemble the components in the correct order, hand-tighten, and finish tightening to the manufacturer’s torque specifications while holding the fitting body steady. Finally, test the joint under pressure and check for leaks using soapy water. For detailed step-by-step procedures, troubleshooting tips, and torque guidance, continue reading.
Quick overview of connecting brass fittings for leak-free joints
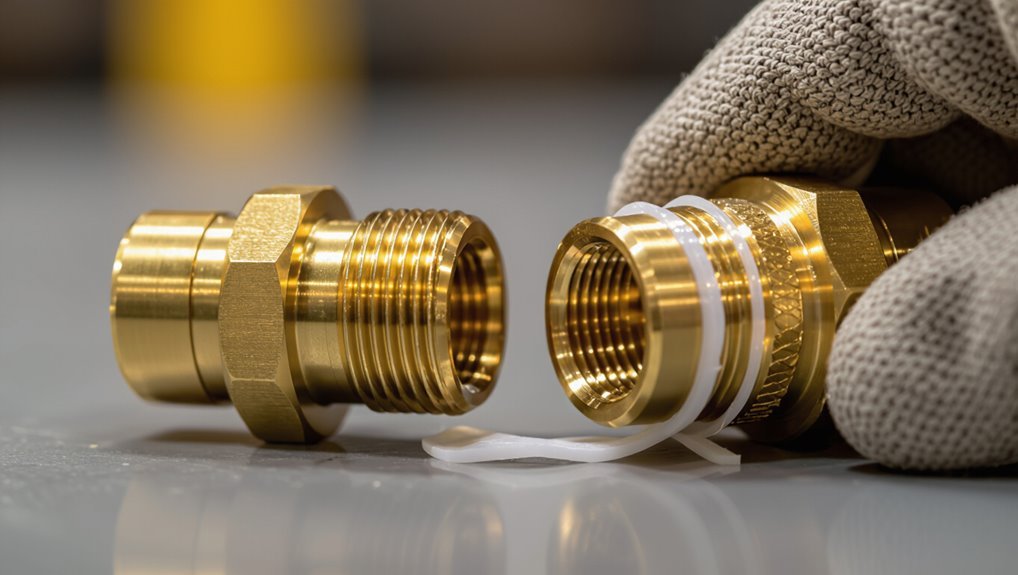
Brass fittings are commonly used in plumbing, gas, and HVAC systems where corrosion resistance and machinability are important.
Their key benefits include durability, good sealing with compatible materials, and ease of assembly.
While limitations involve susceptibility to dezincification in certain waters and higher cost than some alternatives.
This overview frames when brass is appropriate and which performance trade-offs to evaluate for leak-free joints.
When to use brass fittings and common applications
When corrosion resistance, durability, and reliable sealing are required, brass fittings are a preferred choice for plumbing, gas, and hydraulic systems.
Typical applications include potable water lines, fuel and natural gas connectors, instrumentation, and refrigeration.
Professionals consult installation guides on how to connect brass fittings for threaded, compression, or flare joints.
Selection depends on pressure, media compatibility, and temperature requirements.
Key benefits and limitations of brass fittings
Beyond common applications and selection criteria, understanding the benefits and limitations of brass fittings helps installers achieve leak-free joints across threaded, compression, and flare connections.
Brass offers corrosion resistance, machinability, dimensional stability, and good sealing with proper tapes or compounds.
Limitations include dezincification in certain waters, lower strength than steel, incompatibility with ammonia, and potential galvanic corrosion with dissimilar metals.
Tools and materials required
A concise list of essential tools—wrenches, pipe cutters, deburring tools, and cleaning brushes—sets the foundation for reliable brass connections.
Recommended materials such as PTFE tape, pipe dope, or liquid thread sealant should be described for their appropriate applications.
Guidance on selecting the correct brass fitting type and size completes the preparatory checklist.
Essential tools checklist
Several basic tools and materials are required to install brass fittings properly: a concise kit guarantees safe, accurate joints.
Essential items focus on measurement, cutting, tightening, cleaning, and protection.
- Adjustable wrench for secure tightening
- Tubing cutter for clean cuts
- Deburring tool to remove burrs
- Wire brush for surface cleaning
- Safety gloves and eye protection
Recommended materials and sealants (PTFE tape, pipe dope, thread sealant)
Choose appropriate sealants to guarantee leak-free joints when installing brass fittings: common options include PTFE (Teflon) tape, pipe dope (thread-sealant paste), and specialized anaerobic thread sealants.
PTFE tape suits most water and gas fittings; pipe dope provides thicker fill for imperfect threads; anaerobic sealants cure for permanent seals on metal threads.
Select compatible materials and follow manufacturer cure times and application directions.
How to choose the right brass fitting type and size
With sealant selected and cure times observed, the next step is identifying the correct brass fitting type and size for the job.
Assess pipe material, thread standard (NPT, BSP), pressure rating and temperature.
Match fitting style (compression, flare, sweat, push-to-connect) to application.
Measure outside or nominal pipe diameter accurately.
Confirm compatible alloys and any required adapters before purchase and assembly.
Understanding brass fitting types and thread standards
The section compares compression, flare, and threaded brass fittings, noting how each seals and where they are commonly used.
It explains key thread standards—NPT, BSP, and SAE—how to identify them by pitch, angle, and taper, and why mismatching threads causes leaks.
Guidance is provided on selecting fittings appropriate for potable water, gas, and HVAC systems based on material certification and pressure requirements.
Compression fittings vs. flare fittings vs. threaded fittings
Many households and workshops rely on three primary brass fitting types—compression, flare, and threaded—each designed for specific tubing, pressure, and sealing needs.
Compression fittings use a ferrule compressed onto soft tubing for moderate pressures.
Flare fittings deform tube ends for higher-pressure, vibration-resistant seals.
Threaded fittings rely on mating threads and seals (tape or compound) for durable, serviceable connections.
NPT, BSP, and SAE thread differences and identification
Following the overview of compression, flare, and threaded connections, attention turns to the common thread standards that determine compatibility: NPT, BSP, and SAE. Each standard differs by thread angle, pitch, and sealing method; identification uses thread gauges, visual pitch counting, and measurement of major diameter. Correct matching prevents leaks and cross-threading.
| Standard | Key trait |
|---|---|
| NPT | Tapered, 60° |
| BSP | Parallel/tapered, 55° |
| SAE | Straight, unified pitch |
Choosing fittings for potable water, gas, and HVAC systems
Why choose a specific brass fitting type for potable water, gas, or HVAC systems? The correct selection guarantees compatibility, safety, and code compliance.
Potable water requires lead-free, NSF-certified brass and corrosion-resistant seals.
Gas systems need fittings rated for fuel service with proper thread types and leakproof joints.
HVAC often uses flare, compression, or sweat fittings matched to system pressure and refrigerant specifications.
Preparing pipes and fittings for a secure joint
Before assembly, the installer inspects and cleans pipe ends and fittings to remove debris and corrosion that could compromise the seal.
Accurate measurement and square cutting to length guarantee proper fit and engagement.
Final preparation includes deburring, chamfering, and checking alignment to prevent leaks and ease joint assembly.
Inspecting and cleaning pipe ends and fittings
Inspectors should begin by visually examining pipe ends and fittings for burrs, corrosion, deformation, or remnants of old sealant that could prevent a tight joint.
They must remove debris with a clean cloth, wire brush, or deburring tool, then inspect threads and seating surfaces under good light.
Final cleaning uses solvent or mild detergent, followed by drying and reinspection before assembly.
Measuring and cutting pipe to length
Measure each pipe carefully and mark the cut line with a fine-tip marker to guarantee exact lengths that account for fitting depth and thread engagement.
Use a pipe vise or clamp to secure the tube before cutting. Select a suitable cutter or saw for material and diameter, cut squarely following the mark, and confirm length against the fitting.
Re-measure before finalizing any cuts.
Deburring, chamfering, and alignment techniques
Remove burrs and chamfer edges to guarantee smooth insertion and proper seating of brass fittings; this prevents cuts to sealing surfaces, reduces turbulence, and helps achieve a leak-free joint.
Use a deburring tool and a small file to remove sharp edges, then lightly chamfer beveled ends.
Verify axial alignment and concentricity before assembly; misalignment stresses seals and causes leaks.
Step-by-step: Installing compression brass fittings
The procedure for installing compression brass fittings begins with correctly assembling the sleeve (ferrule), nut, and body in the proper order.
Attention to the recommended torque and tightening sequence guarantees a secure, leak-free joint without deforming the ferrule.
Common sealing mistakes—insufficient thread engagement, over-tightening, and failing to seat the ferrule—should be watched for and corrected.
Assembling compression fittings: sleeve, nut, and body
Begin by identifying the three components—sleeve (ferrule), nut, and body—and confirming they are the correct size and undamaged for the tubing and fitting in use.
Slide the nut onto the tubing, then the ferrule with its tapered end facing the fitting body.
Insert tubing fully into the body, seat the ferrule, then hand-start the nut onto the body threads, ensuring alignment before final tightening.
Correct torque and tightening sequence
After the nut is hand-started and threads are aligned, proper torque and a correct tightening sequence guarantee a leak-free seal without damaging the ferrule or tubing.
A calibrated torque wrench set to manufacturer specifications should be used.
Tighten in incremental turns: hand-tight, then specified fraction (often 1/4–1/2 turn) while holding the fitting body stable.
Verify alignment and recheck torque after system pressurization.
Common sealing mistakes with compression fittings
While seemingly simple, compression fittings fail most often from predictable installation errors; complacency with alignment, improper tubing preparation, and incorrect nut/ferrule seating are the usual culprits.
Additional common mistakes include over-tightening that deforms ferrules, under-tightening that leaves gaps, using damaged or contaminated components, cutting tubing unevenly, and ignoring manufacturer specifications.
Proper inspection and measured technique prevent leaks and prolong joint life.
Step-by-step: Installing flare brass fittings
The section outlines the steps for forming a proper flare on the tubing, including cutting square, deburring, and using a flaring tool to create a smooth 45° seat.
It then covers assembling and tightening flare nuts to the correct torque to prevent leaks without distorting the flare.
Finally, it explains when to choose flare fittings over compression fittings, such as for high-pressure or vibration-prone applications.
Forming a proper flare on the tubing
Forming a proper flare on the tubing guarantees a gas- or liquid-tight seal between the tube and brass fitting; it requires clean cuts, correct flare dimensions, and steady, even pressure during forming.
The tubing end is deburred, inserted squarely into the flaring tool, and compressed to the specified angle and thickness.
Inspect the flare for uniformity, concentricity, and absence of cracks before fitting.
Assembling and tightening flare nuts
With a clean, uniform flare verified, attention shifts to assembling and tightening the flare nut to secure the joint.
Slide the nut onto tubing, engage threads by hand to avoid cross-threading, then use a flare wrench on the fitting and a second wrench on the nut.
Tighten firmly until snug, then back off slightly.
Inspect for alignment and confirm there is no visible gap.
When to choose flare over compression fittings
Because flare fittings rely on a metal-to-metal seal and withstand vibration and higher pressures better than compression fittings, they are chosen when connections must resist movement, temperature changes, or repeated assembly and disassembly.
They suit gas lines, refrigeration, and high-pressure hydraulic runs.
Compression fittings remain appropriate for low-pressure water lines, confined spaces, or where flaring tools are unavailable or tubing is too soft.
Step-by-step: Installing threaded brass fittings
The technician begins by cleaning the male and female threads and wrapping PTFE tape or applying pipe dope to guarantee a reliable seal.
Attention is then given to sealing technique and recommended tightening limits, typically hand-tight plus a specified number of wrench turns.
Care is taken to avoid overtightening or cross-threading, which can damage brass threads and compromise the joint.
Cleaning threads and applying PTFE tape or pipe dope
Clean and seal threaded connections before assembly to guarantee a leak-free joint; this involves removing debris and old sealant from both male and female threads, then applying an appropriate thread sealant—PTFE tape or pipe dope—consistent with the system’s pressure, temperature, and fluid compatibility.
Threads are brushed, wiped with solvent if needed, inspected for damage, then sealed with the chosen product following manufacturer recommendations.
Proper thread sealing technique and tightening limits
Begin by applying the chosen sealant precisely and sparingly to the male threads—wrap PTFE tape clockwise two to three turns from the first full thread or brush a thin, even layer of pipe dope—so that the sealant fills thread roots without creating bulges that can prevent proper engagement.
Then hand-start the fitting, align it squarely, and tighten to the manufacturer’s specified torque or wrench-flats turns limit, stopping if resistance increases sharply to avoid over-compression, which can crack fittings or damage threads.
Avoiding overtightening and cross-threading
Proceed gently when threading brass fittings to prevent cross-threading and stripping; the installer should hand-start connections, guarantee threads engage smoothly for several turns, and stop immediately if misalignment or binding is felt.
Torque must follow manufacturer specifications; use calibrated tools, apply measured increments, and avoid excessive force.
Inspect threads and seatings for damage, replace compromised components, and retest connections for leaks after controlled tightening.
Testing and verifying leak-free joints
The next step covers methods for confirming that brass fittings hold pressure without leaks, including appropriate pressure tests for both water and gas lines.
It also explains visual inspections and the use of soap-bubble solutions to pinpoint small leaks.
Finally, common leak scenarios are outlined with straightforward troubleshooting actions to resolve them.
Pressure testing methods for water and gas lines
Several straightforward pressure-testing methods validate that brass fittings and joints in water and gas lines are leak-free, each chosen based on system type, local codes, and safety considerations.
For water, hydrostatic tests apply pressurized water to specified psi and monitor pressure decay.
For gas, inert gas (nitrogen) or low-pressure air tests use calibrated gauges and sniffers; certified procedures and safety vents are mandatory.
Visual and soap-bubble leak detection
Visual inspection and soap-bubble testing offer quick, low-cost means to confirm that brass fittings and joints are free of leaks before systems are placed into service.
Examine seams, thread engagement, and sealing materials for gaps or damage.
Apply a mild soap solution to joints, observe for persistent bubbles while pressurizing gradually, and mark any bubbling locations for repair or reassembly prior to final commissioning.
Troubleshooting common leak scenarios
Begin by isolating the affected section and pressurizing it incrementally while monitoring for leaks; this controlled approach helps distinguish between slow weeps, thread seepage, and joint failures.
Inspect connections, fittings, and seals for visible damage.
Tighten fittings to specification, retape or reseal threads, and replace faulty components.
Repressurize and retest until no leakage appears, documenting pressure readings and corrective actions.
Common installation problems and how to fix them
Common installation problems include leaks at the nut/sleeve interface, damaged threads, and distorted ferrules, each requiring specific corrective steps.
Technicians should inspect and tighten or reseat connections for nut/sleeve leaks. They should rethread or replace fittings for damaged threads, and replace ferrules that have lost shape.
The decision to repair or replace depends on the extent of damage, material fatigue, and the reliability required for the application.
Leaks at the nut/sleeve interface and corrective steps
When leaks occur at the nut-to-sleeve junction, they typically indicate misalignment, insufficient tightening, or damaged components that prevent a proper ferrule seal.
Diagnosing the cause requires inspecting the nut, sleeve (ferrule), and tubing for deformation, foreign material, or incorrect parts.
Then, correct alignment, replace damaged pieces, and torque to the manufacturer’s specification.
After correction, pressure-test to confirm leak-free performance.
Damaged threads, distorted ferrules, and repair options
If leaks persist despite correcting nut/sleeve alignment and replacing obvious defects, attention should turn to threads and ferrules that have been compromised by cross-threading, overtightening, or repeated assembly.
Inspect for burrs, flattened ferrule lips, and stripped threads. Minor damage can be chased with appropriate dies or reformed ferrules; severe distortion requires component replacement.
Test assemblies under low pressure before returning to service.
When to replace fittings vs. repair
Although minor blemishes and misalignments can often be corrected in the field, a clear threshold exists where replacement is safer and more cost-effective than repair.
Replace fittings when threads are stripped, cracks or corrosion compromise integrity, or repeated leaks persist after proper tightening.
Repair is appropriate for minor thread damage, gasket swaps, or reseating ferrules.
Prioritize safety, long-term reliability, and material compatibility.
Safety, code compliance, and best practices
Before starting work with brass fittings, practitioners should follow safety precautions for pressurized systems, including depressurizing lines and using appropriate PPE.
They must also confirm local codes, obtain required permits, and use materials approved for the specific application.
Regular inspection and simple maintenance—such as checking joints and replacing worn seals—will help prevent future leaks.
Safety precautions working with pressurized systems
When working with pressurized systems, technicians must prioritize personal safety and code compliance by verifying system depressurization, using rated PPE, and confirming proper component compatibility; this includes checking pressure ratings on brass fittings, ensuring isolation valves are fully closed and locked out, and following local plumbing and mechanical codes for installation and testing.
Inspect tools, use pressure-rated hoses, vent trapped pressure, test joints gradually, and document procedures.
Local codes, permits, and material approvals
Because jurisdictional requirements vary, technicians must confirm applicable local plumbing, mechanical, and building codes before selecting brass fittings or beginning work.
Obtain required permits, submit plans when mandated, and use only fittings listed or approved for the designated service (potable water, gas, HVAC).
Retain manufacturer documentation, certificates of compliance, and inspection records to demonstrate adherence during installation and subsequent inspections.
Maintenance tips to prevent future leaks
Regular inspection and proactive maintenance greatly reduce the risk of leaks in brass fittings. Routine checks, cleaning, and timely replacement preserve integrity while ensuring code compliance and safety.
Recommended actions focus on prevention, documentation, and educated handling.
- Inspect joints quarterly for corrosion or seepage
- Tighten fittings to manufacturer torque specs
- Replace worn seals and tapes promptly
- Keep records of maintenance and repairs
- Use approved materials and trained personnel
Comparison of sealing methods and recommended use cases
A concise comparison of common sealing methods helps determine which is best for a given brass fitting application. The table below summarizes PTFE tape, pipe dope, anaerobic sealants, and when mechanical versus chemical sealing is preferred. Recommended use cases are noted to guide selection based on pressure, disassembly needs, and fluid compatibility.
| Method / Factor | Notes |
|---|---|
| PTFE tape | Easy to apply, good for threads, removable, limited to moderate pressures |
| Pipe dope (thread sealant) | Thicker coverage, better for irregular threads and higher pressures, can be cleaned off |
| Anaerobic sealant | Forms chemical bond, excellent for permanent, leakproof joints on metal threads |
| Mechanical vs Chemical | Mechanical (compression, flare) for reusable, vibration-prone joints; chemical for permanent, high-integrity seals |
PTFE tape vs. pipe dope vs. anaerobic sealants
How should one choose between PTFE tape, pipe dope, and anaerobic sealants when joining brass fittings?
PTFE tape suits general plumbing, easy application, and disassembly.
Pipe dope provides thicker, gap-filling seal and resists vibration.
Anaerobic sealants cure in metal-to-metal gaps for permanent, high-pressure joints.
Selection depends on service medium, pressure, need for future disassembly, and temperature compatibility.
When to use mechanical vs. chemical sealing
Choose mechanical sealing when joints require frequent disassembly, thermal cycling tolerance, or where particulate contamination or solvent incompatibility rules out adhesives.
Opt for chemical seals when a permanent, vibration-resistant, gap-filling bond is needed and service conditions (pressure, temperature, and media) are compatible with the sealant.
Mechanical methods suit reusable, low-pressure or mixed-material assemblies.
Chemical seals suit static, high-vibration, or precision-gap applications with validated chemical compatibility.
Quick reference: troubleshooting checklist and torque guide
Refer to this quick-reference checklist when diagnosing common issues with brass fittings: verify thread type and alignment, inspect sealing surfaces for nicks or debris, confirm compatible materials and correct sealant or tape, check for cross-threading or overtightening, and assess for leaks under working pressure.
- Torque per size and thread spec
- Replace damaged components
- Use proper sealant type
- Retest at operating pressure
- Document torque and outcomes
Conclusion
The guide closes with a quiet warning: when brass meets thread and pressure, outcomes hinge on care. Readers are reminded that neat preparation, correct parts, and measured torque can yield lasting, leak-free joints—yet a single lapse may invite slow failure. The stakes are practical but urgent: a drip becomes a claim, corrosion, or costly repair. They are left to choose diligence over haste, knowing the next turn of the wrench decides everything.