How to Remove a Kitchen Sink Faucet: Step-by-Step Guide for Beginners
To remove a kitchen sink faucet as a beginner, follow these straightforward steps. Start by shutting off the water supply and opening the faucet to relieve any pressure. Clear the cabinet beneath the sink for easy access. Next, disconnect the supply lines and use a basin wrench or adjustable wrench to loosen the mounting nuts. Carefully lift the faucet out, catching any residual water. If you encounter corroded nuts, apply penetrating oil or heat as needed. For pull-down hoses, handle them with extra care. Once removed, inspect the holes, clean the seals, and prepare new gaskets for installation. Continue reading for detailed steps, helpful tips, and troubleshooting advice.
What Removing a Kitchen Sink Faucet Entails
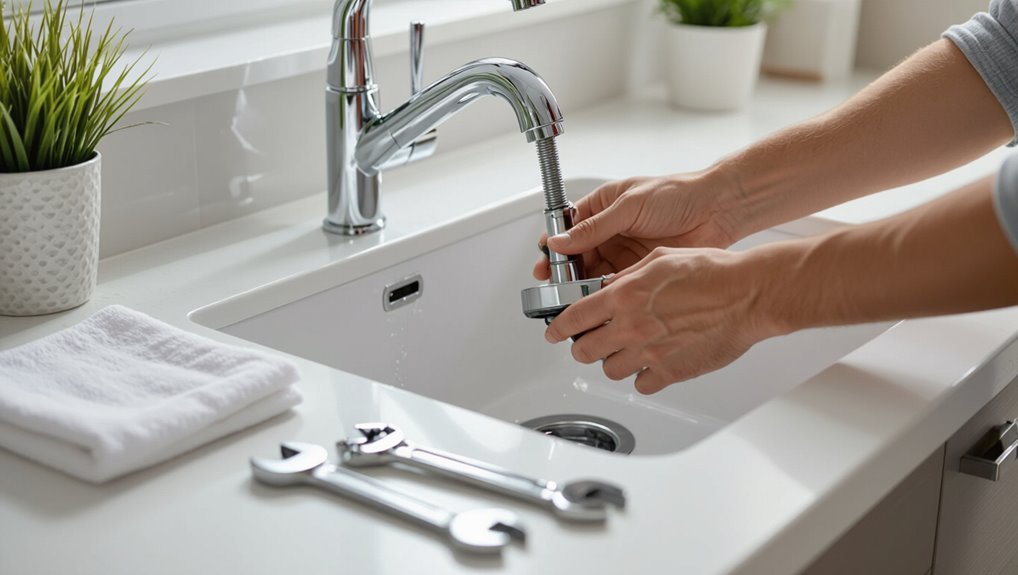
Removing a kitchen sink faucet is typically done for replacement, repair, or to address leaks and corrosion.
The process involves disconnecting water supply lines, the mounting hardware, and any spray hose or escutcheon pieces before lifting the fixture out.
A basic tools-and-materials checklist — including an adjustable wrench, basin wrench, plumber’s tape, bucket, and replacement parts — prepares one for the task.
Why and when you should remove a kitchen sink faucet
Replacing a worn, leaking, or malfunctioning faucet restores water control, prevents damage from persistent drips, and improves kitchen hygiene and appearance.
Homeowners decide to remove a faucet when leaks recur, corrosion reduces function, upgrades are desired, or prior repairs fail.
Learning how to remove a kitchen sink faucet prepares users for safe replacement, warranty work, or resale improvements while avoiding water damage and inefficient operation.
Typical parts you’ll be disconnecting and removing
Start by identifying the faucet assembly and its connected components beneath and above the sink: the spout and handles (or single-handle cartridge), mounting hardware (nuts and brackets), supply lines, shutoff valves, and any spray hose or pull-down weight.
Typical removals include disconnecting supply lines at shutoffs, unthreading mounting nuts, detaching spray hoses and weights, and lifting the spout and valve body clear of the sink.
Tools and materials checklist
A concise checklist of tools and materials helps guarantee the faucet removal proceeds efficiently and without surprises.
Essential items reduce delays and prevent damage.
Recommended checklist:
- Basin wrench, adjustable wrench, pliers, screwdriver set, flashlight.
- Bucket, towels, plumber’s putty or silicone, replacement gaskets, cleaning brush.
- Penetrating oil, tape measure, safety glasses, gloves, supply stop caps.
Safety Precautions Before You Start
Before beginning, the water supply should be shut off and lines checked to confirm no flow remains.
Attention should be paid to nearby electrical outlets and appliances to prevent shocks or water damage.
The person removing the faucet should wear eye protection and gloves and clear the work area for safe access.
Shutting off water supply and verifying no flow
Locate and shut off the water supply to the sink—either the individual shutoff valves under the sink or the home’s main valve—then relieve pressure by opening the faucet and checking both hot and cold to confirm no flow.
Inspect supply lines and shutoff handles for leaks, tighten or replace faulty valves as needed, and place a towel or bucket to catch residual water before disassembly.
Electricity and nearby appliances what to watch for
While working on a sink faucet, attention must be paid to electrical sources and nearby appliances to prevent shocks, short circuits, and equipment damage.
Make certain cords and outlets near the sink stay dry, disconnect or move small appliances, and avoid draping wet rags over electrical items.
Identify and avoid under-sink disposal or heater wiring; if uncertain, consult a qualified electrician before proceeding.
Personal protective equipment and workspace preparation
Gather appropriate personal protective equipment and arrange the workspace to minimize hazards: wear safety glasses to protect against debris, gloves to prevent cuts and chemical exposure, and closed-toe shoes to guard feet.
Place a bucket and towels beneath the sink to catch water, clear the area of clutter and tripping hazards, and guarantee adequate lighting and ventilation for the task.
Use knee pads, keep tools organized, and disconnect power sources.
Preparing the Sink Area
The workspace beneath the sink should be cleared of stored items to provide room for tools and parts.
Protective coverings and a bucket or towels are placed to catch residual water and shield surfaces from scratches.
Hoses and fittings are labeled and reference photos taken so reassembly is straightforward.
Clearing under-sink cabinet space
Clear out all items from the cabinet beneath the sink to create an unobstructed work area and prevent damage to stored belongings.
Remove loose goods, cleaning supplies, and trash; set aside chemicals safely.
Empty drawers or trays and relocate hoses or appliance plugs temporarily.
Wipe the cabinet floor, note obstructions like water filters or garbage disposals, and guarantee clear access to shutoff valves and plumbing connections.
Protecting surfaces and catching water
A towel or shallow pan should be placed beneath the faucet and drain to catch residual water and protect the cabinet floor from drips and stains.
Additional absorbent cloths or rags can line the cabinet base.
Cardboard or thin plywood protects finishes from tools.
Small buckets or trays collect loosened debris and parts.
Work slowly to minimize splashes and promptly wring or empty containers.
Labeling hoses, parts, and taking reference photos
After securing towels and pans beneath the sink, the installer should document the existing setup with several clear photos—wide shots of the underside and close-ups of hose connections, mounting hardware, and any shutoff valves. Label hoses and parts with tape and markers, note orientation, and store photos with labels for reassembly.
| Photo | Label | Note |
|---|---|---|
| Wide underside | A | Orientation |
| Hot hose | B | Valve side |
| Cold hose | C | Length |
| Mounting nut | D | Size |
Step-by-Step Faucet Removal Process
The step-by-step faucet removal process begins by turning off the supply valves and relieving any remaining pressure.
Next, the water supply lines are disconnected and mounting nuts or retaining hardware are removed to free the faucet.
Finally, the faucet body is detached, followed by removal of the escutcheon plate, gaskets, and old sealant.
Step 1 Turn off supply valves and relieve pressure
Begin by locating and turning the hot and cold shutoff valves under the sink clockwise until fully closed.
Then open the faucet to relieve remaining water pressure and drain residual water from the lines.
Verify flow has stopped, then close the faucet.
Place a towel and a small bucket beneath the connections to catch any drips.
Wear gloves and safety glasses for protection.
Step 2 Disconnect water supply lines
Loosen the supply-line nuts beneath the faucet using an adjustable wrench or basin wrench, turning counterclockwise until the lines separate from the faucet tailpieces; hold the valve or use a second wrench to prevent twisting the shutoff.
Drain remaining water into a bucket and blot fittings with a rag.
Disconnect hot and cold lines, inspect for corrosion or damage, and cap or plug open tails to prevent drips.
Step 3 Remove mounting nuts or retaining hardware
With the supply lines removed and open tails capped, attention turns to the mounting nuts or retaining hardware that secure the faucet to the sink or countertop.
Using an adjustable wrench, basin wrench, or socket, loosen each fastener counterclockwise. Hold the faucet steady from above to prevent twisting.
Remove nuts, clips, or brackets, and set hardware aside for inspection or reuse.
Clean the mounting area.
Step 4 Detach faucet body from sink or countertop
Lowering the faucet body away from the sink or countertop requires steady, even pressure to free it from any remaining sealant or alignment pins. Once loosened, lift straight up to avoid bending lines; an assistant can catch the base. Inspect mounting holes for debris and note any damaged components for replacement.
| Item | Action |
|---|---|
| Sealant | Peel/scrape |
| Alignment | Straight lift |
| Lines | Secure |
| Holes | Inspect |
| Hardware | Set aside |
Step 5 Remove escutcheon plate, gaskets, and old sealant
Begin by removing the escutcheon plate, gaskets, and old sealant to expose the sink surface and mounting area for cleaning and inspection.
Use a putty knife or flat tool to pry up the plate gently, peel away gasket material, and scrape sealant residue.
Collect debris, inspect the exposed flange and holes for damage, and set all removed parts aside for disposal or reuse.
Step 6 Clean sink surface and uninstall remaining components
Clear the area around the sink and prepare to clean the exposed surface before removing any remaining components.
A nonabrasive cleaner and soft cloth remove residual sealant, grime, and mineral deposits.
Inspect mounting holes and fittings for damage.
Detach leftover clips, supply lines, and mounting hardware.
Collect small parts, label them if needed, and dry the area thoroughly to prevent corrosion and mold.
Dealing with Common Variations and Complications
Different faucet styles and installation types require distinct removal steps, from single-hole, center-set, and widespread configurations to undermount versus deck-mounted sinks.
Extra attention is needed for pull-down and pull-out sprayer assemblies, which often have quick-connect fittings or retaining clips beneath the spout.
Stuck or corroded mounting nuts may demand penetrating oil, heat, or specialized tools to free them safely.
Single-hole vs. center-set vs. widespread faucets
When tackling faucet removal, understanding whether a fixture is single-hole, center-set, or widespread determines the tools, mounting hardware, and sequence of disassembly required.
Each configuration presents distinct access challenges and potential complications, such as limited under-sink space with single-hole units, misaligned holes in center-set installs, or multiple supply lines and deck spacing issues with widespread faucets.
Identification guides fastener types, gasket removal, and required sealant cleanup.
Pull-down and pull-out sprayer assemblies
Inspect pull-down and pull-out sprayer assemblies for hose length, weight, and swivel connections before disassembly, since these features and their variations determine the removal sequence and common trouble spots. Note hose clips, spray head detents, and counterweights; disconnect fasteners, then test retraction.
| Component | Common Issue | Fix step |
|---|---|---|
| Hose | Kinks | Free and straighten |
| Weight | Misplaced | Reposition on hose |
| Swivel | Leaks | Tighten or replace |
| Spray head | Clogs | Clean or replace |
Undermount and deck-mounted installation differences
Recognize that undermount and deck-mounted faucets require distinct access points, support methods, and sealing techniques:
Undermount units often access from below the sink, necessitating roof cutout clearance, backer support, and underside sealant.
Deck-mounted faucets mount through countertop holes with visible escutcheons and require deck-level sealing and shims.
Different mounting hardware, tool reach, and gasket placement affect removal approach and precautionary measures.
Removing corroded or stuck mounting nuts
Start by acknowledging that corroded or seized mounting nuts are among the most common obstacles during faucet removal and require patience, the right tools, and corrosion-breaking techniques.
Apply penetrating oil, allow dwell time, then use a basin wrench or adjustable crowfoot for leverage.
Tap gently with a hammer to shock rust. If stubborn, heat the nut briefly or cut it off; replace hardware after removal.
Troubleshooting During Removal
If water continues to flow after shutoff, the first step is to isolate supply lines and relieve remaining pressure before proceeding.
Stripped nuts and rounded fasteners require extraction tools or alternative grips to avoid damage while loosening.
Stubborn mineral buildup and adhesive residues are addressed with appropriate descalers, penetrating oil, and gentle mechanical scraping.
What to do if water continues to flow
When water continues to flow during faucet removal, shut off the house’s main water supply and open nearby faucets to relieve pressure and drain remaining water from the lines.
If flow persists, check the shutoff valve for damage or partial closure; tighten or replace it.
Use a bucket and towels to catch residual water, inspect supply lines for leaks, and call a plumber if unable to stop flow.
Handling stripped nuts and rounded fasteners
Encountering stripped nuts or rounded fasteners during faucet removal requires steady hands and the right tools: gripping options like locking pliers, bolt extractors, or a rotary tool with a cutting wheel can provide purchase, while penetrating oil and gentle tapping may loosen corrosion before further force is applied.
Apply steady, controlled torque; protect surrounding finishes with tape; if extraction fails, drill and use an appropriate extractor, then replace damaged hardware.
Removing mineral buildup and adhesive residues
Loosen stubborn mineral deposits and adhesive residue with targeted cleaners and mechanical agitation to expose fasteners and guarantee a clean mounting surface.
Apply vinegar, CLR, or commercial descaler; allow dwell time per instructions.
Use nylon brush, plastic scraper, or brass brush to avoid scratching finishes.
For persistent adhesive, apply adhesive remover or heat, then clean with mild detergent and rinse thoroughly before reassembly.
After Removal: Inspecting and Preparing for Replacement
With the old faucet removed, the sink deck, mounting holes, and remaining seals should be inspected for corrosion, cracks, and residual sealant.
Measurements of hole spacing, deck thickness, and supply line locations are needed to confirm compatibility with replacement faucets.
If damage or complex plumbing conditions are found, professional repair or consultation is recommended before installing a new fixture.
Inspecting sink deck, mounting holes, and seals
A careful inspection of the sink deck, mounting holes, and seals reveals any damage, mineral buildup, or deterioration that could affect a new faucet’s fit and performance.
Document chips, cracks, corrosion around holes, and warped or compressed gaskets.
Scrape mineral deposits, clean surfaces, and verify hole edges are smooth.
Replace torn seals and apply plumber’s putty or new gaskets as needed.
Measuring for a new faucet and compatibility checks
Before purchasing a replacement, measure the sink configuration and note critical dimensions—number of mounting holes, center-to-center spacing, deck thickness, spout reach, and clearance to backsplash or cabinets—to verify the new faucet will fit and operate without interference.
Verify valve and supply line connections match fittings, confirm deck or countertop mounting style, and ascertain accessory compatibility (sprayer, soap dispenser) and clearance for handle motion.
When to repair sink or call a professional
Having confirmed measurements and compatibility, the removed faucet and exposed sink area should be inspected to decide whether a repair will suffice or a professional is needed. Minor leaks, worn seals, or simple valve replacements can be DIY. Corroded mounts, cracked sink material, or complex plumbing issues warrant a licensed plumber.
| Issue | DIY? | Professional? |
|---|---|---|
| Minor leak | Yes | No |
| Corrosion | No | Yes |
| Structural crack | No | Yes |
Tips to Make Removal Easier and Faster
Practical tips can speed faucet removal in tight spaces by recommending low-profile wrenches, swivel sockets, and simple access aids.
Suggested lubricants and penetrating oils, plus the right pliers and extensions, reduce seized fasteners and prevent damage.
Clear labeling and fastener organization during disassembly help avoid leaks and simplify reassembly.
Useful tricks for tight spaces and limited access
Work methodically when space is tight: organize tools within easy reach, clear the cabinet floor, and use targeted lighting to reduce fumbling and save time.
Use compact, angled tools and short extensions to reach fasteners. Support components with a small padded tray to avoid drops.
Label disconnected lines, photograph connections before removal, and work slowly to prevent cross-threading or accidental damage.
Recommended lubricants, penetrating oils, and tools
Gather essential lubricants and penetrating oils before starting removal to cut time and minimize damage: a silicone-based faucet grease for O-rings and seals, a light machine oil (like 3-in-1) for moving parts, and a penetrating oil (such as PB Blaster or Liquid Wrench) for seized nuts and corrosion.
Also have adjustable and basin wrenches, metric and standard sockets, a short extension, nylon pry tools, rags, and safety glasses.
Organizing small parts and preventing leaks later
After lubricants and wrenches are staged, attention turns to managing the many small parts that come off a faucet and keeping the system leak-free when reassembled. Parts should be labeled, bagged, and staged in order; O-rings and cartridges need inspection and replacement. Tighten with proper torque and test for drips.
| Part | Bagged? | Notes |
|---|---|---|
| O-ring | Yes | Inspect |
| Nut | Yes | Mark |
| Cartridge | Yes | Replace if worn |
| Screw | Yes | Keep organized |
Common Mistakes to Avoid
Common mistakes can turn a straightforward faucet removal into a longer, messier job. Avoid these pitfalls:
- Skipping the water shutoff or failing to test for leaks afterward.
- Forcing parts instead of using the correct tools.
- Tossing parts that could be needed for replacement or as reference.
Being mindful of these stops prevents damage and saves time.
Skipping water shutoff or testing afterwards
If the water supply is not shut off before removing or installing a faucet, sinks can flood, fittings can eject under pressure, and small leaks can become costly damage.
Neglecting post-installation testing leaves hidden drips and loose connections undetected.
Professionals recommend closing shutoffs, relieving line pressure, and performing a full function and leak check before finishing to prevent water damage and callbacks.
Forcing parts instead of using proper tools
Using brute force on stuck fittings or tight connections often damages valves, threads, and mounting hardware that are easily preserved with the right tools.
Applying excessive torque or hammering risks stripping threads, cracking seals, and warping components. Proper wrenches, lubricants, and penetrating spray prevent damage and speed removal.
If parts resist, pause, reassess, and use appropriate tools rather than forcing them.
Discarding parts you might need for replacement or reference
Discarding small parts during faucet removal can create needless delays and complicate repairs later. Salvaging nuts, washers, O-rings, and mounting hardware preserves reference for replacements and avoids mismatches.
Store components in labeled bags or trays, photograph assemblies, and note orientations. Losing parts can force unnecessary trips to hardware stores or cause improper reassembly; careful organization saves time and guarantees correct restoration.
Cost, Time Estimate, and When to Hire a Pro
Removal typically takes 30 minutes to two hours for a DIYer, depending on access and complications.
Budget should include replacement parts, new seals, possible supply line swaps, and an allowance for unexpected items or corrosion-related repairs.
If plumbing is corroded, connections leak after removal, or work requires cutting pipes or reconfiguring water lines, a licensed plumber should be called.
Typical time range for DIY removal
A straightforward single-handle faucet can typically be disconnected and lifted out in 30–60 minutes by a homeowner with basic tools.
More complex setups—such as wall-mounted units, faucets with integrated soap dispensers, or those corroded by mineral buildup—can take 1.5–3 hours or longer.
Time varies with access, corrosion, fittings, and need to trim supply lines; allow extra for careful cleanup and inspection.
Potential hidden costs and parts to budget for
After estimating time for a DIY faucet pull, homeowners should also factor in likely hidden costs and replacement parts that can extend both budget and schedule.
Common extras include supply lines, mounting hardware, gaskets, cartridge or valve assemblies, sealant, and small tools.
Anticipate $30–$150 in parts and one to three additional hours for troubleshooting; consider hiring a pro for complex corroded fittings.
Signs it’s better to call a plumber
Recognize when a DIY faucet pull becomes a poor choice: persistent leaks after tightening, stripped or seized mounting nuts, cracked sink or countertop, visible corrosion on supply lines, or evidence of water damage under the cabinet all indicate professional intervention.
A plumber should be hired when repair complexity, potential for hidden damage, or limited time justify labor costs—typically $150–$400 and one to three hours, depending on scope.
Quick Reference Checklist for Faucet Removal
Several clear steps secure a safe, efficient faucet removal: shut off the water supply, relieve pressure by opening the faucet, disconnect supply lines, remove mounting hardware, and lift the faucet free.
A compact checklist guarantees readiness and minimizes surprises.
- Gather tools: wrench, basin light, bucket.
- Verify valves off and lines drained.
- Protect sink and workspace; inspect seals and parts.
Conclusion
Removing a kitchen sink faucet is described as a manageable task when approached methodically, with safety and preparation as the north star guiding each step. The process—loosening supply lines, unfastening mounting nuts, and clearing debris—unfolds like a simple dance when anticipated. Expect variations and occasional stubborn fittings, but with proper tools and patience the job rarely derails. If time, tools, or confidence are lacking, calling a pro prevents costly mistakes.