How to Open a Plastic Drain Valve on a Water Heater Safely and Easily
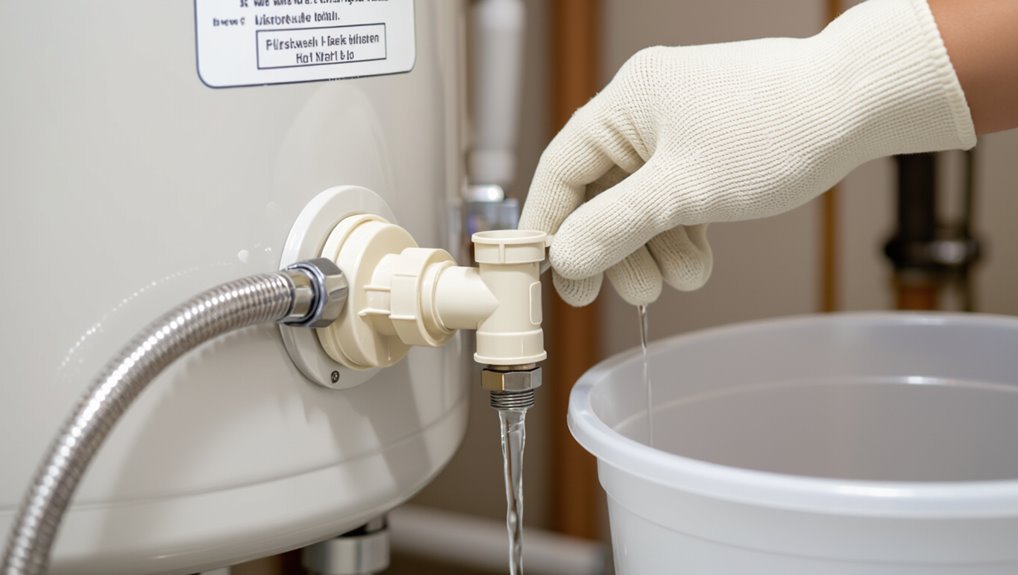
To safely and easily open a plastic drain valve on a water heater, first turn off the power or gas and the cold-water supply. Allow the tank to cool, then open a hot faucet to relieve pressure. Attach a hot-water-rated hose to the plastic drain spigot, directing it to a safe drain. Wear gloves and goggles for protection. Slowly turn the valve a quarter turn while steadying the valve body to manage the flow and check for leaks or debris. Afterward, follow the necessary steps for flushing, repairs, or replacement options.
How to Open a Plastic Drain Valve on a Water Heater Safely and Easily
A brief safety checklist precedes the step‑by‑step method: shut off power or gas, let the water cool, and wear protective gloves and eye protection.
Homeowners comfortable with basic plumbing can open a plastic drain valve for routine flushing or minor maintenance.
If the valve is brittle, leaking, stuck, or the tank shows corrosion, a licensed plumber should be called.
Quick safety summary and direct answer
Several simple precautions make opening a plastic drain valve on a water heater safe and straightforward.
Wear gloves and eye protection, shut off power and water supply, relieve pressure by opening a hot faucet, attach a hose to the valve, and open slowly to control flow and temperature.
If resistance, leaks, or damage occur, stop and seek professional help rather than forcing the valve.
Who should attempt this and when to call a professional
Who should open a plastic drain valve depends on skill level, comfort with basic plumbing, and the valve’s condition.
Homeowners comfortable with shutoffs, hoses, and basic tools can attempt routine draining.
Call a professional if the valve is brittle, leaking, stuck, or if corrosion, high pressure, unusual noises, or uncertainty about gas or electric systems exist.
Safety outweighs DIY.
Basic parts and function of a water heater drain valve
Water heaters use several drain valve designs—common examples are plastic spigots, brass threaded valves, and more durable ball-type valves—each with different durability and flow characteristics.
A plastic drain valve typically operates as a simple threaded or compression spigot that opens to let tank water exit and closes by reseating a rubber washer or cone.
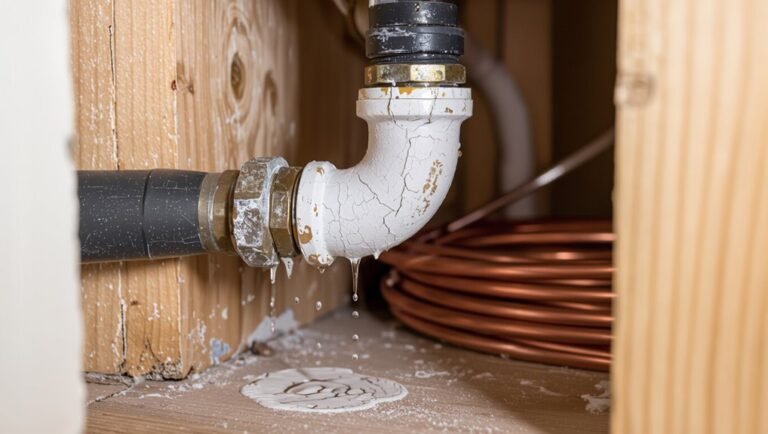
Plastic valves commonly fail by cracking, stripping threads, or developing leaks as the internal seal wears or the plastic becomes brittle.
Types of drain valves (plastic spigot, brass, ball-type)
A drain valve allows controlled release of a water heater’s contents and typically comes in three common types: plastic spigot, brass threaded, and ball-type.
The plastic spigot is inexpensive and simple but less durable.
Brass threaded valves offer corrosion resistance and reliable seals.
Ball-type valves provide robust, quarter-turn operation for higher flow and longevity, often favored for frequent draining.
How a plastic drain valve works
After identifying the common valve types, attention turns to how the plastic spigot operates.
The valve comprises a threaded body, inlet stem, rubber or silicone washer, and external lever or knurled cap.
Turning the control withdraws the washer from the seat, allowing tank water to flow into the spout.
Reversing motion reseats the washer, stopping flow and sealing the tank.
Common failure modes for plastic valves
Inspecting common failure modes for plastic drain valves reveals several predictable issues tied to materials and use.
Cracking from thermal cycling, brittle failure due to UV or age, and thread stripping from overtightening are common.
Internal seals can harden or deform, causing leaks.
Debris and sediment clogging impede flow; improper installation promotes stress fractures and premature malfunction.
Tools and materials you need
The section lists the essential tools needed to open a plastic drain valve, such as a hose, adjustable wrench, and bucket.
It also mentions optional items that can simplify the task, like a garden hose adapter, wet/dry vacuum, or penetrating lubricant.
Finally, it outlines required personal protective equipment and basic precautions to reduce risk while working on the heater.
Essential tools for opening a plastic drain valve
Gathering the right tools guarantees the plastic drain valve can be opened quickly and without damage.
Essential items include adjustable pliers or a slip-joint wrench sized for the valve, a flat screwdriver for lever-style caps, a hose rated for hot water with clamp, a bucket, and work gloves.
A flashlight and safety glasses improve visibility and protection during operation.
Optional items to make the job easier
After listing the basic tools, consider a few optional items that can speed the job and reduce risk.
These extras improve access, cleanup, and control when draining a water heater without repeating basics.
- Flexible drain hose for easier routing to a floor drain
- Small wet/dry vacuum to remove residual water
- Bucket with lid for sediment disposal
- Funnel with strainer to catch debris
Personal protective equipment and precautions
Proper personal protective equipment and basic precautions reduce the risk of scalding, chemical exposure, and slips while opening a plastic drain valve on a water heater.
Safety goggles, heat-resistant gloves, closed-toe shoes, and long sleeves protect skin and eyes.
Use a sturdy bucket and nonslip mat.
Guarantee area ventilation, confirm power/gas is off if required, and keep children/pets away.
Preparatory steps before opening the valve
Before opening the drain valve, the technician turns off the water heater’s power or gas and shuts the cold-water supply.
After allowing the tank to cool and confirming the water temperature is safe, they position a hose, drain pan, and an appropriate discharge point.
These preparatory steps reduce risk of scalding and water damage.
Turn off power or gas supply
Shut off the water heater’s energy supply to eliminate the risk of electric shock or gas ignition while working on the drain valve.
For electric units, switch the breaker at the panel and verify power is off with a noncontact tester.
For gas units, turn the gas control valve to “off” and allow pilot/flame systems to cool.
Confirm zero energy before proceeding.
Shut off the cold-water supply to the heater
Locate and close the cold-water shutoff valve feeding the heater to stop incoming water and prevent refilling while the drain valve is opened.
Confirm the valve is fully closed—turn clockwise for gate or ball valves—then open a nearby faucet to relieve line pressure.
Verify no new water enters the tank before proceeding to attach a hose and operate the drain valve.
Allow the water heater to cool and verify temperature
Let the tank cool for at least two hours after shutting off the cold-water supply so internal temperatures decline to a safe range; confirm the water temperature at the heater’s drain or a nearby hot tap with an infrared thermometer or carefully open a hot faucet and test with a thermometer, aiming for below 120°F (49°C) before attaching a hose or operating the drain valve.
Personnel should wear gloves and eye protection.
Position hoses, drain pans, and safe discharge points
Place a sturdy, heat-rated garden hose on the drain valve and run it to a safe discharge point, ensuring the hose end is secure and visible throughout the draining process.
Position a drain pan beneath the valve for spills. Route the hose downhill away from structures, landscaping, and electrical equipment.
Verify discharge complies with local codes and avoids flooding basements or contaminating water sources.
Step-by-step: How to open a plastic drain valve
The technician begins by securing a hose or bucket to the drain outlet and opening a nearby hot water faucet to relieve pressure.
With one hand steadying the valve body and the other turning the handle, the drain is opened slowly to control flow while directing discharge for flushing sediment.
Once clear, the valve is closed, the hose removed, and the tank refilled and checked for leaks.
Attach a garden hose or bucket securely
Before opening the valve, secure a garden hose or a suitable bucket to the drain outlet so water can be directed safely away from the heater and surrounding area.
Use a tight-fitting hose with a clamp or thread the bucket under the spout and brace it.
Confirm the hose runs downhill or to a floor drain.
Check connections for leaks before proceeding.
Open a hot water faucet to relieve pressure
Open a nearby hot water faucet to release pressure and prevent a sudden surge when the drain valve is turned.
The operator opens a sink or tub hot tap fully, then leaves it running. This equalizes tank pressure, allows air into the system, and promotes steady drainage.
Confirm steady flow before proceeding, watching for leaks or unusual noises.
Slowly open the drain valve technique and hand positions
Slowly rotate the plastic drain valve a quarter turn to start, using two hands for control—one on the valve body to steady the heater connection and the other on the valve handle to modulate movement.
Observe for small, steady flow; pause if resistance or spraying occurs.
Maintain a firm grip, adjust pressure with the handle, and keep body clear of splashes while monitoring fittings for leaks.
How to flush sediment safely through the valve
Once a steady, controlled flow is established from the quarter-turned valve, the operator can flush sediment by directing the outflow into a suitable drain or bucket and briefly increasing the opening to allow heavier particles to purge.
Monitor discharge for grit and discoloration, intermittently reducing flow to check valve stability.
Continue until water clears, maintaining safe distance and avoiding splashes onto skin or electrical components.
Closing the valve and refilling the tank properly
Begin by shutting the drain valve firmly to stop the flow, then close any opened hose and wipe the spigot dry to prevent drips.
Next, reopen the cold water supply slowly to refill the tank, checking for leaks at the valve and fittings.
Allow the heater to fill until water exits a nearby hot faucet, then restore power or gas and verify normal operation.
Troubleshooting common problems while opening the valve
When the plastic drain valve resists movement, leaks, breaks, or yields little or no flow, straightforward troubleshooting steps can identify and often resolve the issue.
Recommended topics include gentle methods to free a stuck valve, temporary measures for stem or seat leaks, actions to contain and respond if the valve breaks off, and diagnostics for clogged or slow drain lines.
The following guidance prioritizes safety and practical next steps for each scenario.
Valve won’t turn or is stuck safe loosening methods
If the plastic drain valve refuses to turn, a methodical, safety-first approach is required to avoid damage or injury.
Confirm power and water are off, relieve tank pressure, and wear gloves and eye protection.
Apply penetrating oil sparingly, wait, then attempt gentle back-and-forth motion with an adjustable wrench padded with cloth.
If still stuck, stop and consult a professional to prevent cracking the valve.
Leaking around the valve after closure temporary fixes
Inspect the valve for the source of the leak immediately after closure, since water or seepage around a plastic drain valve can indicate a loose connection, worn washer, or fracture.
Temporarily tighten the valve body or coupling gently, replace an accessible rubber washer, or apply plumber’s tape to threaded joints.
Use a drip pan and monitor for recurring leakage before scheduling proper repair or replacement.
Valve breaks off containment and next steps
After tightening or temporarily sealing a leaking plastic drain valve, attention must turn to the more serious failure mode where the valve body shears off at its mounting or the spout breaks away, leaving a gap that allows uncontrolled water flow.
The tank should be isolated, water supply shut, and power disabled.
Use a bucket, towel the area, and replace the valve or install a hose adapter and call a plumber if unsure.
No water flow or very slow flow diagnosing clogged lines
Begin troubleshooting by confirming shutdown procedures were followed: cold water supply to the heater is off, power or gas is disconnected, and pressure has been relieved.
Inspect the hose and valve for kinks, mineral buildup, or debris.
Try flushing from the inlet side, open a cold faucet to introduce flow, use a wire or small brush carefully, and consider replacing a clogged hose or valve if flow does not improve.
When to replace a plastic drain valve and replacement options
Signs such as persistent leaks, cracking, or a valve that no longer opens reliably indicate replacement is warranted.
The choice between a replacement plastic valve and a more durable brass or stainless steel valve depends on budget, longevity goals, and compatibility with the heater.
Basic replacement steps include shutting off power and water, draining the tank, removing the old valve, installing the new one with proper sealant, and calling a plumber if corrosion, tank damage, or uncertain connections are encountered.
Signs replacement is needed
Deterioration of a plastic drain valve becomes evident through specific, measurable problems that signal replacement rather than repair.
Persistent leaks despite tightened fittings, cracks or visible deformation, difficulty opening or closing, brittle or crumbling plastic at the stem, and corrosion where plastic meets metal indicate failure.
Replacements include OEM-style plastic assemblies or compatible brass/metal units; select one matching thread size and pressure rating.
Choosing between plastic and metal valves
Assess the situation by weighing durability, cost, and installation compatibility when deciding whether to replace a plastic drain valve with another plastic unit or upgrade to a metal one.
Consider age, leak history, water chemistry, and budget. Metal offers longevity; plastic may suit occasional use.
Choose compatible thread type and valve size; guarantee corrosion resistance for metal.
- Longevity
- Cost
- Compatibility
- Corrosion
Basic replacement steps for a water heater drain valve
After weighing durability, cost, compatibility, and corrosion concerns, the next practical move is determining when to replace a plastic drain valve and which replacement option to choose.
Replace when leaks, cracks, stiff operation, or persistent clogging occur.
Options include identical plastic replacements, brass or ball-style metal valves, or upgrade kits with hose adapters.
Follow drain, shutoff, depressurize, remove, install, test.
When to hire a plumber
Consider calling a licensed plumber when leaks persist despite tightening, visible cracks or brittle plastic appear, the valve resists normal operation, or recurring clogs and sediment impair drainage.
These signs indicate either imminent failure or underlying tank issues that exceed routine DIY repair. A professional evaluates corrosion, recommends replacing with brass or reinforced PVC valves, inspects the tank, and guarantees compliant installation and safe pressure testing.
Preventive maintenance to avoid valve problems
Preventive maintenance reduces the risk of a stuck or leaking plastic drain valve and preserves heater performance.
A regular flushing schedule, simple seasonal inspections for corrosion, and basic corrosion-prevention steps are recommended.
Long-term care—such as gently operating the valve during maintenance and replacing sacrificial anode rods as needed—helps extend valve life.
Regular flushing schedule and methods
A regular flushing schedule helps keep sediment from accumulating and prevents the drain valve from seizing.
Homeowners should flush the tank every six months in moderate-hard water areas and annually with soft water.
Partial flushes remove loose sediment; full drains clear heavier buildup.
Use cold water, open a hot faucet to vent, and close the valve slowly.
Record dates and observations for ongoing maintenance.
Seasonal checks and corrosion prevention
Seasonal checks focus on identifying early signs of corrosion, mineral buildup, and mechanical wear that can compromise the drain valve before it fails.
Technicians inspect connections, test operation, clear visible deposits, and check for leaks. Small corrosion spots receive prompt cleaning and protective coatings.
Documenting findings and scheduling minor repairs prevents sudden failures and maintains reliable drain function through changing temperatures.
Long-term care tips to extend valve life
Extend the service life of a plastic drain valve by adopting a consistent maintenance routine that addresses wear, mineral buildup, and environmental factors.
Regular inspection, gentle operation, and timely replacement prevent failures. Flush sediment periodically and protect the valve from UV and freezing.
Lubricate moving parts with manufacturer-approved products and document maintenance dates to track condition and anticipate replacement.
- Inspect quarterly
- Flush annually
- Protect seasonally
- Lubricate/recode
Safety hazards and how to avoid them
The section outlines key safety hazards associated with opening a plastic drain valve and practical steps to prevent them.
It covers scalding risks and how to manage hot water exposure, procedures for safely isolating electrical or gas supplies before draining, and proper disposal or neutralization of wastewater to protect the environment.
Readers are advised to follow clear, specific precautions to minimize injury, fire, and contamination.
Scalding and hot water burns mitigation steps
Reduce the risk of scalding by treating every drain operation as exposure to potentially lethal temperatures and taking steps to control hot water flow and protect skin.
Wear heat-resistant gloves and long sleeves, open the valve slowly to regulate flow, keep face and limbs clear of discharge, use a hose to direct hot water away, and verify water temperature with a thermometer before handling or disposing.
Electrical and gas safety while draining
Before draining, confirm that all electrical and gas systems connected to the water heater are safely isolated to prevent shocks, sparks, or combustion.
Lock out and tag electrical breakers, shut off gas supply and verify with a gas detector or soap solution.
Ventilation should be guaranteed, pilot lights relit only after checks, and only qualified personnel handle electrical or gas tasks.
Environmental and water disposal considerations
When draining a water heater, consideration must be given to where the discharged water will go and what contaminants it may carry. Sediments, rust, and chemical residues can harm landscaping, storm drains, septic systems, and municipal treatment plants.
The operator should divert discharge to sanitary sewers or safe containment, avoid storm drains, neutralize harmful additives if required, and follow local disposal regulations to prevent contamination and fines.
Quick reference checklist before, during, and after draining
One concise checklist helps confirm safety and efficiency across three phases: pre-drain preparation (shutoff, cool-down, and hose attachment), actions during draining (pressure relief, monitor flow, and avoid backflow), and post-drain steps (close valve, purge remaining water, and inspect for leaks).
| Phase | Key Item | Status |
|---|---|---|
| Pre-drain | Power/gas off | ✓ |
| During | Flow steady | ✓ |
| Post | Leak check | ✓ |
Conclusion
Like a gardener easing open a stubborn hose spigot after winter, the homeowner approached the plastic drain valve with patience and care. One study notes plastic valves fail more often after five years, a reminder that gentle handling and timely replacement matter. By following safety steps—shutting power, cooling water, using proper tools—the valve yields without drama. Routine maintenance keeps the system flowing, turning a risky chore into a predictable, manageable task.