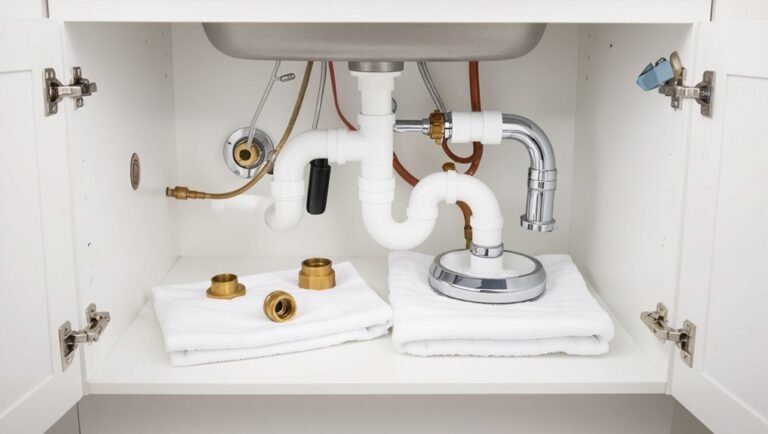
How to Increase Temperature on Water Heater: Safe Steps to Boost Hot Water Fast
To safely increase the temperature on your water heater, start by identifying the type of unit you have (gas, electric, or tankless) and turn off the power source. Adjust the thermostat in small increments (5–10°F), check the outlet temperature, and ensure all panels and insulation are securely restored. If necessary, install anti-scald or mixing valves, and follow manufacturer guidelines to relight pilots or set digital controls. Monitor for any leaks, sediment buildup, or burner issues, and adhere to local codes for safety. Follow the step-by-step procedures for adjustments and troubleshooting to ensure a safe and effective increase in hot water temperature.
How to Quickly and Safely Raise Your Water Heater Temperature
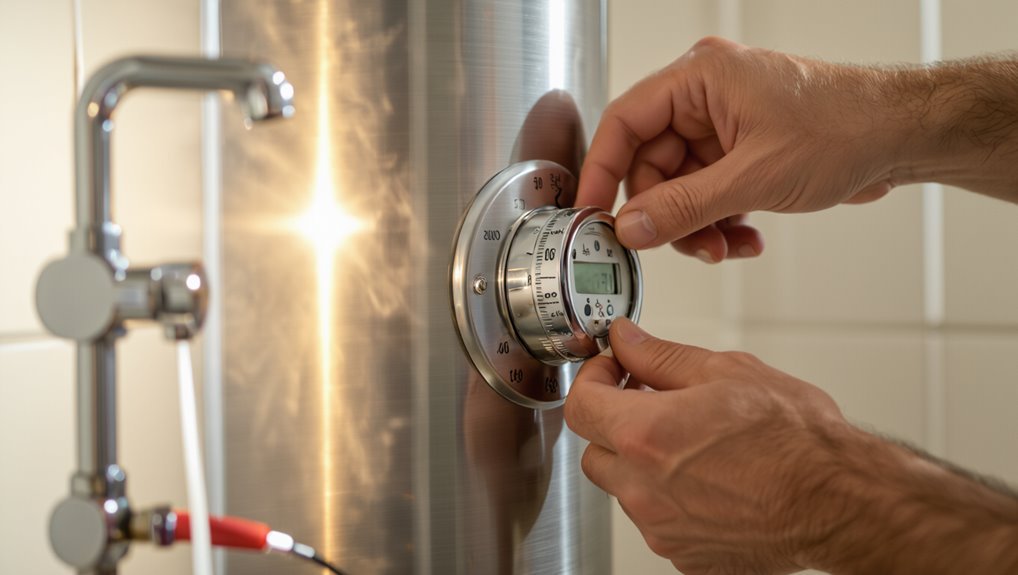
The author recommends setting household water heaters to about 120°F to balance comfort and scald risk.
It is noted that higher settings may be justified for specific needs with added precautions.
Quick, safe adjustments include turning power or gas off before changing the thermostat and testing mixed water temperatures at fixtures.
If controls are inaccessible, settings fail to respond, or there are signs of leak or corrosion, a licensed plumber or technician should be called.
Recommended target temperature and safety considerations
Set the water heater to a safe, effective temperature—typically 120°F (49°C)—to balance scald prevention, bacterial control, and energy efficiency.
When exploring how to increase temperature on water heater, recommend modest adjustments (5–10°F), test mixed-water outlets, and label settings.
Include anti-scald devices, check thermostatic mixing valves, and warn caregivers about risks; document changes for future reference.
When to call a professional plumber or technician
After modest thermostat adjustments and testing mixed-water outlets as recommended, recognizing when to seek professional help prevents damage and safety risks.
A plumber or technician should be called if:
- temperature remains inconsistent
- pressure relief valve leaks
- strange noises
- pilot light or ignition failures
- suspected sediment buildup
- gas smells
- electrical faults
- when local codes require licensed work
Prompt professional diagnosis avoids hazards and costly repairs.
Identify Your Water Heater Type
First, determine whether the unit is a gas or electric tank model by checking for a gas line, burner access panel, or electrical junctions.
Next, note if the system is tankless—smaller wall-mounted units with digital controls—or a hybrid heat pump model with larger cabinets and distinct temperature control interfaces.
Identifying these features clarifies which temperature adjustment steps and safety precautions apply.
Gas tank water heaters: key features to check
A gas tank water heater combines a storage cylinder with a burner and venting system, so identifying one requires checking several specific features:
Look for a gas supply line and shutoff valve, a combustion chamber access panel, a flue or vent pipe exiting the top, a pilot light or electronic ignition, and labels indicating natural gas or propane.
Presence of a draft hood confirms gas operation.
Electric tank water heaters: key features to check
When determining whether a water heater is an electric tank model, inspect for electrical components rather than gas fittings: absence of a gas line and venting, presence of one or two access panels for thermostats and heating elements, and a conduit or junction box connected to the top or side of the tank.
Also note dual-element tanks, visible thermostat dials behind panels, and a lack of burner assembly.
Tankless (on-demand) water heaters: key differences for adjusting temperature
For homeowners who do not have an electric tank model, identifying a tankless (on-demand) water heater is the next step because its components and controls differ markedly:
Tankless units heat water on demand, using flow sensors, gas burners or electric heating elements, and digital control boards.
Temperature is usually adjusted via a digital interface or DIP switches; safety features and flow-rate limits constrain maximum setpoints.
Hybrid heat pump water heaters: temperature controls overview
Identify hybrid heat pump water heaters by their external control panels and the presence of an integrated compressor unit; these systems combine heat-pump technology with traditional electric resistance backup and typically offer a digital thermostat with mode selections (heat pump, hybrid/auto, or electric-only), temperature setpoint buttons, and sometimes a secondary dip or menu for vacation and lockout settings.
Controls allow mode switching, setpoint adjustment, and energy-saving schedules; consult manual for diagnostics.
Prepare Before Making Adjustments
Before adjusting the water heater, the reader should gather basic tools and appropriate protective gear such as gloves and eye protection.
They should also know how to safely shut off electrical power or the gas supply to the unit.
Finally, locating the thermostat or control panel and confirming its accessibility will guarantee adjustments can be made safely.
Tools and protective gear needed
Several essential tools and protective items are required to safely adjust a water heater’s temperature. A flathead and Phillips screwdriver, adjustable wrench, and socket set enable thermostat access and fastener work.
A non-contact thermometer verifies water temperature. Protective gear includes safety glasses, heat-resistant gloves, and closed-toe shoes.
A flashlight and dry cloths improve visibility and cleanliness during adjustments.
How to turn off power and gas safely
When preparing to adjust a water heater’s temperature, the technician must cut all energy sources to eliminate shock, scalding, and combustion risks:
Turn off electrical power at the breaker labeled water heater; verify absence of voltage with a tester.
For gas units, shut the gas supply valve and confirm pilot is extinguished.
Post warning signs and wait before proceeding.
Locating the thermostat or control panel
Locating the thermostat or control panel requires identifying the heater type and inspecting accessible areas.
Electric tanks often have a removable access panel near the middle or bottom; dual-element units have two thermostats.
Gas units use an external control knob near the burner compartment or a digital display on the jacket.
Note manufacturer labels, model numbers, and safety covers before attempting adjustments or calling a professional.
Step-by-Step: Increasing Temperature on a Tank Water Heater
The procedure describes how to raise setpoints on an electric water heater thermostat and on a gas water heater control dial.
It then covers verifying the resulting hot water temperature with a thermometer at the tap.
Finally, it outlines restart steps and brief safety checks to confirm the system is operating correctly.
Adjusting temperature on an electric water heater thermostat
Begin by shutting off power to the electric water heater at the circuit breaker to guarantee safety before any adjustment.
The thermostat access panel and insulation are removed, the thermostat dial is located, and the temperature is increased in small increments.
Restore insulation and power, then check water temperature after 30–60 minutes.
- access panels and insulation
- adjust dial incrementally
- verify temperature and restore power
Adjusting the temperature on a gas water heater control dial
After adjusting an electric thermostat, attention can shift to gas models, which use an external control dial near the burner access panel.
Turn the dial incrementally toward a higher setting, wait 30–60 minutes between adjustments, and note any error indicators.
If pilot or gas smells occur, stop and ventilate; contact a technician for inspection.
- increase slowly
- monitor for issues
- stop if gas odor detected
Verifying temperature with a thermometer at the tap
Check the outlet water temperature with a reliable thermometer to confirm the heater’s setting change produced the planned rise; hold the thermometer probe under the hot tap for at least 30–60 seconds, ensuring steady flow and avoiding mixing with cold.
Record the reading, compare it to the thermostat target, and repeat at other fixtures if distribution or mixing valves might alter perceived temperature.
Restart and safety checks after adjustment
With the outlet temperature verified at the tap, the tank heater can be restored to normal operation and inspected for safe function.
Restore power or gas, relight pilot if needed, and open valve fully.
Check for leaks, unusual noises, and proper burner/flame.
Confirm thermostat setting holds target temperature over one hour.
Document adjustments and advise periodic monitoring for safety.
Step-by-Step: Increasing Temperature on a Tankless Water Heater
The tankless unit’s digital control panel is used to raise the outlet setpoint, typically by pressing temperature up/down or entering a numeric value.
The manual and on-screen menus list common options and diagnostic codes that help identify issues when the unit will not reach the set temperature.
Users should also consider flow rate, since higher flow can reduce delivered temperature even when the setpoint is increased.
Using the digital control panel to raise setpoint
Begin by locating the tankless heater’s digital control panel, usually mounted on the unit or nearby. Then wake the display using the power or wake button so the current temperature setting is visible; this prepares the unit to accept input for raising the setpoint.
The operator then uses controls to increment safely:
- Press temperature up/down to change degrees.
- Confirm new setpoint with OK or Enter.
- Observe display and wait for system acknowledgement.
Common menu options and troubleshooting codes
Several menu options typically appear on tankless water heater control panels, offering temperature presets, system status, and diagnostic access. The user can select setpoint, view error logs, and run maintenance prompts. Troubleshooting codes indicate ignition, flow, sensor, or scale issues; consult manual for code meaning and corrective steps.
| Option | Example |
|---|---|
| Setpoint | 120°F |
| Error Code | E1 |
Flow rate considerations that affect delivered temperature
After reviewing control panel options and error codes, attention shifts to how water flow rate influences the temperature delivered at fixtures.
Higher flow demands more energy; if demand exceeds the unit’s capacity, output temperature drops.
Reducing concurrent draws, adjusting fixture flow restrictors, or selecting a lower flow setting on the heater improves delivered temperature.
Confirm manufacturer flow-rate specifications before changes.
Small, Safe Ways to Boost Hot Water Without Raising Thermostat
Practical, low-risk methods can increase usable hot water without changing the heater’s thermostat. Suggestions include insulating the tank and hot water pipes, reducing demand with low-flow fixtures, flushing the tank to clear sediment, and adding a mixing or tempering valve to allow a higher tank setting while preventing scalding.
Each option improves efficiency or safety and can be considered based on cost and home needs.
Insulating the hot water tank and pipes
Insulating a hot water tank and its supply pipes reduces standby heat loss and preserves more usable hot water without increasing the thermostat setting.
Proper insulation is simple, cost-effective, and safe when using rated blankets and pipe foam.
Steps include:
- Measure and apply a tank blanket rated for the heater model.
- Wrap exposed hot and cold pipes with closed-cell foam.
- Seal joints and valves to minimize gaps and heat escape.
Reducing hot water demand and changing fixtures (low-flow vs standard)
With tank and pipe insulation reducing standby losses, attention can shift to lowering the amount of hot water used so the existing supply goes farther.
Replacing showerheads and faucets with low-flow models cuts consumption without sacrificing performance.
Shorter showers, efficient dishwashers, and aerators reduce demand peaks, extending available hot water.
Prioritize fixture upgrades in high-use areas for immediate, low-cost impact.
Flushing the tank to remove sediment and improve heating efficiency
Flush the water heater tank periodically to remove mineral buildup that reduces heating efficiency and capacity.
Draining and flushing clears sediment from the bottom, restoring heat transfer and usable volume.
A homeowner can shut power/gas, attach a hose to the drain valve, and flush until clear; repeat annually or more in hard‑water areas.
Proper disposal and safety precautions prevent scalding and damage.
Installing a mixing valve or tempering valve for safer higher tank settings
Removing sediment can restore tank capacity, but homeowners seeking more usable hot water without raising the thermostat can add a mixing (tempering) valve to the system.
A tempering valve blends hot tank output with cold supply to deliver safe outlet temperatures, allowing higher storage setpoints while preventing scalding.
Professional installation guarantees correct sizing, compliance with codes, and proper maintenance for reliable, efficient operation.
Troubleshooting Why Hot Water Is Not Getting Hotter
When hot water fails to warm up adequately, common culprits include sediment buildup, a failed heating element, or pilot and gas valve problems.
Testing procedures differ by type: electric units require checks of elements and thermostats with a multimeter, while gas units need inspection of the pilot light and valve operation.
If diagnostics reveal major component failure or repeated issues, replacing the unit may be more cost-effective than further adjustments or repairs.
Common causes: sediment, heating element failure, pilot issues
Although a variety of issues can reduce water heater output, three of the most frequent culprits are sediment buildup, failed heating elements, and pilot light or ignition problems.
Sediment accumulates in tanks, insulating water from heat and reducing capacity.
Element failure stops electric heating zones.
Pilot or ignition faults prevent gas burners from firing.
Identifying these narrows repair options and restores performance.
How to test heating elements and thermostats on electric units
Begin by turning off power to the electric water heater at the breaker to guarantee safety.
Then access the upper and lower heating elements and their thermostats for inspection.
Use a multimeter to check element continuity and resistance; replace any open or out-of-spec elements.
Test thermostats by verifying voltage output and temperature settings; swap or replace faulty thermostats.
Reassemble panels and restore power, then confirm proper heating.
How to check pilot light and gas valve issues on gas units
Inspect the pilot light and gas valve assembly as the next critical step, since a weak or extinguished pilot or a malfunctioning gas control can prevent a gas water heater from reaching proper temperature.
Verify the pilot is steady blue; relight per manufacturer instructions if safe.
Check gas valve operation, listen for clicking, and confirm gas supply.
If unsure about gas components, contact a qualified technician.
When a repair or replacement is more cost-effective than adjustment
If pilot light and gas valve checks do not restore adequate heat, the owner must consider whether repairs or a full replacement will be more cost-effective than continued adjustments.
Evaluate unit age, frequency of failures, repair costs versus replacement price, energy efficiency, and warranty status.
Choose replacement for chronic issues, rising repair bills, or poor efficiency; opt for repair for isolated, inexpensive fixes.
Safety Risks and Legal Considerations
Adjusting a water heater’s thermostat carries safety and legal implications that should be considered before making changes.
Scald risk means many experts recommend limiting settings—often to 120°F—for homes with young children or elderly occupants.
Additionally, local building codes and manufacturer warranties may restrict allowable adjustments, and gas heaters require proper ventilation and CO monitoring to prevent carbon monoxide hazards.
Scald risk and recommended maximum settings for homes with children or elderly
Safety is paramount when increasing a water heater’s temperature because higher settings raise the risk of scald burns, particularly for young children, the elderly, and those with limited mobility or sensation.
Recommended maximum household settings are typically 120°F (49°C); 110°F may be safer for vulnerable occupants.
Installing thermostatic mixing valves or anti-scald devices at fixtures further reduces risk without compromising hot water availability.
Local code and warranty implications of adjusting temperature
After addressing domestic scald risks and protective measures, attention must turn to regulatory and warranty constraints that govern water heater temperature settings.
Local building codes and utility rules may mandate maximum temperatures or mixing valves; violating them can incur fines or inspection failures.
Manufacturer warranties often require adherence to specified settings and installation practices; unauthorized adjustments or tampering can void coverage and shift liability.
Carbon monoxide and ventilation concerns with gas heaters
Any modification to a gas-fired water heater’s operation that increases combustion demand can raise the risk of carbon monoxide (CO) production and exacerbate ventilation deficiencies.
Compliance with venting, flue integrity, and combustion-air requirements is essential. Installations should be inspected by qualified technicians, and CO detectors must be installed nearby.
Tampering, improper adjustments, or blocked vents can create lethal conditions and violate codes and warranties.
Maintenance Tips to Maintain Higher Effective Temperature
Routine maintenance is essential to sustain higher effective water heater temperatures, beginning with a regular flushing schedule and periodic anode rod inspections to prevent corrosion and sediment buildup.
Manufacturers typically recommend professional inspections at set intervals to verify thermostat accuracy, pressure relief valve function, and safe operation.
Operators should also adopt energy-saving practices—such as insulating the tank and lowering standby losses—to minimize costs while running the heater at elevated settings.
Regular flushing schedule and anode rod inspection
Establishing and following a regular flushing schedule, along with periodic inspection of the anode rod, prevents sediment buildup and corrosion that reduce a water heater’s effective temperature and efficiency.
Regular maintenance actions include:
- Flush tank annually to remove sediment and restore heat transfer.
- Inspect or replace anode rod every 1–3 years to prevent rust.
- Verify drain valve operation and clear blockages to guarantee complete flushing.
Recommended professional inspection intervals
Most homeowners should schedule a professional inspection of their water heater every 1–2 years to confirm components are functioning at peak performance and to catch issues that can lower effective temperature.
Technicians assess thermostats, valves, pressure relief, burners or heating elements, and insulation.
Timely diagnostics prevent heat loss, identify sediment-related efficiency drops, and verify safe operation, preserving consistent hot water delivery.
Energy-saving tips when running at higher temperatures
When a water heater is set to higher temperatures, homeowners can still curb energy waste by combining targeted maintenance with behavioral and equipment adjustments.
Regularly bleeding tanks to remove sediment, insulating pipes and the tank, lowering thermostat during vacations, installing low-flow fixtures, and scheduling annual inspections preserve efficiency.
These measures reduce standby loss and limit fuel or electricity use while maintaining desired hot water performance.
Cost and Energy Impact of Raising Water Heater Temperature
Raising the water heater thermostat increases energy consumption predictably, often by about 2–4% per degree Fahrenheit for electric units and roughly 1–3% per degree for gas units, depending on insulation and usage.
The article provides simple per-degree calculations using local energy rates and typical daily hot water use to estimate monthly cost changes.
Readers can apply these formulas to compare projected bill increases before adjusting the setpoint.
Estimated energy use increase per degree (electric vs gas)
Energy consumption for water heating increases predictably with thermostat settings: each degree Fahrenheit of temperature rise typically raises energy use by about 3–5% for electric water heaters and roughly 1–3% for gas units, reflecting differences in system efficiency and standby losses. Impact varies by insulation, usage, and age; incremental increases accumulate over time.
| Factor | Effect |
|---|---|
| Fuel type | Electric higher %/°F |
| Insulation | Reduces standby loss |
| Usage pattern | Alters relative impact |
| Age of unit | Efficiency decline |
| Thermostat setting | Direct proportional effect |
Simple calculations to estimate monthly cost changes
After outlining how each degree affects consumption for electric and gas heaters, the next step quantifies what those percentage changes mean on a monthly bill.
Calculate baseline monthly energy use, apply the percent increase per degree, then multiply by local unit price (kWh or therm).
Add fixed fees and taxes to get new bill.
Compare difference to assess cost impact quickly.
Quick Reference: Safe Temperature Settings and Actions
When adjusting a water heater, users should follow a few clear temperature benchmarks and immediate actions to balance safety and comfort. Recommended settings: 120°F for safety, 130°F for heavy use with caution, and 140°F only with mixing valves. Immediate actions: check thermostat, test outlet temperature, and label controls.
| Setting | Use case | Action |
|---|---|---|
| 120°F | General | Check |
| 130°F | High demand | Monitor |
| 140°F | Commercial | Valve |
Conclusion
The guide concludes that raising a water heater’s temperature can be done safely when the owner first identifies the unit type, prepares properly, and follows clear, stepwise adjustments. Attention to safety risks, local codes, and maintenance keeps problems at bay, while cost and efficiency trade-offs merit consideration. With sensible limits and routine checks, higher hot-water demand can be met without cutting corners; prudent users keep their cool and avoid tempting fate.