How to Clean Pool Hoses Quickly and Safely: Step-by-Step Guide
To clean pool hoses quickly and safely, follow these straightforward steps: First, disconnect the hoses and rinse them to check for clogs, cracks, or mold. Use a garden hose or pressure washer to backflush and dislodge any debris. For corrugated or vinyl interiors, scrub with a flexible or bottle brush, and use a plumbing snake for tough blockages. Disinfect the hoses with a diluted bleach solution (1:20) or vinegar, then rinse thoroughly and dry them in the shade before coiling. Always wear gloves and eye protection, and ensure good ventilation when using chemicals. For more detailed techniques, timings, and troubleshooting tips, continue reading.
How to Clean Pool Hoses Quickly and Safely
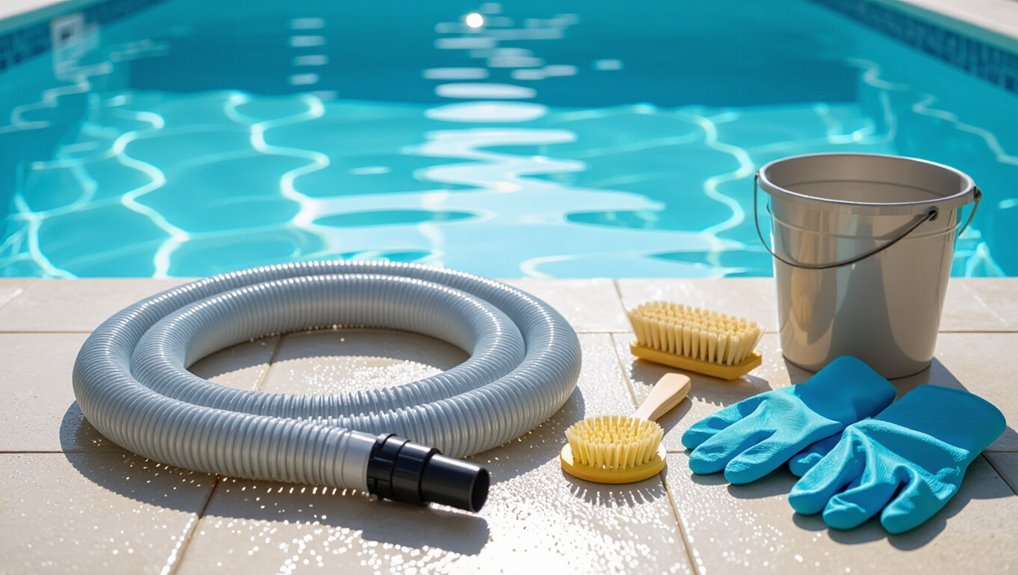
A concise procedure outlines rinsing, brushing, and disinfecting the hose with mild detergent or diluted bleach, followed by thorough rinsing and drying.
Routine cleaning every few weeks or after heavy use prevents clogs, algae buildup, and odors that reduce suction and water quality.
Maintaining a schedule preserves equipment life and guarantees safe, efficient pool operation.
Quick overview of the cleaning process
Begin by disconnecting the hose and rinsing it to remove loose debris.
Then inspect for clogs, cracks, or mold.
Next, flush with clean water, agitate with a brush or create a vinegar solution to disinfect, and use a plumbing snake for stubborn blockages.
Rinse thoroughly, dry completely, and store coiled in a shaded area.
This concise guide explains how to clean pool hoses.
When and why you should clean pool hoses regularly
Regular cleaning of pool hoses every few weeks during the swimming season prevents buildup of algae, mineral deposits, and bacteria that can restrict flow, damage equipment, and contaminate water.
Timely maintenance preserves pump efficiency, extends hose lifespan, reduces repair costs, and maintains sanitary water.
Inspect hoses after heavy use or storms, clean when visible residue appears, and perform deep cleaning monthly for peak performance.
What You’ll Need Before You Start
Before beginning, the article lists the essential tools and supplies needed to clean pool hoses, such as brushes, hose cleaners, and mild detergents.
It also outlines required safety equipment and precautions, including gloves, eye protection, and proper ventilation.
These preparations guarantee the job proceeds efficiently and with minimal risk.
Recommended tools and supplies
Gather a few basic tools and cleaning supplies to make the hose-clearing process efficient and safe: a garden hose or pressure washer for flushing, a soft-bristle brush or bottle brush to scrub interior corrugations, a mild detergent or specialty pool hose cleaner, rubber gloves, a bucket, and plumber’s tape or hose clamps to seal connections as needed.
- Garden hose or pressure washer
- Bottle brush
- Mild detergent or hose cleaner
- Plumber’s tape/clamps
- Bucket and towels
Safety equipment and precautions
With tools and cleaners assembled, attention turns to protective gear and safe work habits to prevent injury and equipment damage.
Protective items include chemical-resistant gloves, eye protection, and a dust mask for dry debris. Guarantee proper ventilation when using cleaners.
Inspect hoses for sharp edges before handling. Use non-slip footwear and keep a first-aid kit nearby.
Follow product labels and dispose of waste responsibly.
Preparing the Pool and Hoses for Cleaning
Before any cleaning begins, the pool’s circulation system is turned off and the hose is isolated to prevent water flow or pump damage.
Hoses are then detached carefully from the pump, skimmer, and return fittings using appropriate tools and following manufacturer guidance. Each hose is inspected for cracks, kinks, or worn collars, and problem areas are noted for repair or replacement.
Shutting off equipment and isolating the hose
Turn off the pool pump and any automatic cleaners, then close the necessary valves to isolate the hose from the system.
Confirm power is off at the breaker if needed.
Relieve pressure by opening a nearby manual release or bleed port.
Verify water flow has stopped and pressure gauges read zero.
Wear gloves and eye protection before proceeding to hose handling.
Detaching hoses safely from pump, skimmer, and return
Disconnect hoses from the pump, skimmer, and return by loosening clamps and carefully sliding fittings apart to prevent strain on connectors and seals.
Support hose weight to avoid yanking, use pliers or screwdriver as needed, and cap open ports to keep debris out.
Place detached hoses on a clean surface, coil loosely to prevent kinks, and note fittings for reassembly.
Inspecting hoses for damage and identifying problem areas
With hoses detached and laid out, the next step is a systematic inspection to locate wear, leaks, and weak fittings.
Each hose is examined along its length for cracks, soft spots, abrasions, bulges, and split seams.
Connections, clamps, and O-rings are checked for corrosion or deformation.
Marked defects are noted for repair or replacement before cleaning and reassembly.
Fast Cleaning Methods for Different Hose Types
A quick comparison of methods for different hose constructions helps identify the most efficient cleaning approach.
Flexible vinyl hoses respond well to gentle brushes and mild cleaners.
Corrugated suction hoses benefit from pressurized rinses and flexible cleaning snakes.
Rigid or semi-rigid hoses are best cleaned with long-handled brushes or run-through plumbing cleaners.
The following section outlines fast, practical steps for each type.
Cleaning flexible vinyl pool hoses
Begin by identifying the specific type of flexible vinyl hose—standard suction, return, or vacuum—since material thickness, fittings, and internal ribbing determine which fast-cleaning method is safe and effective.
Use a soft-bristled brush and mild detergent for external grime.
For internal cleaning, flush with pressurized garden hose water or a diluted vinegar solution.
Rinse thoroughly and air-dry before storage.
Cleaning corrugated suction hoses
Clean corrugated suction hoses by first identifying clogs lodged between the ribs.
Then use a combination of backflushing with a high-flow garden hose and a flexible bottle brush or dedicated hose snake to dislodge debris.
Rinse until water runs clear, inspect for damage, and soak briefly in diluted chlorine or mild detergent for biofilm.
Allow full drying before reassembly to prevent mold and odors.
Cleaning rigid or semi-rigid hoses
For rigid or semi-rigid pool hoses, quick methods focus on flushing and mechanical agitation that respect the hose’s stiffness and fittings.
Inspect connections, remove debris manually, then flush with garden hose or pressure washer on low setting.
Use a soft brush or telescoping pole with cloth to dislodge film.
Rinse thoroughly, check for cracks, dry and store flat to prevent kinks.
Deep-Clean Techniques for Stubborn Buildup
For persistent buildup, the guide recommends targeted deep-clean techniques that address algae, biofilm, internal debris, and mineral scale.
Algae and biofilm are treated with non-corrosive disinfectant solutions while a hose brush, plumbing snake, or water flosser can dislodge trapped debris.
Tough mineral scale and calcium deposits respond to measured soaking in appropriate descaling solutions.
Removing algae and biofilm with non-corrosive solutions
Tackle stubborn algae and slimy biofilm in pool hoses using gentle, non-corrosive agents that dissolve organic buildup without damaging rubber or plastic linings.
Apply diluted hydrogen peroxide or enzymatic cleaners per label, circulate briefly, then rinse thoroughly with clean water.
Repeat as needed, allowing drying between treatments.
Inspect for residue; if persistent, repeat treatment rather than escalating to harsh chemicals that risk material degradation.
Using a hose brush, snake, or flosser for internal debris
After reducing most organic residue with gentle treatments, a mechanical approach using a hose brush, snake, or flosser removes remaining debris clinging to internal surfaces.
The technician feeds an appropriately sized brush or flexible snake through the hose, rotating to dislodge trapped particles. A dental-style flosser clears narrow passages.
Rinse thoroughly, inspect with a light, and repeat until flow is unobstructed.
Soaking methods for mineral scale and calcium deposits
Soak heavily scaled hoses in a mild acidic solution to dissolve mineral deposits without damaging the material: a 1:10 dilution of muriatic acid or a 1:2 to 1:4 mix of white vinegar to water are common choices depending on hose compatibility.
Submerge hoses for 1–4 hours, agitating occasionally.
Rinse thoroughly with fresh water, neutralize acid residues, inspect for softened or weakened sections before reuse.
Safe Cleaning Solutions and Chemicals
The article outlines safe options for cleaning pool hoses, including gentle household cleaners and instructions for properly diluting bleach to sanitize without degrading hose material.
It also introduces commercial hose cleaners and enzyme treatments designed to break down organic buildup.
Finally, it warns against harsh solvents, abrasive tools, and concentrated acids or alkalis that can weaken or melt hose components.
Pool-safe household cleaners and diluted bleach instructions
Choose cleaners that are effective against grime yet formulated to avoid damaging hose materials and pool chemistry.
Use mild dish soap or a diluted household cleaner (follow label dilution).
For disinfection, prepare a bleach solution of 1 part 5–6% household bleach to 20 parts water, rinse thoroughly until no chlorine odor remains.
Test a small hose section first and wear gloves and eye protection.
Commercial hose cleaners and enzyme treatments
Beyond household options, commercial hose cleaners and enzyme treatments offer targeted formulas designed for pool plumbing materials and biofilm removal.
They provide concentrated detergents, biodegradable enzymes, and compatibility guidance to dissolve organic buildup without harsh abrasion.
- Designed for PVC, rubber, and flexible hoses
- Enzymes break down oils and biofilm
- Often biodegradable and pool-safe
- Follow manufacturer dilution instructions
- Rinse thoroughly after treatment
What not to use: chemicals and tools that can damage hoses
Avoid using harsh acids, undiluted bleach, citrus-based degreasers, abrasive brushes, or metal scrapers on pool hoses, as these can degrade PVC, rubber, and hose fittings, causing cracks, leaks, and premature failure.
Solvent-based cleaners, undiluted chlorine, petroleum solvents, and high-pressure washers should also be avoided.
Instead, use mild detergent, diluted disinfectant, soft cloths, or gentle brushes to preserve hose integrity.
Rinsing, Drying, and Reassembling
After cleaning, the hose should be thoroughly rinsed with clear water to remove any chemical or debris residue.
It should then be dried completely—ideally hung in a shaded, well-ventilated area—to prevent mold and mildew formation.
Finally, fittings are reattached securely and the system is pressurized briefly to check for leaks before returning the hose to regular use.
Proper rinsing technique to remove residue
Flush the hose thoroughly with clean water to dislodge lingering chemicals, debris, and biofilm that brushing alone may not remove.
Direct a steady stream through the entire length, rotating and compressing sections to flush trapped particles. Repeat until discharge runs clear.
Inspect ends and fittings, flushing adapters separately.
Use potable water and moderate pressure to avoid kinks or damage.
Best practices for drying and preventing mold
Let hoses be drained and aired promptly to halt moisture buildup that fosters mold: elevate one end and work along the length to expel standing water, then run a steady airflow through the interior and lay hoses straight in a shaded, well-ventilated area to finish drying.
Inspect interiors and fittings for residue or soft spots, sanitize with diluted bleach if needed, and store coiled loosely off the ground.
Reattaching hoses and testing for leaks
Reconnect hoses by aligning fittings carefully, seating clamps or threaded couplings fully, and hand-tightening before applying a quarter-turn with appropriate tools to avoid overtightening.
Inspect seals and replace worn O-rings.
Restore flow gradually, observing joints for drips.
Tighten marginal leaks incrementally and retest.
Run pump several minutes, monitor pressure and connections, then shut down and recheck for slow seepage before routine use.
Preventive Maintenance to Keep Hoses Clean Longer
A regular maintenance schedule with brief weekly rinses and occasional inspections helps prevent buildup and extend hose life.
Proper storage—coiling hoses loosely out of direct sunlight and off the ground—reduces kinks, UV degradation, and algae formation.
Small cuts or persistent leaks warrant repair, while severe cracking, hardening, or recurring failures indicate replacement.
Routine schedule and quick maintenance steps
Establishing a concise routine guarantees pool hoses remain functional and free of buildup between deep cleanings. A weekly inspection, brief rinse, and quick interior flush prevent debris and biofilm.
Monthly mild vinegar soak addresses early scaling. Promptly replace damaged clamps and document maintenance dates to track wear.
- Inspect for cracks and fittings
- Rinse exterior after use
- Flush interior with clean water
- Monthly vinegar soak
- Record maintenance dates
Storage tips to prevent kinks, UV damage, and algae growth
After routine inspections and monthly vinegar soaks, proper storage becomes the next line of defense against kinks, UV degradation, and algae formation.
Hoses should be drained, coiled loosely on wide reels or hooks, and kept off concrete. Store indoors or under UV-resistant covers, elevated to promote airflow, away from chemicals and direct sunlight.
Periodic airing prevents moisture buildup and biological growth.
When to repair versus replace a hose
Decide whether to repair or replace a pool hose by evaluating damage type, age, and performance impact: small punctures, loose fittings, or shallow cracks often warrant repair, while deep splits, severe abrasion, persistent collapse, or hoses older than five years typically justify replacement to maintain flow efficiency and prevent contamination.
Inspect regularly, prioritize seals and clamps, test for leaks under pressure, and document service dates to guide timely replacement.
Troubleshooting Common Hose Cleaning Problems
Troubleshooting common hose cleaning problems begins with identifying the symptom: persistent odors or discoloration often signal organic buildup, while stubborn clogs resist standard flushing or brush methods.
Small leaks, cracks, and temporary loss of suction can sometimes be patched or emptied and reconnected to restore function, but may also indicate the need for replacement.
The following section compares quick fixes versus permanent solutions and explains when professional repair or hose replacement is appropriate.
Persistent odors or discoloration
Lingering smells or darkened inner walls indicate biological buildup, chemical residue, or material degradation within the hose.
Inspect visually and smell at several points.
Flush with a diluted bleach solution (followed by thorough rinsing) or an enzyme cleaner for organic films.
If odor persists or discoloration spreads, replace the hose—materials can trap contaminants or break down, risking water quality and equipment.
Clogs that won’t clear with standard methods
Persistent odors or discoloration may signal deeper issues, and sometimes those same underlying causes lead to stubborn blockages that resist standard clearing methods.
Inspect for mineral scale, root intrusion, or collapsed liners. Use a flexible plumbing snake, pressurized water from a nozzle adapter, or a chemical descaler formulated for pool hoses.
If obstruction persists, document hose age and replace rather than risk damage or contamination.
Leaks, cracks, and loss of suction temporary fixes and permanent solutions
Addressing leaks, cracks, and sudden loss of suction begins with a quick visual and tactile inspection to locate breaches and assess hose integrity.
Temporary fixes include waterproof tape, hose clamps, and PVC cement for small splits; test suction after each repair.
For extensive damage, replace sections or entire hose with compatible, UV-resistant tubing.
Regular maintenance prevents recurrence and guarantees reliable cleaning performance.
Comparison of Cleaning Methods and Tools
The following comparison summarizes common cleaning methods and tools by time required, effectiveness, cost, and safety to help choose the best approach for a given hose and situation. Below is a compact comparison to illustrate typical trade-offs. Readers can use this as a quick reference when weighing options.
| Method/Tool | Key Traits |
|---|---|
| Manual brush | Quick setup; moderate effectiveness; low cost; safe with gloves |
| Pressure washer | Fast; high effectiveness on stubborn buildup; higher cost; caution required |
| Chemical soak | Time-consuming; high effectiveness for scale; variable cost; requires ventilation |
| Pump flushing | Moderate time; good for debris removal; low–moderate cost; safe if fittings secure |
| Combination approach | Varies by mix; often most effective; cost depends on tools; requires attention to safety |
Time required, effectiveness, cost, and safety for each method
When choosing a cleaning method, homeowners should weigh time, effectiveness, cost, and safety together, since a faster approach may cost more or pose greater hazards.
Manual brushing is low-cost, moderate time, safe but laborious.
Chemical flushes are fast and effective but higher cost and require precautions.
Powered tools save time, increase effectiveness, cost more, and need protective gear to reduce injury risk.
Safety Checklist Before Restarting Pool Equipment
A final inspection confirms all hose connections, clamps, and fittings are secure and free of leaks before power is restored.
Once reassembled, the pump is briefly run to verify steady water circulation through the system.
Water chemistry is then tested and adjusted as needed to guarantee safe, balanced conditions before regular operation resumes.
Final inspection steps
Conduct a systematic final inspection before restarting pool equipment to verify all hoses are secure, fittings tightened, and debris cleared from strainers and skimmer baskets.
Confirm clamps and unions are properly seated, no kinks or pinches exist, and hose routing avoids sharp edges.
Ascertain valve positions match documented settings, electrical covers are closed, and tools or loose parts are removed.
Record any faults for correction.
Testing water circulation and chemical balance after reassembly
Start the pump briefly and observe flow through returns and the filter pressure gauge to confirm circulation is established and there are no leaks or air pockets.
Monitor skimmer and pump baskets for proper suction.
Test water chemistry—pH, chlorine, alkalinity, cyanuric acid—and adjust to recommended ranges.
Recheck pressure and flow after thirty minutes; document readings and any corrective actions before normal operation.
Conclusion
Like a garden hose cleared after a spring rain, clean pool hoses let water breathe and systems sing. The steps outlined are seeds planted for lasting clarity; quick rinses are the sunlight, deep scrubs the steady rain, and routine checks the pruning shears keeping growth in check. When hoses are tended, the pool reflects calm order—equipment protected, swimmers safe—proof that small, steady care restores the whole to healthy, flowing balance.