What Is PEX Pipe? Easy Guide to Uses, Types & Plumbing Tips
PEX pipe is a flexible tubing made from cross-linked polyethylene, designed for hot and cold water supply as well as hydronic heating systems. It offers superior resistance to corrosion, scale, and freeze damage compared to traditional rigid pipes, and it is easier to install with fewer fittings. PEX is available in three types: PEX-A, PEX-B, and PEX-C, and comes in coils with color coding for straightforward routing. Installation methods include crimp, clamp, or push-fit systems, all of which must comply with local plumbing codes. For more detailed comparisons, pros and cons, and practical plumbing tips, read on.
What Is PEX Pipe?
PEX (cross-linked polyethylene) pipe is a flexible plastic tubing made by chemically modifying polyethylene to create cross-linked bonds, which improve temperature resistance, strength, and durability.
It is manufactured in several forms—PEX-A, PEX-B, and PEX-C—distinguished by cross-linking methods that affect flexibility and repairability. Common diameters suit residential supply lines, and coils simplify runs with fewer fittings. Color coding (red, blue, white) aids identification.
PEX resists corrosion and scale, tolerates freeze-thaw cycles better than rigid pipes, and is compatible with various fittings and manifolds. Installation requires specific tools and follows local plumbing codes.
Why Plumbers Choose PEX Over Copper or PVC
Plumbers often prefer PEX because it installs faster and with fewer specialized tools than copper or PVC.
Its lower material and labor costs make it an economical choice for both new builds and renovations.
The material’s flexibility and resistance to corrosion and freeze damage also contribute to long-term durability.
Faster, Easier Installation
Installers save significant time with PEX because its flexible tubing and simple joinery reduce fittings, soldering, and rigid layout work required by copper or PVC.
Plumbers favor PEX for fewer connections, faster routing through walls and joists, and minimal specialized tools.
Crimp, clamp, or push-fit systems speed assemblies and enable single-length runs where copper would need many joints.
Thermal expansion allows bending around obstacles, cutting installation time and effort.
Fewer leak points streamline pressure testing and commissioning.
Typical benefits include:
- Reduced fittings and joints
- Faster routing and fewer tools
- Quicker testing and commissioning
Lower Cost And Durability
Compared with copper or PVC, PEX systems typically deliver lower installed cost and strong long-term durability, factors that drive many contractors’ preferences.
Material and labor savings arise from flexible tubing, fewer fittings, and faster connections. PEX resists corrosion and scale that shorten copper life and avoids rigid-joint failure modes found in some plastic pipes. Freeze-expansion tolerance reduces burst incidents in cold conditions.
Longevity studies and manufacturer warranties support its reliability when installed per code. While not universal—UV exposure and certain chemical exposures can degrade it—PEX offers a cost-effective, durable alternative that balances performance and upfront expense for many projects.
How PEX Is Made and What It’s Made Of
Made from cross-linked polyethylene, PEX is formed through a controlled process that converts polymer resin into flexible, durable tubing.
Extrusion forces melted resin through a die, producing continuous pipe that cools and is sized.
Cross-linking alters molecular bonds, improving temperature and chemical resistance.
Additives provide UV stabilizers, antioxidants, and colorants; oxygen barriers may be applied for hydronic use.
Quality control includes dimensional checks, pressure testing, and sample aging.
Typical manufacturing steps summarize as:
- Extrusion of polyethylene compound into tube form.
- Cross-linking to change polymer structure.
- Finishing, testing, and coiling for distribution.
Types of PEX: PEX‑A, PEX‑B, PEX‑C
The three common PEX types differ mainly in how they are made and their performance characteristics.
PEX‑A offers the best flexibility, making it easy to bend and repair without fittings.
PEX‑B is a cost‑effective, strong option while PEX‑C is a less common alternative with more limited use.
PEX‑A: Best Flexibility
Often favored by installers for its suppleness, PEX‑A is cross‑linked using the Engel method, which produces a highly flexible, memory‑resistant piping ideal for tight bends and expansion fittings.
It offers superior elongation, making repairs and retrofits easier, and exhibits strong freeze‑thaw resilience.
Manufacturers note consistent wall thickness and reliable joint integrity with expansion rings.
Suitable for potable water, radiant heating, and complex layouts, PEX‑A reduces fittings and installation time.
Considerations include compatibility with specific tools and higher material cost compared with some alternatives, but performance often offsets expense in demanding installations.
- Flexibility and memory
- Joint reliability
- Application versatility
PEX‑B: Cost‑Effective Strength
While PEX‑A excels at flexibility and ease of installation, many projects prioritize strength and economy—areas where PEX‑B commonly fits.
PEX‑B is produced via the silane or radiationless process, yielding a stiffer tube with good tensile strength and resistance to kinking.
It often costs less than PEX‑A, making it attractive for large runs and budget-conscious jobs.
Connections typically use crimp, clamp, or push‑fit fittings; expansion fittings are less common.
PEX‑B performs well for residential hot and cold water distribution, though it may be slightly less forgiving during installation and repair compared with more elastic grades.
PEX‑C: Less Common Option
Produced using electron beam irradiation, PEX‑C is a less common PEX variant that combines moderate flexibility with greater stiffness than PEX‑A, offering decent chemical resistance but a lower degree of crosslinking than other types.
It suits applications where cost and dimensional stability matter, though its lower crosslink density can reduce long‑term hydrolysis resistance compared with PEX‑A or PEX‑B.
Installation methods mirror other PEX types but may require attention to bending radius and connection fittings.
Selection depends on local codes, expected temperatures, and budget priorities.
- Moderate flexibility, increased stiffness
- Decent chemical resistance, lower crosslinking
- Cost and stability trade-offs
Pros, Cons, and Best Uses of PEX‑A, PEX‑B, and PEX‑C
Because each PEX manufacturing method alters the polymer structure, PEX‑A, PEX‑B, and PEX‑C exhibit distinct strengths, weaknesses, and ideal applications.
PEX‑A offers superior flexibility, excellent freeze‑crack resistance, and durable expansion fittings, making it ideal for retrofits and complex runs, though it is typically costlier.
PEX‑B is stiffer, more dimensionally stable, and often less expensive, suited to new construction and long straight runs; it resists chlorine better but is less forgiving with sharp bends.
PEX‑C occupies a niche: moderate cost and properties, acceptable where neither maximum flexibility nor lowest price is required. Selection balances budget, layout complexity, and fitting preference.
How to Tell PEX Types Apart Visually
Visual clues help distinguish PEX‑A, PEX‑B, and PEX‑C at a glance. Color and printed markings, differences in fittings and visible seams, and variations in wall thickness or measured dimensions are the key indicators to check.
Observing these features together gives a reliable initial identification before confirming with manufacturer information.
Color And Markings
When identifying PEX at a glance, color and printed markings are the quickest clues: red typically denotes hot-water lines, blue indicates cold, and white or gray may be used for plumbing where color coding is unnecessary.
Manufacturers print continuous markings showing material type (PEX-A/B/C), size, pressure rating, temperature limits, certification stamps and production date. These markings help confirm suitability for potable water and specific systems.
Visual inspection should note fading or paint that obscures text.
For quick assessment, check both color and stamp details before installation or maintenance.
- Color: hot/cold/neutral identification
- Stamps: material, size, ratings
- Legibility: make sure markings visible
Fittings And Seams
In examining PEX fittings and seams, the connection style and seam appearance reveal the tube type: PEX-A commonly uses expansion fittings and shows a smooth, uniform wall without visible internal weld lines; PEX-B often employs crimp or clamp fittings and may display a faint longitudinal seam from extrusion; PEX-C typically has more pronounced seams and can be matched with mechanical or barb fittings.
Observers can inspect ends for expansion collars, crimp rings, or barbed insert profiles. Seam prominence, surface texture, and flexibility at joints help distinguish types. Visual checks should be paired with labeling and installer notes for accurate identification.
Wall Thickness/Measurements
Beyond fittings and seam characteristics, wall thickness and measured dimensions offer another practical cue for distinguishing PEX types.
Visual measurement with calipers or a ruler clarifies whether tubing matches nominal size and expected wall gauge. Manufacturers publish nominal OD and SDR or wall thickness; comparing these to measured values narrows possibilities.
Typical observations include:
- Measure outside diameter (OD) and wall thickness; thinner walls often indicate PEX-B or PEX-C variants.
- Compare measured values to nominal sizes (e.g., 1/2″, 3/4″) and SDR tables to confirm type.
- Note reinforcement layers or aluminum that alter thickness and indicate PEX-AL-PEX or oxygen-barrier blends.
PEX Pipe Sizes Explained (1/2″, 3/4″, 1″)
For straightforward residential plumbing, understanding common PEX diameters — 1/2″, 3/4″, and 1″ — clarifies their typical uses, flow capacity, and fitting requirements.
1/2″ PEX commonly supplies individual fixtures: sinks, toilets, and showers; it balances flexibility with adequate flow for single outlets.
3/4″ PEX is used for short branch lines, washer hookups, and small manifolds, offering higher flow and reduced pressure drop.
1″ PEX serves main distribution runs, longer branches, or multi-fixture clusters where volume matters.
Each size requires compatible fittings and consideration of run length and expected fixture units to prevent pressure loss.
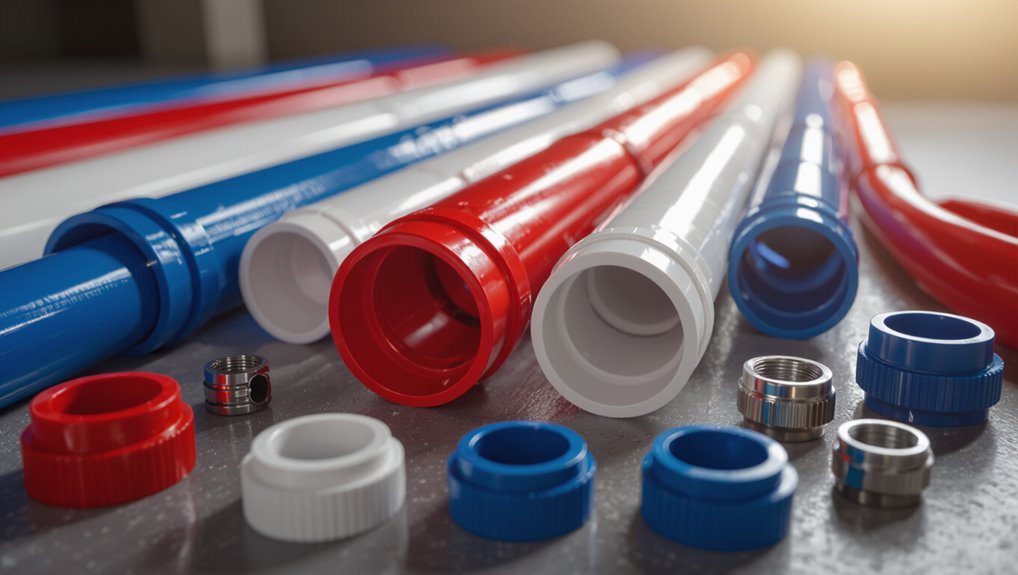
PEX Tubing Color Codes and What They Mean
Why are PEX pipes colored differently? Color coding simplifies identification: blue for cold, red for hot, and white (or natural) for general or mixed use.
The palette aids installation speed and reduces mistakes. Color does not change material properties; performance depends on PEX type and tubing diameter.
Codes vary regionally and by manufacturer, so verification before purchase is prudent. Markings on the tubing indicate certification, temperature rating, and size, which are more important than color alone.
- Blue: cold-water lines, visible distinction.
- Red: hot-water lines, quick identification.
- White/clear: multiuse or concealed runs, versatile.
PEX Fittings: Compression, Crimp, Clamp, and Expansion
PEX fittings join tubing with different connection methods—compression, crimp, clamp (cinch), and expansion—each offering distinct installation steps, tool requirements, and performance characteristics.
Compression fittings use threaded nuts and ferrules to compress tubing, requiring no heat and allowing disassembly.
Crimp fittings employ copper rings compressed with a crimp tool; they are quick but need gauge-checked crimps.
Clamp (cinch) fittings use stainless steel bands tightened with a ratchet tool, offering fast, reliable seals and easy inspection.
Expansion systems enlarge PEX then insert a fitting; the tubing contracts for a secure hold, favored for flexibility and reduced fittings in certain layouts.
Choosing the Right PEX Fitting for Your Job
Which fitting best suits a specific installation depends on factors like system pressure, accessibility, and installer skill. The decision balances durability, leak resistance, and code compliance. Consider joint longevity in high-pressure runs and choose materials compatible with water chemistry.
Accessibility dictates whether a fast, concealed-ready method or a serviceable connection is preferable. Installer experience guides selection toward systems that minimize human error. Cost matters but should not outweigh reliability.
- Match fitting type to pressure, temperature, and code.
- Prefer proven materials for potable water and longevity.
- Factor accessibility and installer proficiency when selecting fittings.
Tools You Need to Work With PEX
Having matched fittings to system demands and installer skill, the next step is assembling the right toolkit for working with PEX.
Essential hand tools include a PEX crimp or clamp tool appropriate to chosen fittings, a reliable PEX expansion tool when using expansion systems, and a quality go/no-go gauge or ring to verify secure crimps.
Pliers, adjustable wrenches, and tubing supports aid installation.
A deburring tool and reamer are useful but avoid detailed cutting discussion here.
Thread sealant or approved PTFE tape suited for potable water connections, a marker, and tape measure complete the compact, job-focused kit.
How to Cut and Prepare PEX for Fittings
Cut tubing squarely and cleanly to guarantee a proper seal with fittings. The installer uses a quality PEX cutter, measures twice, and marks the cut.
After cutting, burrs and rough edges are removed; a deburring tool or fine file smooths the inner and outer edges without enlarging the diameter. The tubing end is inspected for cracks, distortion, or embedded debris.
When required, the pipe is softened briefly with warm water to ease insertion, taking care not to overheat. Properly prepared ends secure tight connections and reduce leak risk.
- Measure and mark precisely.
- Square cut with a PEX cutter.
- Deburr, inspect, and condition.
Make a PEX Crimp Connection: Step‑by‑Step
Before beginning the crimp, the installer confirms the tubing end is square, clean, and fully inserted over the fitting shoulder. The crimp ring is positioned 1/8″–1/4″ from the fitting flange, then the crimper is aligned and closed firmly until ratchet release. After crimping, the joint is inspected visually for even compression and checked with a go/no-go gauge. A pressure test validates the seal before insulation and concealment. Recordkeeping notes material, date, and installer. Maintenance advice: monitor for leaks and recheck crimps if disturbed.
| Step | Verification |
|---|---|
| Position ring | 1/8″–1/4″ |
| Crimp | Even, full closure |
| Test | Pressure pass |
Make a PEX Expansion Connection: Step‑by‑Step
After completing crimp connections, the installer prepares for expansion-style joints by selecting the correct PEX expansion tool, matching ring size, and confirming the tubing end is square and free of debris.
The process proceeds methodically: expand the tubing with the tool to the specified diameter, slide the expansion ring over the expanded end, then release allowing the tubing to contract tightly over the fitting.
Proper alignment and consistent expansion depth guarantee a secure mechanical bond.
Follow manufacturer spacing and cool-down recommendations.
Inspect the completed joint visually for full ring seating and uniform tubing collapse around the fitting before system pressurization.
- Prepare
- Expand
- Seat
How to Test PEX Connections for Leaks
Verify every connection with a controlled pressure test to confirm system integrity and catch leaks before insulation or finishes are applied.
The installer isolates the circuit, seals fixtures, and attaches a calibrated pressure gauge and pump or compressed-air source with regulator.
Pressurize to the code-specified test pressure (typically 50–100 psi higher than operating pressure for residential systems) and monitor for at least 15 minutes, or per local code.
Inspect all fittings, crimp rings, and manifolds for visible seepage.
Record pressure readings; any drop indicates leakage.
Repair suspected joints, purge trapped air, and repeat testing until pressure remains stable for the required duration.
PEX vs Copper: Cost, Durability, and Installation Time
Having confirmed leak-free PEX connections through pressure testing, comparisons between PEX and copper focus next on three practical factors homeowners and contractors weigh most: upfront material and labor cost, long-term durability and maintenance, and total installation time.
- Cost: PEX typically lowers material and labor expenses; flexible runs reduce fittings and wall penetrations, while copper pricing and soldering add cost.
- Durability: Copper resists UV and rodent damage better; PEX resists scale and corrosion and tolerates freeze expansion when installed with slack.
- Installation time: PEX installs faster—fewer joints and easier maneuvering—shortening project schedules and labor hours.
PEX vs CPVC/PVC: Temperature and Chemical Limits
How do PEX and CPVC/PVC compare when exposed to high temperatures and various chemicals? PEX tolerates continuous hot-water temperatures up to about 180°F for short periods and around 140°F for long-term service; CPVC is rated to roughly 200°F continuous service, PVC is unsuitable for hot potable water.
Chemical resistance differs: PEX resists many common household chemicals but can be attacked by certain hydrocarbons, chlorinated solvents, and UV; CPVC and PVC resist a broader range of solvents and acids but are vulnerable to strong alkalis and some organics.
Selection should consider fluid type, temperature, pressure, and applicable codes.
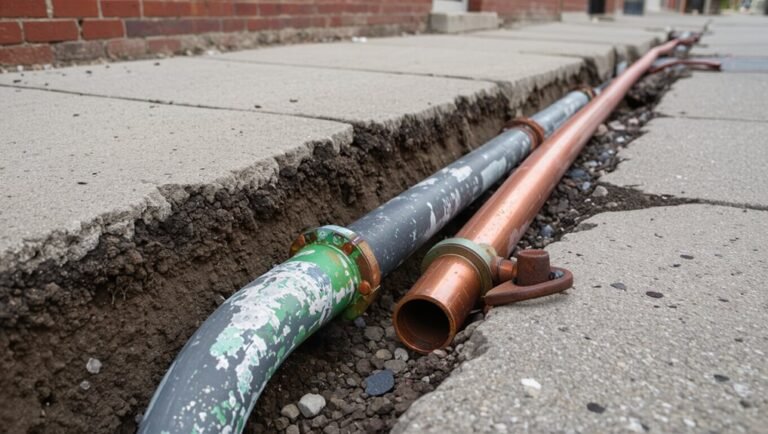
Can PEX Be Used for Outdoor and Buried Residential Lines?
PEX can function effectively outdoors and underground when exposed to appropriate UV protection and temperature ranges.
For buried lines, proper bedding, depth, and tracer tape are recommended to prevent damage and locate the pipe later.
The discussion will outline specific outdoor-use precautions and proven best practices for installing PEX as buried residential service lines.
Outdoor Use Considerations
When exposed to sunlight, cold soil, or mechanical stress, cross-linked polyethylene (PEX) behaves differently than rigid pipes, so its suitability for outdoor and buried residential lines depends on factors such as UV exposure, temperature extremes, burial depth, and local code requirements. PEX can be used outdoors with precautions: UV-sensitive PEX must be shielded, freeze-prone runs require freeze protection or slope for drainage, and mechanical risks demand protective conduit.
Considerations include warranty limitations and connector durability in soil conditions.
- Shielding: UV and sunlight protection.
- Thermal: Frost, insulation, and heat tolerance.
- Mechanical: Conduit, abrasion, and rodent resistance.
Buried Line Best Practices
Although suitable for many buried residential runs, cross-linked polyethylene requires specific installation practices to guarantee longevity and code compliance. Installers must use approved PEX types and fittings, follow local codes, and protect tubing from UV exposure and physical damage.
Trench depth, bedding with sand or fine soil, and separation from sharp rocks or debris prevent abrasion. Avoid direct burial of oxygen-permeable PEX for hydronic systems unless barrier-rated; use conduit where required.
Support and expansion loops accommodate thermal movement. Pressure-tested installations prior to backfill and accessible shutoffs ensure serviceability. Documentation of materials and layout aids future repairs.
Heat Resistance: PEX and Hot Water Systems
How well does cross-linked polyethylene perform under continuous exposure to hot water and elevated pipe temperatures? PEX maintains dimensional stability and resists scaling and corrosion in typical domestic hot water systems when installed within its temperature-pressure ratings. It tolerates repeated thermal cycling with minimal creep compared to unmodified polyethylene.
Long-term performance depends on oxygen barrier presence, proper fittings, and avoiding prolonged exposure above rated temperatures (commonly 180°F for short durations, 140°F typical continuous).
Key considerations include:
- Maximum operating temperature and pressure ratings.
- Use of oxygen-barrier PEX for boiler and radiant systems.
- Proper support, expansion allowances, and compatible fittings.
Freezing and Burst Risk With PEX Pipes
After outlining temperature limits and thermal cycling behavior in hot-water use, attention turns to PEX performance under freezing conditions and the risk of burst pipes.
PEX is more flexible than copper, allowing limited expansion when water freezes; this reduces but does not eliminate burst risk.
Expansion capacity varies by PEX type and installation constraints—anchored runs, fittings, or tight bends limit movement and concentrate stress.
Repeated freeze–thaw cycles increase fatigue and potential failure at joints.
Pressure from melting ice can still exceed pipe strength.
Hence design, routing, and avoiding exposed runs in unprotected spaces remain critical to minimize freeze-related damage.
How to Insulate PEX for Cold Climates
When protecting PEX in cold climates, insulation strategy focuses on preventing heat loss, reducing freeze risk, and preserving system flexibility.
Install closed-cell foam sleeves sized to pipe diameter and seal seams with waterproof tape.
Maintain small expansion gaps where required to allow movement without compromising thermal continuity.
Consider heat trace for exposed runs in unheated spaces, controlled by thermostats and freeze sensors.
- Choose closed-cell foam or polyethylene sleeves for durability and moisture resistance.
- Use pipe wrap and insulation supports in crawlspaces and basements to avoid compression.
- Combine insulation with heat tracing and proper ventilation for reliable freeze protection.
Using PEX for Radiant Floor Heating Systems
In radiant floor heating systems, PEX tubing serves as the flexible, corrosion‑resistant conduit for circulating warm water beneath the floor surface, providing even, efficient heat distribution with lower operating temperatures than forced‑air systems.
Installers lay PEX in loops or serpentine patterns within screed, thinset, or underboard channels, securing spacing to match heat load and flooring type.
Oxygen‑barrier PEX prevents corrosion of metal components.
Proper tubing expansion allowance, pressure testing, and tubing layout documentation guarantee reliable operation.
Compatibility with boilers, heat pumps, or water heaters offers system flexibility.
Routine inspection of manifolds and controls maintains performance without altering embedded tubing.
PEX Manifolds and Home Plumbing Distribution
Centered within modern residential plumbing, PEX manifolds act as centralized distribution hubs that route hot and cold water through individual home runs to fixtures, simplifying isolation, balancing, and leak detection.
Manifolds reduce fittings, shorten run lengths, and permit flexible layout changes without reworking main lines. Valved ports allow single-fixture shutoff and rapid diagnosis.
Materials typically include brass or plastic bodies with labeled outlets for clarity. Proper mounting and accessible placement guarantee maintenance ease.
Consider flow capacity, pressure ratings, and compatibility with PEX connections when selecting a manifold.
- Simplified isolation and maintenance
- Reduced fittings and leak points
- Clear labeling and modular expansion
Zoning and Balancing With PEX Manifolds
Using a PEX manifold to create distinct zones allows a home’s plumbing to deliver tailored flow and temperature control by dedicating individual home runs to specific fixtures or areas. Manifolds simplify balancing: shutoff and flow meters on each circuit enable precise adjustments and isolation for maintenance. Zone separation reduces pressure interactions and improves response times for hot water. Properly labeled circuits speed troubleshooting. Coordinating manifold placement with pump and mixing valves optimizes performance for radiant or domestic hot water systems.
| Benefit | Purpose |
|---|---|
| Individual control | Adjust flow per fixture |
| Isolation | Simplify repairs |
| Metering | Balance system accurately |
Best Practices for Running PEX in Walls and Ceilings
When routed through walls and ceilings, PEX must be protected, supported, and documented to prevent damage, noise, and future access problems; installers should follow clear spacing, fastening, and clearance rules, use sleeves or grommets where pipes cross studs or joists, and plan runs to minimize bends and thermal expansion stresses while keeping service loops and labeling accessible for maintenance.
Best practice requires routing away from electrical, maintaining required clearances, and securing lines at regular intervals. Record locations for future trades.
Use insulation where needed to prevent condensation and sound. Label lines at termination points.
- Route and protect
- Fasten and document
- Insulate and label
Bending PEX: Minimum Bend Radius and Supports
In tight turns and long runs alike, respecting PEX’s minimum bend radius and providing proper support prevents kinking, strain, and premature failure.
Manufacturers specify radius by pipe size; common guidance is 2–3 times the pipe OD for cold bending, larger for hot services. Use manufacturer-approved bend supports, escutcheons, or spring bend protectors where needed.
Secure lines at regular intervals to prevent sagging and movement—typically every 32–48 inches horizontally and at shorter spacings near fixtures. Avoid sharp edges at penetrations and maintain clearance from heat sources.
Inspect installed bends for deformation and replace compromised sections before covering walls.
Expansion Loops and Thermal Movement With PEX
Because PEX expands and contracts markedly with temperature changes, planners must account for thermal movement to prevent stress, noise, and joint failure. Expansion loops, offsets, and gentle curves absorb length changes without straining fittings. Designers calculate expected movement based on pipe length and temperature range, then place loops at intervals or near rigid connections.
- Provide loops sized to accommodate calculated expansion, using factory or field-bent shapes.
- Allow free sliding in supports where movement is expected; use slotted or loose clamps.
- Place loops away from concealed critical assemblies and maintain access for inspection.
These measures reduce noise and prolong system life.
How to Secure and Protect PEX From Nails and Screws
To prevent accidental punctures and maintain system integrity, PEX must be routed and fastened with nail and screw protection in mind. Install steel nail plates where tubing crosses studs or plates, and maintain recommended clearance from fasteners and electrical boxes.
Use plastic or metal straps designed for PEX, spaced per code, avoiding overtightening that can deform tubing. Run lines through bored holes centered in framing members when possible.
Protect exposed runs in crawlspaces with conduit or escutcheons. Clearly mark PEX paths to alert trades. Inspect during rough‑in and before drywall installation to verify all protective measures are in place.
Connecting PEX to Fixtures and Appliances
This section explains how to join PEX to fixtures and appliances, starting with selection of compatible fittings to guarantee leak-free connections.
It covers connections to rigid pipe where codes or durability require it, and highlights common methods for those joins.
Guidance on appliance hookups and proper valve selection is provided to simplify installation and service.
Choosing The Right Fittings
When connecting PEX to fixtures and appliances, selecting compatible fittings is essential to guarantee watertight seals, proper flow, and long-term reliability.
Choose fittings that match PEX type (A, B, C) and system—crimp, clamp, or expansion—so tools and rings align.
Use lead-free brass or engineered plastic fittings rated for potable water and required temperatures.
Make certain manufacturer compatibility when mixing brands to preserve warranties and performance.
- Match fitting style to PEX type and installation method.
- Select materials rated for pressure, temperature, and corrosion resistance.
- Verify manufacturer compatibility and certification for potable applications.
Transition To Rigid Pipe
Having selected compatible fittings and verified system compatibility, attention shifts to connecting flexible PEX to rigid copper, CPVC, or threaded appliance inlets.
Proper conversion requires choosing the correct adapter: crimp, clamp, expansion, or push-fit rated for both materials.
Guarantee pipe ends are cut square, deburred, and fully inserted to the fitting’s stop.
Use support sleeves where required for barb fittings and apply thread sealant or tape on male threads only.
Secure runs near the junction to prevent movement and strain.
Pressure-test the joint per code before concealment, inspecting for leaks and verifying alignment for fixture connections.
Appliance Hookups And Valves
For connecting PEX to fixtures and appliances, installers must select valve types and fittings that match both the PEX size and the appliance inlet, ensuring compatibility with local code and manufacturer requirements.
Properly sized shutoff valves, adapters, and approved adapter fittings prevent leaks and allow service. Compression, crimp, or push-fit methods require matching tooling or rated components.
Consider water hammer arrestors and dielectric unions where dissimilar metals meet. Follow manufacturer torque and installation guidance.
- Confirm PEX size, valve type, and inlet thread.
- Use code-approved adapter fittings and methods.
- Test system pressure and inspect for leaks before finish.
Sizing Hot and Cold PEX Runs for Best Flow
In sizing hot and cold PEX runs for ideal flow, the designer balances pipe diameter, run length, water velocity, and fixture demand to minimize pressure loss and noise while avoiding excessive stagnation.
Calculations use fixture unit counts and expected simultaneous usage to determine required flow rates. Designers select PEX sizes—commonly 3/8″, 1/2″, 3/4″, 1″—to keep friction losses within acceptable limits over the longest run.
Hot-water runs consider heat loss and recovery; cold lines consider temperature stratification.
Branch versus manifold approaches influence sizing strategy. Properly sized runs reduce pressure drop, protect fixtures, and improve user comfort without oversizing materials.
How to Plan a PEX Layout for a Remodel
When approaching a remodel, the PEX layout should be planned around existing structure, fixture locations, and the chosen distribution strategy (manifold or trunk-and-branch), so routing minimizes demolition while meeting flow and temperature requirements.
The designer assesses access points, wall and floor cavities, and appliance demands, mapping runs to reduce bends and shared branches that degrade pressure.
Compatibility with local codes, insulation needs, and future access for repairs is confirmed.
Materials and connection types are specified.
A schematic guides installers and inspection.
- Map fixtures and access
- Choose distribution method
- Optimize routing and insulation
DIY PEX: When It’s Appropriate
A homeowner can handle PEX work for straightforward tasks like replacing a branch line or installing a single fixture, provided they understand local codes.
Successful DIY PEX requires basic plumbing skills, familiarity with fittings and crimping or expansion tools, and the correct size and type of pipe.
For complex layouts, high-pressure systems, or where permits are required, a licensed plumber is the safer choice.
When To DIY PEX
For straightforward jobs like replacing a short run of damaged tubing, installing a new sink, or adding a single fixture, DIY PEX can be appropriate for someone with basic plumbing skills and the right tools.
Projects suited to DIY are typically limited in scope, low risk, and confined to accessible areas. Permits and code compliance remain the homeowner’s responsibility; simple projects often avoid complex inspections.
When work affects main lines, gas-water interactions, or whole-house systems, professional help is advisable. Consider time, local regulations, and warranty implications before proceeding.
- Small, localized repairs
- Single-fixture additions
- Non-critical, accessible runs
Skill And Tool Needs
With basic familiarity with plumbing terms and a steady hand, a homeowner can tackle simple PEX jobs, but success depends on having the right combination of skills and tools.
Required skills include measuring and cutting accurately, deburring, fitting fittings correctly, and testing for leaks. Comfort with reading basic diagrams and following manufacturer instructions matters.
Essential tools: a PEX cutter, crimp or clamp tool (or expansion tool for expansion systems), ring removal tool, deburring tool, and a reliable crimp gauge or go/no-go gauge.
Optional but helpful: pipe support straps, heat gun for specific applications, and a pressure tester.
Knowledge of local code completes readiness.
When to Call a Professional Plumber for PEX Work
In situations involving complex routing, changes to the main water supply, hidden wall penetrations, or gas-line proximity, a professional plumber should be consulted to guarantee code compliance and system integrity.
A plumber evaluates permits, pressure issues, and backflow protection, and makes certain fittings and supports meet local rules.
For renovations, multi-fixture runs, or when thermal expansion devices are needed, trained judgment prevents failures and insurance problems.
- Large-scale reroutes, service connection changes, or meter work.
- Work involving concealed spaces, firestopping, or structural modifications.
- Any project affecting shared systems, safety devices, or requiring permits.
Common PEX Installation Mistakes to Avoid
Common installation errors often stem from inadequate pipe support, choosing the wrong fittings, and failing to accommodate thermal expansion.
Each can cause leaks, stress on connections, or buckling over time. The following section outlines how to recognize and prevent these issues.
Undermining Proper Support
Undermining proper support for PEX runs can lead to sagging, uneven flow, noise, and premature connections failure. The installer should space hangers, rails, or straps per manufacturer specs and avoid long unsupported spans.
Thermal movement requires clips that allow sliding or expansion loops. Unsupported vertical risers increase stress on fittings; continuous support reduces joint strain.
Fastening near bends and shifts prevents wobble and abrasion. Protect pipe where it crosses framing or passes through metal.
Regular inspection reveals loose supports before damage occurs.
- Follow spacing guidelines.
- Accommodate thermal movement.
- Protect at contact points.
Incorrect Fitting Selection
After stressing proper support to prevent strain on joints, attention must shift to choosing the correct fittings, since incompatible or poor-quality fittings are a leading cause of leaks and system failures.
Installers should match fittings to PEX type (A, B, C) and connection method (crimp, clamp, expansion, push-fit). Avoid mixing incompatible materials or low-grade brass that can corrode. Use manufacturer-approved components and follow torque, insertion depth, and ring specifications. Inspect seals and O-rings for damage. Keep inventory organized to prevent substitution errors. Proper selection and installation of fittings preserves system integrity and reduces future maintenance and water damage risk.
Poor Thermal Expansion Handling
Failing to accommodate PEX’s thermal expansion and contraction can shorten service life and cause leaks or bulging at fittings. Installers should allow movement, use expansion loops, and secure properly to avoid stress on joints.
Unsupported long runs can bow; tight clamps can create point loads. Temperature swings in hot-water systems increase cyclic stress, so design with appropriate allowances and follow manufacturer spacing guidelines.
Regular inspection after initial operation helps catch early deformation. Practical measures reduce failures and warranty claims.
- Provide expansion loops or offsets where required.
- Maintain correct pipe support spacing.
- Use flexible routing and avoid rigid restraints.
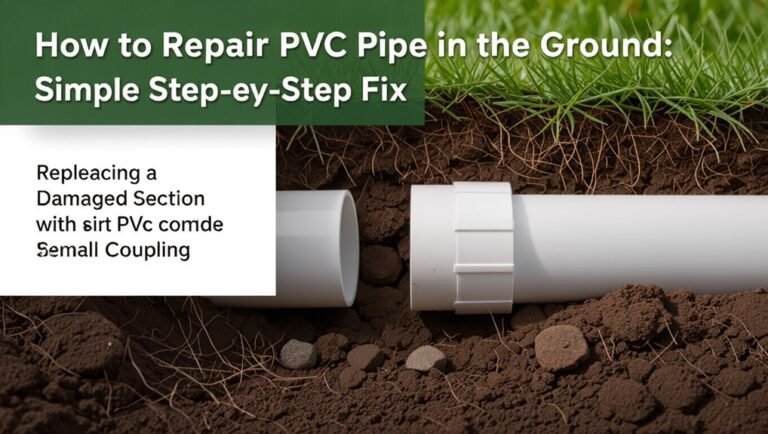
Repairing Damaged PEX Piping Quickly
Repairing damaged PEX piping quickly requires evaluating the leak type and accessibility, then selecting the appropriate repair method—slip couplings for small cuts, sharkbite or push-fit fittings for clean breaks, and crimp or clamp rings for replacements where a secure, permanent joint is needed.
The technician isolates the section, relieves pressure, and trims back to sound tubing. For simple pinhole leaks, epoxy or repair sleeves offer temporary fixes until a planned replacement. Always deburr and square-cut before joining. Test repairs under normal pressure, inspect for movement, and secure pipes to minimize future strain or abrasion at the repair site.
Replacing Old Copper With PEX: Retrofit Tips
When replacing old copper with PEX, selecting the appropriate PEX type (PEX-A, PEX-B, or PEX-C) and compatible connection method is the first priority.
Attention to pressure ratings, UV exposure, and freeze resistance helps match the new tubing to the system’s demands.
Adapting existing copper fittings typically requires conversion fittings or solder-free adapters and careful inspection for corrosion or dimensional mismatches.
Choosing PEX Type
Selecting the right PEX type for replacing old copper requires balancing compatibility, durability, and installation constraints specific to retrofit work. The decision depends on pipe flexibility for tight routes, pressure and temperature ratings, and connection methods that match existing systems.
Consider chlorine resistance in older water systems and UV exposure during installation. Cost and availability also influence choice, as does contractor familiarity with crimp, clamp, or expansion fittings. Typical choices favor PEX-A for flexibility, PEX-B for cost-effectiveness, and barrier or oxygen-impermeable options where boiler or heater performance demands.
- Flexibility and routing
- Connection method compatibility
- Rating and longevity
Adapting Copper Fittings
After choosing the appropriate PEX type, attention shifts to adapting existing copper fittings for a retrofit. The installer evaluates corrosion, measures diameters, and selects conversion fittings—crimp, clamp, or push-fit—to make certain secure joins. Compression fittings may require replacement; soldered joints are cut back. Proper support, dielectric unions, and pressure testing prevent leaks and galvanic issues. Crews should follow local code and manufacturer instructions when converting supply lines, maintaining flow and durability while minimizing demolition.
| Task | Tool | Tip |
|---|---|---|
| Inspect copper | Flashlight | Look for pinholes |
| Cut back | Tubing cutter | Square cut only |
| Join | Push-fit | No heat required |
| Test | Pressure gauge | 150% working pressure |
Cost Breakdown: Materials and Labor for PEX Projects
In evaluating PEX projects, a clear separation of material and labor costs helps stakeholders anticipate total expenditure and compare installation methods.
Material costs include PEX tubing type, fittings, manifolds, and connectors; higher-grade or oxygen-barrier varieties raise per-foot prices.
Labor varies by complexity: new installations run faster than retrofits requiring access work. Regional labor rates and plumber experience influence totals.
Permit fees and inspections add predictable administrative charges. Contingencies for unforeseen repairs should be budgeted.
- Material: tubing, fittings, manifolds, connectors, additives.
- Labor: hours, access difficulty, installer rate.
- Overhead: permits, inspections, contingency.
Tools and Supplies Checklist for a PEX Job
The section outlines the essential PEX tools required for cutting, crimping, and bending tubing, plus fittings and support gear.
It also lists necessary consumable supplies such as rings, clamps, lubricants, and mounting hardware.
Together these items form a concise checklist for planning and executing a PEX installation.
Essential PEX Tools
For a successful PEX installation, having the right tools and supplies is as important as understanding the layout and fittings. Essential tools enable clean cuts, secure connections, and reliable routing. A compact set covers most residential jobs and improves speed and safety.
- Crimp or clamp tool with calibrated jaws for secure fittings.
- PEX cutter and reamer to produce square, burr-free ends.
- Expander kit or push-fit insertion tools depending on chosen system.
Additional helpful items include a tubing bender, deburring tool, tape measure, and inspection gauge to verify connection integrity.
Necessary Consumable Supplies
Gathering consumables before beginning a PEX job guarantees uninterrupted work and consistent connection quality.
A concise checklist includes PEX tubing in required lengths, spare fittings (elbows, tees, couplings), and the chosen connector type: crimp rings, cinch clamps, or expansion sleeves.
Additional essentials are O-rings, pipe clips, mounting brackets, and primer or lubricant where manufacturer recommends.
Sealants and compatible thread tape suit threaded adapters.
Marking pens, measuring tape, and a deburring tool guarantee accurate cuts and clean ends.
Keep extra rings, sleeves, and a small stock of tubing for repairs.
Proper inventory prevents delays and guarantees reliable, code-compliant installations.
Routine Maintenance to Prolong PEX Life
Regularly inspecting and maintaining PEX plumbing extends service life and prevents small issues from becoming costly failures.
Routine care focuses on cleanliness, secure connections and correct water chemistry.
Periodic checks reveal sleeve wear, loose clamps and sediment buildup before escalation.
Scheduled tasks reduce stress on fittings and limit corrosive conditions.
- Inspect visible runs and fittings quarterly for displacement, abrasion or improper support.
- Flush systems annually to clear debris and minimize mineral deposits that affect flow and valves.
- Test water chemistry and adjust softening or pH treatment to prevent premature degradation of components.
How to Spot PEX Failures and Diagnose Leaks
Often, small signs precede major PEX failures, so early detection relies on observing changes in performance, appearance, and sound.
Inspect for damp spots, discoloration, or soft insulation near fittings and runs.
Listen for hissing, dripping, or water hammer noise during use.
Monitor unexpected pressure loss, uneven hot water, or unexplained utility increases.
Examine fittings and crimp rings for corrosion, movement, or visible gaps; check crimp alignment and clamp placement.
Use a moisture meter or infrared camera when concealed lines are suspected.
Isolate sections and pressure-test with a gauge to confirm leaks before repair or replacement.
How Long Does PEX Last? Expected Lifespan
PEX piping commonly carries an expected service life of several decades under normal conditions, often quoted between 25 and 50 years depending on formulation and installation.
Longevity is influenced by factors such as water chemistry, temperature cycles, UV exposure, and fitting quality.
Routine inspection for discoloration, stiffness, leaks, or reduced flow helps determine maintenance needs and signals when replacement should be considered.
Expected Service Life
Most manufacturers and independent studies estimate that cross-linked polyethylene piping will last 40 to 50 years under normal residential conditions.
Expected service life reflects material stability, installation quality, and typical usage patterns rather than theoretical maximums.
Performance records from long-term residential installations support widespread adoption for potable water and radiant heating.
Replacement cycles are generally aligned with home renovations or major system upgrades rather than premature failure.
Maintenance needs are minimal, limited to inspections for mechanical damage or fittings.
Typical assurances include warranties and certification-backed lifespan estimates.
- Typical lifespan: 40–50 years
- Common applications: potable water, radiant heat
- Warranty-backed expectations: manufacturer certifications
Factors That Affect Longevity
Considering material composition, installation quality, environment, and usage patterns together determines how long cross-linked polyethylene piping will perform in a residential system.
Lifespan depends on polymer type (PEX-A, B, or C), manufacturing standards, and additive stability.
Proper fittings, secure supports, and avoidance of kinks reduce stress and failure risk.
Water chemistry—pH, chlorine, hardness—and sustained high temperatures accelerate degradation.
UV exposure and sunlight cause surface embrittlement.
Mechanical damage from excavation or abrasion shortens service life.
Appropriate sizing and pressure management minimize cyclic fatigue.
When selected and installed to match conditions, PEX commonly reaches multiple decades of reliable service.
Maintenance And Replacement Signs
Regularly scheduled inspections and basic preventative care extend a cross-linked polyethylene piping system’s serviceable life and make impending replacements easier to predict.
Visual checks, pressure testing, and monitoring for temperature excursions detect early degradation.
Typical PEX lifespans range from 25 to 50 years depending on installation quality, water chemistry, and UV exposure.
Replacement decisions rely on observable signs and performance metrics.
- Visible damage or persistent leaks indicating material failure.
- Repeated joint or fitting failures despite repairs.
- Discolored, odorous, or taste-altered water suggesting internal breakdown.
Timely documentation and professional assessment guide cost-effective replacement planning.
PEX Water Quality and Taste Concerns
How does PEX affect the taste and safety of household water? Studies indicate modern PEX releases minimal odor- or flavor-causing compounds after initial flushing.
New installations may impart a slight plastic smell or taste for a short period; recommended flushing removes most residues.
PEX resists bacterial growth when properly installed and maintained because it lacks corrosion-prone metal interiors, though stagnation and warm temperatures can increase biofilm risk.
Certified PEX (NSF/ANSI 61) meets potable-water standards.
Maintenance includes periodic flushing after prolonged inactivity and monitoring for discoloration or odor changes, which warrant testing and professional assessment.
Code and Permit Basics for PEX Plumbing
Permit requirements for PEX installations vary by jurisdiction and can affect project scope and timing.
Inspectors typically enforce specific timing for rough‑in and final inspections, so scheduling should align with local procedures.
Only PEX products listed as code‑compliant and installed per manufacturer instructions meet most permitting standards.
Permit Requirements Vary
Across jurisdictions, requirements for permits and inspections related to PEX plumbing can differ substantially. Municipal codes, state regulations and local enforcement each influence whether permits are required, who may obtain them, and which PEX applications are allowable. Installers and homeowners should verify rules before work begins.
- Confirm: check local plumbing code and permit office for PEX-specific provisions.
- Qualifications: determine licensing or journeyman requirements to pull permits.
- Scope: identify which installations (repiping, additions, water heaters) trigger permit needs.
Failure to obtain required permits can lead to fines, required rework, or denial of occupancy approval.
Inspection Timing Rules
Typically, inspection timing for PEX plumbing is set by local code and the issuing authority, specifying when rough‑in, pressure, and final inspections must occur relative to installation stages. Inspectors verify concealment, fittings, and support before covering walls, observe pressure tests to confirm leak‑free systems, and perform final checks for fixtures, labeling, and accessibility. Scheduling follows permit conditions; delays can force uncovering work. Contractors track required notices, test records, and corrective actions. A simple visual aid:
| Stage | Inspector checks | Outcome |
|---|---|---|
| Rough‑in | Routing, supports | Approve/modify |
| Pressure | Leak tests | Pass/fail |
| Final | Fixtures, docs | Certificate |
Code-Compliant Materials
Code-compliant materials for PEX plumbing are routinely defined by a combination of model plumbing codes, local amendments, and manufacturer listings, which together determine acceptable pipe types, fittings, valves, and joining methods for permit approval.
Jurisdictions require listed PEX (ASTM, CSA, or equivalent), compatible fittings (crimp, clamp, expansion), and certified valves and accessories.
Installers must follow manufacturer instructions and approved joining techniques; deviations can fail inspection.
Documentation such as product listings and installation guides should be on-site for inspectors.
Permit applications often cite specific standards and models to expedite approval.
- Specify listed products
- Follow approved joints
- Provide documentation
Is PEX Recyclable? Environmental Impact
Considering its widespread use in plumbing, evaluating PEX’s recyclability and environmental footprint is essential for informed material choices.
PEX is a cross-linked polyethylene thermoset; cross-linking prevents melt recycling via conventional methods. Limited mechanical recycling exists for un-cross-linked PE, but PEX typically requires chemical recycling or energy recovery, both less common and more costly.
Production consumes petrochemical feedstocks and energy, though long service life and reduced leak rates can lower lifecycle environmental impacts compared to some metals.
End-of-life options are constrained by inconsistent collection infrastructure.
Sustainable choices hinge on installation longevity, proper disposal pathways, and advances in recycling technologies.
Frequently Asked PEX Myths Debunked
The section clarifies common misconceptions about PEX by addressing its limits, variations, and connection methods.
It notes that PEX is durable but not indestructible, that PEX-A, B, and C have different properties and uses, and that choice of fittings materially affects performance and longevity.
Readers will be guided through practical distinctions to inform proper selection and installation.
PEX Is Not Indestructible
Homeowners’ enthusiasm for PEX often leads to the mistaken belief that the tubing is indestructible; in reality, PEX has specific vulnerabilities and limits that affect its performance and lifespan.
PEX resists corrosion and freezing better than metal but can suffer damage from UV exposure, chemical contact, extreme heat, and improper installation.
Awareness of risks guarantees longevity and avoids failures.
- UV and sunlight: prolonged exposure degrades polymer chains, causing brittleness.
- Heat and pressure: sustained high temperatures or pressure spikes can deform or weaken joints.
- Chemicals and rodents: solvents, oils, and gnawing pests can puncture or compromise tubing.
All PEX Types Differ
Acknowledging common assumptions, PEX tubing comes in several distinct types—PEX-A, PEX-B, and PEX-C—each produced by different methods that impart measurable differences in flexibility, memory, connection methods, and resistance to kink or oxygen diffusion.
PEX-A, made by peroxide crosslinking, exhibits superior shape memory and flexibility, easing installation in tight runs.
PEX-B, produced via silane or irradiation, balances cost with durability and lower expansion.
PEX-C, formed mechanically, is less flexible and more prone to kinking but remains serviceable in specific applications.
Selection depends on project priorities: maneuverability, thermal behavior, and long-term material characteristics rather than a single “best” type.
Fittings Matter A Lot
Consider fittings the control points of any PEX system: they determine leak potential, compatibility with tubing type, and long-term reliability more than the tubing alone. Selection, installation technique, and material matter. Incorrect fittings or mismatched methods cause failures often blamed on PEX itself. Professionals evaluate pressure ratings, chemical resistance, and connection style (crimp, clamp, expansion, or push-fit). Quality seals and proper tools reduce callbacks. Maintenance access and code-approved assemblies improve longevity. Homeowners should prefer proven brands and trained installers to avoid myths about universal interchangeability.
- Choose compatible fittings and method.
- Use correct tools and seals.
- Follow code and manufacturer guidance.
Choosing the Right PEX System for Your Home
Which PEX system best fits a given residence depends on factors such as plumbing layout, local code, budget, and installer preference. Decision-making weighs PEX-A, PEX-B, and PEX-C material properties, connection methods (crimp, clamp, expansion, push-fit), and manifold versus trunk-and-branch designs.
Consider water pressure, thermal expansion, freeze resistance, and available fittings. Evaluate long-term costs: material price, labor time, and maintenance.
Confirm compatibility with local codes and existing fixtures. For DIYers, simplicity and tool access matter; for professionals, speed and reliability may dominate.
Selection should balance performance, cost, and regulatory compliance for the household’s lifecycle.
Conclusion
To summarize, PEX emerges as a flexible, cost‑effective plumbing option—adaptable like a seasoned traveler steering through diverse terrains. Its three material types offer distinct strengths for different installs, while code, installation technique, and environmental considerations shape its suitability. Homeowners and professionals weigh durability, freeze resistance, fitting methods, and recyclability when selecting a system. With informed choices and proper permits, PEX can reliably serve modern plumbing needs, balancing performance, budget, and sustainability.