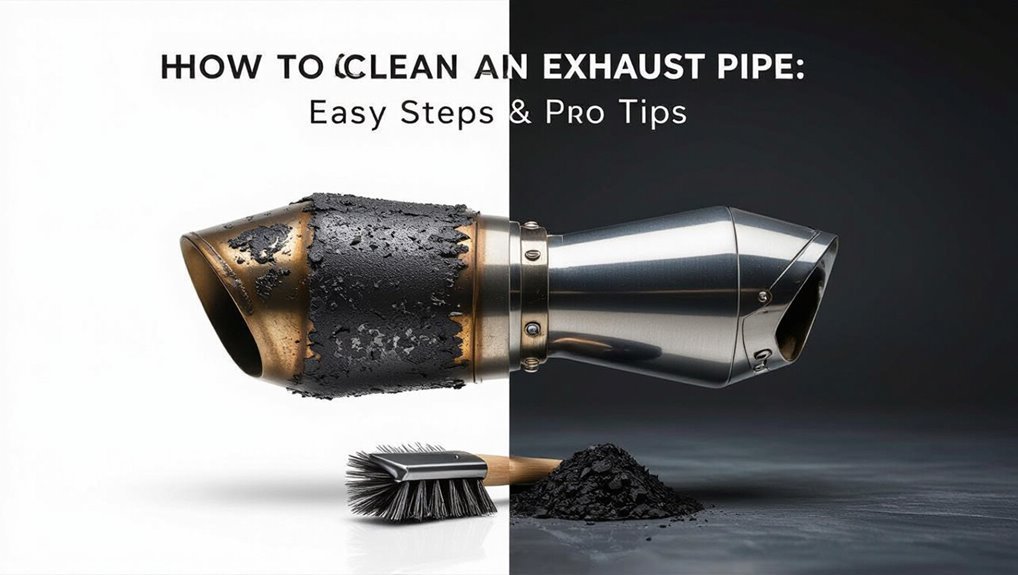
How to Clean an Exhaust Pipe: Easy Steps & Pro Tips
Quick Guide to Cleaning an Exhaust Pipe
To effectively clean your exhaust pipe, follow these straightforward steps:
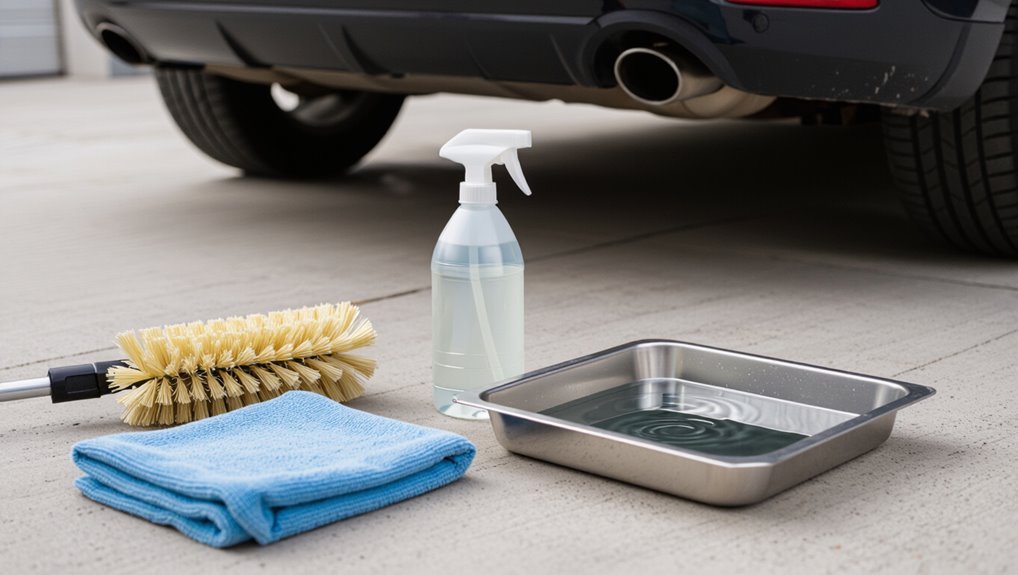
- Preparation: Ensure the vehicle is on level ground, cooled down, and the key is removed for safety. Always work in a well-ventilated area.
- Safety Gear: Wear gloves, eye protection, and a respirator if using chemical solvents.
- Initial Cleaning: Apply a degreaser to loosen surface grime. Use a nylon or brass brush to agitate the dirt.
- Rinse and Dry: Thoroughly rinse with water and dry the exhaust pipe completely.
- Finishing Touch: For shine, use a metal polish; for coated tips, choose a matte-safe cleaner.
- Inspection: Check for any signs of rust, leaks, or seized clamps and determine if repair or replacement is necessary.
By following these steps, you can maintain the appearance and functionality of your exhaust pipe effectively.
Quick 30‑Minute Exhaust Cleaning Checklist
In half an hour, a focused approach can restore an exhaust pipe’s appearance and function: gather basic tools (wire brush, degreaser, rags, protective gloves), park the vehicle on level ground with the engine cool, and work from exterior to interior—loosen surface grime, degrease, scrub, then wipe and inspect for remaining buildup or damage.
Begin by removing loose soot with short, firm strokes. Apply degreaser sparingly, let it dwell per instructions, then agitate stubborn residue with the brush. Rinse or wipe thoroughly until runoff is clear.
Dry with clean rags, recheck joints and mounting points, and reassemble if applicable.
How to Tell If Your Exhaust Pipe Needs Cleaning
Signs that an exhaust pipe needs cleaning include visible soot buildup, reduced engine responsiveness, and unusual odors from the tailpipe.
Observing dark, flaky deposits around the outlet often indicates accumulated residue.
Noting a drop in performance or persistent exhaust smells warrants inspection and possible cleaning.
Visible Soot Buildup
When black residue accumulates around an exhaust outlet, it indicates incomplete combustion or trapped particulates that should prompt inspection.
Visible soot buildup appears as layered, powdery deposits inside or around the tailpipe and can darken nearby metal. It often contrasts with cleaner chrome or stainless finishes and may smear when wiped with a cloth.
Regular visual checks reveal progressive accumulation; sudden heavy deposits warrant earlier attention.
Photographs taken over time help track changes.
Cleaning frequency depends on driving conditions and fuel type, but persistent soot suggests the pipe benefits from cleaning to restore appearance and prevent long-term corrosion.
Decreased Engine Performance
Reduced engine power and sluggish acceleration often signal that the exhaust system is restricted or contaminated, which can stem from heavy soot, carbon buildup, or a partially blocked pipe.
A technician or owner may notice reduced fuel economy, hesitations under load, or engine misfires linked to backpressure.
Regular checks of tailpipe flow and simple cleaning can restore performance before more costly repairs.
Symptoms should prompt inspection of the muffler, catalytic converter, and pipe interior.
If cleaning doesn’t help, professional diagnosis is advised to rule out internal engine or exhaust component failure.
- Slower acceleration than usual
- Drop in MPG
- Engine hesitation under load
- Check engine light illuminated
Unusual Exhaust Smell
How can an unusual exhaust odor indicate a need for pipe cleaning? An acrid, sulfuric, or rotten-egg smell suggests buildup of unburned fuel, oil, or catalytic converter inefficiency causing deposits in the pipe.
A sweet, syrupy scent can signal coolant leakage into combustion chambers, leading to residue.
Persistent burnt oil aroma points to oil entering the exhaust via seals or valve guides, accumulating and burning inside the pipe.
Intermittent fuel-like smells after starting hint at rich mixtures leaving deposits.
Noting odor type, duration, and accompanying symptoms (smoke, performance loss) helps determine whether cleaning, mechanical inspection, or component repair is required.
Choose Safety Gear for Exhaust Cleaning
Before touching any part of the exhaust system, the cleaner should assemble proper protective gear: heat-resistant gloves, safety goggles, a respirator rated for particulates and solvents, and long sleeves to shield skin from burns, metal shards, and chemical splashes.
The person evaluates fit and condition of each item, replacing worn or torn pieces.
Proper footwear and a fire-resistant apron are recommended if sparks are possible.
Inspect respirator cartridges for compatibility with chosen cleaners.
Dispose of contaminated PPE per local regulations.
Maintain ventilation to reduce inhalation risk and pause work if any protective element fails.
- Heat-resistant gloves
- Safety goggles
- Respirator with appropriate cartridges
- Long sleeves and protective footwear
Gather Tools and Materials for Exhaust Cleaning
Before starting work, a concise list of essential tools — wrenches, brushes, scrapers, and a pickup mirror — should be assembled.
A cleaning supplies checklist that includes degreaser, steel wool or brass brushes, rags, and a container for used solvent helps guarantee efficiency.
Required safety gear such as gloves, eye protection, and a respirator must be at hand and inspected for proper fit.
Essential Tools Needed
What tools are required to clean an exhaust pipe effectively? A concise selection of durable, purpose-built tools improves safety and efficiency. Protective gear prevents injury while access and agitation tools remove deposits. Inspection and finishing tools confirm cleanliness and restore appearance. Items should fit the pipe size and vehicle configuration; preference is given to stainless or corrosion-resistant materials for longevity.
- Mechanic’s gloves and safety glasses
- Wire brush set with long handle
- Flexible extension and socket wrench
- Microfiber cloths and polishing pad
Cleaning Supplies Checklist
For effective exhaust pipe cleaning, assemble a compact set of corrosion-resistant supplies tailored to the pipe diameter and vehicle layout: a degreaser or dedicated exhaust cleaner, stainless-steel wool or brass brushes for stubborn carbon, a non-abrasive metal polish, disposable shop rags or microfiber cloths, a spray lubricant or penetrating oil for seized fittings, and a bucket of warm water with mild detergent for initial rinsing.
Include a soft nylon brush for interior swabbing, a plastic scraper for scale, a spray bottle for diluted cleaner, lint-free polishing pads, and a small container for waste solution. Keep spare cloths and replacement brushes on hand.
Safety Gear Required
With the cleaning supplies assembled, attention turns to personal protective equipment that protects the user from sharp edges, hot surfaces, chemical exposure, and airborne particles. The individual should select durable gloves, eye protection, and respiratory gear appropriate for solvents and dust.
Heat-resistant gloves are needed if the exhaust was recently used; nitrile or chemical-resistant gloves protect against degreasers. Safety glasses or a face shield prevents splashes and debris. A respirator with organic vapor cartridges or at minimum an N95 masks guards against fumes and particulates. Sturdy closed-toe shoes and long sleeves complete the basic safety ensemble.
- Heat-resistant gloves
- Chemical-resistant gloves (nitrile)
- Safety glasses or face shield
- Respirator (organic vapor cartridges or N95)
Picking the Right Cleaner for Metal Exhausts
When choosing a cleaner for a metal exhaust, the priority should be compatibility with the specific metal—stainless steel, chrome, or aluminized surfaces each react differently to chemicals. The writer recommends selecting products labeled for the target finish: stainless cleaners for stainless, chrome polishes for chrome, and mild alkalines for aluminized steel.
Avoid acidic or abrasive formulas on plated surfaces to prevent pitting and discoloration. Consider residue-free, high-temperature safe options to withstand heat cycling.
For heavy soot, use solvent-based degreasers rated for metal; for light tarnish, a gentle polish suffices. Always follow manufacturer directions and test inconspicuously.
Pre‑Clean Inspection: Check for Damage and Leaks
After selecting a cleaner suited to the exhaust metal and testing it on an inconspicuous area, an inspection for damage and leaks should be performed before any cleaning begins.
The inspector notes dents, punctures, loose clamps, and rusted seams; each affects cleaning approach and safety.
With the vehicle cooled and on level ground, visual checks and light taps reveal thin areas, while a short engine run can expose audible leaks.
Small leaks may need temporary sealing; larger damage requires repair.
Document findings and decide whether cleaning in place is advisable or if service is needed.
- Visual scan for corrosion and cracks
- Tap test for thin metal
- Check clamps and hangers
- Listen for exhaust leaks
When to Remove the Exhaust Tip Vs. Clean It in Place
Before deciding whether to remove the exhaust tip or clean it in place, the inspector evaluates accessibility, condition, and risk: easy-to-reach tips without seized fasteners can often be cleaned on the vehicle, while heavily corroded, dented, or internally soiled tips—or those with frozen clamps—should be removed for thorough cleaning or repair to avoid damage and guarantee safety.
Cleaning in place suits light surface grime, minor soot buildup, and where removal risks nearby components.
Removal is chosen when corrosion, internal blockage, alignment issues, or muffler work require inspection. Practicality, time, and potential parts replacement guide the choice.
How to Remove an Exhaust Tip Safely
With the vehicle cooled and secured, the inspector begins removal of the exhaust tip by first evaluating attachment type and nearby components to plan tool choice and safety steps.
They wear gloves and eye protection, support the pipe to prevent strain, and loosen fasteners methodically.
Corroded clamps receive penetrating oil before gentle persuasion; welded tips require professional attention.
After detaching, the inspector inspects for damage, cleans mating surfaces, and temporarily caps openings to prevent debris entry.
- Identify clamp, bolt-on, or welded attachment
- Use penetrating oil for rusted hardware
- Support the assembly while loosening
- Inspect and protect exposed openings
How to Degrease Heavy Exhaust Buildup
Before applying solvents, one should assess the severity of the grease and carbon buildup to determine whether light cleaners or industrial-strength degreasers are required.
Select a degreaser formulated for heavy automotive deposits and follow manufacturer dilution and contact-time instructions.
Use appropriate safety gear (gloves, eye protection, and respirator if needed) and make certain the work area is well ventilated.
Assess Buildup Severity
Evaluate the condition of the exhaust pipe visually and by touch to determine if deposits are light, moderate, or heavy. The inspector notes color, texture, adhesion, and spread. Light soot wipes away; moderate requires scrubbing; heavy appears tar-like, layered, and resists basic cleaners.
Record areas with pitting, rust, or unusual odors suggesting oil or fuel residues. Assess accessibility and safety before starting removal.
- Note color gradients: black, brown, or metallic sheen
- Test adhesion with a gloved fingertip or plastic scraper
- Photograph spots for reference and progress
- Mark sections needing protective gear or mechanical tools
Choose Strong Degreasers
Select a degreaser formulated for heavy carbon, tar, and oil deposits, prioritizing industrial-strength, high-solvency products labeled for automotive exhaust or engine components.
Choose formulations specifying safe use on metal and chrome to avoid finishes damage.
Prefer gel or clinging sprays for vertical surfaces and extended dwell time.
Review active ingredients—solvents like petroleum distillates and citrus terpenes remove tar effectively; alkaline builders break down grease.
Check manufacturer guidance for contact time and dilution ratios.
Test on a small, inconspicuous area first.
Opt for products with rust inhibitors to protect exposed metal after cleaning.
Safety Gear And Ventilation
Having chosen a heavy-duty degreaser, attention shifts to safety gear and ventilation to protect the user and the workspace during application and agitation. Proper protection minimizes chemical exposure, inhalation risks, and skin irritation.
Work where airflow is strong: outdoors, near open windows, or under an exhaust fan. Keep ignition sources away when solvents are present. After use, ventilate until odors dissipate.
- Nitrile gloves, chemical-resistant and well-fitted
- Safety goggles or a face shield to prevent splashes
- Respirator with organic vapor cartridges for enclosed spaces
- Portable fan or open doors/windows to maintain cross-ventilation
Best Brushes for Exhaust Soot and Carbon
Choosing the right brush for exhaust soot and carbon hinges on bristle material, stiffness, and diameter to match the pipe’s size and deposit type.
Nylon brushes suit light soot and delicate finishes; brass or bronze provide firmer abrasion without excessive scratching on stainless steel.
Steel wire brushes remove heavy carbon but risk scoring softer metals; use them only where appropriate.
Flexible long-handled or coil brushes reach deep bends and resonators.
Cup or cone-shaped heads adapt to flared tips.
Quality construction—secure bristle anchoring and a comfortable handle—reduces bristle loss and improves control.
Match brush choice to deposit severity and metal hardness.
How to Scrub an Exhaust Pipe Without Scratching It
After identifying a brush that balances abrasion and softness for the pipe material and deposit level, care must be taken in technique to remove soot and carbon without leaving scratches.
One-inch strokes with consistent pressure prevent gouging; work wet with a mild cleaner to float grit away. Rinse often to avoid re-abrasion and inspect under good light; stop when micro-scratches appear and switch to a softer pad.
For stubborn spots, apply solvent, let it soak, then use gentle agitation.
Finish with a microfiber polish to restore shine and remove residue without abrading the surface.
- Use steady, overlapping strokes
- Keep the surface lubricated
- Change or rinse tools frequently
- Inspect and adapt pressure
Using a Wire Brush Without Damaging Chrome
How can a wire brush be used on chrome without leaving scratches or pitting? One should select a soft-bristled brass or nylon wire brush rather than steel; softer materials reduce abrasion.
Work gently with light pressure and short, controlled strokes following the pipe’s contour. Keep the brush clean of grit to avoid embedded particles scratching the surface.
Test on an inconspicuous spot first. Use steady motion to remove loose deposits, avoiding aggressive back-and-forth scrubbing.
After brushing, wipe with a microfiber cloth to remove residue and inspect for damage. Replace the brush when bristles deform or harden to maintain safety.
Using Chemical Cleaners Safely (Application & Dwell Time)
Before using chemical cleaners on an exhaust pipe, the product label should be read carefully for hazards and specific instructions.
The cleaner must be applied evenly and only to recommended areas to avoid streaks or damage.
The surface should be left undisturbed for the manufacturer’s specified dwell time before rinsing or wiping.
Read Product Label
When using chemical cleaners on an exhaust pipe, the product label is the primary source of instructions and safety information; it specifies correct dilution, application method, required dwell time, and any surface or material restrictions.
The reader must check warnings, required PPE, and compatibility with metal finishes.
Note first aid measures, disposal instructions, and ventilation recommendations.
Follow the specified dwell time precisely to allow active ingredients to work without overexposure.
Store and transport according to label guidance to prevent spills or reactions.
Reference the manufacturer contact for clarification or emergency information.
- Check PPE and ventilation requirements
- Verify metal compatibility
- Observe exact dwell time
- Follow disposal instructions
Apply Properly And Evenly
After confirming label instructions and PPE, the cleaner should be applied in a controlled, even layer to the exhaust pipe so active ingredients contact the entire affected area without pooling. Application tools (spray, brush) are chosen for coverage and material compatibility. Movement should be steady, avoiding excess and runoff; edges receive the same attention as flat areas. Ventilation and drip containment remain in place while residue is minimized. The operator notes start time for later removal per instructions and secures surroundings to prevent contact.
| Tool | Coverage | Caution |
|---|---|---|
| Spray nozzle | Broad | Overspray |
| Brush | Targeted | Abrasion |
| Cloth | Finishing | Saturation |
| Sponge | Local | Shedding |
| Applicator pad | Even | Contaminants |
Observe Recommended Dwell
In accordance with label directions, the cleaner must remain undisturbed on the exhaust pipe for the specified dwell time so active ingredients can break down deposits effectively. The recommended dwell varies by product and soil level; exceeding it may damage finishes or increase fumes, while shortening it reduces cleaning efficacy. Observers should time each application, keep the area ventilated, and avoid contact during activation. After the dwell, follow neutralization or rinse instructions precisely to remove residues.
- Time the dwell with a watch or phone
- Maintain good ventilation throughout
- Avoid touching treated surfaces
- Neutralize or rinse as directed
How to Clean the Inner Pipe and Deep Carbon Deposits
Using a combination of mechanical agitation and solvent treatment, the inner pipe and deep carbon deposits can be removed effectively without damaging the exhaust.
Begin by protecting surrounding areas and wearing gloves and eye protection.
Insert a flexible wire brush or dedicated exhaust brush into the pipe, rotating and advancing to loosen scale.
Apply a high-temperature carbon remover or solvent designed for metal; allow prescribed dwell time.
Repeat brushing to dislodge softened deposits, then use an air nozzle to blow loosened particles outward.
Inspect with a flashlight; repeat solvent and brushing cycles until deposits are minimized and airflow restored.
How to Flush the Exhaust Tip With Water Safely
Before introducing water to the exhaust tip, the writer emphasizes taking safety precautions such as ensuring the vehicle is cool, wearing gloves and eye protection, and positioning the car on a level, stable surface.
They note that only lukewarm water should be used to avoid thermal shock to metal and residue loosening, and that high-pressure sprays near seams should be avoided.
Finally, they recommend testing a small rinse first and checking for trapped moisture in joints before finishing.
Safety Precautions First
Although the exhaust cools quickly after shutdown, anyone flushing the tip with water should confirm the vehicle is fully off, the key removed, and the parking brake engaged; this prevents accidental starts and movement while working near the tailpipe.
Protective gloves and eye protection reduce burn and splash risks.
Work outdoors or in a well-ventilated area to avoid fume buildup.
Avoid directing water into the muffler opening or electrical components.
Follow manufacturer guidance for accessories and tools.
- Wear heat-resistant gloves and safety glasses
- Verify stable footing and good lighting
- Use a low-pressure hose or spray bottle
- Keep flammable materials away
Proper Water Temperature
When flushing an exhaust tip with water, the temperature of the fluid should be near ambient to prevent thermal shock to metal and any nearby seals; lukewarm water—around 15–30°C (60–86°F)—is ideal for loosening soot without causing rapid contraction or expansion. The worker tests water with a hand, avoids hot runoff, and guarantees the vehicle and exhaust are cool. Gentle flow and mild detergent improve cleaning while preventing damage. After rinsing, drying with a cloth or compressed air stops corrosion. Routine checks of seals and brackets follow.
| Step | Temperature | Purpose |
|---|---|---|
| 1 | 15–30°C | Loosen soot |
| 2 | ambient | Prevent shock |
| 3 | cool | Protect seals |
| 4 | dry | Prevent corrosion |
Dry and Polish Metal for a Lasting Shine
Once the exhaust pipe is visibly clean and free of moisture, a lint-free cloth or microfiber towel is used to thoroughly dry the surface to prevent water spots and corrosion.
Attention moves to polishing: a small amount of metal polish is applied with a soft cloth, worked in circular motions to remove fine oxidation and restore luster.
Stubborn blemishes are addressed with a non-abrasive pad, avoiding excessive pressure.
Final buffing with a clean microfiber brings out a uniform shine.
Routine inspection catches missed spots and keeps finish consistent.
- Apply polish sparingly
- Use gentle circular strokes
- Rinse cloths between passes
- Buff to a uniform shine
Protectants and Sealants to Slow Future Exhaust Buildup
To slow future soot and corrosion, a thin protective coating is applied to the cleaned, cooled exhaust surface, forming a barrier that repels moisture and ease removal of grime. The selection favors high-temperature ceramic sprays, silicone-based sealants, or clear heat-resistant lacquers. Application is light, even, and allowed to cure per product instructions. Reapplication after seasonal use preserves protection; inspect for chips or wear. Avoid coatings that trap moisture against seams. For longevity, combine coating with routine wipes after short trips to prevent buildup before it bonds.
| Product type | Benefit |
|---|---|
| Ceramic spray | Heat tolerance |
| Silicone lacquer | Flexible protection |
How to Remove Rust From an Exhaust Pipe
Begin by evaluating the extent of corrosion on the exhaust pipe, distinguishing surface rust that can be removed from deeper pitting or structural damage that may require part replacement.
For surface rust, start with wire brushing, follow with sandpaper or a rotary brush, then clean residue with solvent. Apply rust converter on stubborn flakes, let cure, and finish with high-temperature primer and paint or a stainless protector.
For deeply pitted or compromised sections, consult replacement options rather than attempt patching.
- Wire brush and sand to bright metal
- Use rust converter for stubborn areas
- Clean with solvent before coating
- Finish with high-temp primer and paint
Spot Welding, Holes, and Thin Metal: When to Repair
Assess whether spot welding or patching thin sections is appropriate by judging hole size, edge thickness, and surrounding metal condition.
Small punctures with solid edges and no deep corrosion respond well to spot welding or brazing; thin, flaking metal often resists heat and requires reinforcement.
For moderate holes, add a welded patch using compatible material, ensuring full penetration and smooth transitions to prevent stress risers.
Large or extensively corroded sections are better replaced to restore structural integrity and prevent leaks.
After repairs, inspect welds for porosity, grind smooth, and coat with high-temperature paint or sealant to inhibit recurrence.
Cleaning Muffler Tips Vs. Tailpipes: What’s Different
Compared with the tailpipe, the muffler tip is primarily a cosmetic and airflow-facing component, so cleaning approaches differ: muffler tips focus on removing surface deposits, chrome stains, and polish restoration, while tailpipes require attention to internal soot, creosote-like carbon buildup, and corrosion that can indicate deeper exhaust-system issues.
- Use metal polish, soft cloths, and mild abrasives for muffler tips to restore shine without damaging plating.
- For tailpipes, employ wire brushes and pipe cleaners to reach internal surfaces and dislodge compacted soot.
- Inspect tailpipes for pitting or scaling that signals corrosion needing repair.
- Rinse thoroughly and dry to prevent flash rust.
How to Clean Matte or Coated Exhaust Finishes
When cleaning matte or coated exhaust finishes, care is taken to preserve the factory appearance by avoiding harsh chemicals that can strip coatings.
Gentle, pH-neutral cleaners and soft microfiber cloths are recommended to remove grime without damaging the surface.
Abrasive pads, steel wool, and aggressive brushes are avoided because they can scratch or abrade the finish.
Preserve The Finish
With delicate coatings and matte finishes, cleaning requires gentler methods to avoid altering appearance or damaging the surface. The goal is to remove grime while preserving texture and color. Use soft microfiber cloths, low-abrasion tools, and minimal mechanical action.
Avoid high heat, aggressive polishing, or abrasive pads that can shine or strip coatings. Rinse thoroughly and dry by blotting rather than rubbing.
Regular light maintenance prevents buildup that demands harsher treatment later. When in doubt, test a small hidden area first and follow manufacturer guidance to maintain warranty and finish integrity.
- Use soft microfiber cloths
- Choose non-abrasive tools
- Rinse and blot dry
- Test an inconspicuous spot first
Use Gentle Cleaners
Regularly using gentle, pH-neutral cleaners helps protect matte and coated exhaust finishes while removing road grime, oil, and light oxidation.
The cleaner should be applied with a soft microfiber or lint-free cloth, worked in small sections, then rinsed or wiped away before drying.
Concentrated products must be diluted per manufacturer instructions to prevent residue.
Test any product on an inconspicuous area first to verify compatibility with the coating.
After cleaning, a dedicated matte-safe protectant can be applied sparingly to restore water repellency without adding gloss.
Regular, light maintenance reduces the need for stronger interventions later.
Avoid Abrasive Tools
Avoiding abrasive tools preserves the integrity of matte and coated exhaust finishes by preventing scratches, swirl marks, and coating loss.
Cleaners should be noncaustic; microfiber or soft cotton removes grime without abrading.
Mechanical brushes, steel wool, and scouring pads are inappropriate as they physically damage thin coatings.
When stubborn deposits persist, use chemical decontaminants formulated for coatings and follow product dwell times.
Rinse thoroughly and dry gently to avoid water spots.
- Use a soft microfiber cloth for wiping and buffing
- Choose pH-neutral cleaners labeled safe for coatings
- Avoid scrubbing with brushes that have stiff bristles
- Test any product on an inconspicuous area first
Eco‑Friendly Cleaners and DIY Exhaust Solutions
Choosing eco-friendly cleaners and simple DIY methods reduces chemical runoff and exposes users to fewer toxic fumes while effectively removing soot and grease from an exhaust pipe.
The article recommends mild biodegradable degreasers, diluted vinegar, and baking soda paste for surface grime.
A soft-bristled brush or microfiber cloth prevents scratching while loosening deposits.
For stubborn residues, repeated gentle applications and warm water rinse avoid harsh solvents.
Proper disposal of wash water, capturing runoff, and using drip pans protect soil and drains.
Routine light cleaning extends finish life and minimizes the need for aggressive treatments, promoting safer maintenance practices.
How to Remove Black Soot From Rich‑Running Engines
While eco-friendly cleaning and careful rinsing handle surface grime, black soot from an engine running rich requires a different approach. The soot is carbon buildup from incomplete combustion; removal combines mechanical agitation, targeted solvents, and preventive tuning.
Begin by protecting surroundings and using gloves and eye protection. Apply a solvent designed for carbon deposits, allow dwell time, then agitate with a nylon or brass brush to avoid scratching. Rinse and dry thoroughly. Inspect for persistent staining; repeat if necessary. Finally, address the root cause by adjusting fuel mixture or servicing ignition to prevent recurrence.
- Use carbon solvent appropriate for metals
- Agitate gently with nonabrasive brush
- Rinse and dry completely
- Correct fuel/ignition settings
Removing Tar, Road Grime, and Salt From Exhausts
When confronted with tar, road grime, and salt on an exhaust, start by securing the vehicle and cooling the pipe completely; these contaminants require different cleaners and careful technique to avoid damaging finishes.
Begin with a soft brush and mild degreaser for loose grime, rinsing thoroughly.
Use a plastic scraper and tar remover for stubborn deposits, testing on an inconspicuous spot first.
For salt corrosion, rinse with fresh water, apply a corrosion inhibitor, and lightly polish chrome or stainless trim with a nonabrasive metal polish.
Dry completely and inspect seals and welds; repeat targeted treatments until surfaces are clean and protected.
How Often to Clean Your Exhaust Pipe
After removing tar, road grime, and salt, owners should establish a regular cleaning schedule for exhaust pipes based on driving conditions and vehicle type.
Frequency varies: city drivers encounter more soot and salt, needing cleaning every 1–3 months; highway drivers may clean every 3–6 months.
Seasonal salt and coastal humidity demand inspections after winter or wet seasons.
Visual checks after heavy off-road use or after noticing soot build-up, rattles, or odd smells prompt immediate cleaning.
Proper intervals preserve appearance and prevent corrosion without over-cleaning.
- Check monthly in harsh conditions
- Inspect quarterly for mixed use
- Clean biannually for light highway use
- Detail after salt exposure
Motorcycle Exhausts and Header Cleaning Tips
When addressing motorcycle exhausts and headers, attention first turns to removing rust and scale to prevent corrosion and restore surface integrity.
Once cleaned, components benefit from polishing to remove oxidation and reveal the metal beneath.
A protective finish should then be applied to maintain appearance and slow future deterioration.
Remove Rust And Scale
Begin by evaluating the extent of rust and scale on the exhaust and headers to determine whether light surface corrosion, pitting, or heavy flaking is present.
For light rust, use fine steel wool or a brass brush with penetrating oil; for pitting, follow with a medium abrasive to remove loose material.
Heavier scale may require a rotary brush at low speed, protecting surrounding parts.
After removal, clean residues with solvent and dry thoroughly to prevent flash rust.
- Use penetrating oil before mechanical action
- Work gradually to avoid thinning metal
- Keep heat sources and bearings protected
- Inspect welds and replace if compromised
Polish And Protect Finish
Several straightforward steps restore shine and provide lasting protection for motorcycle exhausts and headers.
The surface is cleaned of residues, then a fine metal polish is applied with a microfiber pad in circular motions until blemishes fade.
Stubborn spots may require a non-abrasive polish or light buffing wheel at low speed.
After polishing, residues are removed with a clean cloth and an appropriate solvent to make certain adhesion.
A heat-resistant sealant or high-temperature wax is then applied sparingly to create a protective barrier against oxidation and road contaminants.
Final inspection confirms uniform finish and proper curing before use.
Truck and Diesel Exhaust Cleaning Tips
Tackle diesel and heavy-truck exhausts with methods tailored to thicker soot and tougher residues; professional-grade degreasers, high-temperature brushes, and pressure washing at controlled psi levels remove buildup without damaging chrome or welded joints.
Technicians should allow cool-down, protect sensors and DPF components, and use solvent-compatible wipes for crevices.
Prevent ingress into electronic modules and avoid prolonged soaking of rubber mounts.
After cleaning, inspect flanges, clamps, and heat shields for corrosion and restore protective coatings as needed to resist road salts and oil residues.
- Use diesel-specific degreasers
- Shield sensors and wiring
- Inspect mounting hardware
- Reapply corrosion protection
Avoid Common Mistakes When Cleaning Exhausts
After addressing diesel-specific techniques and hardware checks, attention should turn to common mistakes that undermine exhaust cleaning efforts. One should avoid harsh abrasives, skipping protective gear, neglecting inspection of seals, using inappropriate solvents, or forcing brushes into tight bends. Proper sequence, moderate pressure, and correct cleaners prolong component life.
| Mistake | Consequence |
|---|---|
| Harsh abrasives | Scratched metal |
| No PPE | Health risks |
| Wrong solvent | Coating damage |
| Excess force | Bent tips |
| Skipping inspection | Hidden leaks |
Consistent methodical cleaning, following manufacturer guidance, and pausing to inspect prevents damage and reduces repeat work.
Troubleshooting Stubborn Carbon Deposits
Identify stubborn carbon deposits by their hard, dark crust and resistance to normal brushes and cleaners.
The technician assesses thickness, location, and metal condition before choosing stronger methods. Mechanical removal with brass or nylon brushes reduces buildup; chemical cleaners formulated for carbon can loosen residue when used per instructions. Heat-assisted softening, via controlled torching or running the engine briefly, helps in some cases but requires caution to avoid damage. After removal, inspect for pitting and reapply protective finish. Regular maintenance prevents recurrence.
- Use appropriate personal protective equipment
- Test cleaners on a small area first
- Avoid steel wool on soft alloys
- Work in a ventilated area
When Cleaning Won’t Fix It: Signs You Need Replacement
When is cleaning no longer enough? Visible structural damage—cracks, holes, severe pitting—or flaking metal indicate failure beyond cosmetic repair.
Persistent exhaust leaks after gasket and joint checks, or loud, irregular noise despite cleaning, signal internal damage or misalignment.
Deep rust penetrating through the pipe wall and expanding corrosion that returns quickly after treatment suggest replacement.
If emissions tests fail due to internal baffle collapse or catalytic converter issues, cleaning won’t restore function.
Repeated repairs in short intervals, or repair costs approaching replacement price, also justify installing a new exhaust component for safety and longevity.
How to Prevent Exhaust Discoloration After Cleaning
Regularly applying a protective finish and controlling heat and contaminant exposure are the most effective ways to keep an exhaust pipe from discoloring after cleaning.
After polishing, a thin layer of high-temperature clear coat or chrome wax seals metal against oxygen and road grime. Avoid prolonged idling and aggressive driving that raise surface temperatures. Wipe off oil, brake dust, and road film promptly to prevent staining. Periodic inspections catch early color shifts so coatings can be reapplied.
- Use a high-temp lacquer or ceramic sealant
- Cool the pipe before applying products
- Remove fresh deposits promptly
- Reapply protective finish every few months
Seasonal Maintenance: Winter Salt and Summer Soot Care
After sealing and monitoring an exhaust pipe to prevent heat- and contaminant-induced discoloration, seasonal factors demand different care: winter road salt accelerates corrosion while summer riding produces heavier soot and carbon buildup.
During winter, prompt rinsing with fresh water after salty drives, periodic mild detergent washes, and thorough drying reduce chloride exposure; inspecting seams and mounting points for pitting prevents unnoticed deterioration.
In summer, more frequent de-greasing and mechanical soot removal (soft brushes, nonabrasive pads) keep flow and appearance ideal.
In both seasons, applying a high-temperature corrosion inhibitor and documenting condition changes supports timely repairs and extends service life.
How Performance Mods Change Cleaning Needs
Modifying an exhaust for increased flow or power alters its cleaning and inspection needs: larger-diameter pipes, high-flow headers, and performance coatings change soot patterns, raise operating temperatures, and expose welds and baffling to different stressors.
Owners should expect altered residue buildup, more frequent heat discoloration, and potential catalytic or sensor fouling depending on tuning.
Cleaning methods must account for coatings and material tolerances; aggressive abrasives or harsh chemicals can damage finishes.
Inspection should focus on mounts, joints, and heat-affected zones.
Adjust maintenance intervals based on use, tuning, and observed deposits.
- Check coatings before using cleaners
- Monitor welds and flanges
- Avoid abrasive scrubs on ceramic
- Increase inspection frequency
Professional Cleaning Vs. DIY: When to Hire a Shop
When exhaust issues require repairs beyond basic cleaning, a professional shop is often the safer choice. Trained technicians can address structural damage, emissions-system faults, and legal compliance that exceed typical DIY skills.
Safety risks from hot components and toxic residues also justify professional intervention.
When Repairs Exceed DIY
In deciding between a home remedy and professional service, the owner should weigh the visible damage, unusual noises, persistent smells, and the limits of personal tools and skills.
When repairs exceed DIY, technicians offer diagnostics, welded or replaced sections, and parts sourcing beyond consumer access.
Complex corrosion, internal baffle failure, or frame-mounted damage typically demand shop equipment and expertise.
Time, warranty needs, and resale concerns also favor professionals.
Cost comparisons should include tool rental and potential for incomplete fixes.
- Severe rust or perforation
- Internal blockages unreachable by hand tools
- Noises indicating structural failure
- Need for certified repair records
Safety Or Legal Concerns
Often, owners underestimate the safety and legal implications of cleaning an exhaust system themselves. Professionals recognize risks: burns, toxic fumes, and contact with hazardous residues.
Tampering with catalytic converters or emission-control devices can violate laws and void warranties. A shop offers proper containment, ventilation, and disposal of contaminated materials, plus certified repairs and documentation if emissions testing is required.
DIY is reasonable for surface polishing and minor soot removal; anything involving sensors, internal cleaning, or structural repair merits professional attention. When in doubt, consult a qualified technician to assure compliance, safety, and preservation of vehicle value.
Cost Estimate: Supplies Vs. Professional Service
Comparing the cost of cleaning an exhaust pipe at home versus hiring a professional requires tallying direct expenses and realistic time investment: DIY supplies such as degreasers, brushes, replacement clamps, and safety gear typically run low-to-mid-range, while professional service quotes include labor, disposal, and potential parts replacement that can double or triple the outlay; the decision hinges on pipe condition, the value of the owner’s time, and tolerance for risk or incomplete results.
- DIY: upfront tool and chemical expense, low recurring cost.
- Professional: higher immediate fee, warranty or guarantee possible.
- Hidden costs: disposal, travel, unexpected repairs.
- Time vs. quality trade-off.
Documenting Cleaning for Warranty or Resale
After weighing DIY costs against professional charges, attention should turn to documenting the cleaning process for warranty protection or future resale.
Clear records should include date, methods, products, and any parts removed or replaced. Photographs before, during, and after cleaning provide visual proof of condition and workmanship.
Retain receipts for cleaners, tools, and professional services; note technician names and shop contact details if applicable.
Store documentation digitally and as printed copies with the vehicle’s maintenance log. Concise, organized records increase buyer confidence and support warranty claims by demonstrating proper care and adherence to manufacturer guidelines.
Cleaning an Exhaust During a Mobile Detailing Visit
When a mobile detailer includes exhaust cleaning in a service visit, they guarantee safe access, containment of runoff and residues, and efficient workflow to minimize time on site.
The technician assesses vehicle position, shields nearby trim, and uses compact tools and absorbent pads to capture loosened grime.
Cleaning steps favor low-mess agents and rinseless techniques when water use is limited.
Final inspection guarantees no abrasive contact with sensors or heated components.
The detailer documents performed actions and any needed follow-up, then removes waste for proper disposal or return to the shop to avoid leaving residues at the customer’s location.
- Inspect access and protect surrounding surfaces
- Use low-mess cleaners and pads
- Capture and contain loosened residue
- Document actions and remove waste
Legal and Environmental Rules for Cleaning Exhausts
In addressing legal and environmental rules for cleaning exhausts, technicians must follow regulations that limit the discharge of metal particulates, solvents, and contaminated wash water into storm drains and soil.
Compliance requires use of approved containment, filtration, and disposal methods; documenting waste streams; and adhering to local hazardous waste codes.
Permits may be necessary for commercial operations and mobile services; failure risks fines and remediation orders.
Proper labeling, training, and use of biodegradable or low-toxicity cleaners reduce environmental impact.
Coordination with municipal waste authorities ensures lawful disposal.
Regular audits and updated practices keep operations within evolving environmental and occupational safety standards.
How to Restore Chrome Shine With Household Items
Using common household items, a dull or slightly pitted chrome exhaust can be restored to a bright, reflective finish without specialized tools.
First, cleanse surface grime with warm soapy water and a soft cloth; rinse and dry thoroughly.
Remove light rust or buildup using a paste of baking soda and water, gently rubbed with a microfiber or nylon pad.
For polishing, apply vinegar or lemon juice to dissolve tarnish, then buff with a dry cloth.
Finish with a thin coat of automotive wax or mineral oil to protect the shine.
- Soapy water cleanup
- Baking soda paste
- Vinegar or lemon polish
- Wax or mineral oil finish
Pro Mechanic Tips for Faster, Safer Cleaning
After restoring chrome with household cleaners, a mechanic shifts focus to techniques that speed the job while reducing risk. He wears nitrile gloves and eye protection, guarantees the vehicle is cool, and works in a well-ventilated area.
He uses a cordless impact driver with wire-wheel attachments for stubborn buildup, controlling speed to avoid metal damage. Compressed air clears loose debris before polishing, and quick-use chemical degreasers remove oily residue without prolonged soaking.
He inspects mounting hardware, tightens fasteners, and replaces damaged clamps. Finally, he documents procedures and products used to streamline future maintenance and guarantee consistent safety.
Quick Touch‑Up Routine Between Deep Cleans
Frequently, a brief touch‑up between full restorations preserves finish and minimizes future labor.
The technician inspects the tip and midpipe for fresh soot, light water spots, and minor oxidation.
Using microfiber, mild degreaser, and a gentle polish keeps metal bright without aggressive abrasion.
Quick routines extend intervals between deep cleans and reduce risk of surface pitting.
- Wipe cooled surfaces with a damp microfiber to remove dust.
- Apply a diluted degreaser sparingly; rinse and dry immediately.
- Use metal polish with light pressure on small areas.
- Finish with a dry microfiber buff to restore shine.
Conclusion
In a few gleaming minutes the exhaust pipe transforms from soot-black villain to chrome‑bright hero, as if garage sorcery erased years of road grime. Tools march like disciplined soldiers, cleaners sing their citrus hymns, and safety gear stands watchful at the gates. With rhythm and routine, even stubborn carbon yields, promising rides that purr and reflect. Regular touchups keep the shine triumphant, turning maintenance into a small, satisfying ritual of mechanical pride.