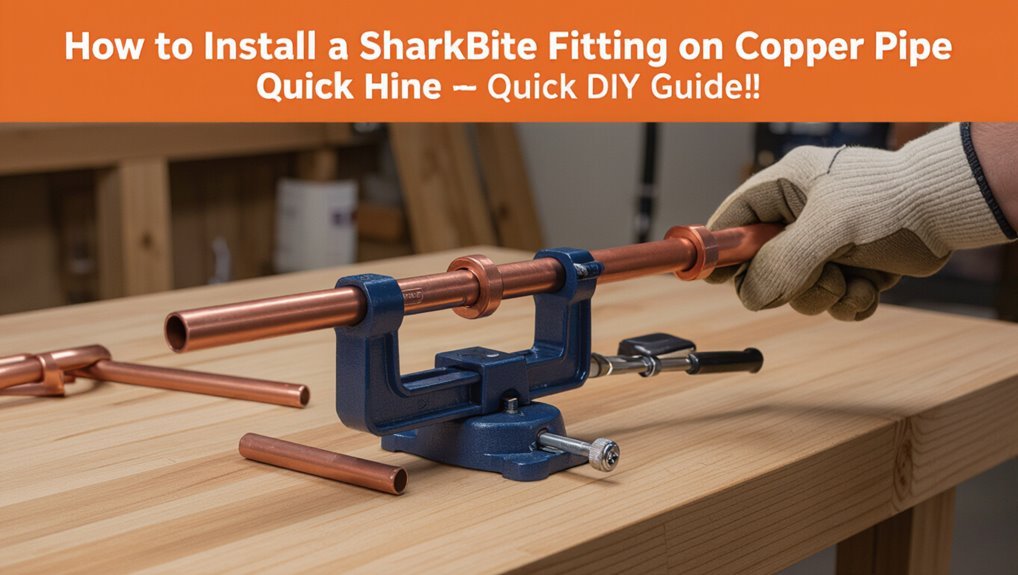
How to Install a Sharkbite Fitting on Copper Pipe €” Quick DIY Guide
To install a SharkBite fitting on copper pipe, follow these steps:
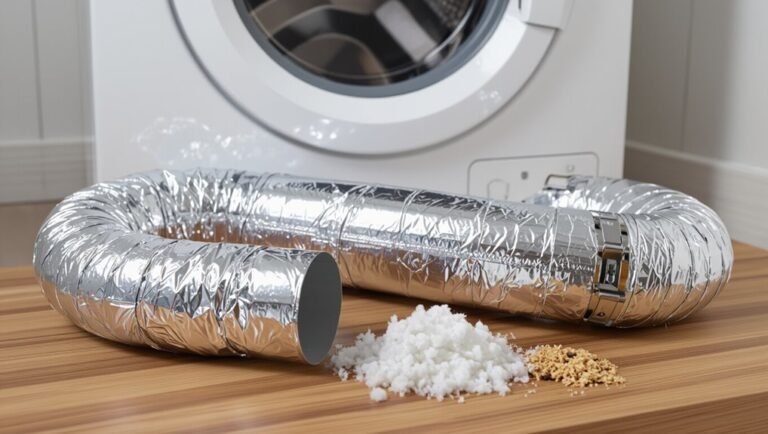
- Shut off Water: Ensure the water supply is turned off before beginning.
- Cut the Pipe: Cut the copper pipe square to the desired length.
- Deburr and Clean: Remove any burrs and clean the ends of the pipe thoroughly.
- Mark Insertion Depth: Mark the correct insertion depth on the pipe for proper fitting.
- Attach the Fitting: Push the SharkBite fitting straight onto the pipe until it fully seats against the shoulder.
- Test the Connection: Gently pull on the fitting to confirm it is securely attached.
- Re-pressurize and Inspect: Turn the water back on and check the joint for any leaks.
- Support the Joint: Ensure the fitting is supported according to local codes.
Key Takeaway: Installing a SharkBite fitting is straightforward—cut, clean, insert, and test for leaks. Follow these steps for a successful installation.
Quick Answer: Installing SharkBite on Copper Pipe
Begin by shutting off the water and draining the line to prevent leaks; then cut and deburr the copper pipe squarely to guarantee a proper fit.
The installer measures and marks the insertion depth, verifies pipe cleanliness and absence of corrosion, and guarantees the O-ring seat is clear.
The SharkBite fitting is pushed onto the pipe with firm, straight pressure until it seats against the depth mark.
A gentle pull test confirms engagement.
For removal, a disconnect clip or tool compresses the stainless steel grab ring while sliding the pipe free.
The process requires no soldering, flame, or special tools beyond basics.
Who Should Use SharkBite Fittings
SharkBite fittings suit both homeowner DIYers seeking quick, tool-light repairs and professional plumbers needing reliable, time-saving connections.
Homeowners benefit from the fittings’ simplicity for stopgap fixes or small projects, while pros may use them for service work, tight spaces, or when soldering is impractical.
Consider project scope, local code, and long-term expectations when choosing between DIY use and professional application.
Homeowner DIYers
Many homeowners find push-to-connect fittings well suited to routine repairs and small remodeling projects because they require no soldering, special tools, or extensive plumbing experience. Homeowner DIYers benefit from SharkBite fittings for their speed, reversibility, and clear installation steps. They work well for shutoff replacements, fixture swaps, and temporary fixes while waiting for professional service. Important considerations include pipe condition, access, and local code allowances. Simple testing for leaks and proper pipe deburring remain essential. The fittings are practical when confidence and scope are modest but are not a substitute for complex system work.
| Use case | Skill level | Typical tools |
|---|---|---|
| Shutoff swaps | Beginner | Cutter, marker |
| Fixture moves | Intermediate | Deburr, cloth |
| Temporary fixes | Beginner | Wrench, tester |
Professional Plumbers
Professional plumbers frequently choose push-to-connect fittings for specific tasks where speed, reliability, and code compliance are paramount.
They rely on SharkBite for repairs, remodels, or temporary connections when soldering is impractical or disruptive.
Training and experience allow assessment of suitability—pressure rating, pipe condition, and local code acceptance—ensuring long-term performance.
Professionals prefer SharkBite for emergency fixes, tight spaces, and projects requiring quick inspection-ready results.
They also document installations and use proper testing procedures.
While not a universal replacement for traditional joints, licensed plumbers view SharkBite as an essential, code-compliant tool when selected and installed according to manufacturer guidelines.
Why Choose SharkBite for Copper Pipe Work
SharkBite fittings are highlighted for their faster, tool-free connections that markedly cut installation time.
They provide a reliable, user-friendly option for joining copper pipe without soldering or specialized equipment.
The push-to-connect design creates a consistent, leak-resistant seal suitable for many residential and commercial repairs.
Faster, Tool-Free Connections
Choose push-to-connect fittings to speed work on copper pipe: they slip on without solder, flux, or specialized tools, cutting installation time and reducing skill requirements.
Installers simply deburr and square the pipe end, mark insertion depth, push the fitting on, and verify alignment.
This method minimizes job-site setup and eliminates flame hazards, permit needs, and cool-down waits.
Ideal for tight spaces, emergency repairs, and retrofit projects, the fittings permit quick disassembly for repositioning or replacement.
Contractors and DIYers benefit from predictable, repeatable assembly steps that streamline workflows, save labor hours, and simplify inventory compared with traditional joining methods.
Reliable, Leak-Resistant Seal
Because a secure joint is central to system performance, SharkBite push-to-connect fittings use a combination of an EPDM O-ring and stainless-steel grab ring to create a reliable, leak-resistant seal on copper pipe.
The grab ring bites into the tube to resist axial pullout while the O-ring compresses to form a watertight barrier.
Installation requires proper tube preparation—clean, deburr, and mark insertion depth—to guarantee consistent compression and engagement.
Tested for pressure and temperature ranges common in residential plumbing, these fittings reduce leak risk versus poorly soldered or improperly crimped joints.
Their predictable sealing behavior supports repairs, remodels, and temporary connections.
Tools Needed for SharkBite on Copper
A small set of basic hand tools and a few specialty items will cover the tasks required to install push-fit fittings on copper pipe; these include a tubing cutter, deburring tool or reamer, measuring tape or marker, and a reliable wrench for tightening threaded adaptors.
Additional useful tools include a pipe brush or emery cloth to clean outside surfaces, a spring or zip tie to maintain alignment when inserting pipe, and slip-joint pliers for grip. A small level helps guarantee runs are straight.
Optional items: flashlight for confined spaces and a rag for wiping debris. Proper tools reduce installation errors.
Materials Checklist: SharkBite Parts
For a successful SharkBite installation on copper pipe, assemble the specific fittings and accessories required for the job: straight couplings, elbows, tees, and reducers in the correct diameters; SharkBite stop valves and threaded adaptors where connections to fixtures or existing pipe are needed; end caps and ball valves for isolation; and a supply of replacement O-rings or retaining clips if working on older fittings.
Also include pipe cutters, deburring tools, and a marker to prepare pipe ends; a tape measure and calipers to verify sizing; a small container for parts; and gloves to keep components clean. Purchase extras of common sizes.
Safety Precautions Before You Start
Why inspect the work area and tools before cutting or connecting? The installer verifies water is shut off, drains lines, and relieves pressure to prevent leaks and injury.
Protective gear—gloves, safety glasses—is donned to guard against metal shards and splashes.
The workspace is cleared of flammable materials and trip hazards; adequate lighting and ventilation are confirmed.
Tools are checked for condition and correct size; damaged blades or burrs are replaced.
Nearby shutoffs, electrical sources, and exposed wiring are identified to avoid accidental contact.
A bucket and towels are placed to catch residual water and contain mess.
How to Choose the Right SharkBite Fitting
Selecting the correct SharkBite fitting begins with verifying pipe size compatibility to guarantee a secure, leak-free connection.
Attention then turns to the fitting’s material and pressure ratings to match the system’s operating conditions.
Choosing a fitting that meets both size and rating requirements reduces the risk of failure and simplifies installation.
Pipe Size Compatibility
Choosing the correct SharkBite fitting hinges primarily on matching the fitting’s nominal size to the pipe’s actual outer diameter; mismatches cause leaks or poor engagement. Practitioners measure the copper pipe OD with calipers or a tape, then select the SharkBite size stamped on the fitting (e.g., 1/2″, 3/4″).
Compression-style markings differ from copper nominal dimensions, so reliance on OD is essential. For changeovers, use the appropriate adapter type rather than forcing sizes.
Verify that insertion depth aligns with manufacturer specifications to guarantee the grab ring and O-ring seat properly. Accurate sizing prevents installation failures and water damage.
Material And Pressure Ratings
When evaluating SharkBite fittings, attention to material composition and rated pressure is essential to make certain compatibility with the system’s fluid, temperature range, and operating pressure.
The fittings are typically brass with EPDM O-rings; brass resists corrosion in potable water but may not suit aggressive chemicals. Confirm O-ring material if fluids differ or elevated temperatures occur.
Pressure ratings vary by size and type; most are rated to 200 psi for cold water and lower at high temperatures—verify manufacturer specifications for hot-water use.
Select fittings whose material and pressure ratings exceed maximum expected system conditions for safety and longevity.
Measure and Mark Copper Pipe for SharkBite
Measure the copper pipe carefully and mark the insertion depth for the SharkBite fitting using a calibrated tape measure and a pencil or non-permanent marker.
The installer notes the fitting’s published insertion length, measures from the pipe end, and marks clearly on all sides to guarantee even seating.
Debris, burrs, or uneven surfaces near the mark are identified for later attention.
Confirm measurements against the fitting again before proceeding.
Use visible, removable marks and avoid permanent inks that could interfere with sealing surfaces.
Consistency and clear alignment marks reduce risk of under- or over-insertion.
- Verify insertion depth
- Mark circumference evenly
- Recheck measurement
How to Cut Copper Pipe Cleanly
With marks in place to show the correct insertion depth, the installer prepares to cut the copper pipe squarely to avoid fitting issues.
A tube cutter is selected for clean, controlled cuts; the wheel aligns with the mark, the cutter rotated around the pipe while tightening gradually. For tight spaces, a compact tubing cutter or a hacksaw with a fine-tooth blade may be used, supported to prevent deformation. Cutting oil reduces scoring with a saw.
The operator avoids twisting or bending the pipe and keeps steady pressure.
Once severed, the cut face is inspected for straightness and absence of cracks before moving on.
Deburr and Square the Pipe End Correctly
Before fitting a SharkBite coupling, the pipe end must be inspected for burrs and for a square, even cut.
Any sharp edges or metal shavings should be removed with a deburring tool or file to guarantee a proper seal.
A square cut end prevents misalignment and reduces the risk of leaks.
Check For Burrs
How should the cut end of a copper pipe look before a SharkBite fitting is applied? The installer inspects for burrs and sharp edges that can damage the O-ring or prevent full insertion.
Remove internal and external burrs with a deburring tool or file until the edge is smooth. Confirm cleanliness and dryness before fitting.
- Run a finger (carefully) around the ID and OD to detect roughness.
- Use a rotating deburring tool for the inside and a file or cloth for the outside; recheck.
- Make certain no metal shavings remain; wipe the pipe and fitting seat clean.
Square Cut End
Square the cut end so it sits perfectly perpendicular to the pipe’s bore; an uneven or angled cut can prevent full insertion into the SharkBite fitting and compromise the O-ring seal. The installer measures, marks, then uses a tube cutter or fine-toothed saw to achieve a square face. After cutting, deburring removes sharp edges and internal burrs that block seating. Verify squareness with a combination square or by rotating the pipe against a flat edge. Properly prepared ends guarantee reliable compression against the O-ring and prevent leaks.
| Tool | Purpose | Check |
|---|---|---|
| Tube cutter | Straight cut | Visual |
| Deburring tool | Remove burrs | Smooth edge |
| Combination square | Verify squareness | 90° alignment |
How to Dry-Fit and Verify the Pipe
With the fittings and pipe cut to length, the installer dry-fits each SharkBite connector onto the copper to confirm alignment and clearance for surrounding fixtures.
They check fit depth markings, make certain the pipe seats fully, and verify that no debris or burrs impede the connection.
Movement and rotation are tested to confirm space for future access and any insulation.
Sightlines to valves and joints are reviewed so service is possible without obstruction.
- Confirm full insertion and alignment.
- Verify surrounding clearance and access.
- Inspect pipe ends for cleanliness and squareness.
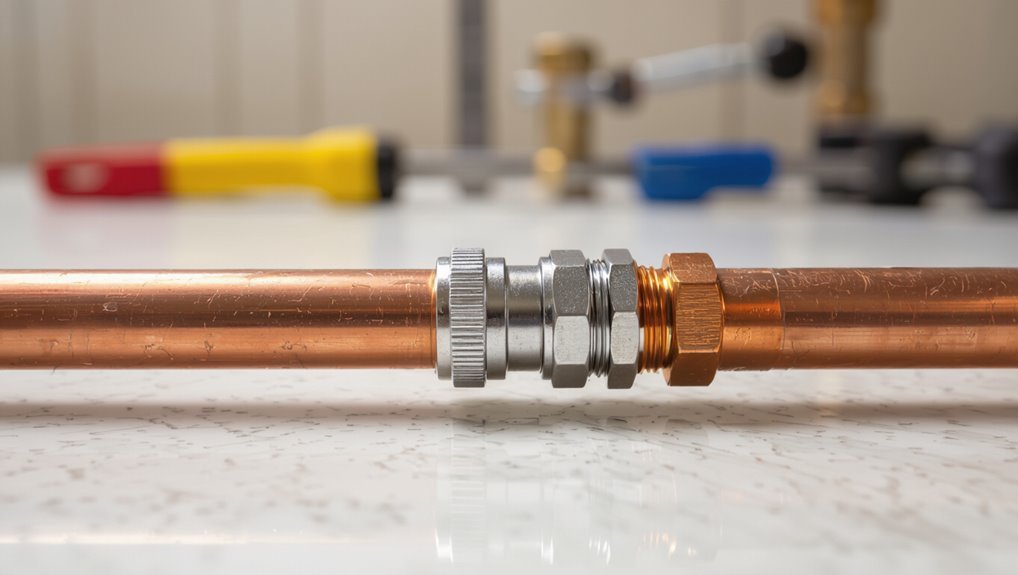
Step-by-Step: Install a SharkBite Fitting
Begin by preparing the joint area: make certain the copper pipe end is fully inserted to the fitting’s depth mark, clean, deburred, and free of moisture or debris, then push the SharkBite fitting onto the pipe using a firm, straight motion until it seats against the stop and the retaining teeth engage.
Verify alignment and orientation before seating. Rotate slightly to confirm the grab ring engages. Visually inspect the connection for even contact around the pipe circumference.
Test by applying moderate manual pull to make certain retention. Reopen downstream valves slowly, check for leaks, and monitor pressure for several minutes to confirm a watertight seal.
How Far to Push the Pipe: Depth Guide
The required insertion depth for each SharkBite fitting is specified by the manufacturer and must be reached to guarantee a secure, leak-free connection.
Technicians should mark the pipe at the correct depth before insertion and use that mark as a visual stop.
After seating the pipe, verification by feel and a final visual check confirms proper engagement with the internal O-ring and grab ring.
Required Insertion Depth
Measure the pipe carefully to make sure it reaches the fitting’s required insertion depth, typically marked on the SharkBite fitting or specified in the manufacturer’s documentation. Proper insertion guarantees the O-ring seats and the metal teeth bite the pipe for a secure, leak-free connection. Insert until resistance is felt and the pipe aligns with the depth indication.
- Use the fitting’s mark or chart to know the exact millimeter/inch depth.
- Account for any pipe burrs or deformation that reduce effective insertion.
- Do not rely on visual guesswork; consistent depth prevents leaks and fitting failure.
Marking And Verification
How far should the pipe be pushed into a SharkBite fitting? The installer measures the required insertion depth from the fitting end and marks the pipe with a permanent marker or tape.
A visible mark prevents under- or over-insertion; it should align with the collar when fully seated. After pushing the pipe until the mark meets the fitting body, the installer verifies by checking that the pipe cannot be pulled out easily and that the mark sits flush with the fitting edge.
If a depth gauge is available, it is used for consistency across multiple joints. Recut and re-debur if alignment fails.
When to Use Pipe Supports and Clamps
In tight spaces and long runs alike, pipe supports and clamps control movement, prevent sagging, and protect joints from stress.
Proper support spacing follows code and pipe size; horizontal copper typically needs supports every 3–6 feet, vertical runs require guides to prevent buckling.
Install clamps near fittings to reduce shear forces on SharkBite connections.
Use cushioned clamps where pipes contact framing to avoid abrasion and noise.
Consider thermal expansion: allow sliding supports or expansion loops for long hot-water lines.
Securely anchored supports simplify future service and preserve alignment, minimizing leak risk and prolonging system life.
- Follow spacing guidelines by pipe diameter
- Place clamps adjacent to fittings
- Use cushioned or sliding supports where needed
Make a Reliable SharkBite Tee on Copper Pipe
To create a reliable SharkBite tee on copper pipe, the installer first measures and marks the run and branch locations for accurate cuts.
Next, the cut ends are cleaned and deburred to guarantee a proper seal and prevent valve damage.
Finally, the tee is installed and pressure-tested to confirm a leak-free connection.
Measure And Mark
Where should the SharkBite tee sit on the copper run is determined by careful measurement and marking before any cutting occurs.
The installer measures from fixed reference points (valve, wall, appliance) to the tee centerline, noting allowances for the fitting depth and branch orientation.
Marks are made with a fine-tip pencil or masking tape to guarantee visibility.
Verify alignment and clearance for the branch direction and nearby fittings.
Record measurements for future inspection.
- Measure from reference to tee centerline precisely.
- Mark inlet, outlet, and branch locations clearly.
- Double-check distances and orientation before proceeding.
Clean And Deburr
Before cutting, the copper ends must be cleaned and deburred to guarantee a leak-free SharkBite connection.
The installer removes corrosion, solder, and oxidation with emery cloth or a wire brush until bright copper appears.
After cutting, a deburring tool or round file removes internal and external burs to prevent O-ring damage and secure full insertion.
The outside diameter should be smooth and free of deformities; a quick wipe with a clean rag removes metal dust and oil.
Verify the pipe end is square and the marking remains visible.
Proper cleaning and deburring increase seal reliability and fitting longevity.
Install And Test
Position the cleaned copper pipe and SharkBite tee so the marked insertion depths align with the fitting’s shoulders, ensuring the pipe remains straight and fully seated. The installer pushes the pipe into the tee until tactile resistance is felt and the shoulder is reached.
After assembly, the joint is visually inspected for full engagement and absence of debris. Pressurize the system slowly, checking the tee and nearby joints for leaks. If no leaks appear, bring system to normal pressure and recheck.
- Confirm seating depth and straight alignment.
- Inspect for gaps or debris.
- Pressure-test and recheck for leaks.
How to Remove a SharkBite Fitting Safely
To remove a SharkBite fitting safely, the technician first shuts off the main water supply and relieves pressure by opening a downstream faucet; this prevents water discharge when the connector is released. The technician uses a proper oil or plastic disconnect tool, positions it fully against the fitting collar, and applies steady inward pressure while pulling the pipe straight out. Inspect the pipe end and fitting for damage. Cap or replace components as needed. Restore water slowly and check for leaks.
| Step | Action |
|---|---|
| 1 | Shut off water |
| 2 | Relieve pressure |
| 3 | Use disconnect tool |
| 4 | Pull straight |
| 5 | Inspect and cap |
Reuse: Repair or Re-Seat a SharkBite Connection
After removing or inspecting a SharkBite fitting, the technician may find the pipe or connector in good enough condition to be reused rather than replaced.
Reuse requires verifying O-ring integrity, removing corrosion or burrs, and ensuring the pipe end is square and clean.
If the grab ring shows no deformation and the O-ring is intact, re-seating can restore a reliable seal.
Steps to proceed:
- Clean pipe end, file burrs, and deburr inside diameter.
- Inspect and replace the O-ring if hardened; lubricate with approved silicone grease.
- Push the fitting fully onto the pipe until it seats and test for leaks.
Common Mistakes When Installing SharkBite
What common errors undermine SharkBite installs and how can they be avoided?
Improper pipe preparation—failing to deburr, square-cut, and remove oxidation—prevents full engagement.
Skipping measurement or misaligning joints causes stress and leaks.
Inserting pipe without marking depth risks incomplete seating.
Using damaged, dirty, or incompatible pipe and fittings reduces seal reliability.
Overheating nearby fittings with solder or using thread sealant inside SharkBite bodies contaminates O-rings.
Reusing worn fittings beyond manufacturer guidance invites failure.
Neglecting to follow manufacturer torque or installation steps voids warranties.
Avoid these mistakes by careful prep, correct tools, and following SharkBite instructions precisely.
Pressure Test and Leak-Check Steps
Having addressed common installation errors, the next step is to confirm system integrity through systematic pressure testing and leak checks.
The installer isolates the branch, reopens supply slowly, and observes fittings for visible seepage. A pressure gauge and a shutoff cap or test plug verify holding pressure; allow recommended dwell time.
If pressure drops or moisture appears, depressurize, disassemble the joint, and inspect tubing end, depth, and O-ring contact before reassembling.
Final steps document test readings and monitor periodically. Follow local codes for test pressures and durations to guarantee a compliant, leak-free connection.
- Prepare and isolate
- Apply and hold pressure
- Inspect and document
When Not to Use SharkBite Fittings
In specific situations, SharkBite fittings should be avoided: they are unsuitable for permanently buried or concealed installations where mechanical access for future repair is impossible, for systems exposed to continuous high heat above the fitting’s rated temperature, and where local codes or insurance policies prohibit push-to-connect devices.
They are also not recommended for long-term submerged outdoor applications without manufacturer confirmation, or where aggressive chemicals or galvanic environments could degrade seals.
Avoid use on damaged, heavily corroded, or misshapen copper tubing that prevents a proper grip.
When vibration, cyclic movement, or excessive pressure fluctuations are expected, alternative jointing methods should be selected.
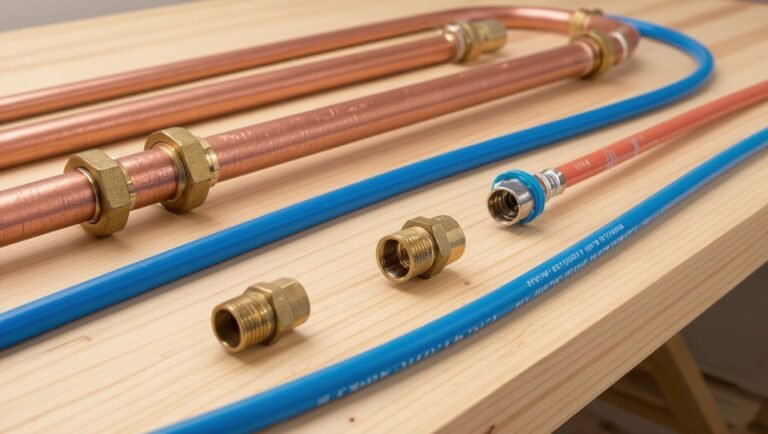
SharkBite vs Soldering and Compression Fittings
Compared directly, SharkBite push-to-connect fittings, traditional soldered joints, and compression fittings each offer distinct trade-offs in speed, required skill, and long-term reliability.
SharkBites permit rapid, tool-free connections and are ideal for repairs or tight spaces; they require minimal skill but may be less preferred in concealed, long-term installations.
Soldered joints demand skill, a torch, and clean preparation; they create durable, permanent seals suited to new work.
Compression fittings use mechanical seals without heat, useful where soldering is impractical but need periodic retightening.
- SharkBite: fast, tool-free, repair-friendly
- Solder: permanent, skilled, durable
- Compression: mechanical, reusable, maintenance-needed
Cost, Time Savings, and When to Call a Plumber
When evaluating SharkBite fittings against soldered and compression methods, upfront material costs and labor time quickly become deciding factors.
SharkBite fittings cost more per unit but eliminate torch, flux, and solder expenses and reduce installation time dramatically.
For simple repairs and tight spaces, a homeowner saves money by avoiding professional hourly rates.
Complex systems, concealed leaks, main shutoff issues, or code-required joints still justify hiring a licensed plumber to guarantee compliance and long-term reliability.
Emergencies, lack of tools, or uncertainty about pipe condition are also reasons to call a pro.
Weigh parts cost versus labor risk when deciding.
Conclusion
He finishes the simple steps, heart quickened by the hiss of water turned on—will it hold? Fingers steady, eyes scan the joint; no drip appears. The quiet tension breaks into relief as the connection stays dry, cool metal meeting the push-fit snugly. Tools are set aside. A small triumph: a reliable SharkBite on copper, installed without flame, yet the memory of that first cautious moment lingers, reminding that careful checks always matter.