Fix Pipe Leak on Joint: Quick DIY Repair Guide for Homeowners
To quickly fix a leaking pipe joint, follow these steps:
- Shut Off the Water: Stop the water supply to prevent further leakage.
- Drain and Dry the Area: Remove any standing water and dry the surface around the leak.
- Identify the Pipe Material and Leak Type: Determine what kind of pipe you have (PVC, copper, etc.) and the nature of the leak (small thread, pinhole, or larger breach).
Quick Fix Options:
- Small Thread Leaks: Use PTFE tape or pipe dope to seal the threads.
- Pinhole Leaks: Apply epoxy putty to seal the hole.
- Larger Breaches: Use a rubber sleeve and hose clamps or a repair coupling to cover the damaged area.
After repairs, slowly re-pressurize the system and check for any remaining seepage. If the leak persists, is hidden, or if the pipe is corroded, it’s best to call a plumber for professional assistance.
Quick Answer: Stop a Leaking Joint Now

For an immediate fix to a leaking pipe joint, shut off the water supply to the affected line, dry the area, and apply a temporary seal such as pipe tape, epoxy putty, or a rubber patch clamped in place; these steps stop most leaks long enough for a permanent repair.
The homeowner assesses leak size and material, selects an appropriate temporary method, and follows product instructions.
After sealing, slowly restore water to check for seepage.
Note any corrosion or joint damage and document location.
Keep tools and replacement parts ready so a future permanent repair or professional intervention can proceed without delay.
Decide: DIY or Call a Plumber?
When should a homeowner attempt a repair and when is it wiser to call a plumber? A homeowner may handle minor, accessible joint drips with basic tools and parts, provided confidence with pipe fittings and local codes.
Choose DIY when the leak is small, water can be shut off easily, and no corrosion or hidden damage exists. Call a plumber for persistent leaks, bursts, extensive corrosion, soldered joints, gas lines, complex fittings, or when water damage risk is high. Professional intervention suits uncertain diagnosis, lack of tools, or insurance requirements.
Err on caution: improper fixes can worsen damage and increase costs.
Quick Safety Checklist Before You Start the Repair
Always check utilities and surroundings before touching the joint: shut off the water at the supply and drain the affected line, turn off nearby electrical circuits if water could reach outlets or appliances, and make sure gas lines are not involved.
Next, wear safety gear—gloves and eye protection—and guarantee adequate lighting and ventilation. Clear the work area of clutter and combustible materials.
Verify structural stability if the leak is near supports or ceilings. Have a phone nearby for emergencies and know the location of the main shutoffs and local utility numbers.
Inspect for corrosion, mold, or contaminated water before proceeding.
Tools Every Homeowner Should Have for Joint Leaks
The homeowner should assemble a compact kit focused on essential hand tools—adjustable wrench, pipe cutter, slip-joint pliers, and a wire brush—for accessing and preparing the joint.
Appropriate sealants and tapes, such as plumber’s tape and epoxy putty, should be included for temporary and permanent sealing.
Clear selection of these items speeds repairs and reduces the risk of making the leak worse.
Essential Hand Tools
Gathering a compact set of hand tools equips a homeowner to address most pipe-joint leaks quickly and safely. A focused kit minimizes damage, speeds diagnosis, and supports secure temporary or permanent repairs.
Key tools prioritize grip, cutting, measurement, and controlled force without requiring specialty equipment.
- Adjustable wrench — for nuts and fittings on varied pipe sizes.
- Slip-joint pliers — for gripping irregular shapes and steadying components.
- Tubing cutter or hacksaw — for clean pipe removal when replacing sections.
- Wire brush and utility knife — for cleaning joint surfaces and trimming materials prior to assembly.
Sealants And Tapes
Sealants-and-tapes form the frontline defense against small pipe-joint leaks, providing quick, reliable barriers that can be used for temporary holds or long-term fixes depending on the product.
Homeowners should keep PTFE thread tape for threaded fittings, silicone or plumber’s putty for small gaps, and epoxy putty for pinhole repairs and permanent sealing on wet or dry surfaces.
Self-fusing silicone tape wraps conform to irregular shapes and resist pressure temporarily.
Choose materials rated for the pipe’s temperature and fluid.
Clean, dry surfaces improve adhesion; follow cure times and manufacturer instructions.
Replace temporary fixes with proper repairs when possible.
Materials That Fix Most Leaking Joints
The section outlines the materials commonly used to stop leaks at joints, including pipe sealants, temporary patch options, and permanent repair compounds.
It compares their typical applications, ease of use, and expected durability.
Guidance is provided to help select the right material for a given leak scenario.
Common Pipe Sealants
Common pipe sealants fall into a few practical categories—thread tapes, pastes, anaerobic liquids, and epoxies—each suited to particular joint types and pressures. The homeowner should select based on pipe material, thread type, temperature, and system pressure.
Proper surface prep and following cure times guarantee lasting seals. Compatibility with potable water or fuel must be checked. Some sealants fill gaps; others bond metal-to-metal. Safety precautions include ventilation and gloves.
- PTFE thread tape — for threaded metal and plastic fittings.
- Pipe dope (paste) — thicker seal for uneven threads.
- Anaerobic sealant — cures in absence of air, ideal for metal threads.
- Epoxy putty — bonds and fills for structural leaks.
Temporary Patch Materials
For quick, short-term repairs on leaking joints, a handful of readily available materials can stop or slow leaks long enough for a permanent fix: PTFE tape and pipe dope for threaded connections, rubber patches or self-fusing silicone tape for small pinholes and hairline cracks, epoxy putty for filling gaps and adhering to metal or plastic, and hose clamps or repair sleeves to compress and support damaged sections.
Other practical options include rubber-lined repair tape for irregular surfaces, plumber’s putty for temporary sealing around fittings, and clamp-on couplings for larger breaches. Selection depends on pipe material, leak size, accessibility, and water pressure.
Permanent Repair Compounds
After temporary measures have stopped immediate water loss, attention shifts to permanent repair compounds designed to restore structural integrity and long-term watertightness.
The homeowner evaluates compound compatibility with pipe material, cure time, strength, and ease of use. Proper surface preparation and following manufacturer instructions guarantee durable joints.
Common choices include epoxies for rigid seals, silicone-based sealants for flexibility, polymer-modified mortars for larger breaches, and anaerobic sealants for metal threads. Selection depends on location, pressure, and exposure.
Professional consultation is recommended for high-pressure or concealed systems to confirm suitability and guarantee code compliance.
- Epoxy resin
- Silicone sealant
- Polymer mortar
- Anaerobic thread sealant
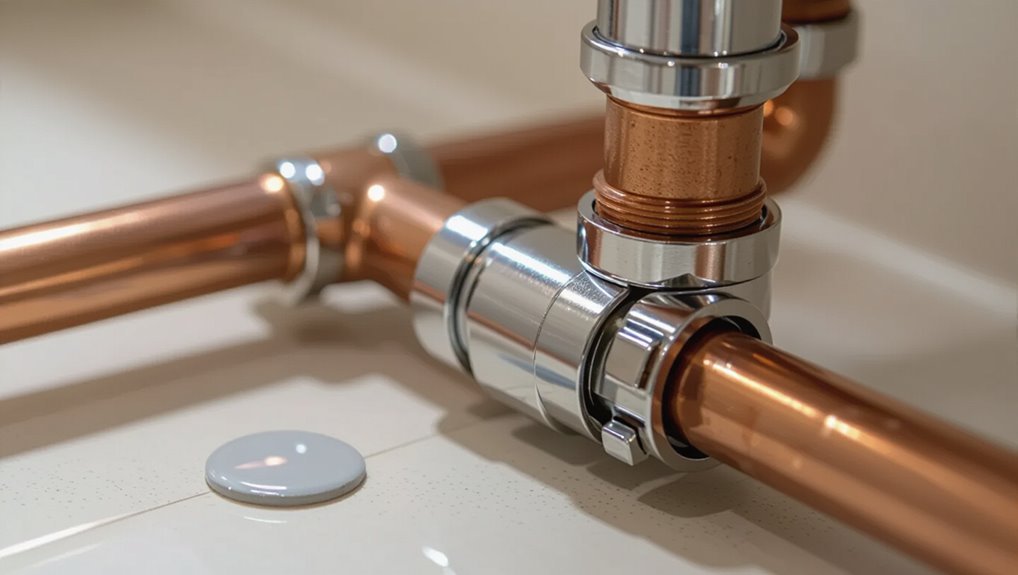
How to Identify Your Pipe Material (Copper, PVC, PEX)
Identifying whether a household pipe is copper, PVC, or PEX begins with a visual and tactile inspection: copper is metallic with a reddish-brown hue and often shows soldered joints; PVC is rigid, white or gray plastic with solvent-welded fittings; and PEX is flexible tubing available in red, blue, or white that connects with crimp, clamp, or push-fit fittings.
Additional cues include weight and sound—copper feels heavier and rings when tapped; PVC is lightweight and hollow-sounding; PEX is soft and will flex. Markings or stamping on the pipe often state material and size. Knowing the type guides compatible repair methods and fittings.
How to Locate the Exact Leaking Joint Fast
When a leak is suspected, the quickest route to the exact joint is a systematic wet/dry scan: visually inspect along the run for active drips, mineral stains, or fresh corrosion, then dry the area with a cloth and paper towels and watch for reappearance of moisture while listening for hissing or dripping; one person notes the spot while another traces upstream and downstream for dampness.
Use a flashlight and mirror for tight spaces.
Thermal camera or infrared thermometer can reveal cooler wet areas.
Mark the joint once found.
- Check visible signs closely
- Dry, then observe rewetting
- Use flashlight/mirror
- Scan with thermal tool
How to Shut Off Water and Relieve Pressure Safely
The first step is to locate and close the property’s main shutoff valve to stop water flow to the affected pipe.
After the main is off, open nearby faucets and a high drain to bleed remaining pressure from the system.
Confirm pressure relief by checking that water flow has stopped and a pressure gauge reads zero before beginning repairs.
Locate Main Shutoff
Before beginning repairs, a homeowner should locate and shut off the main water valve to stop flow and prevent further damage.
The main shutoff is typically near the water meter, basement wall, garage, or exterior foundation.
Identifying its type—wheel, lever, or ball—is essential so proper action can be taken.
If the valve is stiff, use a wrench gently or call a professional.
After closing, confirm no water runs from taps.
Keep emergency contact info and valve access clear for future incidents.
Proper identification and access prevent delays and reduce risk during joint leak repairs.
- Check common valve locations
- Note valve type
- Use correct tool if stiff
- Verify taps are off
Bleed Remaining Pressure
Shut off the main and open several faucets and lowest-level drain points to release trapped water and reduce pressure in the lines.
After valves close, inspect high and low fixtures until flow stops; run hot and cold taps to clear both systems.
If present, open outdoor hose bibs and attic/garage drains to vent isolated branches.
For systems with a pressure-reducing valve, confirm it’s isolated before proceeding.
Use a pressure gauge on a convenient spigot to verify near-zero pressure.
Wear eye protection and have towels ready for residual drips.
Do not attempt joint repairs until pressure is fully relieved.
How to Dry and Clean the Joint for a Lasting Repair
Once the leak source is identified, moisture and contaminants must be removed thoroughly to guarantee a durable repair. The joint is dried and cleaned methodically: remaining water is wiped away, corrosion or old sealant is scraped, and the surface is left free of oils and debris so adhesives or solder bond properly.
- Wipe joint with clean rags to remove pooled water.
- Use a small brush or scraper to remove corrosion, old tape, and sealant.
- Apply solvent or isopropyl alcohol to dissolve oils; allow it to evaporate fully.
- Inspect under good light; repeat cleaning until surface is visibly clean and dry.
Temporary Fixes to Stop Leaks Immediately
With the joint clean and dry, immediate measures can be applied to stop the leak while a permanent repair is prepared.
A rubber patch or bicycle inner tube piece affixed over the joint and clamped tightly with hose clamps or stainless steel bands often halts flow temporarily. Epoxy putty kneaded and pressed onto the leak cures to form a solid seal for small gaps.
For larger weeps, wrap multiple layers of rubber and tape, then secure with pipe repair clamps.
These temporary methods minimize water damage but require monitoring and replacement with a permanent repair as soon as feasible.
How to Use Plumber’s Tape Correctly on Threaded Joints
The section explains the essentials of preparing threaded pipe ends by cleaning and removing old sealant or debris to guarantee a tight fit.
It then outlines the correct method of wrapping plumber’s tape from the first thread outward, keeping tension and overlapping evenly.
Practical tips on how many wraps to apply and how to avoid tape bunching will follow.
Preparing Threads Properly
Before wrapping any threaded fitting, a technician should inspect and clean the threads to remove old tape, corrosion, and debris that can prevent a proper seal.
The technician uses a wire brush or rag and solvent, checks for nicks or cross-threading, and replaces damaged fittings.
Dry threads fully before proceeding.
Select appropriate tape grade for the pipe material and system pressure.
Assure male and female threads match and align during assembly to avoid damaging the tape.
- Clean with solvent and brush
- Remove old sealing material
- Inspect for damage or mismatched threads
- Dry and choose proper tape grade
Wrapping Tape Correctly
After preparing the threads properly, a technician should wrap plumber’s (PTFE) tape snugly around the male threads in the direction of the thread twist so the tape stays in place during assembly; the tape should overlap slightly, covering threads from the end back toward the pipe shoulder without extending past the first thread to avoid contamination.
Typically two to three wraps provide an effective seal for standard fittings; thicker tape or additional wraps suit larger or damaged threads.
Smooth the tape with a finger to seat it into crests, then assemble fittings hand-tight plus the recommended wrench turns, avoiding over-torquing that could cut the tape.
How to Use a Pipe Repair Clamp for Small Joint Leaks
For small leaks at pipe joints, a repair clamp offers a quick, reliable temporary fix by sealing the breach and restoring pressure control. The user selects a clamp sized to the pipe, shuts off water, and dries the area.
Positioning over the leak, bolts are hand-tightened, then evenly torqued to seal without deforming the pipe. After re-pressurizing, the repair is inspected for seepage and retorqued if needed. Clamps serve as interim solutions until proper joint replacement.
- Choose correct clamp size and material.
- Stop flow and dry joint.
- Center clamp and tighten evenly.
- Test and monitor for leaks.
How to Use a Rubber Sleeve and Hose Clamps for Quick Sealing
Using a short section of rubber sleeve secured with two hose clamps provides a fast, effective temporary seal for small leaks at joints or pinholes. The homeowner cleans and dries the area, centers the sleeve over the leak, then tightens clamps evenly to compress rubber without cutting the pipe. Pressure testing follows to confirm the stopgap. Removal is simple when permanent repair is planned.
| Material | Action | Result |
|---|---|---|
| Rubber sleeve | Slide over leak | Conforms to pipe |
| Hose clamp 1 | Tighten upstream | Prevents slip |
| Hose clamp 2 | Tighten downstream | Guarantees seal |
| Clean cloth | Dry surface | Better grip |
How to Apply Epoxy Putty for Pinhole and Joint Leaks
When a rubber sleeve is unsuitable for a permanent fix or the leak is small enough to patch directly, epoxy putty offers a durable option for pinholes and joint leaks.
The surface must be dry, clean, and free of corrosion; sandpaper or a wire brush improves adhesion. Knead equal parts until uniform color, press firmly over the defect, and shape to overlap surrounding pipe. Allow full cure per manufacturer before restoring pressure. For pressurized lines, drain and test at low pressure first.
- Clean surface thoroughly
- Mix until uniform color
- Apply and smooth with gloved fingers
- Cure fully before testing
How to Use Slip Couplings to Replace a Leaking Joint Section
Before beginning, the water supply should be shut off and the line drained to prevent flow during repairs.
The damaged section of pipe is then cut out cleanly to provide square ends for connection.
A slip coupling is slid over the joins and positioned to bridge the gap, then secured to restore a watertight seal.
Turn Off Water
To prepare for replacing a leaking joint with a slip coupling, the water supply to the affected section must be shut off and the lines drained so work can proceed safely and cleanly.
The homeowner locates the appropriate shutoff—fixture, branch, or main—verifies other fixtures remain dry, and notifies occupants.
After shutting the valve, open nearby taps and a drain to relieve pressure; check a pressure gauge if available.
Keep a bucket and towels ready.
Confirm isolation before touching the pipe.
- Find and close the correct shutoff valve.
- Open downstream faucets to drain.
- Relieve trapped pressure.
- Verify dryness before starting.
Cut Out Damaged
Cut out the damaged section by marking a straight line on the pipe at least 1–2 inches beyond visible corrosion or deformation, then score and cut evenly so the replacement piece seats squarely. The removed segment should be measured and cleaned; burrs and debris must be smoothed to assure proper alignment. Verify pipe ends are parallel and free of old sealant. Dry-fit the replacement to confirm length. Keep the work area clear and wear eye protection. Record measurements for the coupling. Use the table below for quick checks.
| Item | Check | Action |
|---|---|---|
| Length | Confirm | Trim if needed |
| Ends | Smooth | Deburr |
| Fit | Square | Re-measure |
Install Slip Coupling
With the damaged section removed and pipe ends squared and cleaned, the installer prepares to fit a slip coupling over the joint.
They confirm pipe diameters and select a coupling rated for the system (e.g., PVC, copper, or PEX).
Grease or primer is applied where required; the coupling sleeve slides fully over one end, the pipe is aligned, then the sleeve is centered between ends.
Fasteners or solvent are engaged per coupling type, and excess adhesive wiped away.
After cure time, the system is pressure-tested for leaks.
Proper seating and manufacturer instructions guarantee a durable repair.
- Verify size and material
- Apply primer/grease if needed
- Center coupling and secure
- Pressure-test after cure
Replacing a Threaded Joint on Metal Pipes: Step-by-Step
Begin by isolating the section of pipe and relieving system pressure to assure a safe working environment.
The worker removes fittings with appropriate wrenches, noting thread direction and condition. Corroded threads are cleaned with a wire brush; damaged sections are cut out squarely.
New male and female threaded ends receive pipe dope or PTFE tape applied correctly. The replacement joint is hand-started then tightened with wrenches to manufacturer torque guidance, avoiding over-tightening.
Once assembled, the system is slowly re-pressurized and inspected for leaks. Final checks ensure alignment, support, and absence of seepage before returning the system to service.
Replacing a Glued PVC Joint: Step-by-Step
Replacing a glued PVC joint begins with assembling the correct tools and materials, including a PVC cutter, primer, cement, replacement fittings, and safety gear.
The damaged section is cut out cleanly and removed to create true, square ends for rejoining.
Surfaces are then cleaned and primed before applying solvent cement and assembling the joint to the specified working time.
Tools And Materials
For a clean and durable replacement of a glued PVC joint, gathering the correct tools and materials beforehand is essential.
The homeowner should collect quality PVC cement matched to pipe type, primer where required, replacement pipe and fittings of identical diameter, and appropriate safety gear.
A solvent-safe rag and a small container for solvent disposal are also recommended.
Measuring tools guarantee correct lengths; a marker labels cut points.
Threaded tools or adapters are unnecessary for glued joints.
Inventorying parts and testing fit before adhesive application prevents delays and waste, enabling an efficient, reliable repair process.
- PVC cement and primer
- Replacement pipe/fittings
- Measuring tools and marker
- Safety gear and solvent rag
Cutting And Removal
Cut the damaged section of glued PVC using a fine-toothed saw or PVC pipe cutter, leaving enough straight pipe on each side for a proper splice and to allow clean faces for rejoining.
Support surrounding pipe to prevent stress while cutting. Mark cut locations with a square to guarantee perpendicular ends.
Remove any fittings or fragments carefully; pry gently with pliers if needed. File or deburr cut edges to remove burrs and roughness without altering diameter.
Measure the removed length to select the correct replacement piece. Inspect adjacent pipe and fittings for cracks or deformities before proceeding to the next step.
Clean And Reglue
After the cut faces are square and burr-free, the repair area must be thoroughly cleaned and prepared for solvent welding. All surfaces receive a wipe with a clean, lint-free cloth and PVC cleaner to remove grease, dirt, and oxidation.
Primer is applied where required, allowing adequate flash-off time. Solvent cement is then brushed evenly onto both socket and pipe, avoiding puddles. The joint is assembled with a quarter-turn and held for the manufacturer’s recommended set time. Excess cement is removed and the repair is protected from movement until full cure.
- Clean with PVC cleaner
- Prime if required
- Apply solvent cement
- Assemble and hold
Replacing a PEX Joint With Crimp or Clamp Fittings: Step-By-Step
Begin by shutting off the water supply and draining the line to guarantee a dry, pressure-free workspace; then remove the damaged PEX section and prepare the pipe ends for new fittings.
Measure and cut squarely, deburr, and slide crimp rings or stainless-steel clamps onto each pipe.
Insert the PEX fitting fully until the shoulder seats.
Position rings or clamps 1/8–1/4 inch from the pipe end and use the correct crimp tool or clamp driver to compress evenly.
Verify ring or clamp placement and crimp quality with a gauge if available.
Restore water, inspect for leaks, and retighten or replace fittings if necessary.
Should You Solder a Copper Joint?
The decision to solder a copper joint depends on pipe size, system pressure, and whether a permanent, watertight connection is required.
Proper soldering requires a torch, flux, solder, pipe cutter and brush, plus eye protection and good ventilation to manage heat and fumes.
For those without tools or comfort using a torch, compression fittings, push-fit connectors, or brazing by a pro are practical alternatives.
When To Solder Copper
Decide to solder a copper joint when a durable, leak-proof connection is required and the pipes are compatible with soldering—typically clean, annealed copper tubing with fittings designed for capillary action. Soldering suits pressurized potable water lines, permanent repairs, and areas where mechanical joints may vibrate or loosen. It is less appropriate for sections needing frequent disassembly or for non-copper materials. Evaluate access and ability to heat the joint evenly; restricted spaces or nearby combustible materials may favor alternatives. Consider pipe condition—severely corroded or thin-walled tubing may not take solder reliably.
- Permanent potable water lines
- High-pressure runs
- Vibration-prone areas
- Clean, compatible copper only
Tools And Safety Needs
Before soldering a copper joint, gather appropriate tools and confirm safety measures to guarantee a clean, effective connection and prevent injury or fire.
Required tools include a propane or MAP torch, lead-free solder, flux, wire brush or emery cloth, pipe cutter, fitting reamer, heat shield, and adjustable wrench.
Personal protective equipment: flame-resistant gloves, safety glasses, and a respirator if ventilation is poor.
Shut off and drain water, isolate the work area, remove combustible materials, and have a fire extinguisher ready.
Verify local codes and, when uncertain, consult a licensed plumber before proceeding with soldering.
Alternatives To Soldering
After preparing tools and safety measures for a soldered repair, homeowners and technicians should weigh whether soldering is the best method for a given copper joint.
Alternatives may be faster, safer, or more appropriate for wet lines, limited access, or temporary fixes.
Consider longevity, pressure rating, required skill, and cost when choosing a method.
- Compression fittings — reusable, no heat, suitable for accessible joints.
- Push-fit connectors — fast, no tools, good for repairs and DIY.
- Epoxy and sealants — temporary; for low-pressure or emergency stops.
- Brazing or mechanical coupling — professional options for higher strength.
Advanced: Brazing a Copper Joint Safely
Practitioners should treat brazing a copper joint as a precision task that combines proper preparation, heat control, and safety precautions to prevent leaks and injury.
Clean surfaces thoroughly, removing oxidation and flux-resistant contaminants; fit parts with correct clearance for capillary action.
Use appropriate brazing alloy and flux rated for copper plumbing; preheat evenly to avoid thermal shock.
Maintain a controlled flame, directing heat to the base metal rather than filler.
Watch for proper flow and fillet formation, then cool slowly.
Ventilate the workspace and wear eye, hand, and respiratory protection.
Inspect the joint under pressure testing for leaks before returning to service.
Checking and Repairing Compression Fittings Without Full Replacement
The technician inspects the compression nut for visible damage, corrosion, or looseness before proceeding.
If the ferrule sleeve shows wear or deformation, it is replaced with a correctly sized ferrule rather than swapping the entire fitting.
The nut is then re-tightened carefully to stop the leak while avoiding over-tightening that can crush the ferrule or crack the fitting.
Inspect The Compression Nut
Begin by visually and manually inspecting the compression nut for signs of looseness, corrosion, cracks, or cross-threading, since these defects commonly cause leaks at compression fittings.
The inspector should tighten gently with an appropriate wrench, avoiding overtightening that can deform the nut or ferrule.
Clean visible corrosion with a wire brush and apply a mild penetrating lubricant if threads bind.
If damage is superficial, smoothing rough spots with fine emery cloth may restore seating.
Confirm alignment of the tubing and nut before testing under low pressure.
If the nut remains defective or leaks persist, consider further repair steps.
- Tighten carefully
- Clean threads
- Smooth minor damage
- Test under low pressure
Replace The Ferrule Sleeve
When a compression fitting continues to leak after the nut has been checked, attention should turn to the ferrule sleeve: a small, often-ignored ring that seals tubing under compression and can deform, crack, or wear over time. The ferrule is removed, inspected for deformation or splits, and replaced if damaged. Proper ferrule seating and correct size matter; install the new ferrule onto the tubing, insert into the fitting, and hand-start the nut before final tightening. Test under low pressure, then normal service pressure. Replace ferrules matching material and tube diameter to make sure a lasting seal.
| Issue | Action |
|---|---|
| Deformed ferrule | Replace |
| Cracked ferrule | Replace |
| Wrong size | Select correct ferrule |
Re-Tighten Without Overdoing
After replacing or confirming the ferrule is sound, attention turns to re-tightening the compression nut without overdoing it. The goal is to restore a leak-free seal while avoiding overtightening that deforms the ferrule or damages the pipe. The technician hand-tightens, then uses a wrench for a quarter to half turn. After each small adjustment, the joint is tested under normal pressure.
If leaks persist after modest tightening, the ferrule or nut likely needs replacement. Follow a cautious, incremental approach and stop at the first secure, leak-free feel to preserve fitting integrity.
- Hand-tighten first, then wrench 1/4–1/2 turn.
- Test under normal pressure after each turn.
- Stop when leak ceases; avoid extra torque.
- Replace ferrule/nut if tightening fails.
How to Cut Out and Replace a Damaged Joint Section Cleanly
With the water supply shut off and the line drained, the technician marks a straight cut on each side of the damaged joint, leaving enough pipe for a secure coupling while avoiding any nearby fittings or obstructions.
Using a pipe cutter or hacksaw, the technician makes square cuts, deburring and cleaning each end to guarantee full contact.
The damaged section is removed, and the replacement piece is checked for correct length and alignment.
Clamps or supports hold pipes steady while couplings or sleeves are slid into place.
Fasteners are tightened evenly to manufacturer torque, and excess debris is cleared from the work area.
How to Prepare and Pressure-Test New Fittings for a Leak-Free Seal
Following the replacement section being secured and couplings tightened, attention shifts to preparing the new fittings and verifying their integrity under pressure.
The installer inspects threads or socket faces, removes debris, and applies appropriate sealant—PTFE tape for threaded joints, primer and solvent for PVC, or manufacturer-specified compounds.
Assemble fittings per torque recommendations and let adhesives cure if required.
Isolate the repaired section, connect a pressure source and a calibrated gauge, and slowly raise pressure to the working level plus safety margin.
Hold for the specified duration while monitoring the gauge and visible joints; any drop or seepage indicates rework.
- Inspect and clean mating surfaces
- Apply correct sealant or primer
- Assemble and allow cure/settling
- Pressurize slowly, hold, and monitor
How to Test Your Repair and Inspect for Hidden Leaks
How can the repaired section be verified beyond a visual check? The homeowner slowly restores water, watching pressure gauges or the meter for unexpected flow.
Hands feel fittings for moisture; paper towels detect slow weeps. A dry-paper or tissue method around joints reveals pinhole leaks.
For concealed lines, a listening scope or smartphone app may detect dripping. After pressurization, observe for 10–30 minutes, then recheck after several hours and the next day.
If available, apply a soap solution to reveal bubbles on pressurized joints. Any persistent change in meter reading or dampness indicates further investigation or professional service.
Handling Leaks on Hot-Water Joints Versus Cold-Water Joints
When comparing hot‑water joints to cold‑water joints, temperature and pressure differences require distinct handling: hot lines expand and accelerate chemical breakdown of seals, while cold lines may mask slow leaks due to condensation and lower pressure cycles.
- Inspect materials: prioritize heat-resistant sealants and PTFE tape rated for hot service on hot joints; standard variants suffice for cold.
- Tightening approach: allow for thermal expansion on hot joints—avoid over-tightening; cold joints can accept firmer initial torque.
- Replacement frequency: expect shorter seal and gasket life in hot systems; schedule inspections sooner.
- Temporary fixes: use high-temperature epoxy or clamp for hot lines; simpler rubber sleeves work for cold leaks.
How Water Pressure Affects Joint Leaks and What to Check
Temperature and fluid characteristics influence leak behavior, but water pressure often determines whether a joint shows no sign, a slow seep, or a sudden spray. The guide notes that higher pressure stresses seals, loosens fittings, and reveals marginal defects; low pressure can mask issues. Inspect visible fittings, listen for hissing, and check meters for unexplained flow when fixtures are off. Use a pressure gauge at an accessible spigot; compare to recommended household ranges (40–60 psi). If pressure spikes occur, note timing and correlating appliance use before tightening or replacing fittings.
| Checkpoint | Action |
|---|---|
| Visual | Inspect for wetness, stains |
| Diagnostic | Measure pressure, monitor meter |
| Timing | Note when leaks appear |
How to Treat Corroded Joints Before Repairing or Replacing
Before attempting repair or replacement, assess and stabilize corroded joints to prevent further damage and guarantee a reliable connection.
The inspector documents corrosion extent, shuts off water, and drains the line.
Corrosion scale is removed with a wire brush or emery cloth; chemical rust removers are applied cautiously and rinsed.
Cleaned surfaces are inspected for pitting; shallow pits may be smoothed, but deep pitting warrants replacement.
Threads are chased with appropriate dies.
After cleaning, apply a corrosion inhibitor or primer compatible with pipe material.
Finally, make certain fittings are dry and debris-free before proceeding to repair or replacement.
- Document condition
- Mechanical cleaning
- Chemical treatment
- Inspect for pitting
How to Prevent Recurring Leaks at the Same Joint
To prevent a joint from leaking repeatedly, a systematic approach addresses root causes rather than just sealing visible seepage.
Inspect surrounding pipe alignment, support, and vibration sources; correct misalignment and add clamps or hangers to reduce joint stress.
Replace degraded seals or solder and clean mating surfaces thoroughly before resealing.
Check water pressure and install a regulator if pressure spikes occur.
Use compatible materials and proper joint assembly techniques to avoid chemical or thermal mismatch.
After repair, monitor the joint for a few weeks and re-tighten or adjust supports as needed to guarantee a durable, long-term seal.
How to Choose the Right Replacement Fitting for Your Pipe Type
Choosing the correct replacement fitting begins with matching the fitting material to the existing pipe material to guarantee compatibility and prevent corrosion or failure.
The preferred connection type—soldered, threaded, compression, or push-fit—should align with the pipe material and the installer’s tools and skills. Selecting a fitting that satisfies both material and connection requirements reduces the risk of future leaks and simplifies installation.
Match Pipe Material
When replacing a leaking joint, matching the replacement fitting to the existing pipe material is essential to guarantee a proper seal and long-term reliability.
The installer should identify the pipe type—copper, PVC, CPVC, PEX, or galvanized—then select a fitting rated for that material and pressure.
Mismatched metals cancorrode; polymers require compatible solvent or compression connections.
Size and wall thickness must align with the pipe’s nominal diameter.
For mixed-material repairs, use approved adaptor fittings to prevent deterioration.
Verify local codes and manufacturer recommendations before installing the replacement to confirm safety and durability.
- Identify pipe material
- Confirm fitting rating
- Match dimensions
- Use approved adaptors
Consider Connection Type
After confirming pipe material and dimensions, the installer must evaluate connection types to guarantee a leak-proof joint.
Selection depends on pipe composition, pressure rating, accessibility, and permanence desired. Soldered and brazed fittings suit copper; compression fittings provide quick, non-soldered options for small repairs.
Threaded connections fit metal pipes with matching NPT or BSP threads, while solvent-welded fittings are required for PVC and CPVC.
Push-fit fittings work across materials for temporary or emergency fixes but verify pressure and temperature limits.
Match sealing method—solder, thread tape, solvent, or gasket—to material and application for a reliable, code-compliant repair.
Cost and Time Estimates for Common Joint Repairs
For common joint repairs, cost and time estimates hinge on joint type, access difficulty, and whether parts require replacement or only resealing. Typical tasks include tightening compression nuts, replacing O-rings, or re-soldering/brushing flux on copper. Simple resealing often costs under $20 in materials and takes 15–45 minutes. Replacing fittings or valves may run $20–80 and require 30–90 minutes. Soldering or replacing sections can take 1–3 hours and cost $30–120 in parts. More complex jobs increase time for drying, pressure tests, and system shutdowns.
- Compression/nut tightening: low cost, <1 hour
- O-ring/gasket swap: <$20, 15–45 min
- Fitting/valve replacement: $20–80, 30–90 min
- Solder/section replacement: $30–120, 1–3 hours
How to Protect Nearby Surfaces and Finishes During Repair
During pipe-joint repairs, protecting surrounding surfaces and finishes is essential to prevent stains, scratches, and heat damage. Lay down waterproof drop cloths or plastic sheeting to catch drips and debris. Use painter’s tape and cardboard or thin plywood to shield nearby cabinetry, countertops, and flooring edges. Place heat-resistant pads when soldering and keep a metal heat sink between pipe and trim.
Remove small movable items and cover fixtures with microfiber cloths to avoid scratches. Secure coverings with low-residue tape and check periodically for trapped moisture. Dispose of contaminated coverings promptly to avoid staining other areas.
How to Work in Tight Spaces and Under Sinks Effectively
Working beneath a sink or inside a cramped cabinet requires deliberate planning and compact tool selection to maintain access and avoid damage.
The writer recommends clearing the area, laying protective padding, and using focused task lighting.
Small, multi-function tools and flexible extensions reduce contortions.
Regular breaks prevent strain; goggles and gloves protect from drips.
Efficient workflow sequences—turn off water, release pressure, isolate the joint—minimize repeated entry into tight space.
- Prepare: clear, pad surfaces, position a bright work light.
- Select: compact wrenches, swivel sockets, magnetic trays.
- Protect: gloves, goggles, drip pans.
- Pace: short tasks, steady posture.
How to Document the Repair for Future Maintenance or Insurance
Once the leak is repaired and tools are cleared, documenting the work protects both future maintenance efforts and any insurance claims.
The homeowner records date, time, location, materials used, parts replaced, and step-by-step actions taken.
Photographs before, during, and after repair show condition and repairs; include close-ups of the joint and surrounding area.
Retain receipts, product labels, and any warranty information.
Note tests performed and outcomes (e.g., pressure test duration, no-drip confirmation).
Store records digitally and as printed copies in a labeled folder.
Clear, dated documentation speeds future diagnostics and substantiates claims if needed.
Building a Simple Homeowner Maintenance Checklist to Avoid Joint Leaks
To reduce the risk of joint leaks, a concise homeowner maintenance checklist focuses on regular inspections, simple preventive tasks, and timely documentation.
The checklist prioritizes visible joints, access points, and fittings indoors and in utility areas. It schedules monthly quick checks, quarterly closer inspections, and immediate notes for any anomalies. Record locations, date, observations, and actions taken to build a maintenance history that aids repairs and professional consultations.
- Inspect visible joints for dampness, corrosion, or loose fittings.
- Tighten accessible connections and replace worn seals.
- Clean around joints to detect early leaks.
- Log findings and schedule follow-ups.
How Seasonal Changes and Freezing Cause Joint Leaks and Fixes
Seasonally varying temperatures and moisture levels often stress pipe joints. Expansion and contraction from heat and cold loosen seals and fittings; repeated cycles fatigue solder, plastic, and compression rings.
In freezing conditions, water trapped near joints expands, cracking pipes or forcing fittings apart, producing hairline or sudden leaks. Thawing can wash debris into connections, worsening seals.
Preventive fixes include insulating exposed pipes and joints, maintaining steady indoor heat, and installing heat tape where needed. Temporary repairs—epoxy putty or rubber and hose-clamp patches—contain leaks until proper replacement or professional repair restores joint integrity and long-term reliability.
When a Leak Indicates a Larger Plumbing Problem to Investigate
Recognition of a single leak can sometimes signal a broader plumbing failure that warrants immediate investigation.
Observing nearby staining, recurring leaks, or pressure changes suggests systemic issues rather than an isolated joint failure. The homeowner should document symptoms, shut off water if needed, and consider professional assessment when patterns emerge.
- Multiple leak points appearing over time.
- Sudden water pressure loss or sputtering taps.
- Discolored water, sediment, or persistent odors.
- Soft floors, wall bulging, or unexplained mold growth.
These indicators point to corroded mains, hidden pipe breaks, or failing fittings requiring diagnostic testing and targeted remediation.
How to Shop Smart for Repair Parts and Avoid Low-Quality Materials
A parts-shopping checklist helps homeowners distinguish durable components from cheap substitutes when repairing a leaky joint. The checklist prioritizes material compatibility, pressure ratings, corrosion resistance, and manufacturer reputation.
Buyers should inspect fittings for solid construction, verify seals and threads match pipe type, and prefer brass, stainless steel, or rated plastics over unknown alloys. Compare part numbers, warranties, and read concise reviews focusing on longevity and failure modes.
Avoid unusually low prices without specs. When uncertain, consult local plumbing suppliers or bring the old part for direct comparison. Smart selection reduces repeat repairs and guarantees a reliable joint restoration.
Conclusion
Like a sailor mending a torn sail before a storm, the homeowner’s swift, steady care tames a leaking joint. With basic tools, proper materials and a safety-first mindset, small repairs restore order and buy time. Seasonal vigilance and sensible shopping prevent repeat trouble, while knowing when to summon a professional keeps the house from becoming a ship adrift. Patient maintenance turns minor drips into lasting calm.