Fix a Hole in a Copper Pipe: Quick DIY Repair Guide
Quick DIY Repair Guide for a Hole in a Copper Pipe
If you have a small hole in a copper pipe, you can quickly stop the leak with either a temporary or permanent solution. Here are some key takeaways for your repair:
- Shut Off the Water: First, turn off the water supply and drain the line to prevent any further leakage.
- Clean the Area: Use a wire brush or sandpaper to clean the area around the hole until you see bright copper.
- Choose Your Repair Method:
- Epoxy Putty: Apply this for a quick, temporary fix.
- Neoprene Sleeve: Use a neoprene sleeve secured with stainless clamps for a more durable solution.
- Cut and Replace: For a permanent fix, cut out the damaged section and use a compression or push-fit coupling.
- Soldered Sleeve: If you have soldering skills and enough space, you can use soldered sleeves for a lasting repair.
For detailed step-by-step precautions, tools required, and guidance on when to call a professional, continue reading.
Quick Answer: Best Fix for Most Small Copper-Pipe Holes
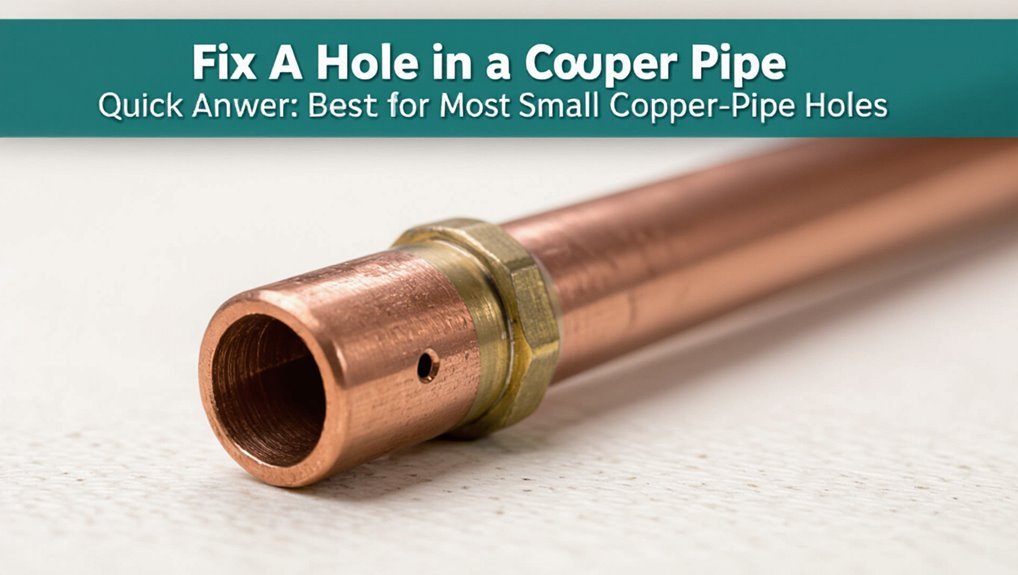
For most small holes in copper pipe, the fastest reliable repair is a soldered patch or a compression repair using a properly sized repair coupling; both restore full-pressure integrity when done correctly.
The technician assesses pipe condition, cleans surrounding metal, and selects a method compatible with available tools and pipe thickness.
Soldering requires flux, solder, and heat applied to a dry, clean surface; compression couplings need correct sizing and tightened fittings with backup support.
Both methods, when executed to code and tested under pressure, provide durable, leak-free results without replacing long pipe sections.
Safety and inspection follow completion.
Decide: DIY or Call a Pro for a Copper-Pipe Hole?
Decision-making hinges on the hole’s size and location, with small, accessible punctures differing greatly from larger or hidden breaches.
The homeowner’s skill level and comfort with soldering, cutting, or using clamps determines whether a safe repair is feasible.
Time and cost tradeoffs — immediate DIY savings versus potential long-term damage or professional guarantees — should guide the final choice.
Damage Size And Location
When evaluating a copper pipe hole, size and location determine whether a homeowner can reasonably repair it or should call a professional. Small pinholes or hairline cracks in accessible, above-ground runs often lend themselves to patching, soldering, or clamping.
Larger ruptures, burst sections, or holes at joints, elbows, or beneath flooring present greater risks: structural damage, hidden corrosion, or difficult access. Holes near gas lines, electrical wiring, or inside walls that require demolition favor professional assessment.
Consider whether the damaged length allows replacement of a short segment versus necessitating extensive rerouting. Err on the side of safety when uncertainty exists.
Your Skill Level
Evaluating one’s own skill level helps determine whether a homeowner should attempt a copper-pipe repair or hire a professional.
A clear, honest assessment of experience with plumbing, soldering, and basic tools guides the decision. Complex joints, hidden fittings, or uncertain diagnostics favor professional intervention. Novices should avoid risky improvisation; experienced DIYers can handle small punctures with proper materials and safety measures.
Consider personal tolerance for trial-and-error and ability to follow code or permit requirements.
- Tool familiarity: soldering iron, tubing cutter, emery cloth
- Prior plumbing repairs completed
- Confidence diagnosing root cause
- Willingness to accept liability and cleanup
Time And Cost Tradeoff
After evaluating skill level, the next consideration is how time and money influence whether to repair a small hole in a copper pipe oneself or hire a professional.
The DIY route saves labor costs but requires purchasing tools and materials, and may consume several hours for diagnosis, prep, and repair. A novice should factor possible mistakes, repeated attempts, and the value of their time.
Hiring a plumber increases immediate expense but typically shortens downtime, guarantees code-compliant work, and reduces risk of water damage.
For minor, accessible leaks an experienced homeowner may opt to DIY; for complex, hidden, or urgent cases, a pro is prudent.
3 Fast, Safe DIY Fixes for Small Copper-Pipe Holes
For small holes in copper pipe, homeowners can consider three practical DIY options: an epoxy putty patch, a rubber sleeve with a clamp, or a soldered copper repair.
Each method balances speed, durability, and required skill, with epoxy putty and sleeve clamps offering quick, low-skill fixes and soldering providing a longer-lasting but more technical solution.
Choosing among them depends on the hole size, access, and the repairer’s comfort with plumbing tools.
Epoxy Putty Patch
Mix two-part epoxy putty, press it firmly over the cleaned, dry area, and smooth it to seal small holes in copper pipe quickly and safely.
The method cures to a hard, water-resistant patch that restores pressure integrity for localized leaks.
Preparation is critical: sand to bright metal, remove oils, and keep the patch dry until set.
Typical cure times vary by product; consult instructions and avoid pressurizing prematurely.
Removal requires cutting or grinding if permanent replacement follows.
Advantages include speed, minimal tools, and suitability for confined spaces.
- Surface prep
- Knead equal parts
- Apply and shape
- Allow full cure
Rubber Sleeve Clamp
When a small hole appears in a copper pipe, a rubber sleeve clamp provides a quick, reliable temporary repair.
A neoprene or EPDM sleeve fits over the breach; a stainless-steel band or U-shaped clamp compresses the sleeve, sealing flow.
Preparation requires shutting water, drying the area, and removing corrosion or burrs so the sleeve seats evenly.
Installation is straightforward and reversible, making it suitable for emergencies or until permanent work is scheduled.
Limitations include pressure and temperature ratings—confirm compatibility—and that it is not a long-term substitute for proper replacement or soldered repair.
Inspect periodically for slippage or degradation.
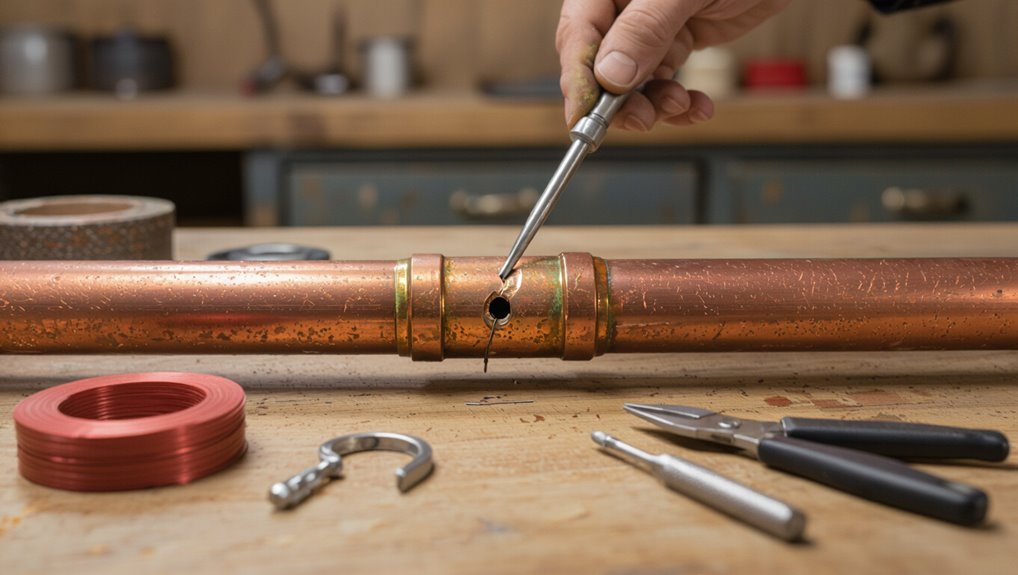
Soldered Copper Repair
Soldered copper repair restores a leaking copper pipe by cleaning the metal, applying flux, heating the joint, and drawing soft solder into the hole or seam to form a watertight bond. It suits small punctures and joints when water is shut off and lines drained. Proper heat control prevents damage and guarantees capillary action fills the gap. Safety gear, ventilation, and a fire-resistant pad are required. Use lead-free solder for potable lines. If corrosion or a large breach exists, replacement is preferable.
Steps summarize skill and caution needed for durable results:
- Clean and flux.
- Heat evenly.
- Apply solder.
- Inspect and test.
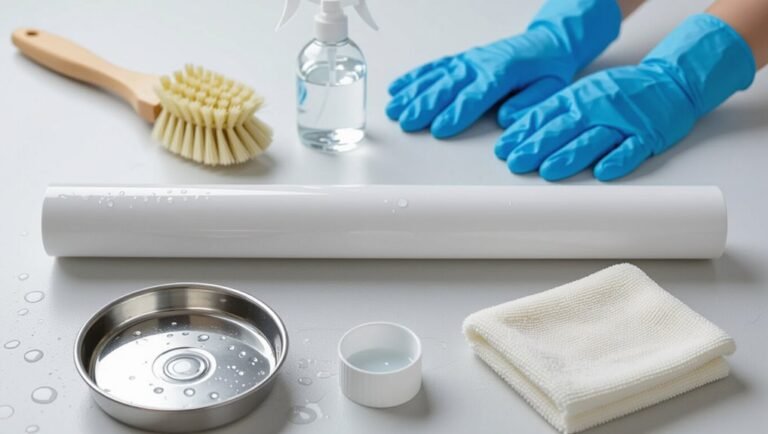
Tools and Materials for Copper-Pipe Repairs
Before beginning a copper-pipe repair, assemble the essential tools and materials to guarantee a smooth, safe job: a pipe cutter or hacksaw, emery cloth or sandpaper, flux, lead-free solder, a propane or MAPP gas torch, fitting brushes, replacement fittings or coupling, PTFE tape for threaded joints, pipe cleaning brush, a deburring tool, and appropriate safety gear (gloves, goggles, and a fire-resistant cloth).
Additional helpful items include a torch stand or heat shield, spare pipe sections, adjustable wrench, solder paste applicator, joint clamps, and a bucket or towels to catch residual water. Select materials rated for potable water and confirm compatibility with existing piping.
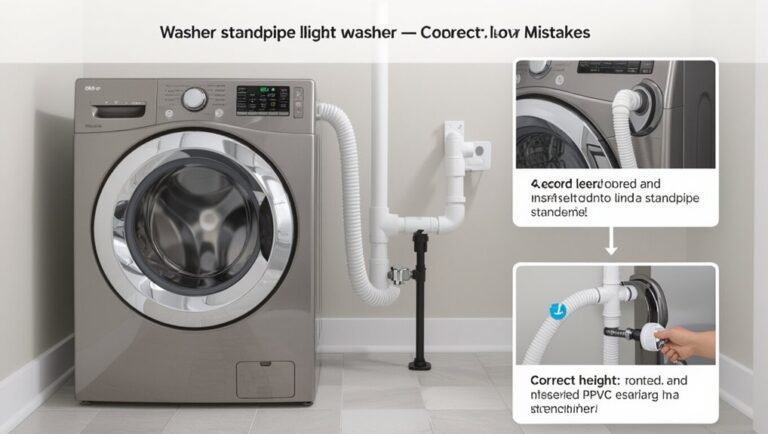
Shut Off and Drain the Water Safely First
Locate and shut off the correct water supply valve to isolate the affected copper run. The homeowner verifies cold and hot valves, then closes the main if needed. Next, open nearby faucets to relieve pressure and confirm flow stops at the leak. Use towels and a bucket to catch residual water.
- Confirm which valve isolates the damaged section.
- Turn valves clockwise until fully closed; avoid excessive force.
- Open lowest and highest fixtures to drain lines.
- Check an exposed connection for continued dripping before proceeding.
Only proceed once flow has ceased and pressure is relieved.
Prep: Dry and Clean the Copper Around the Hole
Wipe the area around the leak with a clean cloth to remove standing water, then use a hair dryer or heat gun on low to thoroughly dry the copper before cleaning.
Once dry, remove corrosion, solder residue, and mineral deposits with a fine-grit abrasive pad or emery cloth until bright metal appears.
Degrease with acetone or isopropyl alcohol on a lint-free rag to eliminate oils and flux.
Mask adjacent surfaces and fittings with tape to prevent accidental abrasion.
Inspect for hairline cracks, pits, or thinning metal using good light.
Proper surface preparation guarantees reliable adhesion and a secure subsequent repair.
Patch Small Holes With Epoxy Putty
With the copper surface cleaned and dried, the next step is to seal small holes using epoxy putty.
The process is straightforward: choose a potable-water–safe putty, cut a portion, and knead until uniform. Apply firmly over the defect, pressing edges to guarantee adhesion. Shape to smooth contours and remove excess. Allow full cure per manufacturer instructions, then test under low pressure before returning to normal use.
- Select rated epoxy putty.
- Knead to consistent color.
- Press and mold over hole.
- Cure fully, then pressure-test.
Use Silicone Repair Tape for Emergency Temporary Fixes
In an urgent leak, silicone repair tape provides a fast, temporary seal by self-fusing into a watertight sleeve around the damaged area. The surface should be clean and dry; excess water wiped away improves adhesion.
Stretch the tape while wrapping, overlapping each layer by half to build thickness and guarantee full coverage past the hole or crack. Apply firm pressure to activate fusion and smooth the final layer.
This method stops leaks until professional repair is possible. It resists heat and water but is not permanent; inspect frequently and replace if degradation or continued seepage appears.
Cut and Solder a Copper Sleeve for a Permanent Repair
Cut away the damaged section and prepare to install a soldered copper sleeve for a durable repair.
The pipe ends are deburred, cleaned with emery cloth, and fluxed.
The sleeve fits snugly over the gap; alignment is confirmed before heating.
Once heated evenly, solder is applied until a continuous fillet forms, ensuring a leakproof joint.
After cooling, excess flux is wiped away and the system is pressure-tested.
- Measure and mark cut locations precisely.
- Remove corrosion and burrs thoroughly.
- Use appropriate-sized sleeve and flux.
- Test at working pressure and inspect joints for seepage.
Soldering Checklist : Avoid Common Mistakes
Carefully following a concise soldering checklist prevents common mistakes that lead to leaks or weak joints.
Verify tools: clean soldering iron or torch, proper flux, lead-free solder, emery cloth, and a damp rag.
Shut off water and drain the line.
Clean pipe and fitting to bright copper; apply flux sparingly.
Fit parts fully without gaps.
Heat evenly, feed solder into the joint, not the flame; make certain capillary flow around the circumference.
Allow joints to cool naturally; do not disturb.
Inspect for complete solder coverage and wipe excess flux.
Pressure-test the repair before restoring full service.
When to Use a Compression Coupling on Copper Pipe
After verifying a soldered joint would be sound and confirming tools and materials are available, a plumber may opt for a compression coupling when soldering is impractical or undesirable.
A compression coupling suits tight spaces, timed repairs, or when heat risks nearby finishes or plastic fittings.
It also works on hard-to-move pipe runs and for temporary service until a permanent repair is scheduled.
Proper pipe preparation and correct nut torque guarantee a reliable seal; over-tightening deforms the ferrule and under-tightening leaks.
Consider matching coupling size and copper type; follow manufacturer torque guidance and inspect after pressurizing the system.
- Tight spaces
- Heat-sensitive surroundings
- Temporary fixes
- Difficult access
Install a Push-Fit (SharkBite) Coupling : No Solder
When soldering is impractical, a push-fit (SharkBite) coupling provides a quick, heat-free connection by simply pushing cleanly cut copper pipe into the fitting until it seats.
The pipe ends must be deburred, square, and free of corrosion or sealant. Mark insertion depth, align pipes, then push each pipe into the coupling until the mark meets the shoulder. Verify engagement by gently tugging both pipes.
For repairs requiring a sleeve, cut out the damaged section, measure, and use a coupling on each side or a straight coupling for joinery.
No curing time is needed; the fitting is immediately serviceable.
Test Your Repair for Leaks and Pressure Safety
How should the repair be evaluated before restoring full service? The repaired section should undergo a controlled pressure and leak check to confirm integrity and safety. Use these steps:
- Isolate the repaired zone and reintroduce water slowly, watching for immediate drips.
- Apply a soapy solution along joints and seams; bubbles indicate leaks.
- Pressurize the system to normal operating pressure with a gauge, monitor for pressure drop over 10–15 minutes.
- Inspect surrounding areas and fittings for dampness or corrosion, and document results before leaving the repair in service.
How Long Each Repair Method Typically Lasts
Different repair approaches offer markedly different service lives, so evaluating expected longevity is important.
Temporary patches often provide short-term relief measured in days to months depending on materials and pressure.
Permanent repairs, such as soldering or replacing the affected section, typically last years to the lifetime of the piping when done correctly.
Temporary Patch Longevity
Typically, temporary patch longevity varies widely depending on the repair method, pipe condition, water pressure, and environmental factors. Durability estimates help prioritize interim fixes before a permanent repair.
Rubber sleeve clamps often hold weeks to months under low pressure; epoxy putty can last months if applied to clean, dry copper; silicone tape may endure weeks but fails sooner under heat or pressure spikes; and hose-clamp-and-rubber solutions typically persist for days to weeks when corrosion is advanced.
Consider monitoring leaks, reducing pressure, and replacing temporary fixes promptly to avoid failure and water damage while arranging a permanent repair.
- Rubber sleeve clamps: weeks–months
- Epoxy putty: months
- Silicone/self-fusing tape: weeks
- Hose clamp + rubber: days–weeks
Permanent Repair Lifespan
1. A permanent repair’s lifespan varies by method and conditions. Soldered joints, when properly cleaned and fluxed, often last decades, commonly 20–50 years.
Compression fittings, if correctly installed and not overstressed, typically endure 10–25 years but may require replacement sooner under vibration or thermal cycling.
Mechanical couplings and push-fit fittings rated for permanent use can last 10–30 years depending on manufacturer guidance and water chemistry.
Replacement sections of copper pipe matched and brazed provide longevity similar to original plumbing.
Corrosive water, improper installation, or physical strain reduces all estimates; regular inspection extends service life.
Cost and Time: Temporary vs Permanent Fixes
When weighing temporary versus permanent repairs for a leaking copper pipe, cost and time are the primary deciding factors: temporary measures like epoxy putty or rubber patching require minimal expense and can be completed in minutes to hours, while permanent solutions—soldering, section replacement, or rerouting—carry higher material and labor costs and typically take several hours to a full day or more depending on access and complexity.
The choice hinges on urgency, budget, and long-term reliability. Consider:
- Temporary: low cost, quick, short lifespan.
- Permanent: higher cost, longer time, durable.
- Risk: delay increases damage costs.
- Accessibility affects total time and price.
Common Causes of Holes in Copper Pipe and Prevention
Exposed to water chemistry, mechanical stress, or environmental factors, copper pipes can develop holes from corrosion, erosion, pinhole leaks, physical impact, or faulty installation.
Common causes include acidic or oxygenated water accelerating corrosion, galvanic corrosion from dissimilar metals, abrasive flow causing erosion at elbows and fittings, and vibrations or settling that fatigue joints and thin walls.
External damage from nails, shifting building materials, or freezing adds risk.
Prevention focuses on proper water chemistry control, using compatible fittings and dielectric unions, securing and supporting runs to minimize movement, insulating against cold, and following code standards during installation and repairs.
Corrosion Spots vs Pinholes vs Burst Holes : ID Guide
Regularly inspecting copper piping helps distinguish between corrosion spots, pinholes, and burst holes, each of which signals different causes and urgency for repair.
Corrosion appears as greenish or white crusting, often spreading and weakening metal. Pinholes are tiny, localized leaks from corrosion or erosion, typically slow and produce small drips. Burst holes are sudden, larger ruptures from freezing, pressure spikes, or severe deterioration, causing rapid flooding.
- Appearance: crust vs tiny perforation vs large rupture
- Leak rate: slow seep vs consistent drip vs gush
- Cause: chemical/galvanic vs erosive wear vs mechanical/stress
- Urgency: monitor/clean vs prompt repair vs immediate action
Repairing Pipes in Tight Spaces and Behind Walls
Repairing copper pipes in tight spaces and behind walls often hinges on overcoming limited access and poor visibility.
The discussion should cover ways to improve inspection and reach, such as inspection cameras and strategic access panels.
It should also compare space-saving repair techniques like low-profile clamps, split-sleeve couplings, and inside-surface epoxies.
Access And Visibility
How can a leak in a narrow chase or behind drywall be reached without causing more damage? A methodical assessment minimizes cuts and hidden surprises. Proper lighting, inspection tools and measured openings reveal access points before demolition.
Steps prioritize preservation and safety:
- Use an inspection camera to locate the leak and plan the smallest access.
- Mark stud bays and pipe runs with a stud finder and gentle probing.
- Cut a minimal access panel, preserving framing and insulation.
- Illuminate the cavity with flexible LED lighting to maintain visibility during repair.
This approach limits repair scope, speeds diagnosis, and reduces patching work.
Space-Saving Repair Techniques
When working in confined cavities or behind finished walls, technicians rely on compact tools and planned, minimal interventions to reach and mend copper pipes without excessive demolition.
They favor flexible inspection cameras, long-reach cutters, and low-profile soldering irons or propane micro-torches for confined brazing.
Pinch-off clamps and inflatable bladders isolate flow without full shutoffs.
Sleeve repairs, repair couplings, and epoxy putties designed for small clearances allow swift sealing with minimal access.
Panels are opened only at strategic points, preserving finishes.
Measurements and templates reduce trial cuts.
Prioritizing tool choice and precise access limits repair scope, time, and collateral damage.
Safety: Heat, Flammable Materials, and PPE
Taking proper precautions around open flame and hot surfaces is essential to prevent burns and accidental ignition when working on a copper pipe leak.
Protective eyewear, heat-resistant gloves, and long sleeves reduce burn risk; a fire extinguisher rated for flammable liquids should be nearby.
Flammable materials must be cleared from the work area and vapors ventilated.
Work with a partner when possible and keep a phone available for emergencies.
- Inspect surroundings for combustibles.
- Use heat shields and fire blankets.
- Ground and ventilate when soldering.
- Wear PPE and replace damaged gear.
When to Call a Licensed Plumber and What to Expect
After following safety precautions and attempting basic repairs, homeowners should recognize scenarios that require a licensed plumber. Major leaks, recurring failures, inaccessible piping, mold growth, or water damage beyond a simple patch warrant professional assessment. A plumber will diagnose root causes, provide permit-required work, and recommend durable solutions such as soldered joints, replacement sections, or rerouting.
Expect an initial inspection, cost estimate, timeline, and warranty discussion. Technicians use pressure testing, leak detection tools, and code-compliant materials. Homeowners should request proof of license and insurance, obtain written estimates, and clarify post-repair cleanup and guarantees before work begins.
Conclusion
When faced with a hole in a copper pipe, a homeowner should weigh quick DIY fixes against calling a pro; like a patch on a leaky boat, temporary measures can keep things afloat but may not last. Simple repairs—epoxy, compression fittings, or solderless couplings—work well for small holes if water is shut off and safety observed. For larger damage, extensive corrosion, or inaccessible sections, hiring a licensed plumber guarantees a durable, code-compliant solution.