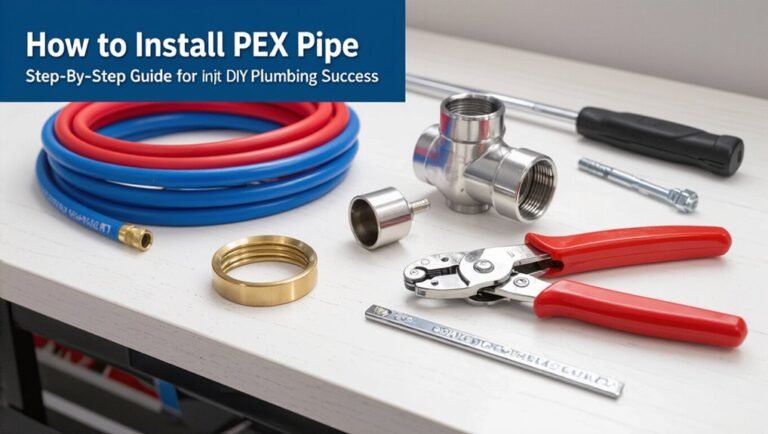
What Size Drain Pipe for a Washing Machine? Quick Guide & Tips
For a washing machine, a 2-inch (50 mm) drain pipe is recommended for optimal performance. This size effectively handles peak spin discharge, minimizes clogging risks, and aligns with common plumbing codes. While smaller 1¼” to 1½” pipes may work in older or compact setups, they are more prone to blockages. It’s also important to consider factors like pipe material (PVC/ABS/cast iron), proper trap and venting, and the height of the standpipe. If you’re dealing with multiple appliances, long runs, or elevation changes, you may need to upsize the pipe or use a pump. For more practical checks, costs, and permit information, read on.
Quick Answer: Correct Washing-Machine Drain Pipe Size
For most residential installations, the correct washing-machine drain pipe size is 2 inches (50 mm) in diameter; this provides sufficient capacity to handle discharge flow and reduces the risk of siphoning or slow drainage.
This standard accommodates most single-machine discharges, aligns with common trap and standpipe configurations, and fits typical laundry room fittings.
Smaller pipes may clog or overflow; larger pipes are seldom necessary and can complicate trap sealing.
Installers should make certain proper connections, adequate slope, and accessible cleanouts.
Local codes or multi-machine setups can dictate alternatives, so verification with applicable regulations is recommended.
Why Pipe Diameter Matters for Washing Machines
In considering washing-machine plumbing, pipe diameter directly determines how effectively discharge water and lint are transported away from the appliance. Proper diameter reduces risk of backups during high-flow spin cycles, limits standing water that traps lint, and minimizes pressure changes that can stress fittings.
Oversized lines may slow flow velocity, allowing solids to settle, while undersized lines increase clog likelihood and strain pumps. Correct sizing supports reliable drainage, simplifies maintenance, and prolongs component life. Selection balances peak discharge rate, trap configuration, and local code; installers evaluate these factors to prevent odors, overflow, and repeated blockages.
Standard Home Drain Sizes: 1¼”, 1½”, 2″
Typical residential drain installations use 1¼”, 1½”, and 2″ diameters depending on fixture and load.
Each size offers different flow capacity and resistance, with larger diameters handling higher peak discharge and reducing clog risk.
Comparing their approximate flow rates clarifies which size suits a washing machine connection.
Common Pipe Diameters
Homes commonly use three drain diameters for washing machines: 1¼”, 1½”, and 2. Each size suits different installations and local codes. The smallest fits compact units or older setups; mid-size is typical for modern homes; largest appears where longer runs or multiple fixtures connect. Materials vary (PVC, ABS, metal) and fittings must match pipe diameter. Proper trap and venting remain essential regardless of size. Installers select diameter based on appliance outlet, building plumbing, and code requirements. Maintenance access and secure connections reduce leaks and backups.
| Diameter | Typical Use |
|---|---|
| 1¼” | Compact/older units |
| 1½” | Standard residential |
| 2″ | Shared/multi-fixture runs |
Flow Capacity Comparison
Several factors determine how much wastewater each drain diameter can carry: pipe cross-sectional area, slope, roughness, and the presence of traps or fittings.
Comparing standard home sizes, 1¼” drains offer limited capacity, suitable only for single fixtures with low flow; they risk siphoning and backups during washer discharge.
1½” is common for washing machines, balancing capacity and space; it handles typical peak flows with proper slope and minimal fittings.
2″ provides additional margin, reducing clogging risk and accommodating multiple fixtures or long runs.
Proper installation and venting guarantee each size achieves its expected hydraulic performance.
How to Check Local Codes for Washing-Machine Drain Size
Before beginning any alterations, verify the local plumbing code requirements for washing-machine drain size and installation details, since jurisdictions can differ on minimum trap diameter, standpipe height, and permitted connections. The homeowner should consult municipal code, the local building department, or a licensed plumber to confirm required pipe diameter, maximum discharge rate, venting, and distance to traps. Record code citations and approved exceptions. When in doubt, request written clarification or a permit inspection to avoid costly rework. Visualize compliance using a simple checklist:
| Item | Requirement | Source |
|---|---|---|
| Pipe diameter | 2″ typical | Local code |
| Standpipe height | 18″–30″ | Code/table |
| Trap size | per code | Inspector |
Measure Your Existing Drain and Standpipe Correctly
After confirming local code requirements, the homeowner should measure the existing drain and standpipe to verify compatibility with those specifications and to plan any necessary modifications.
Use a tape measure and calipers where available: record inner diameter of the drain pipe, outer diameter of the standpipe, and distance from floor to the top of the standpipe opening.
Note the location of the trap weir and any offset or elbow fittings.
Photograph joints and label measurements.
Check for corrosion, obstructions, or nonstandard fittings that might require adapters.
Compile measurements and images to present to a plumber or for purchasing correct replacement parts.
Standpipe Height, Trap Size, and How They Affect Drain Sizing
In determining appropriate drain sizing, standpipe height and trap dimensions set the functional limits for water flow and air break performance. Proper standpipe height guarantees the washer can discharge without siphoning or overflow; traps must provide a reliable seal while offering enough diameter to pass peak flow and debris. Short or narrow traps increase backpressure and risk slow draining. Longer, taller standpipes improve air gap protection but require correct trap alignment. Consider local code limits and manufacturer’s discharge rates when matching standpipe and trap sizes to drain pipe capacity.
| Component | Effect |
|---|---|
| Standpipe height | Prevents overflow |
| Trap diameter | Controls flow |
| Trap depth | Ensures seal |
| Alignment | Affects siphoning |
When to Use a 1½” Trap vs. a 2″ Drain
Given the limits imposed by standpipe height and trap dimensions, choosing between a 1½” trap and a 2″ drain hinges on the washer’s peak discharge rate, local code requirements, and the likelihood of lint and debris accumulation.
The 1½” trap suits most residential washers with moderate flow and short, unobstructed runs; it conserves space and connects easily to common plumbing. A 2″ drain is better when manufacturers specify higher GPM, when multiple appliances tie into the same drain, or where clog risk is elevated.
- Use 1½” for standard single washers with low peak flow.
- Choose 2″ for higher GPM or shared drains.
- Follow local code and appliance specs.
Drain Materials for Washing Machines: PVC, ABS, Corrugated Hose
Several common materials are used for washing machine drains—PVC, ABS, and corrugated hose—each with distinct strengths and limitations.
PVC offers chemical resistance, smooth interior for good flow, ease of joining with solvent cement, and broad availability, making it standard for many installations.
ABS is tougher at lower temperatures and resists impact, favored where code allows and cold climates exist.
Corrugated hose provides flexibility for short runs and appliance connections but can trap lint and reduce flow; it is not ideal for long permanent drainage.
Material choice should consider code compliance, durability, and expected maintenance needs.
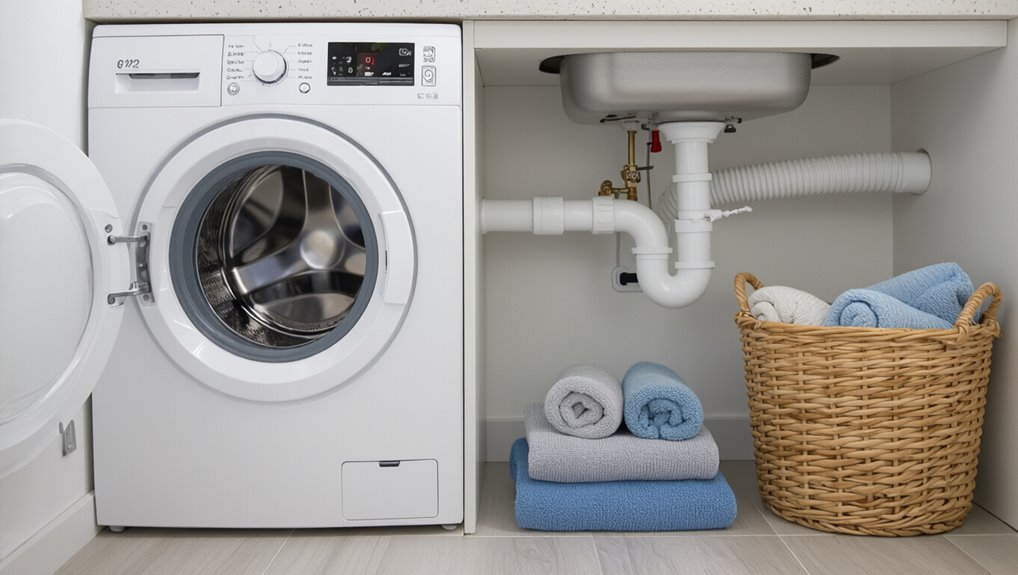
Connecting the Machine Hose Safely to the House Drain
When attaching a washing machine discharge hose to the household drain, proper support, a secure connection, and correct height are essential to prevent leaks, backflow, and siphoning.
The hose should be clamped to a rigid standpipe or inlet using a stainless-steel worm-gear clamp; slip fits and zip ties are inadequate.
Use a trap to maintain a water seal against sewer gases and make certain the hose end remains above the trap weir to avoid siphon.
Inspect for kinks, wear, and proper slope.
Test with a full drain cycle and check for movement or seepage where the hose joins the drain.
- Use a proper clamp
- Maintain a trap
- Test under load
Installing a New Standpipe: Size, Height, and Fittings
When installing a new standpipe for a washing machine, attention must be paid to required standpipe height, acceptable pipe diameters, and proper fittings.
Typical codes set a minimum and maximum height to prevent siphoning and overflow, while 2-inch diameter is commonly recommended to handle discharge.
The correct trap, trap arm length, and connection fittings guarantee reliable drainage and code compliance.
Standpipe Height Requirements
In installing a new standpipe for a washing machine, proper height and diameter are critical to guarantee correct drainage, prevent siphoning, and meet code requirements. The standpipe height typically ranges to accept the washer’s discharge without overflow and to provide an air gap; local codes often require 30–42 inches above the trap weir.
The trap must be accessible and within the specified distance from the standpipe. Fittings should ascertain a secure, vented connection to avoid backflow and maintain trap seal integrity.
Installers should verify local plumbing codes and manufacturer recommendations before finalizing installation.
- Confirm local code height range
- Ascertain accessible trap placement
- Use vented, secure fittings
Pipe Diameter Options
After confirming standpipe height and trap placement, attention turns to selecting the correct pipe diameter for the standpipe and its trap arm.
Common practice favors a 2-inch standpipe to accommodate typical washing machine discharge rates and reduce risk of siphoning or overflow. In tight configurations a 1½-inch pipe may function but increases clog and backup potential; local codes often prohibit its use.
The trap arm should match the standpipe diameter and slope properly to the drain.
For multi-appliance or long runs, upsizing to 2½ or 3 inches may be required by code or plumbing load calculations.
Recommended Fittings And Traps
Proper fittings and a correctly sized trap are essential for a reliable standpipe installation: the standpipe should use a trap and trap arm that match its diameter, provide a smooth flow path, and maintain the required water seal to prevent sewer gas entry.
The installer selects a 2-inch trap for most modern washers, PVC or ABS materials for durability, and a trap arm length that complies with local code.
A vent must be present to avoid siphoning. Elbows and adapters should be gentle to reduce clogging.
- Choose matching 2″ trap and trap arm
- Use smooth PVC/ABS fittings
- Secure proper venting and slope
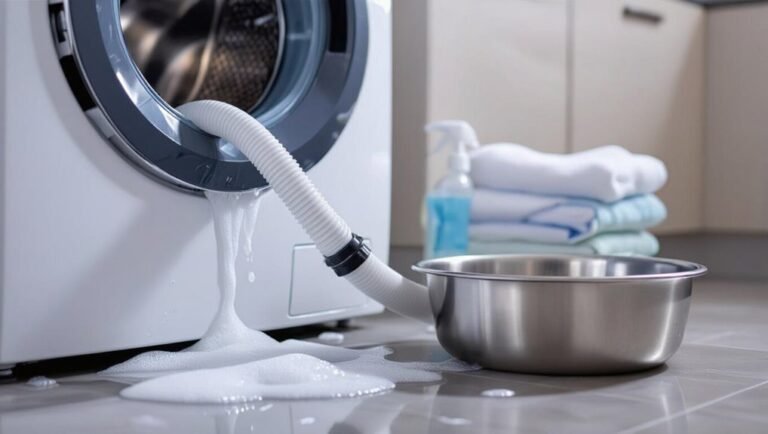
Common Mistakes That Cause Slow Drainage or Backflow
By overlooking simple installation details, many homeowners unintentionally create conditions that slow washer drainage or cause backflow. Common faults include undersized horizontal runs, missing air gaps, improper trap orientation, and poor venting. Sediment buildup and kinked hoses exacerbate restrictions. Correct sizing and routing minimize pooling and reflux. Regular inspection prevents progressive failure.
| Mistake | Effect |
|---|---|
| Undersized pipe | Reduced flow, backups |
| Improper trap/vent | Siphoning, odors |
| Kinked hose/sediment | Partial blockage, slow drain |
Addressing these prevents recurring issues and preserves appliance performance without complex interventions.
How to Test Drainage Capacity and Troubleshoot Clogs
Begin with a quick flow test using a utility bucket and a stopwatch to measure how fast water leaves the drain—this establishes a baseline capacity and highlights slow sections.
Then inspect visible traps and connections for kinks, standing water, or debris.
Use a plumber’s snake for deeper blockages and recheck flow after each pass.
If slow persists, verify venting and pipe slope; trapped air or incorrect pitch reduces capacity.
Record findings and compare to expected gallons per minute for the pipe size to decide repair or upgrade.
- Measure flow rate and note reduced segments.
- Clear accessible obstructions progressively.
- Check venting and slope, then reassess.
Quick Temporary Fixes for Slow Washing-Machine Drains
When a washing machine drains slowly, a quick check of the trap can reveal and allow removal of obvious debris.
If the trap is clear but flow remains restricted, a drain snake can reach and dislodge deeper blockages.
A final flush with hot water helps clear grease and residue and confirms whether the temporary measures restored normal drainage.
Check And Clear Trap
Inspect the washing-machine drain trap for kinks, clogs, or visible debris that restrict flow. The trap often accumulates lint, small fabric fibers, and foreign objects; removing the trap cover and rinsing parts can restore drainage quickly.
Turn off water and power, position a shallow pan, then detach the trap carefully to avoid spills. Reassemble securely and test multiple rinse cycles.
- Check inlet hose and trap entry for lodged material; clear by hand or with a brush.
- Flush trap parts with warm water and mild detergent.
- Replace damaged seals or cracked trap pieces to prevent leaks.
Use A Drain Snake
A drain snake can free clogs deeper in the line than manual trap cleaning, providing a quick, temporary fix for slow washing-machine drains by breaking up lint, hair, and small obstructions that resist hand removal. A homeowner feeds a flexible auger into the drain, turns or cranks to snag debris, then withdraws material. This method reaches beyond accessible traps without tools that require disassembly. It’s suited for minor blockages; persistent or recurring restrictions indicate deeper issues requiring a plumber. Care avoids pipe damage: use appropriate snake size and gentle motion, and inspect removed debris to assess severity.
| Benefit | Consideration |
|---|---|
| Reaches deep clogs | Can damage thin pipes |
| Fast action | Not permanent |
Flush With Hot Water
By pouring a steady stream of hot (but not boiling) water down the washing-machine drain, a homeowner can soften and dissolve lingering soap scum, grease, and compacted lint that restrict flow, providing a quick, temporary improvement in drainage.
It requires minimal tools and poses low risk when performed carefully. Use caution around plastic fittings and avoid scalding.
If the improvement is brief, the issue may need mechanical removal or professional attention. Repeat as a short-term measure until a thorough cleaning or proper pipe sizing is arranged.
- Flush slowly to avoid pressure shock
- Combine with a mild detergent if safe
- Follow with cold water to clear residue
When to Install a Drain Pump vs. Enlarging the Drain
Deciding between installing a drain pump and enlarging a drain hinges on site constraints, system layout, and cost-benefit tradeoffs.
A drain pump suits installations with low standpipes, long horizontal runs, or basement-to-sewer lifts where gravity flow is inadequate; it minimizes demolition and preserves existing piping paths.
Enlarging the drain is appropriate when frequent slow drainage indicates undersized pipe, shared loads exceed pump capacity, or local code mandates larger diameters for combined fixtures.
Evaluate long-term reliability, maintenance access, venting requirements, and potential odor traps.
Choose the option that meets flow needs, complies with codes, and balances upfront expense against operational practicality.
Typical Cost & Time to Resize or Replace a Washing-Machine Drain
Typical costs for resizing or replacing a washing-machine drain commonly range from modest DIY expenses to several hundred dollars for professional work, depending on materials and access.
Most straightforward replacements or upsizing projects take between one and four hours for a plumber, while more complex jobs involving wall or floor access can require a day or more.
Homeowners should budget both time and a contingency for unexpected complications such as hidden damage or additional fittings.
Average Cost Range
When planning a resizing or replacement of a washing-machine drain, homeowners can expect a wide cost range depending on pipe material, access difficulty, and local labor rates.
Typical single-run PVC or ABS swaps often cost $150–$400 for materials and straightforward labor.
More involved jobs—cast iron removal, rerouting, or basement-to-wall changeovers—frequently reach $500–$1,200.
Permits or trap/vent upgrades add fees.
- Basic replacement: $150–$400 — simple access, standard materials.
- Moderate reroute or material upgrade: $400–$800 — partial demolition or better piping.
- Major overhaul: $800–$1,500+ — cast iron, extensive rerouting, permits.
Typical Timeframe Needed
How long will it take to resize or replace a washing-machine drain depends on scope and site conditions: a straightforward swap of a short PVC/ABS run and trap typically requires 1–3 hours.
Moderate jobs involving partial wall or floor access and vent adjustments take 3–6 hours.
Major overhauls—removal of cast iron, extensive rerouting, or work requiring permits and inspections—can span a full day to multiple days including wait times for inspections or specialized labor.
Typical factors affecting duration include access, material removal, venting changes, permit/inspection scheduling, contractor availability, and unexpected issues like rot or corroded connections.
Permit, Code, and When to Call a Plumber for Washing-Machine Drains
In jurisdictions across the United States, washing-machine drain installations are governed by local plumbing codes and often require permits to verify proper sizing, trap configuration, and venting.
Professionals or knowledgeable homeowners should confirm permit requirements before altering drain lines.
Compliance prevents backflow, guarantees correct venting, and avoids future inspections or fines.
When complexity, concealed leaks, or main stack connections are involved, a licensed plumber should be engaged.
For DIY work limited to replacing a visible standpipe, follow local rules and document inspections.
- Permit: check with local building department.
- Code: verify pipe size, trap, vent standards.
- Call a plumber: for complex or unsafe conditions.
Final Checklist Before Modifying a Washing-Machine Drain
Before starting any work on the washing-machine drain, confirm that permits, local code requirements, and the condition of nearby plumbing are documented and accessible.
Next, verify water and electrical shutoffs function and label them.
Inspect the existing drain size, trap condition, venting, and slope to guarantee compatibility with required pipe diameter.
Gather appropriate fittings, pipe materials, and tools; include primer, solvent, or thread sealant as needed.
Plan for overflow protection and a secure standpipe height.
Arrange for waste access and test fittings for leaks after installation.
Finally, schedule inspections and retain receipts and measurements for records.
Conclusion
Like a well-tuned orchestra, the right drain pipe size lets a washing machine perform without a stumble. Choosing the proper diameter—guided by codes, the standpipe, and whether a pump’s needed—keeps water moving smoothly and prevents messy crescendos. Before cutting or replacing pipes, measure, check local rules, and weigh cost versus calling a pro. With those steps in harmony, laundry day remains a simple, quiet movement rather than a soggy symphony.