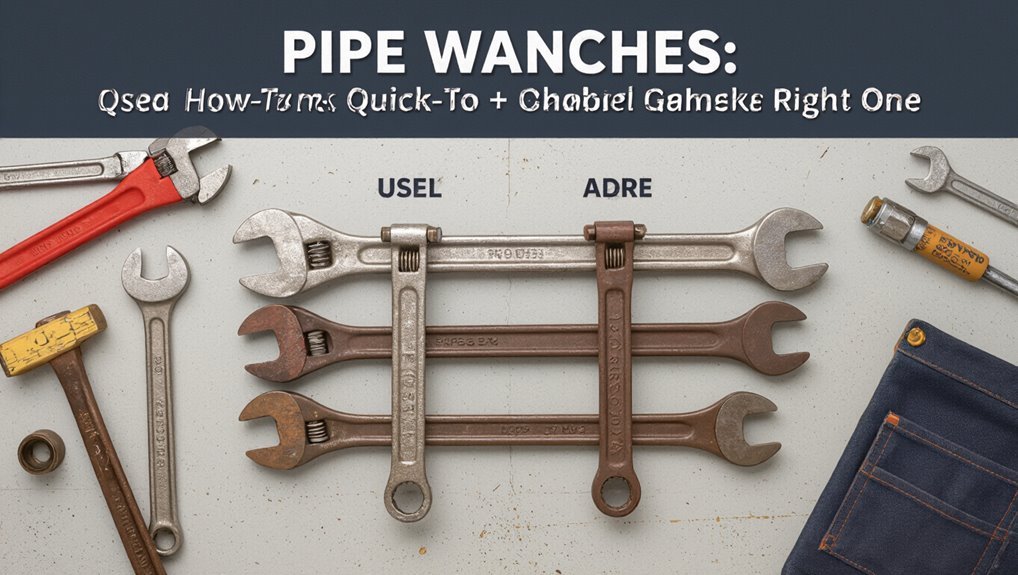
Pipe Wrenches: Uses, Tips & How to Choose the Right One
A pipe wrench is an essential hand tool designed for gripping and turning round pipes and fittings in plumbing, HVAC, and gas applications. It features hardened, angled serrated jaws that provide high torque, making it effective for various tasks. When choosing a pipe wrench, consider factors such as jaw capacity, adjustability, material, and weight to ensure it meets your specific needs. Additionally, inspect the teeth for wear, match the jaw capacity to your pipe size, and monitor torque to prevent slippage or damage. For practical tips, troubleshooting advice, and buying considerations, continue reading.
What This Guide Covers: Quick How‑To + Buying Checklist
What will the reader learn from this guide? The section outlines concise how‑to steps for common pipe wrench tasks and a focused buying checklist. It covers task selection, size matching, grip orientation, safe torque application, and basic maintenance.
The checklist prioritizes jaw capacity, handle length, adjustability, material, weight, and appropriate pipe types. It flags durability indicators, ergonomic features, and price‑to‑value tradeoffs.
Safety reminders include inspecting teeth, securing workpieces, and using correct leverage. The aim is to equip readers with practical decision criteria and succinct procedural steps to choose and use a pipe wrench effectively without unnecessary detail.
What a Pipe Wrench Is and How It Works
A pipe wrench is described by its basic anatomy — a fixed handle, an adjustable jaw assembly, and a heel that positions the bite.
The jaw teeth are hardened and angled to bite into round pipe surfaces, converting rotation into a secure grip.
Lever action mechanics multiply hand force through the handle and jaw pivot, letting the user turn stubborn fittings with controlled pressure.
Basic Tool Anatomy
How does a pipe wrench grip and turn round metal fittings without slipping? A pipe wrench consists of a long handle, an adjustable jaw assembly, a heel jaw pivoted to the handle, and a movable top jaw.
The handle provides leverage; length determines torque. An adjustment nut or knurled ring sets jaw opening to match pipe diameter. A heel pin or spring secures jaw alignment and allows slight bite under load. The body often features ergonomics and non-slip coating. Materials are hardened steel or alloy for durability.
Proper maintenance includes lubrication of moving parts and inspection for wear or damage.
Jaw Teeth And Grip
Gripping power in a pipe wrench comes from interlocking serrated teeth on both the heel and movable top jaw that bite into round metal fittings and convert applied torque into rotational force. The tooth pattern, depth, and angle determine bite efficiency and resistance to slipping. Hardened steel teeth hold edges under heavy use but eventually dull, reducing grip. Proper alignment of jaw faces prevents uneven wear and protects workpieces. Light rust or debris between teeth lowers effectiveness.
- Close-up of sharp, staggered serrations
- Teeth digging into a steel pipe
- Worn teeth with flattened tips
- Cleaned teeth glinting
- Jaw faces perfectly aligned
Lever Action Mechanics
By using the handle as a lever, the pipe wrench multiplies applied force so modest hand effort produces substantial torque at the jaws. The wrench uses a pivoting jaw and fixed jaw; the handle transmits force, the adjustable jaw bites the pipe, and the pivot produces a closing action that increases grip as load rises. Proper handle length and correct jaw engagement determine mechanical advantage and reduce slippage. Users should seat jaws fully and apply steady force along the handle axis. Maintenance—cleaning, adjusting nut, and replacing worn teeth—preserves the lever action and consistent performance.
| Component | Function |
|---|---|
| Handle | Transmits force |
| Pivot | Multiplies torque |
| Jaws | Grip and bite |
Pipe Wrench Parts You Should Know
A pipe wrench consists of several distinct components that work together to grip, turn, and release pipes reliably; knowing each part’s name and function is essential for safe, effective use.
The fixed jaw anchors the tool while the adjustable jaw moves along the shank to set capacity. Teeth on both jaws bite metal or plastic surfaces; spring-loaded cheek plates hold the jaws together. The heel and toe provide leverage and contact points. The handle transmits force and often features knurling for grip.
- Fixed jaw with serrated teeth
- Adjustable jaw and nut
- Shank/handle
- Spring/cheek plates
- Heel and toe contact points
When to Use a Pipe Wrench in Plumbing
The article outlines clear criteria for choosing a pipe wrench based on pipe size, material, and access.
It contrasts using the tool for tightening versus loosening and notes technique differences to prevent slippage or damage.
It also summarizes alternative tools and when they are preferable to a pipe wrench.
When To Choose One
When should a pipe wrench be chosen over other tools in plumbing tasks? A pipe wrench is appropriate when grip on round, smooth, or large-diameter metal pipe is required, when leverage is needed to overcome stubborn fittings, and when a serrated jaw can bite without damaging plated finishes meant for appearance.
It suits heavy-duty repair, removal of threaded pipe, and working in confined spaces where adjustable reach matters.
- A corroded galvanized pipe stuck in a basement crawlspace
- A thick black iron gas line needing removal
- A large-diameter sewer cleanout plug
- A damp, oily pipe requiring firm bite
- Tightening a temporary flange connection
Tightening Vs. Loosening
For tasks requiring directional torque on threaded pipework, a pipe wrench is chosen based on whether the job calls for loosening seized fittings or tightening connections that must withstand pressure; technicians select wrench size, jaw capacity, and bite accordingly.
For loosening, heavier wrenches with aggressive teeth and correct gripping angle prevent slippage and concentrate force to break corrosion.
For tightening, controlled torque and incremental turns avoid over-stressing threads and fittings; a smooth, steady grip and attention to alignment guarantee seals seat properly.
In both cases, inspection of pipe material and thread condition guides technique to minimize damage while achieving secure, leak-free joints.
Alternative Tool Options
Among the many tools available to plumbers, the pipe wrench occupies a specific niche: it excels at gripping and turning round, threaded metal pipes but is neither universal nor always the best choice. Alternatives include adjustable wrenches for flats, basin wrenches for confined sink nuts, strap wrenches for polished finishes, tongue-and-groove pliers for irregular shapes, and socket sets for bolts.
Selection depends on material, access, and finish protection. Choosing the right tool prevents damage and speeds work. Visualize each scenario to match tool to task:
- gleaming chrome faucet needing protection
- cramped cabinet under-sink space
- rounded corroded pipe surface
- large hex flange bolt
- polished stainless fixture
Pipe‑Wrench Uses in HVAC and Gas Work
In HVAC and gas work, a pipe wrench serves as a primary tool for gripping, turning, and aligning threaded fittings and rigid pipe, providing the leverage and bite needed on steel, iron, and thicker copper lines.
Technicians rely on adjustable pipe wrenches for assembling and disassembling gas risers, flaring connections, and securing unions where torque and secure purchase are required.
Long‑handled models offer reach in confined utility spaces; offset heads help access awkward angles.
Careful jaw placement prevents damage to softer materials and fittings.
Regular inspection for worn teeth and proper adjustment maintain safety and reliable performance in pressurized systems.
Industrial and Mechanical Uses for Pipe Wrenches
Serve as a workhorse on shop floors and plant maintenance crews, pipe wrenches provide reliable grip and leverage for tightening, loosening, and aligning threaded piping, couplings, and heavy fittings in industrial and mechanical settings.
Technicians rely on durable adjustable jaws for repeatable torque on steel, iron, and cast‑iron pipe runs.
Maintenance tasks include assembly, disassembly, and corrective adjustments where controlled bite and long handles matter.
Regular inspection and correct wrench sizing guarantee safety and avoid part damage.
Corrosion‑resistant finishes and replaceable teeth extend service life in harsh environments.
- Heavy steam manifold realignment
- Hydraulic line assembly
- Pump flange disassembly
- Compressed air manifold servicing
- Factory conveyor lubrication access
When Not to Use a Pipe Wrench (And the Right Tool to Use)
When a job demands a smooth finish, delicate fittings, or precise torque, a pipe wrench is the wrong choice; its serrated jaws and powerful bite can mar soft metals, deform thin-walled tubing, and overstress threaded fasteners.
Use non-marring pliers, strap wrenches, or soft-jawed adjustable wrenches on polished or plated surfaces. For precision torque on fittings and fasteners, employ a torque wrench or properly sized box/open-end wrench.
Use basin wrenches in confined spaces and flare or line wrenches for hydraulic and fuel lines to prevent rounding. Selecting a tool designed for the material and access prevents damage and guarantees reliable connections.
Quick Rule: Choose Wrench Size by Pipe Diameter
For practical selection, match the wrench size to the pipe’s nominal diameter rather than its measured outside dimension. This simple rule speeds tool choice: a 2″ pipe generally needs an 8–10″ wrench, while larger diameters require proportionally longer handles for leverage and jaw reach.
Selecting by nominal size accounts for fittings and wall thickness that alter outside measurements. Proper fit reduces slipping and uneven pressure. Keep spare sizes for odd fittings and verify clearance in tight spaces.
Visualize common scenarios:
- A cramped basement sink with a short wrench
- Outdoor gas line needing long reach
- Tight elbow joint
- Thick‑walled steel pipe
- Thin PVC in a retrofit
How Pipe‑Wrench Jaw Types Affect Grip and Pipe Protection
Among jaw designs, the choice determines how securely a pipe wrench bites and how much surface damage it risks; straight-toothed, curved or adjustable-plate jaws each balance grip strength against pipe protection differently. The author notes straight teeth maximize bite on stubborn fittings but scar soft metals. Curved jaws distribute bite for thicker contact, reducing gouging while keeping torque. Adjustable-plate jaws sandwich fragile surfaces with replaceable pads for delicate finishes, sacrificing some bite. Selection depends on pipe material, finish, and task urgency. Below, a simple table echoes the stakes and emotions users feel when choosing care over force:
| Grip | Risk | Feeling |
|---|---|---|
| High | High | Tension |
| Medium | Medium | Caution |
| Low | Low | Relief |
| Variable | Low | Trust |
Adjustable vs Fixed Pipe Wrenches: Pros and Cons
Choosing between adjustable and fixed pipe wrenches hinges on the trade-off between versatility and strength.
Adjustable wrenches offer rapid size changes and greater adaptability for varied pipe diameters.
Fixed wrenches provide superior rigidity and torque for heavy-duty, repetitive tasks.
Adjustable Wrench Advantages
When comparing adjustable and fixed pipe wrenches, the adjustable model’s key advantage is versatility: a single tool can accommodate a wide range of pipe diameters and fittings, reducing the number of wrenches required on a job.
The adjustable wrench offers rapid size changes, lighter carrying loads, and suitability for varied tasks. It supports improvisation in tight spaces and simplifies toolkits for maintenance crews. Durability varies by build, so selection matters. Users value its blend of convenience and functionality when unpredictability or mixed-diameter systems are involved.
- a lone wrench fitting multiple copper and steel pipes
- quick thumb-screw adjustments in cramped basements
- a compact wrench replacing several fixed sizes
- swapping from sink to radiator without tool changes
- a journeyman’s pared-down tool belt
Fixed Wrench Benefits
Favoring a specific-size pipe wrench delivers consistent grip and greater torque for heavy-duty work. Fixed wrenches excel where repeatability and robustness matter: jaws are optimized for one diameter, reducing slippage and wear.
Their simpler construction means fewer moving parts, lowering maintenance and failure risk under high load. They often weigh less than comparable adjustable models, improving control during prolonged use.
For production lines or repeated tasks on uniform piping, fixed wrenches speed workflow and improve safety. Limitations include reduced versatility and the need for multiple sizes. Still, in specialized or high-torque applications, fixed tools offer reliable performance and longevity.
Materials Matter: Steel, Alloy, and Lightweight Wrenches
Regarding construction and repair tasks, the material of a pipe wrench determines its strength, durability, and suitability for specific jobs. Steel models offer maximum toughness for heavy-duty plumbing and industrial work, resisting deformation under high torque. Alloy wrenches balance strength and weight, providing corrosion resistance and longer service life. Lightweight aluminum or composite tools reduce fatigue for overhead or tight-space jobs, though they can sacrifice some bite on stubborn pipes. Choice depends on task intensity, environment, and operator endurance.
Visualize tool selection through context and material properties:
- A steel wrench gripping a rusted iron pipe
- An alloy tool in a damp basement
- A lightweight wrench overhead
- Scattered metal shavings near a joint
- A toolbox displaying varied finishes
How Handle Length Changes Leverage and Control
Handle length directly affects the mechanical advantage a pipe wrench provides.
A longer handle increases torque for loosening tight fittings, while a shorter handle gives finer control in confined spaces.
Readers should weigh required force against maneuverability when selecting handle length.
Longer Handles Increase Torque
A longer handle increases leverage, allowing a given force applied by the user to produce greater torque at the jaw and making stubborn fittings easier to turn. The increased moment arm reduces effort for loosening tight pipe joints and minimizes wrist strain during sustained turns. It suits heavy-duty tasks where extra force is required and when access permits full swing.
Users should note added weight and potential clearance issues but can exploit mechanical advantage to tackle corroded or oversized fittings effectively.
- A mechanic steadying a 24″ wrench against a rusted elbow
- Two hands spaced along a long bar for controlled push
- A jaw biting into a thick, knurled nipple
- A wrench cleared away from nearby valves
- A worker bracing the handle against a hip
Shorter Handles Improve Control
Shorter handles reduce the lever arm, trading raw torque for greater precision and control when turning fittings in tight or delicate situations. A shorter wrench allows finer feel, reduces over-rotation risk, and improves maneuverability in confined spaces. It suits small-diameter pipes, valve stems, and finish work where damage must be avoided. Users gain quicker repositioning and safer operation near fragile materials. The choice balances required torque against access and finesse; selecting a shorter handle is a deliberate compromise favoring control over brute force.
| Feature | Benefit | Best Use |
|---|---|---|
| Length | Precision | Tight spaces |
| Torque | Reduced | Small fittings |
| Handling | Improved | Finish work |
Picking a Pipe Wrench for Tight Spaces
Where can a pipe wrench actually fit when space is measured in inches rather than feet? A compact wrench, slim profile and short handle enable access behind fixtures and inside cabinets.
The selection favors right-angle grips, offset heads, and lightweight materials that reduce fatigue while preserving bite. Retractable jaws or adjustable nibs help in confined orientations. Consider clearance around work, fingertip control and ability to pivot in tight arcs. Visualize fit before buying:
- Narrow gap between wall and valve stem
- Little room under a sink trap
- Beside a tiled backsplash edge
- Inside a shallow utility closet
- Around clustered supply lines
Matching Wrench Capacity to Pipe Diameter
Selecting the right pipe wrench means matching its jaw capacity to the pipe diameter so the tool bites securely without overhang or slippage.
A wrench too small won’t seat fully, risking tooth damage and rounded fittings; too large reduces leverage and control. Measure pipe outside diameter, account for fittings or scale, then choose a wrench with a jaw range that centers the grip on the pipe.
For variable sizes, adjustable or multiple wrenches cover common ranges efficiently.
Proper fit guarantees teeth engage teeth-to-metal, distributing force across the contact area for safer, more effective turning and less material deformation.
Straight vs Offset Pipe Wrenches: When to Pick Each
When does one choose a straight pipe wrench over an offset model? A straight wrench suits long runs and clear access, providing strong, inline leverage; an offset wrench fits tight corners, raised fittings, or when knuckles need clearance. Selection depends on workspace, grip angle, and pipe alignment.
Consider weight, handle length, and jaw bite for intendedly tasks.
- Long horizontal pipe under a basement beam
- Tight cluster of fittings near a wall
- Raised union needing knuckle clearance
- Repetitive work along a straight run
- Low-access valve with limited swing
Choose the tool that matches reach and clearance requirements.
Specialty Wrenches: Basin, Chain, and Strap Uses
In tight sink cavities and awkward pipe runs, basin, chain, and strap wrenches provide targeted solutions that regular pipe wrenches cannot.
Basin wrenches reach behind fixtures, their pivoting head and long handle enabling nut access in cramped spaces without marring surfaces.
Chain wrenches encircle irregular or oily pipes, the chain gripping securely for high-torque turns on round, corroded, or large-diameter stock.
Strap wrenches use non-marring webbing for polished, coated, or soft materials where teeth would damage finishes.
Each tool suits specific constraints: access geometry, surface sensitivity, and pipe condition, guiding selection by task rather than general capacity charts.
How to Read Product Specs and Capacity Charts
The section explains how manufacturers present load ratings and what those numbers mean for safe use.
It shows how to read sizing and capacity charts to match a wrench to pipe diameter and expected torque.
Clear interpretation of these specs helps prevent tool overload and guarantees proper selection.
Load Ratings Explained
For clear, safe selection of a pipe wrench, understanding load ratings is essential. Load ratings indicate the maximum force a wrench or its components can withstand during use. They reflect material strength, jaw design, and manufacturer testing, guiding choices for specific tasks. Ratings are typically expressed in pounds or newtons and paired with safety factors. Users should match tool ratings to expected loads, allowing margin for impact and misuse.
Regular inspection verifies rated capacity remains reliable; cracks, wear, or deformation invalidate ratings and demand replacement.
- A marked plate showing pounds or newtons
- Stamped model and batch codes
- Worn jaw teeth under load
- Bent handle stress lines
- Inspection tag with test date
Sizing And Capacity Charts
Moving from load ratings to practical selection, sizing and capacity charts translate those ratings into usable guidance by matching wrench dimensions and rated forces to pipe diameters, material types, and task conditions.
Charts list jaw opening, handle length, and maximum recommended pipe size alongside torque or force limits.
Users compare pipe outside diameter and material (steel, copper, plastic) to charted entries to pick a wrench that provides secure grip without overloading components.
Safety margins, intended purpose (light, medium, heavy), and accessory compatibility (extension handles, replacement jaws) are noted.
Interpreting charts reduces tool misuse and improves job efficiency.
How to Spot Quality: Heat Treatment and Machining Signs
When inspecting a pipe wrench, attention to heat treatment and machining reveals whether the tool will hold an edge and resist cracking under torque.
Look for even temper colors on jaws, consistent hardness without brittle spots, and absence of surface scale that hides improper quenching.
Machining should show clean, uniform tooth profiles, straight handles, and precise thread engagement on adjustment nuts.
Well-executed machining reduces stress risers and improves grip repeatability.
Signs of poor quality include pitted met al near stress zones, uneven teeth, or sloppy threads that bind.
- blued temper band along jaw edge
- crisply cut, symmetrical teeth
- smooth, concentric pin holes
- uniform finish on handle and head
- tight, smoothly operating adjustment threads
Budget vs Pro‑Grade Pipe Wrenches: What You Trade
Choose between budget and pro‑grade pipe wrenches by weighing durability, ergonomics, and long‑term cost. A concise comparison clarifies tradeoffs: entry models save upfront but wear faster; pro tools cost more yet resist deformation, have replaceable parts, and better grips. Professionals favor longevity and serviceability; occasional users may accept shorter life. Consider tooth quality, handle design, warranty, and repairability when deciding. Use the table for quick reference.
| Feature | Budget | Pro‑Grade |
|---|---|---|
| Initial cost | Low | High |
| Durability | Moderate | High |
| Repairability | Limited | Good |
| Ergonomics | Basic | Enhanced |
Top Safety Checks Before Using a Pipe Wrench
After weighing budget versus pro‑grade options for strength and repairability, a few quick safety checks before using a pipe wrench help prevent slips, damage, and injury.
The operator inspects jaw teeth for sharp, even edges and no missing teeth. The wrench body and adjustment nut are checked for cracks, straightness, and smooth movement. The handle is clear of oil, grease, and bends; a non‑slip grip is confirmed. The workpiece is examined for burrs and secure support to avoid sudden rotation. Finally, appropriate wrench size is selected to avoid overreach or excessive force.
- Close view of clean, sharp teeth
- Smooth turning nut
- Straight, grease‑free handle
- Supported, burr‑free pipe
- Correct wrench sizing
Proper Grip and Stance for Pipe‑Wrench Use
With feet planted shoulder-width apart and the body aligned behind the wrench, the operator establishes a stable base that directs force through the legs rather than the lower back.
Hands grip the handle with the dominant hand near the end for leverage and the other hand midway for control; thumbs wrap alongside the handle, not over the jaw.
Elbows remain slightly bent to absorb shock and maintain steadiness.
The torso rotates subtly, using core muscles to augment pull or push motions.
Weight shifts are deliberate: step with the foot on the wrench side when added force is needed.
Breathing is steady to coordinate effort.
How to Seat the Wrench So It Won’t Slip or Damage Pipe
To seat the wrench so it bites without slipping or marring the fitting, the operator aligns the jaws squarely on clean, dry pipe and sets the adjustable jaw just tight enough that the teeth contact evenly across the workpiece.
The handle is held at a slight angle so the fixed jaw bears most load; a light tap on the handle can seat the teeth. Protect soft finishes with a thin cloth or leather shim when necessary. Inspect teeth engagement and reposition if slippage begins. Maintain steady, controlled pressure rather than sudden jerks to preserve threads and fittings.
- dull, evenly seated teeth
- leather shim between jaw and chrome
- slight handle angle
- clean, dry pipe surface
- steady, deliberate pressure
Using Two Wrenches: Avoid Twisting Pipe Threads
When tightening or loosening a threaded fitting, one wrench must secure the stationary pipe or fitting while a second applies torque to the coupling to prevent the joint from twisting.
Using two appropriately sized wrenches distributes forces so connections remain aligned and seals intact.
The holding wrench bears counterforce; the working wrench delivers controlled rotation.
Position both wrenches to avoid slippage and guarantee tooth engagement without crushing softer materials.
Coordinate movements, applying steady, measured torque rather than sudden jerks.
For confined spaces, use offset or stubby wrenches and extend leverage cautiously.
Proper two-wrench technique preserves thread integrity and prevents leaks.
Apply Force Safely: Push vs Pull Techniques
The guide contrasts pushing and pulling to highlight safer ways to apply force with a pipe wrench. It notes that pushing often provides better control and reduced strain, while pulling can increase the risk of sudden slips or torque-related injuries.
Clear body positioning—stable feet, braced arms, and keeping the wrench close to the body—helps minimize those risks.
Push Technique Benefits
Compared with pulling, pushing a pipe wrench concentrates force more directly into the tool’s jaw and reduces the risk of sudden slips by keeping the user’s body behind the applied force.
The push technique improves control, allows steadier torque application, and minimizes wrench biting into soft fittings.
It favors predictable movement, reduces strain on the user’s back when used at the correct height, and helps maintain wrench tooth engagement during adjustments.
Proper foot placement and body alignment are essential.
Visualizing the motion aids consistent execution.
- A steady forearm driving power forward
- Feet braced, hips aligned for balance
- Wrench teeth seated firmly
- Slow, deliberate pressure
- Clear line of sight
Pull Technique Risks
Leaning backward while pulling a pipe wrench transfers force through the user’s arms and body, increasing the chance that a sudden slip will jerk the tool out of alignment. Pulling concentrates load on grip and wrist, raising sprain and crush risks if teeth slip. Controlled, incremental force reduces shock, but pull technique still permits sudden movement toward the user, increasing collision or fall hazards. Use protective gloves and clear footing; keep backup hand ready to guide. Consider pushing where feasible to direct force away from the body.
| Risk | Cause | Mitigation |
|---|---|---|
| Wrist strain | Overgrip | Gloves |
| Slippage | Worn teeth | Inspect |
| Collision | Sudden jerk | Stand clear |
| Crush | Loss of control | Two-handed support |
Body Positioning Tips
In a stable stance with feet shoulder-width apart, the worker positions the body so that pushes send force away from the torso while pulls draw it toward the center, and chooses the method that keeps the tool’s motion predictable and the hands clear of pinch zones.
The worker aligns shoulders and hips with the wrench, uses legs for big pushes, keeps elbows slightly bent on pulls, and avoids twisting the spine.
Anticipation of slip prevents sudden reach.
Visualizing contact points and escape paths reduces injury risk.
- Feet planted on non-slip surface
- Knees soft, weight over midfoot
- Elbows close to body
- Wrench handle directed along forearm
- Clear floor and hand path
How to Loosen Seized or Corroded Pipe Joints
When a pipe joint refuses to move because of corrosion or seized threads, the technician assesses the situation before applying force: determine the joint material, note nearby fittings or finishes that could be damaged, and choose appropriate penetrating oil and tools.
Apply penetrating oil, allow adequate dwell time, and tap the joint lightly with a hammer to help the oil penetrate.
Use the correct pipe wrench size and position it for maximum leverage without overstressing the pipe. Alternate tightening and loosening motions to break corrosion bonds.
If resistant, apply heat cautiously to expand the metal, then retry. If still stuck, consider cutting and replacing the section.
Preventing Galling and Thread Damage During Removal
Proper lubrication and the use of thread-protecting tools are essential to prevent galling and preserve mating surfaces during pipe removal.
Applying a suitable anti-seize or penetrating lubricant reduces friction and heat that can cause threads to bind.
Shielding threads with soft-jaw pliers, pipe protectors, or a sacrificial coupling minimizes direct wrench contact and maintains thread integrity.
Use Proper Lubrication
Technicians routinely apply suitable lubricants to threaded pipe joints before attempting removal to minimize friction, reduce the risk of galling, and protect threads from shear damage. A thin film of penetrating oil or anti-seize reduces seizure, eases initial torque, and limits heat buildup during turning.
Application should reach the engaged threads; allow dwell time for penetration. Reapply if disassembly stalls. Avoid heavy greases that trap debris. Use compatible compounds for the pipe material and service conditions. After loosening, clean and inspect threads, recondition or replace damaged sections before reassembly.
- dripping penetrating oil seeping into crevices
- brush-applied anti-seize coating
- capillary action along threads
- wiped-clean residue on wrench jaws
- gentle twisting with reduced effort
Protect Threads With Tools
After lubrication has eased initial movement, attention turns to preserving the integrity of the threads during removal by using purpose-made tools and techniques that limit contact damage and metal-to-metal galling.
Protective sleeves, soft-jaw pliers, and pipe vise inserts distribute clamping force away from threads. When using adjustable wrenches, wrap threads with thin metal or nylon protectors to prevent jaw indentation. Apply steady, controlled torque; avoid sudden impacts that raise burrs.
For seized fittings, use heat and penetrating oil, then back off gently while monitoring thread condition. Replace damaged seals and re-tap or chase threads if corrosion or deformation compromises engagement.
Turning Large‑Diameter Pipes Safely
When handling large‑diameter pipes, selecting the correct pipe wrench size and securing a stable grip are essential to prevent slippage and pipe deformation. Proper stance, two‑person assistance for long runs, and using cheater pipes cautiously reduce strain and sudden force.
Protect pipe surfaces with leather or soft jaws when torque risks denting. Inspect jaws and adjust for full contact; work in short controlled increments, reversing slightly to free tight threads. Maintain clear communication and workspace to avoid trips or falling sections.
- Two workers steadying a heavy cast‑iron span
- Leather pad preventing ring dents
- Wide wrench teeth biting cleanly
- Controlled short turns
- Clear floor and hand signals
Using Pipe Wrenches on Fittings, Couplings, and Valves
When working on fittings, couplings, and valves, the article outlines proper jaw placement to guarantee a secure grip without damaging threads.
It recommends protecting soft or finished surfaces with pads or strap wrenches to prevent marring.
Clear guidance is given on turning direction and how to apply force to avoid loosening adjoining joints or stressing connected components.
Proper Jaw Placement
On fittings, couplings, and valves, correct jaw placement concentrates bite on the metal surface to prevent slippage and damage. The movable jaw seats on the rounded face while the fixed jaw supports against the flat, aligning teeth with the pipe’s circumference. Position the wrench so force pulls toward the fixed jaw, not away, and keep the handle in line with the pipe axis to avoid torque on threads. Adjust jaw opening minimally for firm engagement. Inspect teeth before use and re-seat if slipping occurs.
- wrench teeth kissing a rounded coupling
- handle pulling toward the fixed jaw
- jaws aligned with pipe axis
- minimal gap between jaws
- teeth digging into metal
Protecting Soft Surfaces
To protect soft-plated or finished fittings, the pipe wrench should never contact the visible surface directly; instead, a sacrificial barrier—such as a strip of leather, rubber, or thin hardwood—must be wrapped around the fitting so the wrench teeth bite only the barrier.
The operator selects a barrier material compatible with the finish and thickness sufficient to prevent metal-to-metal marks.
When working on couplings or valve bodies, the barrier is held tightly and trimmed flush to avoid slipping.
For delicate chromed or painted surfaces, consider padding plus lower jaw pressure to reduce imprint risk while maintaining control during adjustment or removal.
Turning Direction Tips
Which way the wrench is turned determines grip, force direction, and the risk of damage or slippage.
A pipe wrench bites when pulled toward its jaw, so users prefer pull actions for secure holds; pushing can loosen the bite and cause slippage.
For fittings, apply steady pull strokes aligned with the pipe axis.
For couplings, use opposing wrenches to prevent twisting adjacent joints.
Valves require gentle pulls and small increments to avoid stem or seat damage.
Reposition the wrench frequently to maintain tooth engagement and avoid rounding edges.
- A wrench jaw sinking into cast iron
- Hands braced for a controlled pull
- Two wrenches opposing torque
- Tiny turns on a valve stem
- Teeth resetting on repositioning
Protecting Finished Surfaces When Using a Pipe Wrench
When working on exposed plumbing or decorative fittings, protecting finished surfaces prevents scratches, dents, and loss of plating that can result from direct pipe-wrench contact. The technician uses soft jaw covers, taping, and pads to isolate the wrench from metal finishes. Clamping force is minimized and wrench repositioning is preferred over excessive torque. For delicate fixtures, an adjustable spanner or strap wrench substitutes to avoid marks. Inspection after each adjustment catches blemishes early so corrective polishing or plating touch-up can follow. Careful technique preserves appearance while completing necessary repairs efficiently.
| Protection Method | Best Use | Notes |
|---|---|---|
| Soft jaw covers | Polished fittings | Reusable, non-marring |
| Cloth tape | Quick jobs | Replace after wear |
| Rubber pads | Bulky pipes | Distribute pressure |
| Strap wrench | Sensitive surfaces | No teeth contact |
| Alternative tools | Fine work | Use lower torque |
Maintenance: Cleaning, Lubricating, and Sharpening Teeth
Routine maintenance keeps a pipe wrench reliable and safe.
After each use, debris and grime should be removed from the jaws and threads to prevent wear.
Moving parts, including the knurl and pivot, require periodic lubrication to guarantee smooth operation.
Clean After Each Use
After each job, the pipe wrench should be cleaned to remove grime, thread debris, and any corrosive residues that can impair function.
The exterior is wiped with a solvent-dampened rag, jaws are brushed to dislodge trapped particles, and the adjustment threads are cleared of grit.
Inspect teeth for lodged metal shavings and remove them with a stiff brush or pick.
Dry thoroughly to prevent rust and store in a dry place.
Routine cleaning preserves grip accuracy and extends service life without requiring immediate repairs.
- oily rag wiping
- metal shavings scraped from teeth
- brush agitating jaw grooves
- threads cleared of grit
- towel drying before storage
Lubricate Moving Parts
Cleaning readies the wrench for lubrication by removing grime that can hold moisture or abrade moving parts.
The user applies a light machine oil or a spray lubricant to the adjustment nut, threads, and pivot points, then operates the jaw to work lubricant into contact surfaces. Excess oil is wiped away to prevent attracting dirt.
Stainless or plated components need less frequent attention; cast iron benefits from routine protection to forestall rust.
Periodic inspection follows lubrication to confirm smooth action and identify worn parts. Proper lubrication preserves function, simplifies adjustments, and extends the service life of the tool.
How to Check for Wear and When to Replace a Wrench
Frequently, a quick visual and tactile inspection will reveal whether a pipe wrench remains fit for service: check the teeth for rounding or chipping, confirm the jaw faces close evenly without excessive play, verify the adjuster moves smoothly and holds position, and look for cracks, severe corrosion, or bent handles that compromise leverage.
Regularly measure tooth height against a new reference; listen for slippage under load; note worn knurls that prevent secure adjustment.
Replace when teeth lose bite, threads strip, cracks appear, or when deformation reduces safe torque.
Proper records of replacement intervals improve safety and tool reliability.
- Saw-tooth edges smoothed by years of use
- Rust pitting across the jaw surface
- Twisted handle bending light in the sun
- Loose adjuster wandering under pressure
- Hairline crack running along the shank
Quick Field Fixes for Broken Wrenches
When a pipe wrench fails on the job, prompt, practical field repairs can restore enough function to finish a task safely until a proper replacement or shop repair is available. The technician assesses damage, secures loose jaws with temporary clamps, replaces missing pins with nail substitutes, files burrs, and applies lubricant. Care is taken to maintain grip geometry and avoid makeshift fixes that risk slippage. Minor handle cracks can be reinforced with wrap or metal straps. Record the repair for later permanent service.
| Issue | Quick Fix |
|---|---|
| Loose jaw | Clamp or wire |
| Missing pin | Nail substitute |
| Burrs | File smooth |
| Cracked handle | Strap wrap |
How to Store Pipe Wrenches to Extend Their Life
After temporary field repairs, proper storage preserves the function and safety of pipe wrenches by preventing corrosion, deformation, and misalignment.
Stored clean and dry, wrenches last longer: lightly oil moving parts, close jaws to protect teeth, and separate heavy models to avoid bending.
Hang or rack tools to prevent contact with concrete and moisture.
Use labeled spots so each wrench returns to its place, reducing drop risk.
Inspect periodically for rust or wear and reapply protective coatings as needed.
- A row of oiled wrenches hanging on sturdy hooks
- Wrenches nestled in foam-lined drawers
- Clean jaws facing upward
- Labeled pegboard silhouettes
- Dry cabinet with desiccant packs
Must‑Have Accessories: Jaw Covers, Chain Adapters, Cheaters
Among essential pipe wrench accessories are jaw covers, chain adapters, and cheaters, each serving a specific purpose to protect workpieces, increase grip on irregular shapes, and extend leverage safely.
Jaw covers, typically rubber or leather, prevent marring finished surfaces and distribute clamping pressure.
Chain adapters convert standard wrenches into chain-style grips for odd-shaped or larger pipes where fixed jaws cannot reach.
Cheaters, usually removable extension bars, lengthen the handle to multiply torque for stubborn fittings; they require caution to avoid overtightening or tool damage.
Selecting durable, properly sized accessories enhances versatility, protects materials, and improves safety during pipe work.
Choosing a Starter Pipe Wrench Set for Beginners
Why start with a dedicated starter set rather than a single wrench? A beginner benefits from complementary sizes that handle common household pipes without relying on improvisation.
A compact set typically includes a light 10–14″ wrench for tight spaces and a heavier 18–24″ for leverage.
Durable teeth, comfortable grips, and a fitted case simplify learning and storage.
Selecting trusted brands and checking for replaceable parts extends usefulness.
Practice on scrap pipe builds confidence.
Visualize common scenarios:
- Tight under-sink clearance with a short wrench
- Rusted joint needing steady leverage
- Metal shelving used as a makeshift workbench
- Quick swaps between sizes mid-job
- Neat, organized case for transport
How Professionals Size Their Wrench Kit for Jobsites
Professionals size their wrench kit by evaluating the typical pipe diameters encountered on projects to guarantee proper jaw fit and torque.
They prioritize tools for the most frequent job types to avoid carrying unnecessary pieces.
Kits consequently favor a few versatile lengths that cover small, medium, and large pipe work efficiently.
Assess Typical Pipe Sizes
When sizing a wrench kit for a jobsite, experienced tradespeople start by cataloging the common pipe diameters and materials encountered on similar projects. They note nominal sizes, wall thicknesses and coupling types to match wrench jaw capacity and leverage needs.
Assessment distinguishes between residential, commercial and industrial runs, ensuring both small 1/2–1″ work and larger 2–4″+ mains are covered. Consider material—copper, PVC, galvanized steel or cast iron—since surface hardness and fittings affect grip.
Stocking incremental wrench sizes reduces on-site improvisation and speeds workflow.
- a copper sink supply line
- a PVC irrigation main
- a threaded galvanized riser
- a cast-iron soil stack
- a large steel water main
Prioritize Job Frequency
After cataloging typical pipe sizes and materials, tradespeople rank tools by how often they’ll encounter each size on the jobsite to shape a practical wrench kit. Frequency guides selection: common residential sizes get more wrench options, rarer industrial diameters receive one backup. Time saved and fewer tool changes justify carrying multiple sizes that match job patterns. Technicians track calls and retrofit trends, then stock kits reflecting probability and task urgency. Compact kits emphasize the most frequent sizes, while surge jobs prompt temporary additions. A simple reference table helps clarify priorities.
| Priority | Typical Selection |
|---|---|
| High | 10″, 14″ |
| Medium | 18″, 24″ |
Pack Versatile Lengths
For jobsite efficiency, technicians select a mix of pipe wrenches of varying handle lengths to balance reach, leverage, and portability.
They pack compact 8–10 inch wrenches for tight spaces, mid-length 14–18 inch tools for general plumbing, and long 24–36 inch models when extra torque or extended reach is required.
Weight distribution, storage, and transport are considered to avoid overloading tool bags.
Interchangeable sets reduce redundancy while ensuring readiness.
Selection follows job types, common pipe sizes, and anticipated obstacles, enabling fast adaptation without sacrificing control or safety.
- A kneeling plumber using an 8″ wrench under a sink
- A 14″ wrench on a bathroom riser
- Two mid-length wrenches in a tool pouch
- A 24″ wrench bracing against a wall for torque
- A compact set neatly organized in a job box
What to Expect at Different Price Points
Although cost often correlates with build quality and features, buyers should expect clear trade-offs across price tiers: budget wrenches typically offer adequate performance for occasional household tasks but use lower-grade steel and simpler jaws.
Midrange tools commonly balance durability and value, featuring hardened alloy components, replaceable jaw inserts, smoother adjustment mechanisms, and better grip finishes suited for frequent use.
Premium wrenches emphasize longevity and precision—machined jaws, hardened shafts, ergonomic handles, and tighter manufacturing tolerances—reducing slippage and wear in professional settings.
Accessories, warranty coverage, and availability of spare parts also scale with price, influencing long-term ownership costs.
Recommended Brands and Models by Use Case
The article now turns to specific brands and models suited to different users.
For professional plumbers, emphasis is placed on durable, high-performance wrenches that withstand frequent heavy use.
For DIYers, the focus shifts to affordable, versatile options that balance ease of use with reliability.
Best For Professional Plumbers
Professional plumbers prioritize durability, precise bite, and ergonomic design when selecting pipe wrenches.
Brands like Ridgid, Bahco, and Stillson-style makers are favored for consistent performance; cast-steel bodies, replaceable jaws, and knurled adjustment nuts reduce downtime.
Match model to task: heavy 24–36-inch for mains, 10–14-inch for tight spaces, offset patterns for flared fittings.
Service technicians value calibrated torque feel and corrosion-resistant finishes for daily use.
Regular inspection and jaw replacement extend life.
- Large, heavy wrench gripping a mainline under pressure
- Compact wrench working inside a cramped crawlspace
- Offset wrench aligning with a flare fitting
- Smooth knurled nut being adjusted precisely
- Replaceable serrated jaw ready for installation
Top Picks For DIY
Often home DIYers select pipe wrenches that balance affordability, ease of use, and reliability for occasional repairs and projects.
Recommended choices include a 10–14 inch lightweight aluminum wrench for tightening sink and drain fittings, and an 18–24 inch model for larger household pipes. Brands like Ridgid, Milwaukee, and Knipex offer durable options; homeowner-focused lines prioritize comfort grips and replaceable jaws.
For limited storage, folding or compact pipe wrenches provide portability. A channel-lock style wrench serves multi-purpose needs.
Selection depends on pipe material, workspace access, and frequency of use; prioritize corrosion resistance and ergonomic handles for safe, effective DIY work.
Buying New vs Used Pipe Wrenches: Pros and Cons
When deciding between a new or used pipe wrench, buyers must weigh cost, condition, and designed use. New wrenches offer warranty, precise jaws, and predictable performance for demanding or professional tasks. Used tools can provide savings and broken-in ergonomics but may carry unseen wear or shortened life.
Choice depends on frequency of use, budget, and acceptance of risk. Consider task criticality: occasional home repairs versus heavy plumbing work guided by safety and reliability needs.
- A gleaming new wrench in a sealed box
- A weathered wrench with worn paint
- A smooth, comfortable handle
- A chipped, heavy tool
- A stack of mixed wrenches
How to Inspect a Used Wrench Before You Buy It
Inspect the used wrench visually and mechanically before committing to a purchase: check the jaws for even, sharp teeth and minimal pitting; verify the adjuster moves smoothly without play; inspect the handle for cracks, significant dents, or repairs; look for bent or misaligned components that would affect grip or safety; and confirm identification marks or manufacturer stamps to assess material quality and expected lifespan.
Test the wrench on pipe stock to confirm secure bite and proper reset.
Check for excessive wear on the heel and hook, corrosion that compromises strength, and proper spring tension.
Factor repairability and parts availability into the decision.
Eco‑Friendly and Ergonomic Pipe Wrench Options
Across contemporary tool lines, eco-friendly and ergonomic pipe wrenches prioritize reduced environmental impact and user comfort without sacrificing durability.
Manufacturers use recycled steel, low-VOC finishes, and modular repairable designs to extend service life. Handles adopt contoured grips, vibration-damping inserts, and optimized leverage to reduce fatigue and injury risk. Weight distribution and shorter stroke jaws improve control for confined spaces. Selection emphasizes certified materials, warranty-backed replaceable parts, and compatibility with existing tool sets.
- Reclaimed steel body with matte recycled finish
- Soft-touch, contoured handle with anti-slip texture
- Vibration-absorbing elastomer insert near the jaw
- Compact, balanced profile for tight spaces
- Tool-friendly modular jaw for part replacement
Common Mistakes Newbies Make With Pipe Wrenches
Frequently, novices make predictable errors with pipe wrenches that compromise both the workpiece and personal safety. They often choose the wrong size, apply excessive force, or position the wrench improperly, causing slippage, damage, or injury. Lack of inspection, ignored maintenance, and using worn teeth are common. Failure to secure the workpiece or to use supplementary supports increases risk. Proper technique, tool selection, and routine checks prevent many issues.
| Mistake | Consequence | Simple Fix |
|---|---|---|
| Wrong size | Poor grip | Match wrench to pipe |
| Worn teeth | Slippage | Replace tool |
| Excess force | Damage | Use steady pull |
| Bad position | Injury | Reorient jaw |
Troubleshooting Slipping, Rounding, and Stuck Pipes
When a pipe wrench slips, rounds a fitting, or refuses to budge, the problem usually stems from poor contact, improper leverage, or corrosion bonding the joint.
The user should make sure jaw teeth bite squarely, use the correct wrench size, and apply steady, controlled force.
Tapping seized joints with penetrating oil and heat can break corrosion; protect nearby finishes.
If teeth are damaged, replace the wrench or use a strap or chain wrench to avoid further rounding.
Persistent stuck pipes may require gradual tightening-then-backoff, impact from a dead-blow hammer, or cutting and replacing the damaged section.
- serrated jaws digging in
- rusted threads fused together
- rounded hex flats
- awkward leverage angles
- heat and oil breaking grip
Quick Checklist for Choosing the Right Pipe Wrench Now
After addressing common causes of slipping, rounding, and seized joints, the selection process should focus on matching wrench type, size, and condition to the job at hand.
Confirm pipe diameter and choose a wrench with jaw capacity that exceeds the pipe size. Prefer straight, aluminum, or steel models based on weight tolerance and torque needs.
Check adjuster smoothness and heel-to-tooth alignment; avoid worn or cracked jaws. Consider pipe material—soft metals benefit from finer teeth or protective pads.
Select length for required leverage while maintaining control. Prioritize a reputable brand and appropriate safety features for predictable performance.
Day‑One Test: What to Buy and How to Inspect It on Arrival
What should be checked on arrival to make sure the wrench performs reliably? A new pipe wrench is inspected immediately for fit, function, and finish. The head alignment, jaw teeth, adjustment mechanism, and handle integrity determine usability. Lubrication and packaging residue are noted. Tests are quick: open and close the jaw, set against a pipe, and apply moderate torque.
- Visual: clean forged head, crisp stamped size markings
- Feel: smooth knurling on the adjusting nut, no wobble in threads
- Teeth: sharp, evenly spaced grippable serrations
- Alignment: fixed and movable jaw parallel under load
- Handle: no cracks, straight, balanced feel
Conclusion
Like a weathered compass for stubborn metal, the pipe wrench guides hands through girth and grit, translating leverage into quiet authority. Knowing its anatomy, proper use, and common pitfalls turns brute force into finesse; choosing the right size, checking teeth, and testing bite guarantee trustworthiness. Whether loosening, holding, or freeing seized joints, a well‑selected, well‑used wrench transforms problem pipes into predictable paths, leaving the worksite steadier and the craftsman more confident.