How to Clean Grout With Hydrogen Peroxide: Step-By-Step Guide for Sparkling Tile
To effectively clean grout using hydrogen peroxide, mix 3% peroxide with baking soda to create a paste. Apply this to the grout lines, scrub with a stiff brush, let it sit for 10–30 minutes, then rinse and wipe dry. Always test an inconspicuous area first and avoid using on natural stone. For optimal results, consider sealing the grout after it dries. Follow the detailed steps and safety notes for best practices.
What Hydrogen Peroxide Does to Grout and Why It Works
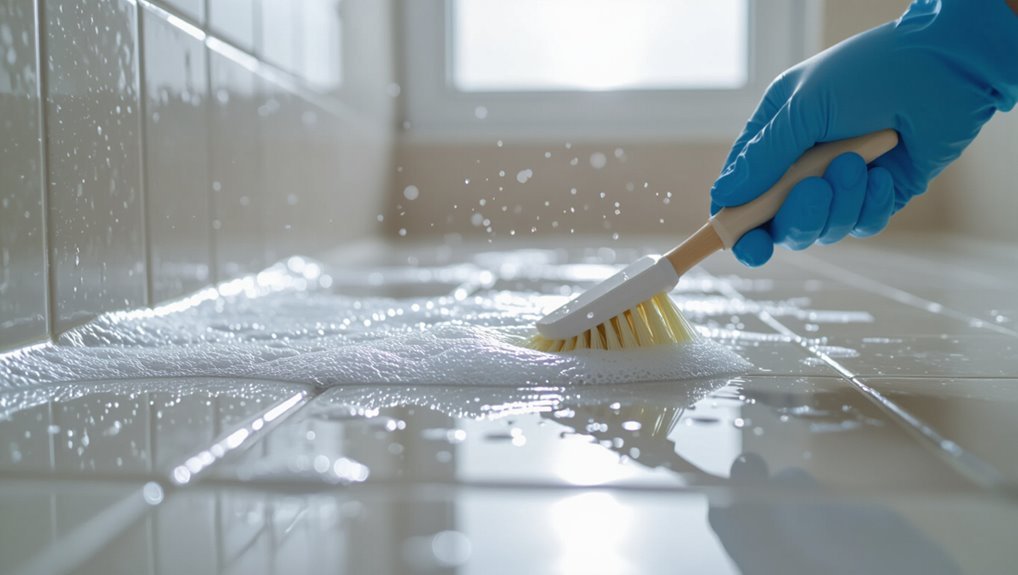
Hydrogen peroxide acts as an oxidizing and bleaching agent, releasing oxygen that breaks down organic matter and loosens surface stains in grout.
It effectively targets mildew, mold, and general discoloration caused by organic buildup, though it is less effective on deep-set mineral stains.
Users should note material compatibility and basic safety: diluted solutions are generally safe on sealed grout and common tiles but can bleach some pigments and should be handled with gloves and ventilation.
Chemical properties relevant to cleaning
Because it releases reactive oxygen species upon decomposition, hydrogen peroxide acts as an oxidizing and bleaching agent that breaks down organic stains and disrupts microbial cell walls in grout.
Its low pH-neutral decomposition produces water and oxygen, minimizing residue.
Porosity, concentration, contact time, and catalytic surfaces influence effectiveness; guidance on how to clean grout with hydrogen peroxide emphasizes appropriate dilution and testing.
Types of stains hydrogen peroxide removes (mildew, mold, discoloration)
Destroys and lifts a range of common grout blemishes, including surface mildew, black mold colonies, and organic discoloration from soap scum, food, or body oils. It oxidizes and breaks down pigmented compounds, fades light mineral staining, and reduces biofilms and mildew pigments. Stubborn deep-set stains may need repeated application or mechanical agitation; inorganic rust or heavy dye stains respond poorly.
Safety and material compatibility overview
After outlining which stains hydrogen peroxide can remove, attention turns to how it interacts with grout and surrounding materials.
Hydrogen peroxide whitens grout by oxidizing organic stains and breaking mold spores, with minimal residue. It is generally safe for cementitious grout and ceramic or porcelain tile but can bleach colored grout, damage some natural stones, and cause irritation if concentrated—use diluted solutions and test first.
When to Use Hydrogen Peroxide vs Other Cleaners
Hydrogen peroxide offers a gentler, non-chlorine alternative to bleach and a more targeted oxidizing action than vinegar, baking soda, or many commercial cleaners.
It is preferable for light-to-moderate stains, porous grout, and situations where fumes or surface bleaching must be minimized.
It should be avoided on colored grout, sensitive stone, or when a stronger commercial formulation is required for heavy mold or long-standing discoloration.
Hydrogen peroxide compared to bleach, vinegar, baking soda, commercial cleaners
Choosing a grout cleaner depends on stain type, surface material, and safety needs; hydrogen peroxide is a mild, oxygen-based bleach that whitens stains without the harsh fumes or corrosive effects of chlorine bleach, making it preferable for colored grout, porous stone, or areas with poor ventilation. It’s gentler than vinegar, less abrasive than baking soda, and safer than many commercial chlorinated cleaners.
| Cleaner | Notes |
|---|---|
| Hydrogen peroxide | Mild, non-chlorine, safe for many surfaces |
| Bleach | Strong, fumes, can damage colored grout |
| Vinegar/Baking soda | Acidic or abrasive; limited bleaching |
Situations where hydrogen peroxide is preferable
When working with light- to moderate-stained grout in poorly ventilated spaces, around colored tiles, or on porous natural stone, peroxide is often the safest and most effective choice; it whitens without the harsh fumes, chlorination damage, or acidity that make bleach, vinegar, or abrasive pastes problematic in those contexts.
It suits routine maintenance, delicate surfaces, households with sensitivities, and small spot treatments needing low-risk bleaching.
Situations to avoid using hydrogen peroxide
Although effective for many stains, peroxide should be avoided on heavily soiled, deeply stained grout or in situations where mold and mildew have penetrated below the surface, because its limited penetration and deactivating action may leave residues and fail to fully sanitize.
Additionally, avoid peroxide on porous stone, colored grout that may bleach, and electrical or metal fixtures; opt instead for professional remediation or targeted cleaners.
Supplies and Preparations Needed
Before beginning, assemble recommended materials and tools such as hydrogen peroxide (noting 3% is common but stronger concentrations are available from specialty suppliers), scrub brushes, syringes or spray bottles, and cleaning cloths.
Wear gloves and eye protection and guarantee good ventilation, and confirm tile and grout compatibility by testing an inconspicuous area for colorfastness or existing sealant or colorant.
Finally, inspect grout condition for cracks or loose sections that require repair prior to treatment.
Recommended materials and tools
Essential supplies include hydrogen peroxide (3% solution), a pH-neutral detergent or mild dish soap, baking soda, a spray bottle, a stiff nylon grout brush or old toothbrush, a microfiber cloth, and rubber gloves.
Additional items: a small bucket, toothpicks for debris, and protective eyewear. Proper ventilation and kneepads improve comfort.
- Bucket for mixing
- Stiff brush
- Microfiber cloth
Concentration options (3% vs higher) and where to buy
Several concentration options exist for hydrogen peroxide when cleaning grout, with 3% being the most common and higher strengths (6–12% or more) available for commercial or industrial use.
Three percent is safe and effective for household stains; stronger solutions accelerate whitening but increase risk of surface damage.
Purchase 3% at pharmacies and supermarkets; stronger concentrations come from pool supply, chemical suppliers, or specialty cleaning stores.
Protective gear and ventilation
Wear nitrile gloves, eye protection, and guarantee adequate airflow when using hydrogen peroxide on grout: nitrile resists peroxide better than latex, safety glasses or goggles protect against splashes, and a window fan or open door reduces vapor buildup—especially with strengths above 3%.
Also consider a mask rated for chemical vapors if sensitivity exists, and wear long sleeves to prevent skin contact during application and scrubbing.
Pre-cleaning checks (tile type, grout condition, colorant presence)
Before applying hydrogen peroxide, inspect the tile and grout to confirm compatibility and identify any vulnerabilities.
Check tile material—natural stone, unglazed ceramic, and some porous tiles may stain or etch.
Assess grout integrity for cracks or crumbling that require repair.
Determine whether grout contains colorant or sealant; test a small, hidden area to verify no discoloration or adverse reaction before proceeding.
Step-by-Step Guide to Cleaning Grout with Hydrogen Peroxide
The following steps outline a practical, safe method for restoring grout with hydrogen peroxide, beginning with preparing the area and testing a small patch.
Instructions cover application technique, recommended brushes and agitation methods, appropriate dwell times and when to reapply, plus final rinsing to remove residue.
Each step emphasizes safety and clear actions to achieve consistent results.
Step 1 Prepare the area and test a small patch
A small area around the grout should be cleared and inspected so any loose debris, mats, or movable items won’t interfere with cleaning.
Next, ventilate the space and wear gloves and eye protection.
Choose an inconspicuous spot, apply a tiny amount of hydrogen peroxide, wait a few minutes, then blot and inspect for colorfastness or damage.
Proceed only if no adverse effects appear.
Step 2 Apply hydrogen peroxide safely and effectively
Mix a 3% hydrogen peroxide solution with a small amount of baking soda into a paste.
Apply it directly to the grout lines with a soft brush or cloth, and allow it to sit for 5–10 minutes before agitating gently to lift stains.
Wear gloves and eye protection, ventilate the area, avoid contact with colored fabrics, and test heat-sensitive surfaces; rinse thoroughly and pat dry.
Step 3 Agitate grout lines (brush types and technique)
Once the paste has sat for the recommended 5–10 minutes, attention shifts to agitating the grout lines to lift embedded grime.
A stiff nylon brush or an old toothbrush provides control without damaging grout. Use short, firm back-and-forth strokes along grout lines, working in small sections.
Apply moderate pressure, rinse bristles often, and switch to a firmer brush only for stubborn stains.
Step 4 Let dwell time and when to reapply
After agitating the grout, allow the hydrogen peroxide paste to sit undisturbed so it can penetrate and break down stains.
Typical dwell time is 10–15 minutes for light soils, up to 30 minutes for stubborn discoloration.
Monitor drying; if paste dries prematurely, mist lightly to maintain activity.
Reapply only to areas still stained, repeating agitation and dwell until desired results appear.
Step 5 Rinse and remove residue
Begin rinsing by loosening and lifting the peroxide paste and loosened soil with clean water and a soft brush or sponge, working in small sections to prevent residue from drying back into the grout.
Continue thorough rinsing until water runs clear, wiping away loosened particles with a microfiber cloth or mop.
Repeat rinses as needed, ensuring no peroxide or debris remains in grout lines.
Step 6 Drying and post-clean inspection
Allow grout to dry completely before declaring the job finished, as moisture trapped in grout can hide stains and promote mildew; typical drying time is 24–48 hours depending on ventilation and tile porosity.
Once dry, inspect joints for discoloration, loose grout or residual cleaner. Touch up stubborn spots with a diluted hydrogen peroxide paste, reseal if needed, and document areas requiring future maintenance.
Alternative Application Methods and Recipes
The article next outlines several alternative application methods and simple recipes for grout cleaning using hydrogen peroxide.
It covers a baking soda–hydrogen peroxide paste (common ratios and when to use it), combinations with dish soap or castile soap for added grease-cutting power, and the pros and cons of ready-to-use sprays versus thicker pastes or longer soaking treatments.
Practical tips for choosing between spray, paste, and soak based on soil level and surface sensitivity are provided.
Hydrogen peroxide + baking soda paste (mixing ratios and uses)
A thick paste of hydrogen peroxide and baking soda combines mild abrasion with bleaching action to lift stains and brighten grout lines.
Mix about two tablespoons baking soda with one tablespoon 3% hydrogen peroxide, adjusting to a spreadable paste.
Apply to grout, let sit 10–15 minutes, scrub with a stiff brush, then rinse.
Repeat for stubborn discoloration; avoid prolonged use on colored grout.
Hydrogen peroxide + dish soap or castile soap
Combine hydrogen peroxide with a few drops of dish soap or liquid castile soap to create a foaming cleaner that cuts grease and lifts grime from grout without harsh chemicals.
Apply sparingly, scrub with a stiff brush, then rinse thoroughly. This blend boosts degreasing power, breaks down organic stains, and foams into grout lines for easier agitation while remaining gentle on most sealed tiles; test first.
Ready-to-use spray vs paste vs soaking methods
After using a peroxide-and-soap foaming solution for spot cleaning, users can opt for different application formats—ready-to-use spray, paste, or soaking method—each suited to specific stain types and time constraints.
Ready sprays offer fast coverage for light grime. Pastes cling to vertical grout for targeted, longer contact.
Soaking (with diluted peroxide) penetrates deep-set stains but requires extended dwell time and ventilation.
Deep Cleaning and Stubborn Stain Solutions
For persistent grout discoloration, combining hydrogen peroxide with a steam cleaner can loosen deep-set grime without harsh chemicals.
Mechanical options such as grout saws or rotary brushes can remove stubborn deposits but require care to avoid damaging tile or joint depth.
If stains, deterioration, or mold persist after these methods, a professional restoration or regrouting should be considered.
Using a steam cleaner with hydrogen peroxide
Using a steam cleaner with hydrogen peroxide delivers concentrated heat and oxidizing power to loosen and lift deep-set grime from grout lines, making it a strong option for stubborn stains that resist scrubbing.
Operators should dilute peroxide appropriately, apply steam in short passes, and wipe residue promptly. This method reduces chemical dwell time and enhances extraction, improving grout brightness without harsh abrasives.
Mechanical options (grout saws, rotary brushes) and precautions
Mechanical tools such as grout saws and rotary brushes provide focused abrasion to remove deeply embedded grime and deteriorated grout where chemical treatments alone fail.
Operators should select the appropriate tool size and grit for the tile and grout type to avoid surface damage. Use steady, light pressure, test in an inconspicuous area, wear eye and respiratory protection, and avoid aggressive action near soft or glazed tiles.
When to call a professional
When should a homeowner consider professional help for grout cleaning?
Professionals are recommended when stains resist peroxide and scrubbing, grout is severely stained, cracked, or deteriorated, mold penetrates deeply, or large areas require intensive restoration.
They provide industrial cleaners, steam, regrouting or sealing, and guarantee tile integrity.
Cost, warranty, and time constraints also justify hiring experts for lasting results.
Preventing Future Grout Stains and Maintaining Results
After restoring grout, attention turns to protection and upkeep to prolong results.
This includes choosing and applying an appropriate sealer at the recommended time, establishing a regular cleaning routine with gentle daily cleaners, and keeping a simple spot-cleaning method using hydrogen peroxide for fresh stains.
Clear guidelines on sealer types, application timing, and quick-response steps help prevent recurrence and reduce long-term maintenance.
Sealing grout: types, timing, and application
Sealing grout is a straightforward preventive measure that preserves cleanliness and extends the life of restoration work by creating a moisture- and stain-resistant barrier over cured grout lines.
Choose penetrating or surface sealers based on pore protection needs; apply after grout fully cures (usually 48–72 hours), follow manufacturer instructions, use a brush or applicator, wipe excess, and reapply periodically for optimum stain resistance.
Regular cleaning schedule and gentle daily cleaners
Establish a simple, consistent cleaning routine to keep grout lines looking their best and to prevent the buildup that leads to stains.
A twice-weekly wipe with a microfiber mop and a pH-neutral cleaner removes surface dirt. Monthly light scrubbing preserves sealed grout. Avoid harsh acids or bleach that degrade sealers.
- Microfiber mop + pH-neutral cleaner
- Weekly grout inspection
- Monthly gentle scrubbing
Quick spot-cleaning routine with hydrogen peroxide
Treat small grout stains promptly with a quick hydrogen peroxide spot-clean to prevent discoloration from setting in and to maintain sealed grout performance.
Apply 3% hydrogen peroxide to the stain, let sit one to two minutes, then scrub gently with a soft brush.
Wipe residue with a damp cloth, dry thoroughly.
Repeat only as needed to avoid degrading sealant.
Common Mistakes and How to Avoid Them
Common mistakes when using hydrogen peroxide on grout include using incorrect concentrations or mixing it with incompatible chemicals, which can reduce effectiveness or create hazardous reactions.
Over-scrubbing can erode grout and scratch tiles, while neglecting ventilation and safety precautions risks irritation or inhalation exposure.
Addressing these errors early preserves results and protects both surfaces and users.
Using incorrect concentrations or mixing with incompatible chemicals
Mixing hydrogen peroxide at the wrong concentration or combining it with incompatible cleaners can reduce effectiveness and create hazardous reactions.
Users should follow product labels, use typical 3–6% solutions for grout, and avoid ammonia, bleach, or acidic cleaners.
Measuring and testing on an inconspicuous area prevents damage.
When in doubt, dilute with water or consult manufacturer guidance to guarantee safe, effective cleaning.
Over-scrubbing or damaging grout and tiles
Scrubbing too vigorously can erode grout lines and scratch tile surfaces, turning a cleaning effort into costly damage.
One should use soft-bristled brushes, gentle pressure, and short, controlled strokes. Test methods on an inconspicuous area first.
Avoid metal pads and abrasive powders. Rinse frequently to check progress and stop when stains lift to prevent overworking surfaces and weakening grout integrity.
Ignoring ventilation and safety precautions
After warning against aggressive scrubbing, attention should turn to the often-overlooked issue of ventilation and basic safety when using hydrogen peroxide on grout.
Users should work in well-ventilated spaces, open windows, and use fans to disperse fumes. Protective gloves and eye protection prevent irritation.
Avoid mixing peroxide with ammonia or bleach. Store solutions safely and keep pets and children away during cleaning.
Troubleshooting Common Problems
When hydrogen peroxide cleaning does not restore grout color, common causes include persistent discoloration, efflorescence, metal staining, and mineral buildup that require different follow-up treatments.
Troubleshooting also addresses surface residue or whitening left after rinsing and drying. The following tips distinguish causes and recommend targeted fixes.
Grout that remains discolored after treatment
Persistent discoloration in grout after hydrogen peroxide treatment signals that the underlying cause may be beyond surface staining.
The writer recommends inspecting for deep-set dye, mold embedded in porous grout, or old grout degradation.
If discoloration persists, options include repeated targeted cleaning, professional-grade poultices, steam cleaning, or replacing grout lines.
Document results and avoid harsh abrasives that further damage grout.
Efflorescence, staining from metals, and mineral deposits
Recognize that efflorescence, metal staining, and mineral buildup are distinct problems with different causes and treatments:
Efflorescence is a powdery white residue from salts leaching through masonry.
Metal stains appear as rusty or gray discoloration from corroding hardware or water with high iron content.
Mineral deposits form hard, crystalline films from hard water.
Treat each accordingly: brush, acid rinse for efflorescence; chelating agents or rust removers for metal stains; descaling agents or vinegar for mineral deposits.
Surface residue or whitening after cleaning
Surface residue or whitening after cleaning often appears as a thin, powdery film or cloudy haze on grout and tile surfaces. This typically results from leftover cleaning agents, dissolved salts, or soap scum that were not fully rinsed away.
To remove it, rinse thoroughly with warm water, scrub gently with a soft brush, then dry.
Repeat rinsing or neutralize cleaners if whitening persists.
Cost, Time, and Expected Results
The following section outlines typical time and labor needed per room, from quick touch-ups to full deep cleans.
It also summarizes estimated costs for hydrogen peroxide, cleaners, brushes, and optional tools.
Finally, it sets realistic before-and-after expectations and offers simple tips for photographing results.
Typical time per room and labor considerations
Efficiency in grout cleaning depends largely on room size, grout condition, and chosen method.
A small bathroom with mild staining may take 30–60 minutes; a larger kitchen or heavily stained floor can require 2–4 hours.
Manual scrubbing increases labor time; using a brush attachment or steam accelerates work.
Allow additional drying and reinspection time between stages.
Estimated cost of materials and tools
After accounting for room size and method, the next consideration is the estimated outlay for materials and tools when using hydrogen peroxide for grout cleaning.
Typical expenses include hydrogen peroxide (small bottle $2–$6), baking soda and dish soap ($1–$5), brushes or grout tools ($5–$20), spray bottles and gloves ($3–$10), and optional steam cleaner rental ($30–$70 daily), totaling roughly $11–$111.
Before-and-after expectations and photo tips
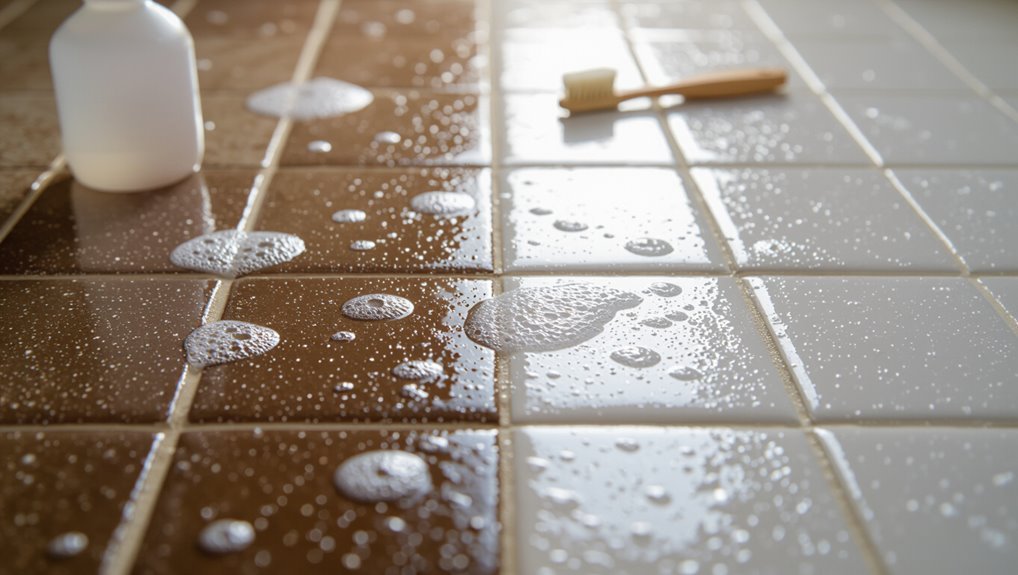
How long will the transformation take, and what can be realistically expected?
Typical cleaning sessions last 30–90 minutes per small room; heavily stained grout may need repeated treatments over days.
Expect noticeable lightening, not perfect restoration for permanently dyed grout.
For photos, shoot before and after in identical lighting, angle, and distance; use a ruler or coin for scale and consistent white balance.
Conclusion
Hydrogen peroxide restores grout by breaking down stains and disinfecting, leaving tile renewed like a rainstorm revealing a hidden city. When used appropriately, it works faster and safer than many harsh chemicals, especially on porous grout and organic stains. Consistent care—sealing, gentle scrubbing, and routine spot cleaning—prevents re-soiling. Avoid overuse on colored grout and always test first. With proper technique, results are economical, timely, and reliably bright.