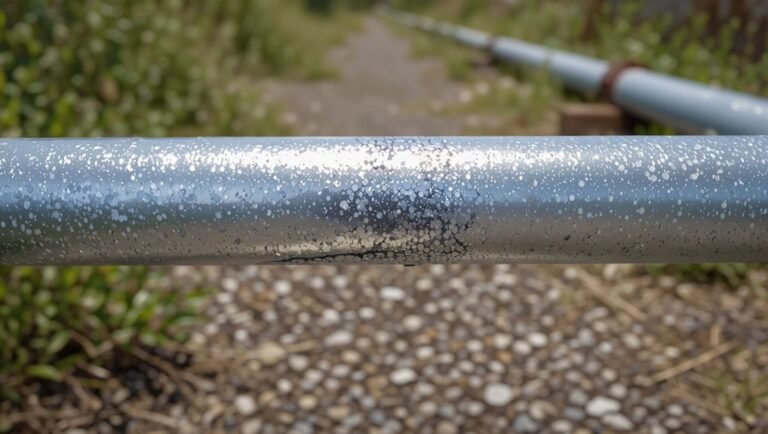
How to Weld Stainless Steel Pipe: Step-by-Step Guide for Strong, Clean Joints
Welding stainless steel pipe effectively requires careful preparation and technique to ensure strong, clean joints. Start with proper joint preparation, including beveling and maintaining appropriate root gaps. Choose the right filler material and utilize controlled heat to maintain corrosion resistance and prevent distortion. Always use personal protective equipment (PPE) and ensure proper ventilation. When TIG or orbital welding, purge the inner diameters to eliminate contaminants. Maintain a steady travel speed and use the correct shielding gas to protect the weld. After welding, inspect the joints for heat tint and clean as necessary. Conduct non-destructive testing (NDT) as required, and document all procedures and materials for traceability. This guide will provide further details on steps, parameters, and troubleshooting techniques.
Overview of Welding Stainless Steel Pipe
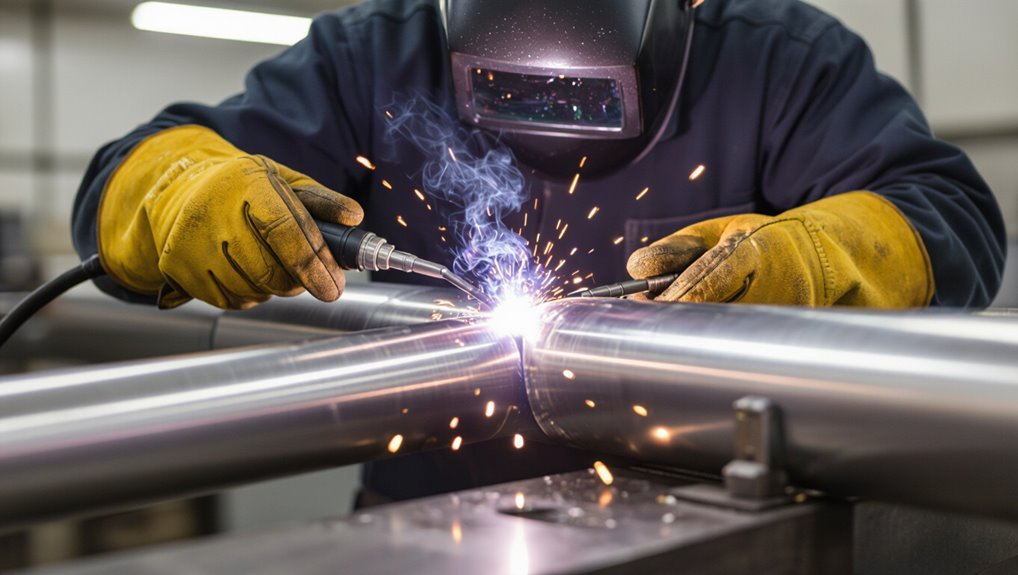
Stainless steel pipe differs from carbon steel primarily in alloy content and corrosion resistance, which affects heat input, filler selection, and distortion control during welding.
It is commonly used in food processing, chemical plants, pharmaceuticals, and marine systems where cleanliness and corrosion resistance are critical.
Typical welding procedures emphasize proper joint preparation, appropriate filler metals and shielding, and controlled heat to achieve strong, corrosion-resistant welds with minimal post‑weld treatment.
What makes stainless steel pipe different from carbon steel
Many fabrication shops and engineers treat stainless steel pipe as a distinct class of material from carbon steel due to its chromium-rich alloying, which imparts corrosion resistance, different thermal and mechanical behavior, and unique welding considerations.
Differences include lower thermal conductivity, higher coefficient of expansion, susceptibility to sensitization and distortion, and specialized filler metals and procedures; these factors shape how to weld stainless steel pipe effectively.
Common applications that require stainless pipe welding
Because of its corrosion resistance and heat-handling characteristics, stainless steel pipe is specified across industries where fluid purity, longevity, or contamination control matter.
Common applications include food and beverage processing, pharmaceutical and biotech systems, chemical and petrochemical plants, marine and offshore piping, power generation and boiler feed lines, HVAC and chilled-water systems, and medical gas distribution.
These sectors demand weld integrity and sanitary finishes.
Quick summary of the welding process and expected outcomes
Welders prepare, join, and inspect stainless steel pipe using controlled heat input and appropriate filler metals to produce corrosion-resistant, mechanically sound joints.
The process includes cleaning, fit-up, tack welding, root and fill passes, and post-weld cleaning or passivation.
Expected outcomes are full-penetration welds with minimal distortion, correct metallurgy, consistent bead profile, and verified leak-free performance meeting applicable codes and inspection criteria.
Required Safety Gear and Shop Setup
Proper personal protective equipment—including flame-resistant clothing, welding helmets with appropriate filters, gloves, and respiratory protection—is essential when welding stainless steel.
Adequate ventilation and fume extraction are required to control hazardous chromium and nickel emissions.
The work area should be prepared to minimize trip hazards and ignition sources, with fire watches and suppression readily available.
Personal protective equipment (PPE) for stainless welding
Several essential pieces of personal protective equipment are required when welding stainless steel to protect against heat, UV radiation, fumes, and hot spatter.
Welders should wear a shade-appropriate auto-darkening helmet, flame-resistant jacket, heavy leather gloves, and long pants.
Eye protection, hearing protection, and respiratory protection suited to task exposures are mandatory.
Steel-toe boots and weld aprons complete the PPE ensemble.
Ventilation and fume control for chromium/nickel alloys
Effective ventilation and fume control are critical when working with chromium/nickel stainless alloys because airborne hexavalent chromium and nickel compounds pose serious inhalation hazards and long-term health risks.
Use local exhaust ventilation (hoods, capture arms) at the weld point, supplemented by general shop ventilation and filtered air cleaners with HEPA and chemical cartridges.
Monitor air, enforce respirator use when exposures exceed limits.
Work area preparation and fire prevention
Prepare the workspace by clearing combustible materials, establishing a defined welding zone, and positioning fire-resistant barriers or curtains to contain sparks and spatter.
Inspect floors, walls, and overheads for hidden combustibles. Keep a Class ABC fire extinguisher and fire blanket accessible.
Remove gas cylinders from the immediate area or secure them. Assign a trained fire watch during and after welding until cool.
Materials, Tools, and Consumables
Selection of the correct stainless alloy and compatible filler metal is critical to achieve corrosion resistance and mechanical properties in welded pipe.
The primary welding methods—TIG, MIG (GMAW), Stick (SMAW), and orbital—each have specific advantages and equipment needs, while essential shop tools include grinders, clamps, bevelers, fixtures and purging systems.
Proper gas selection and calibrated flow rates for shielding and backing gases complete the consumables list and influence weld quality.
Stainless steel alloy selection and matching filler metals
Choosing the correct stainless steel alloy and matching filler metal is essential to achieving desired corrosion resistance, mechanical properties, and weldability in pipe fabrication.
Selection depends on base metal grade (304, 316, duplex, 2205, etc.), service environment, and thermal exposure.
Match composition to avoid sensitization, galvanic corrosion, or brittle intermetallics.
Use certified filler rods/wires and follow manufacturer compatibility charts and specifications.
Welding processes overview: TIG, MIG (GMAW), Stick (SMAW), and orbital
Several common welding processes—TIG (GTAW), MIG (GMAW), Stick (SMAW), and orbital welding—cover the majority of stainless steel pipe fabrication needs, each with distinct materials, tooling, and consumable requirements that affect joint quality, productivity, and field applicability.
TIG offers precision and low heat input; MIG increases deposition rates; Stick suits outdoors and dirty surfaces; orbital provides repeatable, automated circumferential control.
Essential tools: grinders, clamps, purging equipment, bevelers, fixtures
Essential tools for stainless steel pipe welding encompass a focused set of grinders, clamps, purging equipment, bevelers, and fixtures that together determine joint quality, fit-up speed, and corrosion resistance.
Proper angle grinders with stainless wheels, precision clamp systems, internal purge kits, orbital-compatible bevelers, and adjustable fixtures guarantee consistent root gaps, clean edges, minimal oxidation, and repeatable alignment for high-integrity, corrosion-resistant welds.
Gas choices and flow rates: shielding and backing gases
Selects of shielding and backing gases critically influence weld penetration, bead appearance, and corrosion resistance when joining stainless steel pipe.
Preferred shielding mixes include argon with 2–5% oxygen for TIG and argon‑helium blends for increased heat in MIG.
Backing with pure argon or argon‑helium prevents oxidation inside the root.
Typical flow rates: 15–25 CFH externally, 5–10 CFH internal purge.
Pre-Weld Preparation
Before welding, the pipe ends and dimensional tolerances are inspected and the appropriate joint type and groove design (butt, socket, branch) are selected to match application and code requirements.
Surfaces are prepared by solvent cleaning, mechanical methods, or pickling as needed, while fit-up, tack welding and gap control are planned to guarantee alignment and consistent root geometry.
A purge strategy for root protection, including argon/back-purge setup and monitoring, is established to prevent oxidation during welding.
Inspecting pipe ends and dimensional tolerances
A thorough inspection of pipe ends and dimensional tolerances guarantees weld integrity and fit-up consistency by verifying straightness, concentricity, bevel geometry, and length against specification limits.
Inspectors measure wall thickness, OD/ID, root face, and bevel angle, check for burrs, cracks, pitting, and contamination, and confirm that dimensional deviations fall within allowable tolerances before any clamping or tack welding is attempted.
Measurements are recorded, nonconformances tagged, and corrective machining or rework performed to restore compliance, ensuring predictable alignment and leak-free joints.
Joint types and groove designs for pipe (butt, socket, branch)
Having verified pipe ends and dimensional tolerances, attention shifts to choosing appropriate joint types and groove geometries to achieve reliable welds and predictable fit-up.
Selection depends on service, wall thickness, alignment and accessibility: buttwelds with single or double V or J grooves for full penetration; socket welds for small diameters; branch connections using saddles or reinforced grooves.
Specify root gaps, bevel angles, and backing.
Cleaning methods: solvent, mechanical, pickling considerations
Prepare the pipe surfaces by removing oils, oxides, and contaminants that compromise weld quality and corrosion resistance.
Use solvents or degreasers for oil, followed by clean water or alcohol rinse.
Mechanically abrade with stainless wire brushes or fine-grit Scotch-Brite to expose fresh metal without contamination.
For heavy oxidation, apply controlled pickling paste, neutralize and rinse thoroughly.
Verify cleanliness before welding.
Fit-up, tack welding strategy, and gap control
Align pipe sections precisely and secure them with an organized tack-welding sequence that controls gaps, minimizes distortion, and preserves corrosion-resistant finishes.
Use evenly spaced tacks, alternating around the circumference to balance heat. Maintain consistent root gap per procedure, chamfer as required, and keep tack size minimal yet strong.
Verify alignment after tack cooling; adjust before final weld to prevent misalignment and stress buildup.
Purge planning for root protection (argon/back-purge setup)
Effective purge planning is essential to protect the root of a stainless steel pipe weld from oxidation and contamination.
The planner selects purge gas (high-purity argon), calculates flow and volume, seals joints with packing or tape, and monitors oxygen with a sensor.
Back-purge setup guarantees laminar flow and gradual venting.
Proper documentation, leak checks, and purge time prevent discoloration and guarantee corrosion-resistant welds.
Step-by-Step Welding Procedure
The procedure begins with setting machine parameters appropriate to the chosen process and plate thickness to guarantee consistent penetration.
A controlled root pass—managing heat, travel speed, and selective filler—establishes a sound foundation before intermediate and cap passes build up the joint.
Throughout, heat input must be controlled to prevent distortion and sensitization, with inside/outside welding techniques employed as needed to achieve full penetration.
Setting machine parameters by process and pipe thickness
Set machine parameters based on the chosen welding process and the pipe wall thickness to guarantee consistent bead quality and penetration.
Operators select amperage, voltage, and wire/feed speed per process charts; adjust pulse settings for pulse GTAW/GMAW.
Backing gas flow and preheat temperature scale with thickness.
Travel angle and torch distance remain consistent.
Record settings for repeatability and inspection compliance.
Root pass technique: heat, travel speed, and filler addition
Root-pass execution requires precise control of heat input, travel speed, and filler addition to establish a sound, defect-free foundation for subsequent passes.
The welder maintains minimal heat to prevent warping and oxidation, uses steady travel speed to guarantee full penetration without burn-through, and introduces small, controlled filler increments to bridge root gaps and stabilize the molten pool while avoiding slag entrapment and undercut.
Adding filler and building up welds: intermediate and cap passes
Proceeding from the root, the welder builds the joint through controlled intermediate passes and a final cap to restore strength, shape, and corrosion resistance.
Each intermediate pass fills joint taper, removes undercut, and refines profile while maintaining fusion.
The cap pass smooths bead contour, achieves desired reinforcement, and guarantees consistent appearance.
Proper filler selection and steady technique prevent inclusions and promote uniform microstructure.
Controlling heat input to avoid distortion and sensitization
Control heat input carefully to minimize distortion and prevent sensitization of stainless steel; this requires selecting appropriate welding parameters, monitoring interpass temperature, and sequencing passes to distribute heat evenly.
Use low heat input settings, short arc lengths, and pulsed modes where appropriate.
Preheat is generally unnecessary; allow controlled cooling, limit pass size, and use tack sequencing and chill fixtures to reduce warping and carbide precipitation.
Welding from inside/outside for full penetration
Begin by preparing the joint and workspace so that access, fit-up, and cleanliness permit alternating inside and outside welding without interruption.
The welder establishes root pass from the inside for fusion, then flips to the outside for fill and cap, controlling heat and welding sequence to prevent burn-through.
Welds are inspected and cleaned between passes to guarantee full penetration and sound fusion.
Orbital welding specifics for consistent circumferential welds
After establishing reliable inside/outside root and fill techniques, the procedure shifts to orbital welding to confirm uniform circumferential fusion on stainless steel pipe.
The operator secures a calibrated orbital head, verifies purge gas, sets precise amperage, travel speed, and waveform, and programs incremental passes.
Automated rotation guarantees consistent heat input, predictable bead profile, and repeatable penetration, minimizing contamination and rework for critical sanitary or high-purity systems.
Post-Weld Cleaning and Finishing
After welding, immediate cleaning is performed to remove slag and loose oxides using wire brushes and appropriate tools to prevent contamination.
Heat tint is then addressed with methods such as pickling paste, electropolishing, or chemical treatments to restore corrosion resistance.
Finally, mechanical finishing and surface blending are applied for sanitary applications to achieve the required smoothness and joint profile.
Immediate cleaning: slag removal and wire brushing techniques
Remove slag promptly to prevent contamination and simplify subsequent finishing: once a stainless steel weld cools to a safe touch temperature, slag and spatter should be chipped away with a proper slag hammer and then wire-brushed using stainless-steel brushes to avoid iron contamination.
Work along the bead, maintaining light pressure and consistent strokes. Inspect for undercut, porosity, and remaining debris before proceeding to final surface restoration.
Removing heat tint: pickling paste, electropolishing, and chemical options
Addressing heat tint is essential to restore stainless steel’s corrosion resistance and appearance after welding.
Pickling paste (nitric/hydrofluoric blends) dissolves oxide layers locally; follow manufacturer instructions and PPE protocols.
Electropolishing smooths and removes oxides electrochemically for uniform finish.
Alternative chemical cleaners (oxidizing acids, citric-based formulations) can be effective where compatible.
Rinse thoroughly and neutralize residues to prevent corrosion or contamination.
Mechanical finishing and surface blending for sanitary applications
Mechanical finishing and surface blending refine welds to meet the smoothness, crevice-free profiles, and radii required for sanitary stainless steel systems.
Practitioners use progressively finer abrasives, orbital sanders, and rotary tools to remove weld reinforcement, blend toes, and restore finish grade.
Inspection verifies uniform surface roughness (Ra), absence of pits, and consistent weld contours to prevent microbial entrapment and guarantee hygienic cleanability.
Inspection, Testing, and Quality Assurance
Inspection, testing, and quality assurance establish whether stainless steel pipe welds meet appearance, dimensional, and defect acceptance criteria.
Common nondestructive methods—radiography, ultrasonic, and dye penetrant—are selected based on joint geometry and defect types, while leak and pressure tests confirm system integrity.
Complete records of weld parameters, inspection results, and traceability guarantee compliance with specifications and codes.
Visual inspection criteria for stainless pipe welds
Visual assessment of stainless steel pipe welds focuses on identifying surface discontinuities, profile defects, and finish quality that could affect integrity or corrosion resistance.
Criteria typically include verification of weld continuity, absence of cracks, undercut, overlap, excessive porosity, and correct weld reinforcement and contour.
Inspectors also check uniform bead appearance, proper tie‑in, consistent root fusion, smooth changes, and surface cleanliness to prevent crevice corrosion.
Non-destructive testing options: radiography, ultrasonic, dye penetrant
Several complementary non-destructive testing (NDT) methods are commonly employed to verify stainless steel pipe weld integrity—radiography, ultrasonic testing, and dye penetrant—each offering distinct capabilities for detecting internal and surface-breaking defects.
Radiography reveals internal flaws and fusion issues; ultrasonic detects depth and planar discontinuities; dye penetrant highlights surface cracks and lack of overlap.
Selection depends on defect type, access, code requirements, and budget.
Leak testing and pressure testing protocols
Effective leak and pressure testing protocols establish objective criteria and procedures to verify the integrity of stainless steel piping systems under anticipated service conditions.
Procedures define test medium (hydrostatic, pneumatic, or tracer gas), test duration, pressure levels, and acceptable leakage rates.
Safety measures, isolation, and venting are mandated.
Acceptance requires documented results and remedial actions for failures before system commissioning.
Recording weld data and traceability for compliance
Documenting weld data and maintaining traceability are essential components of inspection, testing, and quality assurance for stainless steel piping, providing a verifiable record that each joint meets specified procedures, materials, and acceptance criteria.
Records should include welder ID, procedure qualification, consumables lot numbers, welding parameters, NDT results, and post-weld heat treatment.
Secure, indexed documentation enables audits, failure investigation, and regulatory compliance.
Common Problems and How to Fix Them
Common welding defects in stainless steel pipe—such as porosity, inclusions, and both hot and cold cracking—require targeted preventive measures and repair techniques to maintain joint integrity.
Controlling shielding gas, cleanliness, heat input, and welding sequence helps prevent porosity, inclusions, distortion, and warpage, while post-weld treatments and proper filler selection address cracking.
When joints fail inspection, removal and re-welding under corrected parameters is often the most reliable remedy.
Preventing and repairing porosity and inclusions
Porosity and inclusions undermine joint integrity and appearance in stainless steel pipe welding, so preventing their occurrence and repairing any defects promptly is essential to maintain corrosion resistance and service life.
Use clean, dry base metal and filler, control shielding gas flow, and eliminate contamination.
Detect defects via visual and dye-penetrant inspection; grind or gouge out flaws, reclean, and reweld with correct parameters to restore sound fusion.
Addressing cracking: hot and cold crack causes and remedies
After addressing porosity and inclusions, attention turns to cracking, which presents a different set of threats to stainless steel pipe integrity.
Hot cracking stems from low-melting eutectics and high restraint; remedy by adjusting filler composition, reducing sulfur/phosphorus, controlling heat input, and joint design.
Cold cracking arises from hydrogen, martensite, and tensile stress; mitigate via preheat, post-weld heat treatment, low-hydrogen practice, and stress relief.
Dealing with distortion and warpage
Control distortion and warpage in stainless steel pipe welding by managing thermal input, joint restraint, and sequence of operations to keep geometry within tolerances.
Use balanced weld sequencing, intermittent tack welds, and heat sinks or chill blocks to reduce localized heating.
Minimize weld size and travel speed consistent with fusion.
Apply controlled clamping and allow gradual cooling; measure and adjust fit-up between passes to maintain alignment.
Removing and re-welding unacceptable joints
When a weld on stainless steel pipe fails inspection or shows defects that compromise integrity, proper removal and re-welding procedures are essential to restore fit and corrosion resistance.
Remove defective weld metal by grinding or gouging to sound base metal. Clean oxide with stainless-specific brushes.
Reestablish correct joint fit, preheat minimally if required, and re-weld using proper filler, shielding, and heat control to prevent contamination and distortion.
Best Practices, Tips, and Efficiency Techniques
Selection of compatible filler metals and attention to base metal chemistry guarantee weld integrity and corrosion resistance.
Control of heat input, proper cleaning, and shielding techniques reduce heat tint and contamination risks.
For production work, efficient multi-pass strategies and the timely use of automation or orbital welding improve consistency and throughput.
Choosing the right filler metal and matching metallurgy
Choosing the correct filler metal and ensuring matched metallurgy is critical for durable, corrosion-resistant stainless steel pipe welds; improper selection can lead to stress corrosion cracking, sensitization, or premature failure.
Select filler that matches base alloy chemistry, strength, and corrosion resistance (e.g., 308L for 304, 316L for 316).
Consider duplex compatibility, ferrite content, and application temperature to prevent embrittlement and maintain joint integrity.
Minimizing heat tint and contamination risks
Minimize heat tint and contamination by controlling oxygen exposure, heat input, and surface cleanliness throughout welding operations.
Use proper shielding gas flow, trailing shields, purge techniques for pipe interiors, and cleaned joint surfaces free of oils and oxides.
Limit interpass temperature, employ back purging and weld backing, and avoid stainless contact with carbon steel to prevent carburization and chromium depletion at the weld.
Productivity tips for multi-pass and production welding
Streamline multi-pass and production welding by standardizing joint preparation, welding parameters, and work sequencing to reduce downtime and rework.
Use consistent root and fill techniques, controlled interpass temperatures, and repeatable travel speeds.
Pre-fit fixtures, color-code consumables, and schedule welds to minimize torch changes.
Implement quality checkpoints, training for repeatability, and simple metrics (cycle time, defect rate) to monitor continuous improvement.
When to use automation or orbital welding
When does automation or orbital welding deliver clear advantages for stainless steel pipe work?
Automation excels for repetitive, high-volume, or precision-critical runs—consistent weld quality, reduced heat input, and minimal operator variability.
Orbital welding suits small-diameter, fixed-position piping in pharmaceutical, semiconductor, and food systems where cleanliness and repeatability matter.
Choose automation when throughput, traceability, and narrow tolerances outweigh equipment cost.
Cost Considerations and Material Sourcing
Cost planning for stainless steel pipe welding centers on key drivers such as alloy selection, filler metal, shielding gas, labor, and required testing.
Procuring certified stainless pipe and consumables from reputable suppliers helps control quality-related costs and avoids rework or failed inspections.
Budgeting should thus align material choices with qualification requirements and labor realities to optimize overall project expense.
Cost drivers: alloy, filler, gas, labor, and testing
Material selection and process choices drive the overall expense of welding stainless steel pipe through differences in alloy price, filler metal compatibility, shielding gas requirements, labor intensity, and qualification testing.
Higher-alloy grades and matched fillers raise material costs; specialty gases (argon, helium blends) increase consumable spend.
Skilled labor, slower procedures, and required inspections or NDT add significant labor and certification expenses, influencing project budgeting.
Sourcing certified stainless pipe and consumables
Sourcing certified stainless pipe and consumables requires balancing specification compliance, provenance documentation, and price to control project risk and total cost.
Procurement should prioritize material certificates (e.g., mill test reports), supplier qualification, and traceability. Match grade and finish to welding procedure qualifications.
Consider lead times, batch consistency, and approved filler/metals.
Bulk purchasing and long-term supplier agreements reduce unit cost while preserving quality and accountability.
Examples and Typical Welding Parameters
The section presents concrete examples and typical welding parameters for TIG, MIG, and SMAW across common stainless pipe sizes and wall thicknesses. A compact table below summarizes suggested settings to guide initial setup before final qualification testing. Welders should use these figures as starting points and adjust for joint type, position, and base material condition.
| Pipe Size | Wall Thickness | Suggested Process/Amps |
|---|---|---|
| 1″ | 1.6 mm | TIG 60–80 A |
| 6″ | 6.3 mm | MIG 150–220 A |
Sample parameter table for TIG/MIG/SMAW by pipe size and thickness
A concise parameter table provides welders rapid reference to recommended TIG, MIG, and SMAW settings organized by pipe diameter and wall thickness. The sample lists common combinations with suggested amperage, wire/rod size, and travel speed; users should adjust for joint type, position, and alloy. Reference and verify with procedure qualification before production.
| Size/Thickness | Typical Settings |
|---|---|
| 1″ x 1.5mm | TIG 60A, MIG 80A |
| 4″ x 3mm | TIG 140A, MIG 180A |
Troubleshooting Checklist
A concise troubleshooting checklist helps identify causes of common stainless steel pipe weld defects quickly.
Refer to the following quick diagnostic steps and verify materials, technique, and equipment in order:
- Check base metal cleanliness and fit-up.
- Confirm correct filler, shielding, and heat input.
- Inspect torch angle, travel speed, and joint prep.
Quick diagnostic steps for common weld defects
Several concise diagnostic steps guide rapid identification of common stainless steel pipe weld defects, focusing on visual inspection, parameter checks, and simple non-destructive tests.
The checklist isolates root causes and immediate remedies.
- Inspect visually for porosity, cracks, undercut; note location and pattern.
- Verify welding parameters: current, travel speed, shielding gas flow, filler match.
- Perform dye-penetrant or magnetic particle testing; document findings and corrective actions.
Conclusion
To summarize, the guide frames stainless steel pipe welding as a precise craft where preparation and technique form the backbone of success. Like a surgeon’s steady hand, consistent joint fit-up, correct filler selection, and appropriate heat control produce clean, strong welds that resist corrosion. Attention to safety, tooling, and parameter tuning minimizes rework and expense, while adherence to best practices guarantees repeatable quality across projects and materials.