How to Repair a Frozen Pipe Fast: Step-by-Step Fixes to Prevent Bursts
To quickly repair a frozen pipe, first locate the affected section and shut off nearby water and electrical sources. Open adjacent faucets to relieve pressure. Use controlled heat—such as a hair dryer, a low-setting heat gun, or hot towels—applying it gradually toward the faucet until water flow resumes. Keep an eye out for leaks; if a rupture occurs, shut off the valve and contain small leaks with rubber and clamps or epoxy tape. After addressing the immediate issue, inspect and insulate the pipes to prevent future freezing. Detailed steps and additional tips are provided below.
What to do immediately when you suspect a frozen pipe
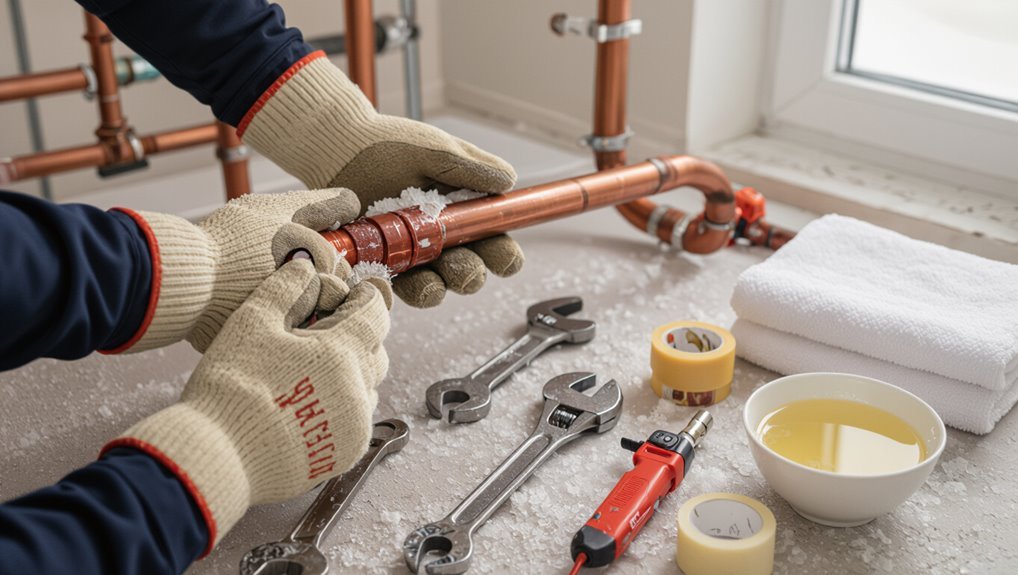
When a frozen pipe is suspected, the homeowner should check for cold, discolored fixtures, frost on exposed pipes, and reduced or no water flow.
Immediate safety steps include turning off nearby heat sources and avoiding electrical contact while evaluating the situation. If there is any risk of fire or electrocution, a qualified professional should be called.
If water is visible or walls are bulging, the main water supply should be shut off at once because these are signs the pipe may have already burst.
How to identify a frozen pipe quickly
How can one recognize a frozen pipe before damage escalates? A rapid assessment: check for lack of water flow at fixtures, visible frost or bulging on exposed pipes, unusually cold pipe surfaces, and ice sounds when faucets are tapped.
Locate the affected section and shut off water if a rupture is suspected. This helps expedite how to repair a frozen pipe and minimize further harm.
Immediate safety steps to prevent fire or electrocution
At the first sign of a suspected frozen pipe, occupants should immediately cut power to nearby electrical outlets and appliances and avoid using open flames or portable space heaters near the affected area; these steps reduce the risk of electrocution from melting insulation or water contact and prevent ignition of flammable materials if a heating attempt goes wrong.
Then ventilate the area, move combustibles away, use battery-powered lights, and notify household members.
When to shut off the main water supply
Why shut off the main water supply immediately? When freezing is suspected, turning off the main valve prevents pressure buildup if a pipe splits, limits water loss, and reduces damage.
The person should locate the main shutoff, close it promptly, notify household members, and avoid running faucets until thawed.
Restore water only after confirmed repairs or professional inspection.
Signs a pipe has already burst
Several clear signs indicate a pipe has burst, and recognizing them quickly allows immediate steps to limit damage.
Water pooling, steady dripping, or sudden loss of water pressure signal failure.
Visible cracks, bulging, or frost on exposed sections confirm freeze-related rupture.
If suspected, shut off the main, open faucets to drain lines, document damage, and contact a professional plumber promptly to mitigate flooding and structural harm.
Fast, step-by-step method to thaw a frozen pipe safely
The guide lists the necessary tools and materials, then outlines a clear, rapid procedure for thawing a frozen pipe.
First, nearby faucets are opened to relieve pressure, after which gentle heat is applied with recommended methods and timeframes.
Heat is then moved progressively toward the frozen section and maintained until full water flow is restored.
Preparation: tools and materials you’ll need
A concise kit of tools and materials is essential before attempting to thaw a frozen pipe.
The preparer gathers items to work safely and efficiently, avoiding improvisation. Required components include protective gear, controlled heat sources, and leak management supplies.
- Personal protective equipment: gloves, eye protection, rags.
- Heat: hair dryer, heat gun (low), hot water bottles.
- Leak control: bucket, pipe repair tape, wrench.
Step 1 Open nearby faucets to relieve pressure
Open nearby faucets to relieve built-up pressure and allow melting water to flow once the ice plug begins to thaw. This prevents pressure accumulation that can burst pipes.
Open both hot and cold taps served by the frozen line, starting with the closest fixture. Leave faucets partially open until full flow returns and the pipe is confirmed thawed.
Then monitor for leaks before restoring normal use.
Step 2 Apply gentle heat: recommended methods and timeframes
Several safe options exist to apply gentle heat to a frozen pipe, each suited to different locations and pipe materials.
Use a hair dryer, heat gun on low, portable space heater, or electric heating tape.
Maintain constant monitoring, avoid open flames, and keep electrical devices dry.
Typical thawing takes 15–60 minutes depending on severity; discontinue if pipe shows stress or leaks.
Step 3 Progressively move heat toward the frozen section
Begin heating at the faucet or nearest accessible point and work methodically toward the frozen section, advancing in short, overlapping strokes so warmth migrates along the pipe without creating thermal shock.
The operator maintains steady, gradual movement, monitoring fittings and joints for signs of thaw. Stop if leaks appear; adjust heat intensity to prevent damage.
Use insulated gloves and keep flammable materials away.
Step 4 Continue until full water flow is restored
Proceed incrementally, maintaining heat on the pipe while intermittently testing the faucet until a steady stream returns; if only drips appear, continue applying heat working back toward colder sections and around fittings until flow is constant.
The operator keeps heating and checking, adjusting intensity to avoid damage, and stops once full, steady flow is achieved throughout the system before removing heat sources.
Step 5 Check for leaks and how to test the line
After flow is restored, inspect the thawed pipe and surrounding joints for leaks by visually scanning for drips, wetness, or corrosion and feeling along the line for warmth and moisture.
If any leak is detected, shut off the water at the nearest valve immediately and contain runoff with towels or a bucket.
Next, open faucets to flush air, monitor pressure, and recheck for slow leaks.
Call a plumber if unsure.
Alternative thawing techniques for different pipe locations
Different pipe locations require tailored thawing methods to avoid damage and risk.
Exposed basement or crawlspace pipes respond well to direct heat, while pipes inside walls or exterior walls often need indirect warming or professional tools.
Outdoor lines may require insulation and careful use of heat tape or space heaters.
The discussion will also note safe use of heating devices and clear indicators for when to call a professional.
Thawing exposed indoor pipes (basement, crawlspace)
When thawing exposed indoor pipes in basements or crawlspaces, choose methods that match the pipe material, access, and surrounding conditions to minimize damage and speed recovery.
Use electric heat tape or portable space heaters for metal or PVC where clearance allows.
Apply warm towels or a hair dryer for localized freezes.
Keep area ventilated, monitor temperatures, and inspect joints for leaks as ice melts.
Thawing pipes inside walls or ceilings
Thawing pipes inside walls or ceilings requires a subtler approach than exposed plumbing because heat must penetrate building materials without causing damage or creating moisture problems.
Use targeted heat: space heaters positioned safely, infrared lamps, or hair dryers aimed at access points.
Open cabinets, remove insulation selectively, monitor wall temperature, and run nearby faucets.
If unsure, call a licensed plumber to avoid structural or mold risks.
Thawing outdoor or exterior wall pipes
Pipes located on exterior walls or outdoors demand approaches that account for direct exposure to cold, wind, and limited access.
Methods include exposing the pipe where possible, applying warm (not boiling) water with a cloth, using a hair dryer on low heat while moving it steadily, and insulating exposed sections immediately after thawing.
Monitor for leaks and restore any removed siding or covers.
Using heat tape or space heaters safely
Several practical options exist for applying controlled heat to frozen plumbing runs, with heat tape and portable space heaters among the most common.
Heat tape must be matched to pipe material, installed per manufacturer instructions, and plugged into GFCI circuits.
Space heaters should be positioned safely, kept clear of combustibles, monitored continuously, and never left unattended.
Both require thermostat control to avoid overheating.
When to call a professional instead of DIY
Assess the situation before attempting any DIY thawing—certain locations and conditions make professional assistance the safer, faster choice.
A plumber should be contacted for burst signs, inaccessible pipes (inside walls, under concrete, attics with limited access), complex multi-line freezes, gas line proximity, electrical hazards, or when plumbing history suggests vulnerability.
Professionals prevent further damage, guarantee proper thawing, and restore safe water flow.
Temporary repairs and leak containment if a pipe bursts
If a frozen pipe bursts, immediate containment can limit water damage using emergency patches such as rubber, clamps, or specialized waterproof tape.
The damaged section should be isolated by shutting off valves and draining remaining water before temporary repairs are applied.
Assessment of the rupture’s size and location then determines whether a permanent replacement is required or a temporary fix will suffice until professional repair.
Emergency patching options (rubber, clamp, tape)
When a frozen pipe begins to leak or bursts, quick temporary patching can limit water damage until a professional repair is made. Options prioritize containment and speed:
- Rubber and hose clamp: wrap rubber (inner tube) and tighten clamp over leak.
- Pipe clamp: metal saddle with gasket for larger cracks.
- Self-fusing silicone tape: stretch tightly to seal small pinholes.
How to drain and isolate a damaged section
Shut off the water supply to the affected line and open nearby faucets to relieve pressure before attempting any repairs; then locate the closest shutoff valves to isolate the damaged section from the rest of the system.
Drain residual water by opening the lowest drain or valve, collect leaks with a bucket, and apply a temporary plug or clamp.
Monitor for continuing seepage and dry the area for permanent repairs.
When to replace vs. temporarily repair a pipe
Assess the damage quickly to decide whether a burst or leaking pipe needs a temporary containment or full replacement.
Temporary fixes—clamps, rubber patches, epoxy putty—serve short-term containment for small cracks or while awaiting professional repair.
Replace when corrosion, multiple fractures, compromised joints, or repeated failures exist.
Prioritize safety, water shutoff, and scheduling a permanent replacement to avoid future bursts and property damage.
Long-term fixes to prevent future freezes and bursts
A shift from emergency patching to preventive measures reduces the risk of repeat freezes and costly bursts.
Practical long-term fixes include adding pipe insulation and sealing drafts, rerouting or relocating exposed piping, and installing heat tracing or thermostatic controls where needed.
Coordinating these upgrades with improvements to home heating and air-seal measures provides the most reliable protection.
Insulation options for pipes and vulnerable areas
Although insulation choices vary with pipe material and location, selecting appropriate coverings and targeting vulnerable areas are the most reliable long-term defenses against freezing and bursting.
Suitable options include foam sleeves, fiberglass wrap, and heat tape; fit, moisture resistance, and temperature rating matter.
Identify attics, crawlspaces, exterior walls, and exposed valves for coverage and seal gaps to maintain continuous protection.
- Foam sleeves
- Fiberglass wrap
- Heat tape
Re-routing or relocating pipes for better protection
Consider relocating vulnerable piping away from exterior walls and unheated spaces to reduce exposure to freezing temperatures. Rerouting inside conditioned areas or through insulated chases provides a durable safeguard against future freezes and bursts.
Professionals should map routes to minimize exterior exposure, shorten long exposed runs, and place pipes higher than crawlspaces.
Where relocation isn’t feasible, enclose lines within heated or insulated cavities for long-term protection.
Installing heat tracing or thermostatic controls
Install electrical heat tracing or thermostatically controlled cable along vulnerable pipes to provide reliable, automated freeze protection.
Professionals select appropriate self-regulating or constant-wattage tape, match voltage and pipe material, and follow manufacturer spacing and insulation requirements.
Thermostatic controllers maintain setpoints, reducing energy use.
Proper installation, grounding, and periodic inspection prevent failures and guarantee long-term suppression of freeze events without altering building heating or envelope.
Improving home heating and sealing air leaks
When indoor temperatures are raised and drafts are sealed, the risk of pipe freezing drops considerably. Homeowners should evaluate heating distribution and envelope integrity as primary long-term defenses.
This includes optimizing thermostat settings, ensuring adequate heat reaches vulnerable areas (basements, crawlspaces, exterior walls), and sealing gaps around windows, doors, and penetrations that admit cold air.
Regular insulation upgrades, targeted caulking, weatherstripping, and balanced airflow maintain consistent warmth and reduce freeze risk.
Materials, tools, and cost considerations
A concise review of the materials, tools, and costs helps readers plan a rapid and effective repair.
The section highlights essential DIY tools for thawing and patching, compares common replacement pipe materials with their pros and cons, and outlines typical price ranges for DIY fixes versus hiring a professional.
Clear estimates and tool lists enable informed choices under time pressure.
Essential tools for DIY thawing and repairs
Tools and materials fall into three clear categories: temporary thawing equipment, basic plumbing repair tools, and consumables for sealing and insulation.
Essential items include: a hair dryer or heat gun for controlled thawing; pipe wrenches, slip-joint pliers, tubing cutter; and pipe tape, epoxy putty, foam insulation.
Costs vary; prioritize safety and quality.
- Hair dryer/heat gun
- Wrenches/pliers
- Tape/putty/insulation
Common replacement pipe materials and pros/cons
Selecting replacement pipe material depends on factors such as water pressure, exposure to freezing, ease of installation, longevity, and budget. Copper: durable, costly. PEX: flexible, freeze-resistant. CPVC: affordable, brittle with cold. Galvanized: prone to corrosion. PVC: not for hot water.
| Material | Pros/Cons |
|---|---|
| Copper | Durable / Expensive |
| PEX | Flexible / UV-sensitive |
| CPVC | Cheap / Brittle cold |
| Galvanized | Strong / Corrodes |
| PVC | Inexpensive / Not hot-water suitable |
Typical cost ranges for DIY repair vs. professional service
After choosing a replacement material based on durability, freeze resistance, and budget, attention turns to costs and required items for repair.
DIY expenses commonly range $20–$150 for pipe, fittings, solder, flux, heat source, insulation, and basic tools.
Professional service typically costs $150–$600+ depending on access, leak complexity, travel, and labor; emergency or weekend calls increase rates considerably.
Common mistakes and safety hazards to avoid
Common mistakes and safety hazards include using open flames or other unsafe thawing methods that can ignite materials or overheat pipes.
Technicians may also miss hidden cracks or weakened joints that only reveal themselves after thawing, leading to leaks later.
Electrical risks arise when water contacts heaters, cords, or outlets, so power sources and drying must be managed before repairs.
Unsafe thawing methods and why they’re risky
Using improvised methods to thaw a frozen pipe can create immediate and severe hazards.
Applying open flames, high-heat torches, or improvised electrical devices risks ignition, burns, and structural fire. Excessive pressure from banging or improper tools can fracture pipe walls.
Chemical heat sources may release toxic fumes. Untrained attempts often escalate leaks into bursts, causing water damage, mold, and costly repairs.
Overlooking hidden damage after thawing
Neglect can turn a successful thaw into a costly problem when hidden damage goes unnoticed; small cracks, joint separations, or compromised seals may not leak immediately but will worsen over time.
Inspect fittings, drywall, and insulation for moisture, discoloration, or warping. Document any deterioration, tighten or replace affected joints, and monitor for slow leaks to prevent mold, structural decay, and future rupture.
Electrical hazards around water and heaters
After thawing and repairing visible pipe damage, attention must shift to electrical risks that can accompany moisture and temporary heating solutions.
Exposed wiring, overloaded circuits from space heaters, and wet outlets pose shock and fire hazards.
Professionals recommend disconnecting affected circuits, using GFCI protection, keeping heaters clear of combustibles and water, and consulting an electrician for any uncertain or persistent issues.
Step-by-step checklist to follow during and after a thaw
A concise checklist guides actions before, during, and after thawing to reduce risk and verify repair success.
It covers pre-thaw safety steps, a controlled thawing procedure, and post-thaw inspection and monitoring.
Following each checklist in order helps prevent damage, detect leaks, and maintain system integrity.
Pre-thaw safety checklist
Before applying heat, a concise safety checklist confirms the thaw proceeds without injury or further damage:
- Shut off water supply and open faucets to relieve pressure and detect leaks.
- Turn off electricity to affected areas; remove combustible materials and guarantee ventilation.
- Keep a fire extinguisher nearby; have towels/bin to contain water and a phone ready to call a plumber if leaks appear.
Thawing procedure checklist
Several clear steps guide the thawing process to minimize damage and guarantee safety.
Follow ordered actions, monitor heat application, and keep water flow steady once thawed. Use controlled warming, avoid open flames, and have a shutoff ready.
- Apply gentle heat progressively.
- Check fittings and joints while warming.
- Restore water slowly and observe for leaks.
Post-thaw inspection and monitoring checklist
Inspection after thawing confirms system integrity and detects residual issues that could cause leaks or failure. A concise post-thaw checklist guides verification and short-term monitoring to prevent surprises.
- Visually inspect joints, fittings, and exposed pipe for moisture or deformity.
- Restore water slowly, checking pressure and sounds for irregularities.
- Monitor for 24–48 hours, rechecking temperature and any slow seepage.
Conclusion
To summarize, one should act quickly and calmly: locate the freeze, open faucets, and apply gentle heat while monitoring for leaks. Temporary plugs and towels can limit water until a permanent repair is made; call a plumber if unsure. Combine immediate thawing with insulation and thermostat adjustments to prevent repeat freezes. Like a clockwork telegraph humming in the background, these steps restore flow and reduce the risk of costly, disruptive bursts.