How to Clean Brass Faucets: Step-by-Step Methods for Shiny, Scratch-Free Results
To keep your brass faucets shiny and scratch-free, follow these essential care steps: First, determine if your brass is lacquered or unlacquered using an alcohol test. For daily maintenance, simply wipe the faucets with a microfiber cloth and mild soapy water, then dry thoroughly. For a deeper clean, remove any debris and use a gentle descaler or a baking soda paste to tackle tarnish. Scrub with a soft brush, rinse well, and buff the surface. Finally, apply a thin layer of wax or sealant for added protection. Establish a regular cleaning schedule to prevent buildup and maintain their luster.
What Makes Brass Faucets Different from Other Metals
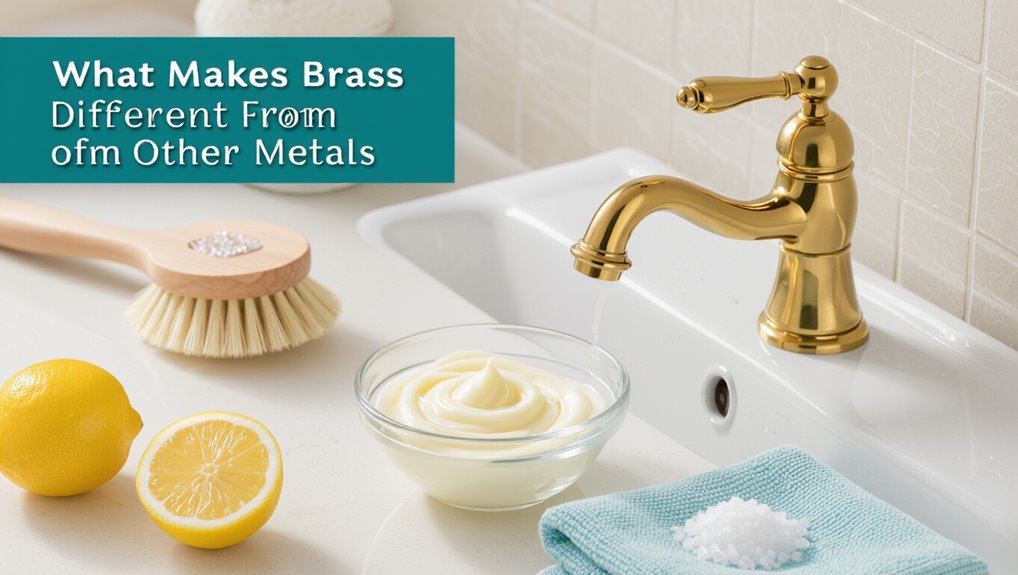
Brass is an alloy of copper and zinc, and its metal content influences how it responds to water, acids, and abrasive cleaners.
Brass faucets are produced with different finishes—polished, lacquered, and intentionally aged or antique—that alter both appearance and surface vulnerability.
Those finishes dictate specific cleaning approaches and risks, since abrasive or acidic methods can remove lacquer, dull polish, or strip patina.
Composition of brass and how it affects cleaning
An alloy of copper and zinc, often with small additions of lead, tin, or nickel, gives brass its characteristic color, softness, and corrosion behavior.
Composition dictates reactivity to acids, abrasive sensitivity, and patina formation, so cleaners and techniques must match alloy makeup.
Readers asking how do you clean brass faucets should select pH-balanced, nonabrasive products to avoid etching or accelerated tarnish.
Common finishes on brass faucets (polished, lacquered, antique)
Finish type determines both appearance and care requirements for brass faucets.
Polished brass shows a bright, reflective surface; lacquered brass has a clear protective coating that resists tarnish; antique or unlacquered brass offers a patinaed, matte look.
Each finish alters durability, reaction to moisture, and susceptibility to abrasives, influencing routine maintenance choices without yet addressing specific cleaning techniques.
How finishes change cleaning needs and risks
Because each surface treatment alters how metal interacts with water, cleaners, and abrasion, maintenance needs and risks vary considerably across faucet finishes.
Polished brass tolerates mild detergents but scratches easily; lacquered surfaces resist tarnish yet are damaged by solvents and abrasive pads; antique or patinated finishes rely on gentle cleaning to preserve coloration.
Cleaning choices must match finish type to avoid irreversible harm.
Quick Checklist: What You Need Before You Start
Before starting, the reader should assemble the essentials to protect the finish and surrounding areas.
- Mild, brass-safe cleaners and soft cloths
- Small brushes and basic tools plus gloves and eye protection
- Towels or drop cloths for counters and a drain cover
- A bowl or tape for small parts and fasteners
With these items ready, the work proceeds more quickly and with less risk to the fixture or surfaces.
Safe cleaning supplies to gather
A concise kit of safe cleaning supplies helps protect brass finishes and speed the job: a soft microfiber cloth, a nonabrasive sponge, mild dish soap, white vinegar or lemon juice for light tarnish, baking soda for gentle paste cleaners, a soft-bristle toothbrush for crevices, and a clear wax or lacquer-safe polish for protection.
Include small bowls for mixing, distilled water for rinsing, and cotton swabs.
Tools and protective gear
Several essential tools and pieces of protective gear should be assembled to guarantee safe, efficient brass faucet cleaning:
- soft microfiber cloths,
- nonabrasive sponges,
- soft-bristled toothbrush,
- plastic or wooden toothpicks for crevices,
- small nylon brush,
- bucket,
- spray bottle,
- rubber or nitrile gloves,
- and safety goggles.
Optional items include a mask for strong fumes and a towel to absorb drips.
Surfaces and items to protect (counters, drains)
Most surfaces and nearby items should be shielded to prevent damage from cleaners and runoff: protect countertops with towels or waterproof mats, cover sink drains with a stopper or mesh to catch debris and prevent chemical spills from entering plumbing, and remove or wrap nearby toiletries, electronics, and decorative objects to avoid splashes or residue.
Also protect cabinet faces, grout, and flooring; tape delicate edges and keep ventilation open.
Immediate Steps to Take for Light Daily Cleaning
For light daily cleaning, one should start with a soft microfiber cloth to wipe away water spots and fingerprints after each use.
Mild, non-abrasive cleaners or simple homemade solutions like diluted dish soap or a vinegar-water mix are recommended to remove buildup without harming the finish.
After cleaning, the faucet should be thoroughly dried and gently buffed to restore and maintain its shine.
Daily wipe-down method for water spots and fingerprints
A quick daily wipe prevents water spots and fingerprints from building up on brass faucets.
Using a soft, lint-free microfiber cloth, the user should blot and then gently buff the surface after each use.
Focus on handles, spout, and base.
Drying prevents mineral deposits; light circular motions remove smudges without abrasion.
Store the cloth nearby for routine access.
Recommended mild cleaners and homemade options
Several gentle cleaners are safe for regular brass care and can be easily prepared at home: a diluted dish soap solution, a 50/50 white vinegar-and-water mix for light mineral buildup (used sparingly), or a paste of baking soda and water for spot cleaning.
Use soft cloths or sponges, apply gently, rinse thoroughly with water, and test any cleaner on an inconspicuous area first.
Drying and buffing technique for shine
After rinsing away cleaner, the brass surface should be dried immediately to prevent water spots and mineral traces.
Using a soft microfiber cloth, pat dry then buff in circular motions. Apply light pressure to restore luster without abrading.
For extra shine, finish with a drop of mineral oil or a dedicated brass polish, wiping off excess and buffing until reflections are uniform and streak-free.
Step-by-Step Deep Cleaning for Tarnish and Mineral Buildup
Before beginning deep cleaning for tarnish and mineral buildup, the finish and any existing damage should be assessed to choose appropriate methods.
First, the area is prepared and loose debris removed, then a gentle descaling solution is applied to affected areas.
Stubborn deposits are loosened with safe tools and the surface is finished by polishing to restore luster without scratching.
Assessing the finish and damage before deep cleaning
A careful inspection of the faucet’s finish and any existing damage is essential prior to deep cleaning to choose appropriate methods and avoid worsening corrosion or removing protective coatings.
Examine for lacquer, plated, or bare brass, surface scratches, pits, and active corrosion. Note discoloration patterns and loose parts.
Document findings to select gentle cleaners, polishing techniques, or professional restoration when indicated.
Step 1: Preparing the area and removing loose debris
Several clear workspaces and protective coverings should be established around the sink and countertop to prevent damage and contain debris.
The person should gather soft brushes, microfiber cloths, a plastic scraper, cotton swabs, and a small bowl.
Cold water rinses dislodge loose particles; gently brush crevices and aerator screens.
Dispose of collected debris and dry the area before proceeding to chemical or mechanical treatments.
Step 2: Applying a gentle descaling solution
Mix a gentle descaling solution of equal parts distilled white vinegar and distilled water, or use a commercial, brass-safe descaler diluted per the manufacturer’s instructions, to dissolve mineral deposits without harming the finish.
Apply with a soft cloth or soak a cotton pad, allow brief dwell time (minutes, not hours), then rinse thoroughly with clean water and dry to prevent water spots.
Step 3: Removing stubborn deposits with safe tools
Begin by assembling soft, non-abrasive tools—microfiber cloths, cotton swabs, a soft-bristled toothbrush, and wooden or plastic toothpicks—to target tarnish and mineral buildup without scratching the brass.
Work gently, loosening deposits with dampened toothbrush strokes and coaxing residue from crevices with swabs and toothpicks.
Rinse frequently, blot dry, and repeat localized treatments until deposits lift, avoiding metal scrapers or harsh abrasives.
Step 4: Polishing and restoring luster without scratching
Polish the brass using gentle, non-abrasive methods to restore shine without causing scratches: apply a small amount of a recommended brass polish or a paste made from baking soda and water with a soft microfiber cloth.
Rub in circular motions over tarnished areas, then buff lightly with a clean, dry cloth until the luster returns.
Work small sections, inspect progress, repeat sparingly, and avoid aggressive scrubbing.
Step 5: Final rinse, dry, and protective coating
Rinse the faucet thoroughly with warm water to remove all residue from cleaners and polishing compounds, ensuring no paste or polish remains in crevices or around the aerator.
Pat dry immediately with a soft microfiber cloth to prevent water spots.
Apply a thin, even layer of wax or brass sealant, buff gently, and allow to cure per product instructions to protect against fingerprints and mineral buildup.
How to Clean Lacquered vs. Unlacquered Brass Faucets
The article distinguishes lacquered finishes from bare brass by noting visual cues and touch tests, then outlines care routines suited to each type.
It explains that unlacquered brass benefits from gentle polishing and waxing to develop a desirable patina, while lacquered fixtures require mild cleaning to protect the coating.
Guidance is also provided on when old lacquer should be stripped and how to apply a fresh protective lacquer.
Identifying lacquered finishes and appropriate care
How can one tell if a brass faucet is lacquered or bare?
Visually, lacquered brass has a glossy, uniform coating and resists fingerprints; bare brass shows a warmer, slightly matte tone and may darken at edges.
Touch and a gentle solvent test (inconspicuous spot with rubbing alcohol) confirm coating.
Care differs: lacquered requires mild cleaners and no abrasives to preserve the finish.
Special steps for unlacquered brass to achieve natural patina
When aiming for a warm, authentic patina on unlacquered brass, start by gently removing surface oils and dirt with a mild, pH-neutral soap and soft cloth so subsequent chemical or mechanical aging proceeds evenly.
Apply controlled patination: dilute vinegar or ammonia fume exposure yields subtle toning; protect high-contact areas with wax or microcrystalline coating; allow layered development, monitoring progress to avoid uneven coloration.
When to remove old lacquer and how to relacquer
Occasionally lacquer on brass faucets becomes cracked, yellowed, or peeling, signaling it should be removed before any refinishing.
Stripping requires a mild chemical stripper or gentle sanding to bare metal, followed by thorough cleaning and degreasing.
After drying, apply a thin, even coat of high-quality clear lacquer or protective wax; allow proper curing between coats for durable, glossy protection.
Natural and DIY Cleaning Recipes with Measurements
The section outlines simple, measured recipes for maintaining brass finishes using household ingredients.
- Mild soap spray for everyday use
- Vinegar-based descaler for mineral deposits
- Baking soda paste for gentle abrasion
- Lemon and salt method for spot treatment
Each recipe includes exact proportions and a note on suitability for lacquered versus unlacquered brass.
Mild soap spray for everyday use
A simple mild soap spray offers a safe, everyday solution for cleaning brass without damaging its finish.
Combine 1 cup warm water, 1 teaspoon mild liquid dish soap, and 1 tablespoon rubbing alcohol in a spray bottle.
Lightly mist the brass, wipe with a soft microfiber cloth, then dry immediately to prevent water spots.
Use as needed for routine maintenance.
Vinegar-based descaler for mineral deposits
Dissolve mineral buildup with a simple vinegar-based descaler that is both natural and effective.
Mix equal parts white vinegar and distilled water in a bowl; soak a microfiber cloth for 10–15 minutes.
Apply to affected brass, gently patting—avoid scrubbing. Rinse thoroughly with warm water and dry immediately to prevent spotting.
Repeat weekly for persistent hard-water deposits.
Baking soda paste for gentle abrasion
Following vinegar’s gentle chemical action on mineral deposits, baking soda paste provides mild abrasive cleaning for brass without harsh chemicals.
Mix three parts baking soda to one part water into a spreadable paste. Apply gently with a soft cloth or soft-bristled toothbrush, rub in circular motions, rinse thoroughly, and dry.
Repeat for stubborn grime, then polish lightly for even sheen.
Lemon and salt method for spot treatment
Combine acidity and abrasion with a halved lemon and a sprinkling of table salt to tackle localized tarnish on brass faucets.
Rub the salted lemon over spots, applying light pressure until discoloration lifts. Rinse with warm water and dry immediately to prevent watermarks.
Repeat for stubborn areas, then buff gently with a soft cloth to restore natural luster without chemical residues.
Homemade polish recipes for long-lasting shine
Several simple, measured recipes produce a long-lasting shine on brass without harsh chemicals.
Mix 1/2 cup white vinegar, 1/4 cup flour, and 1 tsp salt into a paste; apply 10 minutes, rinse, buff.
For light maintenance, combine 2 tbsp baking soda with 1 tbsp lemon juice into a paste; rub gently, rinse, dry.
Polish with a soft cloth and light mineral oil.
Tools and Products to Avoid to Prevent Scratches and Damage
Care should be taken to avoid tools and products that can scratch or chemically damage brass finishes.
- Abrasive pads
- Harsh chemical cleaners
- Metal-bristled brushes
- Acidic or bleach-based solutions
Before using any cleaner, test it on an inconspicuous spot and wait a few minutes to check for discoloration or finish damage.
Abrasive pads, harsh chemicals, and wrong brushes to avoid
Any abrasive pads, strong chemical cleaners, or stiff-bristled brushes should be kept away from brass faucets because they can strip protective coatings, cause scratches, and accelerate tarnishing.
Avoid steel wool, heavy-duty scouring pads, bleach, ammonia-based cleaners, oven cleaners, and wire brushes.
Opt instead for soft microfiber cloths, mild pH-neutral cleaners, and nylon-bristle brushes when gentle agitation is needed to preserve finish and longevity.
How to test a product safely on your faucet
Begin by selecting an inconspicuous spot—such as the underside of the spout or inside the base plate—and apply a small amount of the cleaner or polish with a soft cloth to observe for color change, finish dulling, or pitting over 24 hours.
This quick compatibility check reveals whether the product reacts with the faucet’s coating before full application. Document results, wait the full period, then proceed only if no adverse effects appear.
Troubleshooting Common Problems
Troubleshooting common issues with brass faucets begins by identifying symptoms such as white cloudy mineral film, green or blue verdigris, light scratches, or dull areas.
Recommended remedies range from gentle descaling and targeted cleaning for mineral buildup and verdigris to polishing for mild scratches and restoring luster.
The guide also explains when discoloration signals deeper corrosion or finish failure that requires professional repair or replacement.
Removing white cloudy mineral film
White cloudy mineral film—often a chalky buildup of calcium and magnesium from hard water—can dull brass finishes and collect in crevices.
To remove it, apply a 1:1 white vinegar and water solution, let sit briefly, then gently scrub with a soft toothbrush.
Rinse thoroughly, dry with a microfiber cloth, and buff.
Repeat for stubborn deposits, avoiding abrasive pads or acidic soak on lacquered brass.
Dealing with green or blue verdigris
Some patches of green or blue verdigris indicate active corrosion where copper in the brass has reacted with moisture and acids; left untreated it can pit the metal and spread into seams and threaded areas.
Remove loose deposits with a soft brush, then neutralize with a diluted vinegar or lemon solution, rinse thoroughly, dry, and apply a thin protective wax or lacquer to prevent recurrence.
Fixing light scratches and dull areas
Address minor scratches and dull patches promptly to restore appearance and prevent deeper damage.
Light abrasions can be buffed with a soft cloth and non-abrasive metal polish, following grain or original finish. Apply polish sparingly, rub gently, then wipe clean.
For satin finishes, use a fine Scotch-Brite pad lightly. Test hidden areas first and finish with a protective wax or lacquer as needed.
When discoloration indicates deeper damage
When patches of greenish, black, or uneven brown appear and do not respond to routine cleaning, the discoloration often signals deeper corrosion, pitting, or loss of protective lacquer rather than surface tarnish.
In such cases, replacement of the affected part or professional restoration is recommended. Surface treatments will mask symptoms temporarily; underlying metal integrity must be assessed to prevent leaks and further deterioration.
Professional Restoration and When to Call a Pro
When tarnish is deep, structural damage appears, or multiple repairs have failed, a homeowner should recognize that DIY methods may be insufficient.
Professional restoration typically includes mechanical polishing, re-plating or lacquer removal, replacement of worn components, and a final protective finish.
Costs and timeframes vary by extent of work but commonly range from modest hourly rates for minor polishing to several hundred dollars and days for full re-plating.
Signs that DIY won’t be enough
How can one tell that a brass faucet problem has outgrown household fixes?
Deep pits, fractures or bending, persistent corrosion beneath plating, loose internal components that leak despite gasket or cartridge replacement, and wide-area discoloration unresponsive to safe cleaners indicate limits of DIY.
If previous repair attempts worsen appearance or functionality, or water damage and safety concerns exist, seek professional assessment.
What professional restoration includes
Several professional services address brass faucet issues that exceed DIY options: assessment and disassembly, mechanical repairs or part replacement, specialized cleaning and re-plating, and refinishing or full component replacement when structural damage is present.
Technicians diagnose corrosion depth, restore surface finish with controlled abrasives and chemical stripping, replace valves or cartridges, and apply protective coatings, ensuring functionality, matched appearance, and longevity beyond routine homeowner maintenance.
Typical costs and timeframes
Although exact figures vary by region and condition, professional restoration of brass faucets typically ranges from modest hourly labor rates for minor repairs to several hundred dollars for complete re-plating or replacement.
Small polishing or seal replacements often take one to three hours; re-plating or extensive corrosion repair can require several days including drying and curing.
Clients receive written estimates and timelines upfront.
Preventive Maintenance Schedule for Long-Lasting Shine
A simple maintenance schedule keeps brass faucets bright and slows wear.
- Daily: quick wipe with a soft cloth.
- Weekly: mild cleanser and rinse.
- Monthly: inspect for spots and mineral buildup.
- Seasonal/annual: check seals, polish, and address corrosion promptly.
Daily, weekly, and monthly tasks
Because consistent care prevents buildup and dulling, a simple schedule of daily, weekly, and monthly tasks keeps brass faucets bright and reduces the need for intensive polishing.
Daily: wipe with a soft microfiber cloth after use.
Weekly: clean with mild soapy water, rinse, and dry.
Monthly: inspect for mineral deposits, apply a light brass polish if needed, and buff to restore shine.
Seasonal checks and long-term upkeep
Inspect seasonal changes and perform targeted maintenance to prevent corrosion and wear that accumulate over months.
Every season, check seals, aerators, and mounting hardware for leaks or mineral buildup.
Deep-clean with appropriate polish and remove hard-water deposits.
Reapply protective wax or lacquer if finish dulls.
Document inspections, note recurring issues, and schedule professional servicing biennially to preserve function and appearance.
Comparison of Common Commercial Brass Cleaners
A brief comparison of common commercial brass cleaners highlights differences in effectiveness, suitability for various finishes, and important safety notes for users. The following table summarizes typical properties to evaluate before selecting a product. Readers are advised to match cleaner choice to finish type and follow safety instructions on labels.
| Cleaner Type | Key Considerations |
|---|---|
| Mild polish | Good for lacquered or delicate finishes; moderate effectiveness |
| Acidic cleaner | Strong effectiveness on tarnish; may damage unsealed or plated finishes |
Effectiveness, suitability for finishes, and safety notes
When comparing commercial brass cleaners, effectiveness, compatibility with different finishes, and safety considerations determine which product is appropriate for a given fixture.
Prospective cleaners vary: some remove tarnish quickly but can strip lacquer or plated coatings.
Mild, pH-neutral formulas suit lacquered or antique finishes. Strong acids or abrasives risk damage and fumes; gloves, ventilation, and patch testing are recommended before full application.
Eco-Friendly and Safe Practices for Home and Environment
The discussion shifts to eco-friendly choices, emphasizing biodegradable cleaners and proper disposal of residues to prevent harm to drains and waterways.
Attention is given to safe handling practices that protect plumbing finishes and fixture seals from corrosive or abrasive agents.
Recommendations prioritize products and methods that balance effective brass care with environmental and household safety.
Biodegradable cleaners and disposal of residues
Choose biodegradable cleaners formulated for brass to minimize environmental impact and reduce harmful runoff.
The article advises selecting non-toxic, phosphate-free formulas and concentrated options to lower packaging waste.
Rinse residues into a sink trap rather than storm drains, collect concentrated waste for hazardous disposal if present, and neutralize mild acidic residues with baking soda before final rinse.
Follow local disposal regulations.
Safe handling to protect plumbing and fixtures
Several simple precautions preserve both plumbing and brass fixtures while keeping cleaning eco-friendly.
Gloves protect skin from acidic solutions; soft cloths and nonabrasive pads prevent scratches.
Avoid pouring concentrated cleaners down drains; dilute and neutralize before disposal.
Turn off water supply and cover aerators to stop debris entering plumbing.
Inspect seals and fittings after cleaning to catch leaks early and prevent corrosion.
Quick Reference: Dos and Don’ts for Cleaning Brass Faucets
A concise checklist helps separate safe actions from risky ones when caring for brass faucets.
- Note six essential dos.
- Note six critical don’ts.
- Refer to the full lists below for specifics and context.
Top 6 dos
When cleaning brass faucets, homeowners should follow a concise set of positive actions that protect the finish and extend the fixture’s life.
Use mild soap and warm water, test cleaners in an inconspicuous spot, polish gently with a soft cloth, dry thoroughly to prevent water spots, apply protective wax or lacquer as recommended, and perform regular light maintenance to avoid heavy buildup.
Top 6 don’ts
After listing the key positive steps for brass-faucet care, attention turns to common mistakes that undo those benefits.
Avoid abrasive pads, harsh chemicals (bleach, ammonia), and acidic cleaners that strip finishes.
Do not scrub dry or force moving parts.
Never neglect rinsing and drying.
Avoid repainting or sealing without testing.
Do not ignore manufacturer instructions or regular gentle maintenance routines.
Conclusion
Like a well-tended heirloom clock whose gears hum with remembered care, a brass faucet repays steady attention with enduring luster. Regular gentle cleaning, judicious use of cleaners suited to lacquered or unlacquered finishes, and prompt removal of mineral deposits preserve both function and beauty. With mindful, eco-friendly practices and a modest preventive schedule, tarnish yields and scratches remain rare—restoring the faucet to its rightful place as a quietly radiant centerpiece of the home.