
How to Cap a Plastic Water Line: Step-by-Step Guide for DIY Repairs
To cap a plastic water line effectively, you can use various methods depending on the type of pipe—PEX, CPVC, or PVC. Begin by shutting off the water supply and relieving any pressure in the line. For clean, square-cut pipe ends, a push-fit cap is the easiest and most reliable option. PEX pipes can also use crimp or clamp caps, while CPVC and PVC require solvent-weld or threaded fittings. Remember to deburr and clean the pipe before capping, and always test for leaks afterward. Follow the detailed step-by-step guide for tools, methods, and troubleshooting to ensure a successful repair.
What capping a plastic water line’means and when you should do it
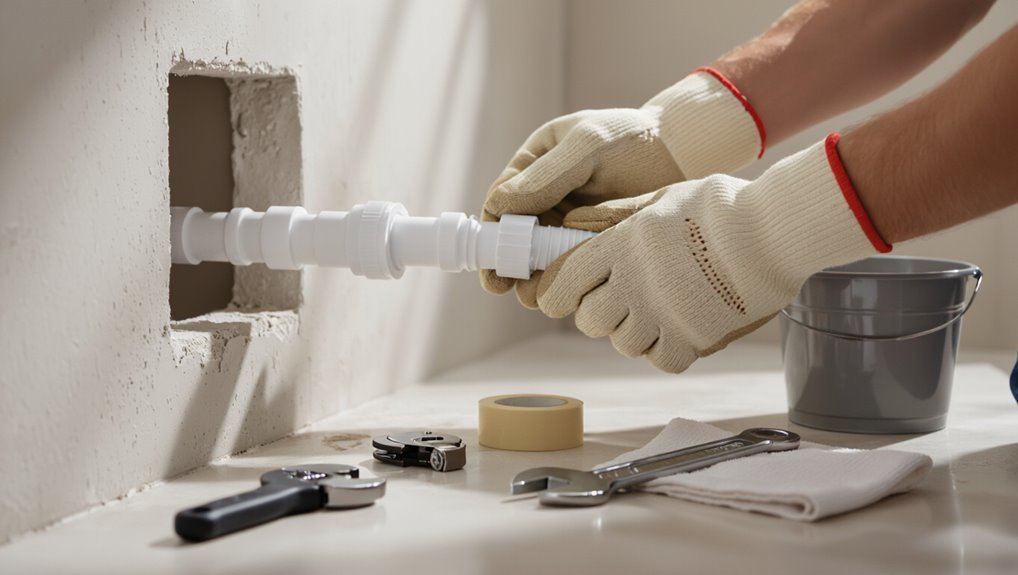
Capping a plastic water line means securely sealing the end of a PEX, CPVC, or PVC pipe to stop water flow temporarily or permanently.
It is commonly done during repairs, seasonal shutdowns, or remodeling to prevent leaks and allow work to proceed safely.
Before starting, one should confirm applicable codes and shut off and depressurize the system to guarantee safety.
Common scenarios that require capping (repairs, seasonal shutdowns, remodeling)
Several common situations call for sealing off a plastic water line: temporary repairs, seasonal shutdowns, and remodeling projects.
Homeowners or contractors may isolate sections during leak fixes, winterizing outdoor systems, or rerouting supply for renovations.
Knowing how to cap a plastic water line prevents water damage, allows safe work, and preserves pressure integrity until permanent fittings or restorations are completed.
Types of plastic water lines covered (PEX, CPVC, PVC)
When dealing with household plumbing, identifying the pipe material—PEX, CPVC, or PVC—is essential because each requires different capping methods and fittings.
Knowing when to cap (temporary repairs, winterization, or during remodels) helps determine whether a push-fit cap, solvent-weld plug, or crimped/stamped PEX cap is appropriate.
PEX uses crimp, clamp, or push-fit; CPVC favors threaded or solvent fittings; PVC typically uses solvent-weld plugs or threaded caps.
Safety and code considerations before you start
Before work begins, homeowners and tradespeople should understand that sealing a plastic water line involves permanently or temporarily stopping water flow at a cut or unused stub to prevent leaks, contamination, and pressure loss.
Confirm local plumbing codes, permit requirements, and approved materials (PEX, CPVC, PVC).
Isolate feed, depressurize lines, use appropriate fittings, and consider backflow prevention, inspection access, and qualified help for complex systems.
Quick answer: the simplest reliable method to cap a plastic water line
The simplest reliable way to cap a plastic water line is to shut off the supply, cut the pipe square, and attach a compression or push-fit cap rated for the pipe material.
Required tools and materials are a pipe cutter or fine-toothed saw, deburring tool or sandpaper, a compatible cap (compression or push-fit), and plumber’s tape or primer/sealant if specified by the cap manufacturer.
This method minimizes leakage risk and can be completed with basic plumbing tools.
One-sentence summary of the fastest safe cap method
Quickly and reliably cap a plastic water line by slipping on a compression-style plastic cap sized to the pipe, tightening its nut with a wrench until it compresses the ferrule and seals the line.
This method minimizes leak risk, requires minimal preparation, and is reversible for future work; it suits standard polyethylene or PEX runs when pressure is shut off and fittings are intact.
Tools and materials needed for the quick method
Essential items for the quickest reliable cap are a correctly sized compression-style plastic cap (matched to the pipe OD or nominal size), an adjustable wrench or appropriate-sized open-end wrench, and Teflon tape or pipe thread sealant if the cap has threaded connections.
- Smooth cut pipe end
- Compression nut and ferrule
- Clean rag to dry surfaces
- Small utility knife for trimming
Tools, materials, and safety gear explained
The section outlines the essential tools—pipe cutter, deburring tool, wrench, and an optional torch—needed to prepare and cut plastic water lines.
It compares common cap types and fittings for PEX, CPVC, and PVC, including compression, push-to-connect, glue/solvent, and crimp options.
It also summarizes required personal protective equipment and basic safety precautions for working with tools and solvents.
Essential tools (pipe cutter, deburring tool, wrench, torch if applicable)
A small set of reliable tools makes capping a plastic water line straightforward and safe. Essential items include a sharp pipe cutter sized for the tubing, a deburring tool to remove burrs and guarantee a clean end, an adjustable wrench for fittings, and pliers.
Where heat-based joints are used, a plumber’s torch and heat shield are necessary; safety gloves and goggles complete the kit.
Cap types and fittings for PEX, CPVC, and PVC (compression, push-to-connect, glue/solvent, crimp)
Different pipe materials require matched cap types and fitting methods to guarantee a secure, code-compliant seal: PEX commonly uses crimp/clampring fittings and push-to-connect caps, CPVC is typically sealed with threaded compression caps or solvent-weld fittings, and PVC is closed using solvent-glue caps or threaded/compression adapters where permitted.
| Material | Cap type | Attachment |
|---|---|---|
| PEX | Push-to-connect, crimp | Mechanical |
| CPVC | Threaded, solvent-weld | Thread/solvent |
| PVC | Solvent-glue, threaded | Solvent/thread |
Personal protective equipment and safety precautions
Personal protective equipment and basic safety procedures protect workers from common hazards when capping plastic water lines.
Gloves resist cuts and chemicals; safety glasses prevent debris; hearing protection shields during power-tool use. A respirator is advised with solvent cement or glue.
Non-slip footwear and knee pads increase stability.
Always shut off water, depressurize lines, ventilate workspaces, and follow manufacturer instructions for tools and fittings.
Step-by-step guide to capping a PEX water line (push-to-connect and crimp methods)
Before capping PEX, the water supply must be shut off and system pressure relieved. Then the tubing cut square and deburred to specified measurements.
For push-to-connect caps, the end is simply inserted to the marked depth, while crimp or clamp caps require a ring, fitting, and proper tooling to secure and compress the connection.
Finally, the capped line should be pressure-tested and inspected for leaks before restoring normal operation.
Preparing the line: shutting off water and relieving pressure
Several straightforward steps guarantee safety and prevent mess when preparing a PEX water line for capping.
First, locate and close the appropriate shutoff valve or the main supply. Open nearby faucets to drain residual water and relieve system pressure.
For longer runs, bleed pressure at the highest and lowest points. Confirm no flow remains before proceeding with any cutting or fittings.
Cutting and preparing the tubing end (measuring, square cut, deburring)
With the water shut off and pressure relieved, attention turns to producing a clean, correctly sized end on the PEX tubing.
Measure required length, allow clearance for fittings, mark square cut. Use a PEX tubing cutter to slice straight across; inspect for ovaling.
Deburr or chamfer the inner and outer edges with a reamer or utility knife. Clean the cut surface before fitting.
Installing a push-to-connect cap: detailed steps
Begin by selecting the appropriate cap type and size for the PEX tubing—either a push-to-connect (also called push-fit) cap or a crimp-style end fitting—ensuring compatibility with the tube diameter and system pressure.
Mark insertion depth on the tubing, confirm a square, deburred end, then firmly push the tubing into the push-to-connect cap until it seats.
Test by gently tugging and pressure-checking the capped line.
Installing a crimped or clamp-style cap: detailed steps
Install a crimped or clamp-style cap by preparing the PEX tubing, selecting the correct cap and ring, and securing the connection with a crimping or clamp tool to create a reliable, watertight seal.
Measure and square the tube end, slide the ring over tubing, seat the cap fully, position the ring evenly, crimp or clamp per tool specifications, and trim excess ring or deformity for a neat finish.
Pressure test and leak-check procedures
After capping a PEX line using either a push-to-connect or crimp method, perform a systematic pressure test and leak check to confirm the seal’s integrity.
Isolate the capped section, pressurize with water or air to recommended psi, monitor a gauge for pressure loss for 10–15 minutes, inspect all joints visually and with soapy solution, tighten or recap if bubbles or drops appear.
Step-by-step guide to capping a CPVC water line (solvent weld and push-fit)
This section outlines how to cap CPVC lines using both solvent-welded and push-fit methods, starting with proper pipe preparation and cutting.
It summarizes the step sequence for solvent cement application and recommended cure times for a permanent seal.
Then, it explains using push-fit caps for reversible or temporary closures.
The discussion concludes with procedures for leak testing and required wait times before restoring pressure.
Preparing and cutting CPVC correctly
Prepare the CPVC section by confirming water is shut off, draining the line, and marking the cut point. Accurate preparation prevents leaks and guarantees a proper fit for either solvent-weld or push-fit caps.
Use a square-cut tool or fine-tooth saw, support the pipe, cut perpendicular, deburr and chamfer the edge, and clean with a non-abrasive cloth to remove dust and oil before fitting.
Using solvent cement to install a permanent cap: step sequence and cure times
Begin by confirming the shutoff and a drained line.
Clean pipe end and cap socket with approved primer.
Apply solvent cement evenly to pipe and inside cap, then insert with a quarter-turn twist to distribute.
Hold for 30 seconds. Wipe excess.
Allow initial set per manufacturer (typically 15–30 minutes) and full cure before pressurizing (usually 24 hours at room temperature).
Using a push-fit cap for temporary or reversible capping
When a temporary or reversible solution is needed, a push-fit cap offers a quick, tool-free method for sealing a CPVC water line.
It slips onto the cleaned pipe end and locks in place with internal O-rings and stainless steel teeth, providing an immediate, pressure-rated seal that can later be removed without cutting.
The installer cleans the pipe, pushes the cap fully on, and checks alignment.
Leak testing and wait times
After capping, test the joint and allow proper curing time before restoring pressure or insulating the line.
The installer should pressurize the section to recommended working pressure, inspect visually for drips, and feel for moisture.
For solvent-weld caps, wait manufacturer-specified cure time (often 15–60 minutes initial, full cure up to 24 hours).
Push-fit caps can be tested immediately but rechecked after 24 hours.
Step-by-step guide to capping a PVC water line (glue and threaded options)
The following section explains how to prepare PVC pipe ends, either for solvent-weld caps or for threaded fittings, and outlines required drying and cure times.
It covers cutting and cleaning, applying primer and cement for a glued cap, and using an adapter to fit a threaded cap where needed.
Final steps describe pressure testing to confirm a watertight seal.
Cutting, cleaning, and priming PVC ends
Begin by cutting the PVC pipe squarely using a fine-toothed saw or PVC cutter.
Then deburr and smooth the cut edge with a utility knife or sandpaper.
Wipe the pipe and fitting with a clean, lint-free cloth.
Use a PVC cleaner/primer to remove oils and soften surfaces; apply evenly to both male and female ends, allowing brief flash time before proceeding to the capping step.
Solvent-welding a PVC cap: steps and drying times
Apply the solvent-weld cap promptly after priming to guarantee a strong, leak-free joint; coat the inside of the cap and the outside of the pipe with an even layer of PVC cement, insert the pipe fully with a 1/4–1/2 turn to spread the cement, hold alignment for about 30 seconds to prevent push-out, then allow the assembly to set undisturbed for the manufacturer-recommended tack time (typically 5–15 minutes) and reach full cure per the label (commonly 24 hours for pressurized water).
After curing, inspect the joint for gaps, test at low pressure first, and only return to full service once the labeled cure time has elapsed.
Installing a threaded cap with adapter if pipe is threaded
Install a threaded cap with an adapter when the PVC outlet already has compatible threads or has been prepped with a threaded fitting; this method provides a removable, pressure-rated seal without solvent-welding.
Clean threads, apply plumber’s tape or thread sealant, hand-start the adapter, then tighten with an adjustable wrench until snug.
Avoid over-tightening to prevent cracking; verify alignment for proper seating.
Testing for leaks
After the threaded cap or solvent-welded plug is secured, the next step is to test the capped PVC water line for leaks to confirm a watertight seal.
Slowly restore water pressure, inspect the cap, joint, and surrounding pipe for drips or seepage.
Monitor pressure gauge or system for several minutes. If any leak appears, depressurize, drain, and rework the seal or replace the cap.
Temporary vs permanent capping: choosing the right approach
Temporary caps such as push-fit or rubber expansion types offer quick installation and easy removal but may be less reliable long-term and can fail under high pressure or prolonged exposure.
Permanent options like solvent-weld or crimped fittings provide durable, code-compliant seals but are not designed for reuse and require cutting or replacement to restore service.
The choice depends on expected reuse, pressure and exposure conditions, and applicable plumbing codes.
Pros and cons of temporary caps (push-fit, rubber expansion)
When a short-term solution is needed, homeowners and contractors often choose push-fit or rubber expansion caps because they are quick to apply and require no special tools.
Advantages include speed, reusability, and suitability for temporary shutdowns.
Drawbacks are limited long-term reliability, potential slip under pressure, degradation from UV or chemicals, and unsuitability for permanent buried or pressurized installations.
Pros and cons of permanent caps (solvent weld, crimped fittings)
Although permanent caps require more time and skill to install than quick temporary plugs, they offer durable, code-compliant seals suited for long-term or buried plastic water lines.
Solvent-weld joints provide leak-proof, low-profile connections but are permanent and require proper primer/adhesive.
Crimped fittings allow strong mechanical holds and faster installation but need correct tooling and can be harder to remove without cutting the pipe.
When to use each based on expected reuse and code
If future use is likely or building work is ongoing, a removable cap or plug is usually preferable so the line can be reinstated without cutting or solvent work; conversely, permanent methods are appropriate for long-term abandonment, burial, or situations requiring code-approved, tamper‑resistant seals.
Choice depends on anticipated reuse, local plumbing code, pressure rating, accessibility, and inspector requirements; temporary caps ease testing, permanent seals guarantee durability.
Common problems and how to troubleshoot them
Common issues when capping plastic water lines include leaks at the cap, damaged tubing ends, and incompatible fittings between different materials.
Causes and fixes range from tightening or replacing faulty caps to splicing, rerouting, or replacing damaged sections.
Compatibility problems are resolved by using appropriate adapters or matching materials and verifying pressure ratings.
Leaks at the cap: causes and fixes
Leaks at a plastic water line cap usually indicate problems with the seal, the cap, or the fitting rather than the pipe itself.
Inspect gasket integrity, thread condition, and seating. Tighten to manufacturer torque, replace worn O-rings or use compatible tape, and swap cracked caps.
Verify correct cap type and clean mating surfaces. Pressure-test after repair to confirm no residual seepage.
Damaged tubing ends: repair options (splice, reroute, replace section)
Addressing a damaged tubing end requires choosing between a splice, reroute, or section replacement based on the damage type, location, and system access.
Small, clean cuts suit inline splices or couplings; crushed or contaminated ends often need cutting back to sound material.
Severely compromised runs justify rerouting or replacing the affected section.
Guarantee proper cutting, deburring, and secure connectors to restore integrity.
Fitting compatibility issues between materials
When different tubing materials or connector types meet, mismatched diameters, thread standards, and chemical incompatibilities often cause poor seals or premature failure.
Identify materials (PEX, PVC, CPVC, polyethylene), measure OD/ID, and verify thread types.
Use approved adapters, dielectric unions, or coupling fittings and appropriate sealants.
Test under pressure, inspect for leaks, and replace incompatible parts rather than forcing connections.
Cost, time, and difficulty estimates
The section outlines typical material costs for common capping methods, from simple push-fit caps to solvent welding and threaded adapters.
It also provides estimated time and the skill level required for each approach, distinguishing quick DIY jobs from more complex tasks.
Guidance is included on when hiring a professional is the safer or more cost-effective choice.
Typical material costs for each method
A concise comparison of common capping methods—push-fit caps, compression fittings, solvent-welded caps, threaded adapters with plugs, and heat-fused caps—helps homeowners estimate material costs, installation time, and skill level required.
Typical retail prices: push-fit caps $5–15; compression kits $8–20; solvent-welded caps and primer $3–10; threaded adapters plus plug $6–18; heat-fusion tools or kits $30–120.
Accessories may add a few dollars.
Estimated time and skill level required
Although some methods require only basic tools and 10–20 minutes, others demand specific equipment and up to a few hours of work. Homeowners should match the capping technique to their comfort level and schedule.
Simple push-fit caps suit novices; solvent welding or threaded adapters need moderate DIY experience. Tight spaces, frozen pipes, or multiple fittings increase difficulty and time.
When to call a professional
When should a homeowner hire a professional to cap a plastic water line? A professional is advised for complex access, unknown pipe type, high water pressure, or visible leaks.
Typical service costs range $150–$500 depending on location and complexity. Expect 30–90 minutes onsite; emergency calls may increase fees.
Difficulty rises with confined spaces, soldering needs, or code compliance requirements.
Maintenance, longevity, and inspection tips
Routine checks every six months are recommended for capped plastic water lines, with extra inspections after freeze–thaw cycles.
Indicators that a cap needs replacement include visible cracks, leakage, or brittle deformation around the fitting.
For winter storage and long-term shutdowns, draining the line, insulating exposed fittings, and using frost-resistant caps can extend service life.
How often to inspect capped lines
Regularly scheduled inspections are essential to guarantee capped plastic water lines remain secure and leak-free over time.
Inspect visually and by touch every 3–6 months for fittings, cap tightness, and nearby moisture.
After temperature extremes, ground movement, or construction, perform immediate checks.
Maintain a simple log noting date, findings, and any tightening or minor maintenance to track trends and anticipate service needs.
Signs a cap needs replacement
Following scheduled inspections, attention should turn to clear indicators that a cap requires replacement.
Visible cracks, deformation, or compromised threads signal seal failure risk. Persistent leaks, moisture accumulation around the cap, chemical corrosion, or brittle plastic from UV exposure also justify replacement.
If the cap no longer fits securely or shows repeated failure during pressure checks, replace it promptly to maintain system integrity.
Winterizing and long-term storage of capped lines
Prepare capped plastic water lines for winter storage by draining all water, drying the interior, and securing caps to prevent freeze damage and contamination.
Store lines indoors or in insulated, ventilated spaces, elevated from floors.
Inspect caps and seals periodically, replace deteriorated components, and apply corrosion-resistant tape if metal fittings are present.
Before reuse, flush, sanitize, and check for cracks or leaks.
Quick-reference checklists and diagrams
The article provides concise checklists of materials and tools tailored to each common plastic pipe type to guarantee correct parts and fittings are on hand.
A one-page, step-by-step checklist for installing a push-fit cap summarizes preparation, installation, and verification in a single, printable reference.
Simple diagram suggestions illustrate cap placement, orientation, and pressure-testing points for quick visual confirmation.
Materials and tool checklist for each pipe type
A compact checklist for materials and tools is essential to safely and effectively cap any plastic water line. Each pipe type—PVC, CPVC, PEX, and polyethylene—requires specific fittings, cutting tools, and sealing supplies.
A concise list helps verify compatibility, seal method, and safety gear before starting.
- PVC: solvent cement, primer, PVC cap, fine-tooth saw
- CPVC: CPVC cement, cap, tubing cutter, gloves
- PEX: push-fit cap, PEX cutter, clamp tool, emery cloth
- Polyethylene: compression cap, razor knife, pipe insert, lubricant
Step-by-step one-page checklist for a push-fit cap
Follow this concise, step-by-step checklist when installing a push-fit cap on a PEX line to guarantee a secure, leak-free termination:
- Shut water, depressurize, and dry the pipe end.
- Square-cut tubing, remove burrs, and deburr.
- Inspect cap seal, align fully, push until audible click.
- Restore water, check for leaks, tighten or reseat if needed; monitor for five minutes.
Simple diagram suggestions for placement and testing
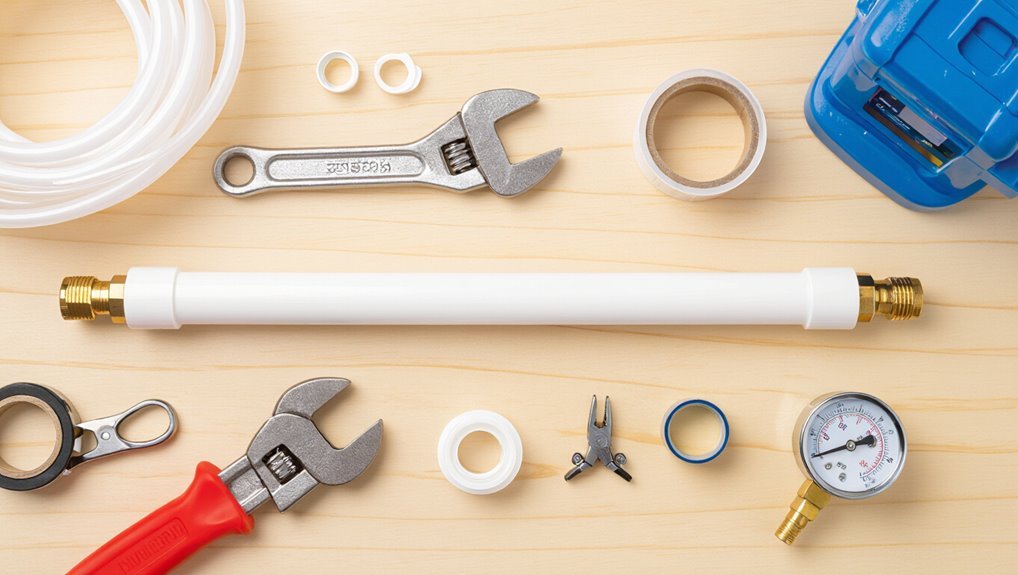
After completing the push-fit cap installation checklist, include a simple diagram to show cap placement and test points for pressure checks and leak inspection.
Use a clear pipe run, mark cap location, valve positions, and a test port. Indicate direction of flow, expected pressure gauge placement, and common leak spots.
Add concise legend and scale; keep lines and labels minimal for quick reference.
Conclusion
Capping a plastic water line completes a small but essential job, protecting homes from leaks and future headaches. With clear tools, proper fittings, and basic safety, most DIYers can finish the task quickly and confidently. Carefully choosing the right method for PEX or CPVC and verifying seals prevents common failures. Regular inspection keeps the cap reliable for years. Follow instructions precisely—this modest repair can feel like solving one of plumbing’s great mysteries.

