How to Do Plumbing for a Bathroom: Complete Step-by-Step Guide for DIYers
To tackle bathroom plumbing as a DIYer, start by assessing the current layout, ensuring you know where water supply and drainage lines are located. Familiarize yourself with local codes and permits to avoid issues. Essential skills include understanding different pipe types (PVC, CPVC, PEX, copper), ensuring proper slopes for drainage, and knowing how to securely join pipes. Begin by shutting off the water and draining the lines to protect your workspace. Projects can range from simple faucet replacements to more complex installations like toilets or tubs; however, intricate rerouting may require professional help. Follow this comprehensive guide for detailed steps, necessary tools, and troubleshooting tips.
What a DIY bathroom plumbing project covers and when to attempt it
The section outlines common DIY bathroom plumbing tasks—installing fixtures, rerouting drains on simple layouts, and replacing shutoff valves—while noting typical skill and tool requirements.
It then explains which jobs usually justify hiring a professional (complex re-piping, major drain relocations, or work tied to structural or gas systems) versus those reasonable for a competent homeowner.
Finally, it reminds readers to check local codes, permit requirements, and inspection rules before starting to avoid fines or failed inspections.
Typical tasks included (installing fixtures, rerouting drains, replacing valves)
A DIY bathroom plumbing project typically includes installing or replacing fixtures (sinks, toilets, showers), rerouting supply lines and drains to accommodate new layouts, and swapping valves and fittings to restore reliable shutoff and prevent leaks.
It explains how to do plumbing for a bathroom with concise steps and safety notes.
- Install fixtures
- Reroute drains
- Replace valves
- Test for leaks
When to hire a pro vs. when DIY is reasonable
When homeowners are comfortable with basic tools and local codes, DIY bathroom plumbing can cover tasks such as replacing faucets and valves, installing a sink or toilet, patching and rerouting accessible drain lines, and testing for leaks.
However, projects that involve major rerouting of sanitary stacks, working on cast-iron main drains, altering supply pressure, or plumbing for multi-fixture systems should be left to a licensed plumber.
Simple repairs, fixture swaps, and accessible drain troubleshooting suit competent DIYers, while complex reroutes, hidden leaks, structural alterations, and system-wide work require professional assessment and execution.
Legal, permit, and code considerations to check before starting
Why check permits and codes before turning a wrench? Local codes, permit requirements, and inspection schedules determine legal compliance and safety.
A DIYer must confirm allowed work scope, required licensed trades, fixture clearances, venting and sewer connection standards, and water heater/regulatory rules.
Unpermitted or noncompliant work risks fines, failed inspections, insurance denial, or mandatory rework by a licensed contractor.
Essential plumbing basics every DIYer must know
A clear grasp of how residential water supply and drainage systems operate is essential before starting any bathroom plumbing work.
The discussion should cover common pipe materials and fittings (PVC, CPVC, PEX, copper), how pipe sizes, slopes, and traps affect flow and venting, and a concise tools and safety equipment checklist.
Knowing these basics helps a DIYer plan, avoid code violations, and prevent costly mistakes.
How residential water supply and drainage systems work
Understanding is essential before any work begins: residential water supply and drainage systems consist of two distinct networks—pressurized cold and hot water supply lines that deliver fresh water, and a gravity-driven drainage and vent system that removes waste and prevents sewer gases from entering the home.
Supply relies on pressure and shutoffs; drainage uses traps, slope, and vents to maintain flow and prevent odors.
Common pipe materials, fittings, and their uses (PVC, CPVC, PEX, copper)
Because different plumbing tasks demand specific properties, selecting the correct pipe material and fitting is a practical decision based on temperature, pressure, joint type, corrosion resistance, and code requirements.
PVC suits drain and vent lines; CPVC handles hot water supply; PEX offers flexibility, freeze resistance, and easy connections for potable water; copper provides durability and heat tolerance.
Choose compatible fittings and approved joining methods.
Understanding pipe sizes, slopes, and trap fundamentals
Plumbing clarity starts with knowing how pipe diameter, slope, and traps control flow and prevent odors. Correct pipe sizing guarantees sufficient capacity and water velocity. Proper slope prevents standing water and blockages, and correctly sized traps keep sewer gas out without siphoning.
DIYers must match fixture drain sizes, maintain typical slopes (1/4″ per foot for horizontal drains), and install traps with proper seal depth and venting.
Required tools and safety equipment checklist
A concise set of hand and power tools, plus basic safety equipment, is indispensable before beginning any bathroom plumbing project.
Essential items guarantee efficient, safe work and proper installations.
Recommended checklist:
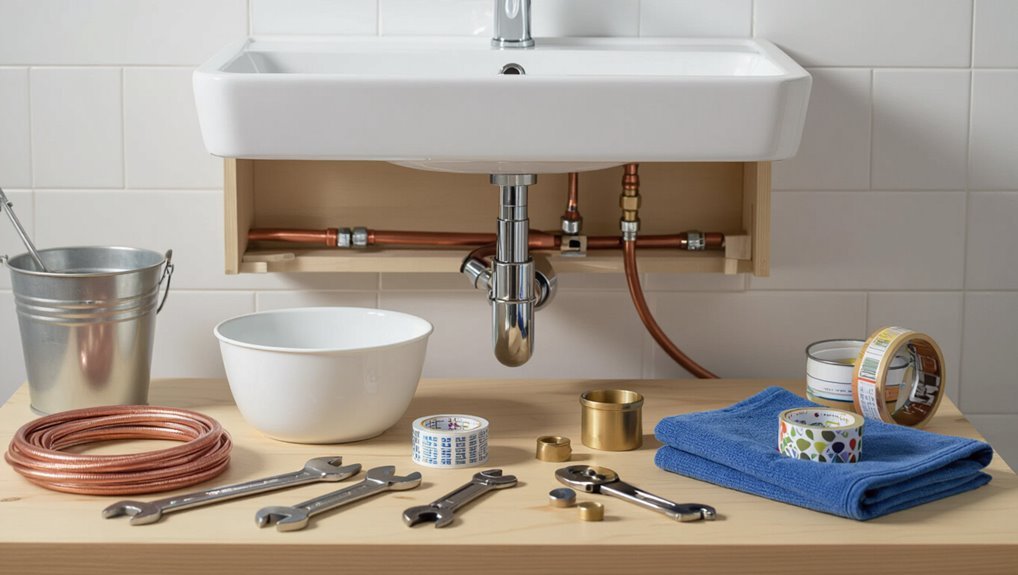
- Adjustable wrenches, pipe wrench, basin wrench, pliers.
- Tubing cutter, hacksaw, power drill with bits.
- Plumber’s tape, sealants, replacement fittings.
- Gloves, safety glasses, knee pads, mask.
Planning your bathroom plumbing project step-by-step
Before any pipes are cut or fixtures ordered, the existing layout should be assessed and a clear plumbing plan drafted showing supply and waste lines.
Accurate measurements and a mapped diagram help produce a precise materials list.
Finally, time, budget, and a reasonable contingency should be estimated to keep the project on track.
Assessing existing layout and creating a plumbing plan
When evaluating an existing bathroom layout and creating a plumbing plan, the homeowner should first document current pipe locations, fixture positions, and access points to understand constraints and opportunities.
Accurate measurements and photos will reveal what can be reused, what must be relocated, and where structural or code limitations exist.
Then develop a prioritized plan addressing routing, venting, and serviceability while minimizing demolition and ensuring code compliance.
Measuring, mapping supply and waste lines, and creating a materials list
Several precise measurements and a clear map of existing supply and waste lines are essential before purchasing materials or cutting into walls.
Measure lengths, offsets, pipe diameters, fixture tailpiece locations and elevations.
Sketch a scaled plan showing hot, cold and drain routes, cleanouts and vents.
Tally fittings, pipe types, valves, connectors, seals and fasteners.
Produce a concise materials list with quantities and sizes.
Estimating time, budget, and contingency
A realistic estimate of time, budget, and contingency converts the measured plan into an actionable schedule and spending framework, aligning labor, materials, permit costs, and risk allowances with project milestones.
It should itemize hours for demolition, rough-in, pressure testing, fixture installation, inspections, and cleanup, assign unit costs to each material and subcontracted task, and include a contingency—typically 10–20% of the total—reserved for unforeseen issues such as hidden rot, undocumented obstructions, or code-required changes.
Projected timelines, milestone deadlines, cash-flow needs, and permit lead times must be documented. Quotes from trades and suppliers should be collected, compared, and locked before purchasing to minimize overruns.
Preparing the worksite
Before any cutting or removal begins, the homeowner should shut off the water and drain the lines to prevent leaks and water damage.
Surfaces and fixtures must be protected, power isolated or verified safe, and work areas ventilated to manage dust and fumes.
Existing fixtures should be removed methodically, using proper demolition techniques to avoid damaging plumbing rough-ins.
Shutting off water and draining lines safely
Shut off the water at the appropriate valves and relieve pressure in the pipes to prevent leaks and flooding while working.
Verify main and fixture shutoffs, then open nearby faucets and drain low points to remove residual water.
Plug or cap exposed lines. Use a bucket and towels for remaining drips.
Confirm zero flow before cutting or disconnecting to guarantee a dry, safe workspace.
Protecting finishes, electrical safety, and ventilation
Once the supply is verified dry and lines are capped, attention turns to preparing the workspace for protection, electrical safety, and ventilation.
Surfaces are covered with drop cloths; fixtures and trim are masked. Power to nearby circuits is locked out and outlets tested.
Temporary lighting is installed on GFCI circuits. Windows or exhaust fans provide consistent airflow to control dust and fumes during work.
Removing existing fixtures and demolition tips
Begin by removing nonstructural items—towel bars, mirrors, lighting, and trim—so access to fixtures and fasteners is clear.
Shut off water and electricity, drain lines, cap supplies.
Remove sink, toilet, tub in order, supporting heavy pieces.
Protect floors and adjacent areas with drop cloths.
Label and bag small parts.
Demolition proceeds from fixtures outward; inspect studs and plumbing for damage before proceeding.
Installing or replacing the toilet
Attention is directed to inspecting the flange and subfloor for damage or misalignment before proceeding.
The discussion will cover step‑by‑step toilet installation and sealing the base, tuning fill and flush mechanisms for proper operation, and diagnosing common installation problems with their fixes.
Practical guidance and troubleshooting tips follow to guarantee a reliable replacement or new installation.
Inspecting and preparing the flange and subfloor
Inspecting the toilet flange and surrounding subfloor is a critical preparatory step before installing or replacing a toilet. The flange should be level, undamaged, and securely fastened; any cracks, corrosion, or warped sections necessitate repair or replacement.
Assess subfloor integrity for rot, soft spots, or moisture damage. Reinforce or replace compromised sheathing, guarantee a flat, stable surface, and confirm proper flange height relative to finished floor.
Toilet installation steps and sealing the base
Set the toilet onto a properly prepared flange and secure it while ensuring a watertight seal at the base.
Tighten bolts incrementally to avoid cracking the porcelain. Trim excess wax or gasket material, check alignment, and install caps.
Apply a thin bead of silicone or appropriate sealant around the base for cosmetic sealing only.
Inspect for rocking; shim if necessary before final tightening.
Adjusting fill and flush mechanisms
Once the bowl is secured and sealed, attention turns to the tank’s internal hardware: the fill valve, float, and flush valve assembly control tank refill level and flush performance.
Adjust the float height to set water line, guarantee the fill valve shuts off without hissing, and verify the flapper seats fully.
Test multiple flushes, fine-tune chain slack, and confirm no continuous flow or weak flushes.
Common toilet installation problems and fixes
Addressing common problems during toilet installation helps prevent leaks, poor flushing, and wasted water.
Common issues include uneven mounting, wax ring failure, misaligned flange, and faulty connections.
Solutions: level and shim the bowl, replace the wax seal or use a rubber gasket, reposition or repair the flange, tighten bolts evenly, and inspect supply line fittings.
Test for leaks and proper flush function.
Installing or replacing a bathroom sink and faucet
The next step covers selecting a sink type and matching drain assembly to guarantee proper fit and function.
It then explains mounting the sink, installing and securing the P-trap and tailpiece, and connecting the hot and cold supply lines.
Finally, testing for leaks and troubleshooting low water pressure or persistent leaks are addressed.
Selecting sink type and compatible drain assembly
When choosing a bathroom sink, the installer must match the sink style—drop-in, undermount, vessel, or wall-mounted—to a drain assembly designed for that configuration, ensuring compatibility with tailpiece length, overflow alignment, and pop-up or grid-type drains.
Materials, finish, and waste size (typically 1¼” or 1½”) should align with local codes and faucet type.
Verify gasket fit and mounting hardware compatibility.
Mounting sink and securing P-trap and tailpiece
Begin by positioning the sink so its drain aligns precisely with the cabinet cutout and the trap outlet. Once seated, fasten mounting clips or bolts evenly to prevent stress on the bowl.
Insert the tailpiece into the sink drain, hand-tighten slip nut and washer, then align and connect the P-trap.
Verify proper gasket placement, test alignment, and tighten joints to hand-firm plus quarter-turn.
Connecting supply lines and testing for leaks
After confirming the shutoff valves are closed and the faucet’s supply ports are clear, the installer attaches flexible supply lines to the faucet tailpieces, ensuring each line matches the correct hot or cold port.
Connections are hand-tightened then finished with a wrench, avoiding overtightening.
Valves are opened slowly, fixtures exercised, and visible joints inspected for drips; any weep is retightened or resealed.
Troubleshooting low water pressure and leaks
Diagnose low water pressure and leaks methodically, starting with a visual inspection of visible fittings, supply lines, and the faucet aerator to narrow potential causes.
Check shutoff valves fully open, remove and clean aerator, verify cartridge condition, and test both hot and cold separately. Use a pressure gauge if needed.
Tighten fittings, replace damaged hoses or seals, and retest to confirm repair.
Installing or replacing a bathtub or shower
Selecting the correct shower or tub valve and setting proper rough-in depths determines performance and future access.
The process then covers installing the drain assembly, ensuring complete waterproofing of the shower pan, and connecting the valve before fitting the trim.
Common issues such as slow drains and leaks are addressed with proper sealing, trap access, and careful testing.
Choosing shower/tub valves and rough-in considerations
Begin by matching the valve type and rough-in dimensions to the chosen tub or shower unit and the home’s plumbing layout; this confirms compatibility with trim, valve cartridges, and future maintenance access.
Consider single‑handle, thermostatic, or pressure‑balanced valves, supply line spacing, depth from finished wall, and access panels.
Verify local codes, flow rates, and diverter orientation to guarantee proper function and serviceability.
Installing drain assembly and shower pan waterproofing
Installers must fit the drain assembly and waterproof the shower pan with precision to prevent leaks and guarantee proper drainage.
They set the drain flange, test alignment with trap and waste lines, apply appropriate sealants or gaskets, and secure the assembly.
For the pan, installers install a bonded membrane or liner, slope mortar bed correctly, and lap waterproofing to wall flanges before final tile or pan installation.
Connecting shower valve and trim installation
Connect the valve body to the supply and outlet lines, verify alignment and depth relative to the finished wall, then mount trim components to guarantee a watertight, accessible assembly.
Test for leaks at soldered, threaded, or push-fit joints before finishing wall surfaces.
Install escutcheon, handle cartridge, and diverter per manufacturer torque and orientation specs.
Check operation, shutoffs, and access panel clearance.
Handling tub/shower common issues (drain clogs, leaks)
Several common tub and shower problems—most importantly slow or blocked drains and faucet or drainline leaks—can be diagnosed and resolved with a few systematic steps.
Inspect visible fittings, test drainage speed, and remove hair or debris with a plumber’s snake.
Tighten or replace worn washers, cartridges, or seals to stop leaks.
Verify trap and pipe integrity; apply proper sealant and test for leaks.
Working with supply lines: cutting, joining, and routing
The section outlines practical methods for cutting, joining, and routing water supply lines in a bathroom.
It covers PEX connection options—crimp, clamp, and push-fit—alongside CPVC and copper joining techniques such as solvent cement and soldering.
It also explains the placement of shutoff valves and manifolds.
Procedures emphasize proper tools, secure fittings, and clear routing to guarantee reliable, code-compliant service.
PEX techniques: crimp, clamp, and push-fit fittings
PEX tubing offers three reliable joining methods—crimp, clamp, and push-fit—each suited to different tools, skill levels, and installation scenarios.
Crimp uses copper rings and a crimp tool for permanent, inexpensive seals.
Clamp employs stainless steel cinch rings and a simple crimping tool for strong, code-approved joints.
Push-fit provides quick, tool-free connections ideal for repairs and tight spaces, though slightly costlier.
CPVC and copper joining methods (soldering, solvent cement)
After covering crimp, clamp, and push-fit methods for PEX, attention shifts to CPVC and copper supply lines, which require different joining techniques and handling.
CPVC uses solvent cement: clean, prime, apply cement, then assemble and hold briefly.
Copper requires soldering or push-fit copper fittings: clean, flux, heat, feed solder, or use approved mechanical connectors.
Cut squarely and deburr before joining.
Installing shutoff valves and manifolds
Begin by locating and marking valve and manifold positions that provide easy access for maintenance while minimizing extra pipe runs.
Shutoff valves are installed on individual fixtures or branch lines; manifolds centralize control for multi-fixture systems.
Cut supply lines squarely, deburr, and dry-fit fittings.
Use appropriate joining methods (compression, sweat, push-fit) and secure routing with clamps and supports, testing for leaks before finishing.
Waste and vent system work
Attention turns to the waste and vent system, where proper slope and hanger spacing guarantee reliable horizontal drain runs.
The text covers tying new fixtures into existing drains and extending or modifying vents to maintain trap seal integrity and prevent slow draining.
Methods for locating and correcting sewer gas odors are also outlined to safeguard indoor air quality.
Proper slope for horizontal drain runs and support spacing
Proper slope and secure support of horizontal drain runs are essential to guarantee positive flow, prevent blockages, and maintain long-term integrity of the waste and vent system.
Pipes typically require 1/4 inch per foot slope for 1-1/2 to 3-inch drains; larger mains may use 1/8 inch.
Support spacing follows code: usually every 4 feet for horizontal plastic, closer near fixtures and fittings, avoiding sag.
Connecting new fixtures to existing drain lines
Having established correct slope and secure support for horizontal drains, the focus shifts to tying new fixtures into the existing waste and vent network.
Install appropriate fittings—wyes, sanitary tees, and adapters—maintaining flow direction and access for cleanouts.
Match pipe materials and sizes, use proper solvent or threaded joints, and slope branch connections.
Test for leaks and verify traps remain properly vented and accessible.
Understanding and extending venting for proper drainage
Extend and balance the plumbing venting so air can enter the system, preventing siphoning and allowing wastewater to flow freely.
The installer locates existing vents, verifies trap arm lengths and slopes, and ties new vents into stack or main vent per code.
Use appropriate fittings, maintain fall, and avoid back-to-back traps.
Test with water to confirm vents function before finishing walls or ceilings.
Identifying and correcting sewer gas odors
Detecting sewer gas odors requires systematic inspection of the waste and vent system to locate their source and eliminate gas entry points.
Inspect traps for dry seals, test for leaks at wax rings and cleanouts, and verify vent pipe integrity and termination.
Repair cracked seals, reset or replace wax rings, guarantee traps retain water, and clear vent obstructions to restore proper airflow and prevent odors.
Pressure testing, leak checking, and final commissioning
The contractor begins final plumbing by conducting water pressure and pressure-drop tests to confirm supply integrity and identify leaks.
Drain and vent integrity is verified with smoke or water tests, ensuring traps and joints are sealed and vents flow correctly.
A concise fixture testing checklist—including shutoffs, flow, drainage, and leak inspection—completes commissioning before handover.
Performing water pressure and pressure drop tests
Begin by isolating the bathroom’s plumbing circuits and pressurizing them to the specified test pressure.
Then monitor for pressure drops that would indicate leaks or faulty fixtures.
Record baseline pressure, wait recommended dwell time, and inspect all joints, valves, and fixtures.
Repair any drops, repressurize, and repeat until stable.
Document results and release pressure safely before final commissioning.
How to perform a smoke or water test for drains and vents
Use smoke or water tests to verify integrity of drain and vent systems before final commissioning: these tests reveal leaks, improper connections, or blocked vents by pressurizing or flooding the system under controlled conditions and observing for escapes.
Seal all openings, apply appropriate pressure or fill to specified level, monitor for bubbles or smoke exit points, repair defects, retest until no leaks remain, and document results.
Final fixture testing checklist
Several systematic checks confirm that fixtures, fittings, and associated piping meet performance and safety standards before handover.
Conduct pressure tests on supply and waste lines to specified durations and pressures; inspect all joints, valves, and seals for visible leaks; operate fixtures to verify flow, drainage, and trap seals; test shutoffs and overflow protection; document results, correct defects, and retest until all criteria are satisfied.
Common mistakes to avoid and how to fix them
Common installation errors—such as incorrect vent and trap sizing, improper pipe slopes, loose fittings, and inadequate support—are frequent causes of performance issues and leaks.
Misapplied sealants or thread tape can also undermine joints and seals. Each mistake has a straightforward remediation, from resizing vents/traps and re-pitching runs to tightening or replacing connections and reapplying proper sealant techniques.
Oversized/undersized vents and traps errors
Incorrect sizing of vents and traps—either oversized or undersized—can compromise drainage performance, create persistent clogs, or allow sewer gases into living spaces.
Make certain trap arms match fixture drain flow and trap seal depth per code.
Size vents to maintain neutral pressure; replace incorrect fittings, resize with approved reducers or enlargements, and retest with water and smoke tests to confirm proper venting and odor prevention.
Improper slopes, loose connections, and inadequate supports
After addressing vent and trap sizing, attention must turn to the physical alignment and support of the piping system: improper slopes, loose connections, and inadequate supports are frequent sources of leaks, backups, and stress on joints.
Confirm drain lines have proper fall (1/4″ per foot for typical 1½–2″ drains), tighten and test all joints, and add hangers and straps at recommended intervals to prevent sagging.
Sealant and thread tape misuse
Apply thread sealant and tape with care: using the wrong type, too much, or too little can cause leaks, contaminate fixtures, or make future repairs difficult.
Common mistakes include mixing incompatible sealants, wrapping tape against thread direction, over-applying paste that squeezes into lines, and relying solely on tape for flange seals.
Inspect joints visually and by pressure-testing before finishing surfaces.
How to remediate each common error
Addressing each common sealing and tape error requires a systematic, corrective approach that isolates the fault, removes inappropriate materials, and restores proper joint integrity.
Inspect joints for old sealant, overwrapped tape, cross-threading or contamination.
Remove defective material, clean surfaces, reapply correct tape direction and ply count, reseal with suitable caulk, torque fittings properly, test for leaks, and monitor for recurrence.
Maintenance tips to keep bathroom plumbing reliable
Regular routine checks and simple preventive maintenance help spot leaks, corrosion, and worn seals before they become major problems.
Guidance can distinguish safe DIY drain care—like using a plunger or enzyme cleaners—from situations that require a professional to avoid damage.
The discussion will also cover winterizing steps and freeze-prevention measures to protect pipes in cold weather.
Routine checks and simple preventive maintenance
A few simple inspections performed monthly can prevent most common bathroom plumbing problems:
- Check for slow drains and clear hair traps.
- Inspect visible pipes, valves, and connections for leaks or corrosion.
- Test shutoff valves and faucet operation for stiffness or drips.
- Verify caulking and grout around tubs, showers, and sinks to prevent water intrusion.
DIY drain care vs. when to call a professional
When should a homeowner tackle a slow sink or clogged shower drain, and when is it wiser to call a professional?
Homeowners can use plungers, hand snakes, enzymatic cleaners, and remove visible debris.
Call a plumber for recurring clogs, foul odors, sewage backups, multiple fixtures affected, or when unfamiliar tools or invasive access (wall/floor removal) would be required to resolve the issue safely.
Winterizing and freeze-prevention tips
After addressing slow drains and recognizing when professional help is needed, homeowners should prepare bathroom plumbing for cold weather to prevent frozen pipes and costly damage.
Insulate exposed pipes, seal drafts near walls and vents, drain and shut off outdoor lines, maintain steady indoor temperature, and open cabinet doors to circulate warm air.
Check heat tape and replace worn seals annually.
Cost, time, and material comparison table for common bathroom plumbing projects
A concise comparison of cost, time, and materials helps clarify when a project is practical for a homeowner versus when professional labor is more cost-effective. The table below summarizes typical DIY effort, pros and cons of hiring a pro, and common material needs for five frequent bathroom tasks. This helps readers decide which jobs to attempt and which to outsource to save time or avoid costly mistakes.
| Project | Typical DIY vs. Pro | Common Materials |
|---|---|---|
| Replace faucet | DIY: low cost, moderate time; Pro: faster, guarantees leak-free | New faucet, supply lines, sealant |
| Install toilet | DIY: moderate difficulty, risk of seal leaks; Pro: guarantees proper flange/seal | Toilet, wax ring, bolts |
| Replace shower valve | DIY: high skill/time; Pro: avoids water damage | Valve, solder/fitters, gaskets |
| Reroute supply lines | DIY: advanced plumbing/soldering; Pro: reduces code/pressure issues | PEX/CPVC, fittings, valves |
| Install bathtub | DIY: large, time-consuming; Pro: prevents structural/waterproof issues | Tub, drain, backer, waterproofing |
Typical DIY vs. professional labor considerations and when hiring saves money
Frequently, homeowners weigh the trade-offs between tackling bathroom plumbing themselves and hiring a licensed pro by comparing cost, time, and material needs for specific projects.
DIY suits simple tasks—faucet swaps, toilet replacements—saving labor costs but risking mistakes, code violations, or longer timelines.
Professionals add expense but deliver permits, warranty, complex repairs, and faster completion; hire pros when skill, liability, or concealed systems are involved.
Safety, permits, and final inspection checklist
The section outlines common items inspectors check—proper venting, trap seals, fixture clearances, leak-free connections, and accessible shutoffs—and how to prepare for each.
It also explains the importance of permits and scheduling inspections to avoid delays or fines.
Finally, it recommends documenting all changes and keeping receipts and warranty information for future claims and resale.
Items inspectors commonly check and how to prepare
When preparing for a bathroom plumbing inspection, homeowners should understand which safety elements, permit requirements, and specific fixtures inspectors routinely evaluate so that the project meets code and passes final approval.
Inspectors check venting, trap seals, anti-siphon devices, proper pipe sizes, supply shutoffs, accessible cleanouts, fixture mountings, leak tests, water heater connections, and GFCI protection.
Have permits posted and work exposed for review.
Documenting changes and keeping receipts for warranties
After inspectors complete their review and approvals, maintaining a clear record of alterations and purchases protects the homeowner and supports warranty or permit claims.
The homeowner should log work dates, contractor details, permit numbers, and photos; retain receipts, product manuals, and warranty documents.
Store both digital backups and physical copies.
Organized records streamline future repairs, warranty disputes, and resale disclosures.
Conclusion
A DIYer concludes that bathroom plumbing demands knowledge, planning, and patience; can one afford to skip steps when water, waste, and safety are at stake? With fundamentals, proper tools, and adherence to codes, many tasks—toilet installation, leak repairs, and routine maintenance—are achievable. Yet recognizing limits, obtaining permits, and scheduling inspections guarantee lasting results. Following the guide’s checklists minimizes mistakes and secures a reliable, code-compliant bathroom plumbing system for years to come.