How to Adjust Shower Water Flow Quickly: Step-by-Step Fixes for Low or High Pressure
To quickly adjust your shower water flow, start by identifying if the issue is low (weak stream, slow fill) or high (pipe hammering, misty spray). For immediate fixes, reset the valve, adjust the diverter, and clean the showerhead by soaking it in vinegar or removing mineral deposits. If these steps don’t resolve the problem, you may need to remove and inspect the showerhead, replace cartridges or washers, or adjust the main pressure-reducing valve (PRV) for your entire house. Most fixes require only simple tools, but if the issue persists or is complicated, it’s best to consult a plumber. Further details on adjustments and maintenance are available if needed.
How to Quickly Diagnose Shower Water Flow Problems
A quick assessment begins by distinguishing symptoms of low pressure—weak, sputtering stream—or high pressure—forceful spray and valve stress.
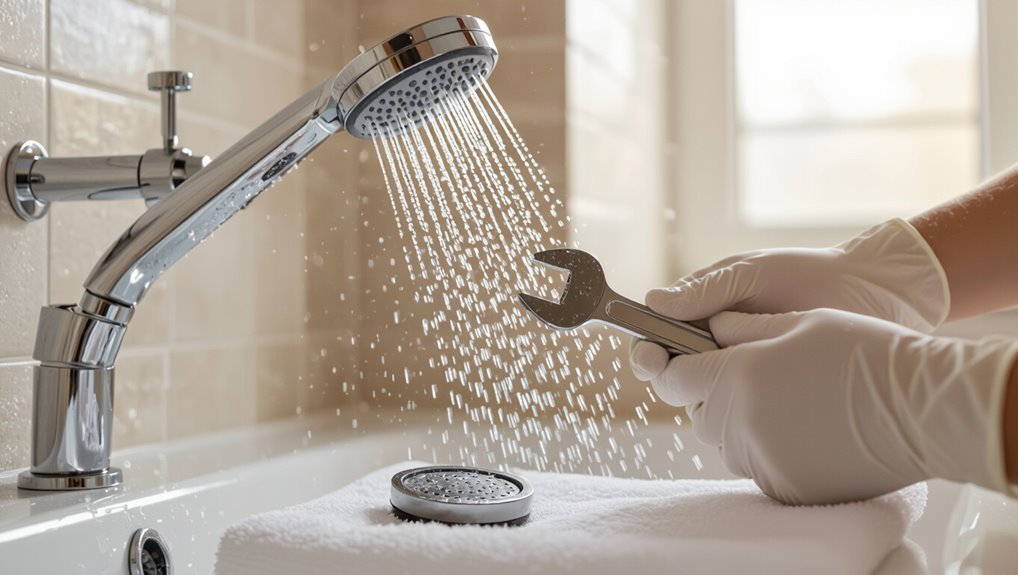
Basic tools like a pressure gauge, wrench, and safety gloves allow immediate checks of flow and fittings while avoiding injury.
If simple checks (cleaning the aerator, tightening connections) do not restore normal flow, a qualified plumber should be contacted.
Signs of low water pressure vs. high pressure
How can one quickly tell whether a shower’s flow problem stems from low pressure or excessive pressure?
Observers note weak, thin streams, long filling times, and reduced spray coverage as signs of low pressure.
Conversely, hammering, loud pipes, misting spray, or sudden surges indicate high pressure.
Recognizing these patterns helps prioritize fixes when learning how to adjust shower water flow.
Tools and safety precautions to check flow immediately
Prepare basic tools and follow simple safety steps before diagnosing shower flow to prevent injury and avoid damaging plumbing. A flashlight, adjustable wrench, screwdriver, bucket, and cloth suffice.
Shut off water and power to electric heaters first. Wear gloves and eye protection.
Use a pressure gauge or bucket-timer method to measure flow. Check visible fittings for leaks; tighten gently to avoid stripping threads.
When to call a professional vs. DIY
When should a homeowner attempt fixes and when is a professional call warranted?
A homeowner should handle basic tasks: cleaning showerheads, replacing cartridges, checking visible valves and supply shutoffs.
Call a licensed plumber for persistent low pressure, leaks, corroded pipes, water hammer, municipal issues, or when work requires shutting mains, soldering, or permits.
Safety and code compliance justify professional intervention.
Quick First-Aid Fixes You Can Do in Minutes
A few simple first-aid fixes can restore acceptable shower flow in minutes.
They include resetting the shower valve and adjusting the diverter, unclogging a showerhead with a vinegar soak or by clearing mineral deposits with a pin, and fine-tuning water volume using the shower control handle.
These steps require minimal tools and can often resolve common low-flow issues immediately.
Resetting the shower valve and adjusting diverter
Start by turning off the shower’s water supply at the shutoff or main valve to prevent accidental flow; then remove the handle and trim to access the cartridge or stem.
Inspect for debris, misalignment, or worn seals. Gently reposition or realign the cartridge, tighten retaining nuts, and test the diverter’s movement.
Reassemble trim and restore water, checking for leaks and balanced flow.
Temporary fixes for clogged showerheads (vinegar soak, pin poke)
Clear, quick fixes can restore water flow from a clogged showerhead in minutes without tools: soaking the head in white vinegar dissolves mineral buildup, while using a thin pin or toothpick to dislodge individual nozzles clears blockages.
Remove the showerhead or fill a plastic bag with vinegar secured around it; for fixed heads, apply vinegar-soaked cloth.
Rinse thoroughly and test flow.
How to adjust flow with the shower control handle
Turn the control handle to check for simple misadjustments before calling a plumber: many low-flow or uneven showers respond to a firm, deliberate adjustment of the existing valve, which can restore normal pressure by fully opening the hot/cold mix or repositioning a partially engaged flow stop.
Move handle through full range, test temperature and flow at each point, and note stiffness or erratic response suggesting cartridge or valve wear needing replacement.
Step-by-Step: Restore Flow by Cleaning and Replacing the Showerhead
The guide instructs how to safely remove and inspect a showerhead to identify common blockages.
It then outlines methods for deep-cleaning mineral deposits and signs that indicate replacement is a better option.
Finally, it compares recommended showerhead types for low-flow conservation and for restoring high-pressure performance.
Remove and inspect the showerhead safely
Begin by shutting off the water supply and allowing the shower to cool.
Then gather basic tools—adjustable wrench, cloth, and soft brush—to protect finishes and simplify removal.
Wrap the wrench jaws with cloth, loosen the showerhead turning counterclockwise, and remove it.
Inspect threads, rubber gasket, and inlet for corrosion, cracks, or debris.
Note damage requiring replacement; set aside components for cleaning.
Deep-cleaning mineral deposits
Loosen mineral buildup by soaking the removed showerhead in a descaling solution—white vinegar or a commercial limescale remover—so that deposits soften and dissolve.
After adequate soaking, scrub jets with a soft brush or toothpick to clear openings, rinse thoroughly, and flush with water to remove residue.
Reassemble seals and test flow, repeating if stubborn deposits remain.
When and how to replace a showerhead for better flow
Replace a worn or inefficient showerhead when cleaning and basic repairs no longer restore adequate pressure or when damage, persistent clogging, or outdated flow restrictors limit performance.
Turn off water, protect fittings with tape, unscrew the old head with an adjustable wrench, remove old tape and debris, apply new plumber’s tape, install the replacement, hand-tighten, test for leaks, and adjust alignment.
Recommended showerhead types for low-flow and high-pressure situations
Selecting the right showerhead depends on whether the priority is conserving water or maximizing pressure: low-flow models (1.5–2.0 GPM) use aeration or pulsation to maintain coverage while reducing consumption, whereas high-pressure options feature smaller nozzles, pressure-boosting chambers, or matched-pump compatibility to increase force without dramatically upping flow.
- Low-flow aerating: soft, wide coverage, efficient.
- Pulsating/air-injection: feels stronger, saves water.
- Pressure-boost/compact-nozzle: designed for low-supply homes, pairs with pumps.
Adjusting Home Water Pressure at the Source
Next, the article addresses adjusting household water pressure at its source by locating and setting the main pressure-reducing valve (PRV).
It explains how to read a pressure gauge, which target pressure to aim for, and clear steps to increase pressure safely.
It also covers how to lower pressure when needed to protect plumbing and fixtures.
Locating and adjusting the main pressure-reducing valve (PRV)
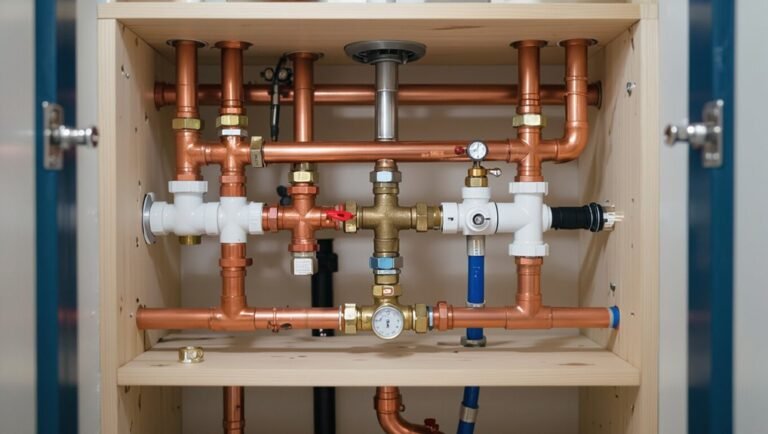
A pressure-reducing valve (PRV) is typically installed near where the water supply enters the house and regulates the whole-house water pressure; locating it is the first step before any adjustment.
Once found—often on a horizontal pipe with a bell-shaped body and adjustment screw—inspect for isolation valves.
Turn the screw clockwise to reduce pressure or counterclockwise to increase, then test fixtures for desired effect.
How to read a pressure gauge and target pressure levels
How should the pressure gauge be read to guarantee safe, comfortable water flow? A reader notes static pressure with an attached gauge at a hose bib or near the PRV while taps are off.
Then open a faucet to record flow (dynamic) pressure.
Target residential range: about 40–60 psi static, with minimal drop under flow.
Record values, compare to local codes.
Steps to safely increase household water pressure
Begin by locating the main shutoff and pressure regulator to establish control points before making adjustments.
Verify current pressure with a gauge, then turn the regulator screw clockwise in small increments, rechecking pressure after each change.
Open a nearby faucet to flush air.
If pressure remains low, inspect for closed valves, clogged filters, or consult a licensed plumber before increasing beyond recommended limits.
How to reduce household pressure to prevent damage
Several household systems benefit from lowering incoming water pressure to prevent pipe stress, appliance wear, and fixture leaks.
A pressure-reducing valve (PRV) installed at the main supply allows safe, adjustable control. Set PRV to recommended 50–60 psi, test with a gauge, and inspect periodically.
Lower pressure extends fixture life, reduces burst risk, and improves appliance performance while conserving water.
Fixes for Common Plumbing Causes of Poor Flow
Common plumbing faults that reduce shower flow include partial pipe blockages, worn mixing valves or cartridges, and corroded piping that may require replacement.
Technicians typically inspect and clear deposits from lines, test and replace faulty valve components, and assess pipe condition to decide between repair and full replacement.
Shared-line conditions—such as upstream usage by neighbors or municipal supply variations—are also considered when diagnosing intermittent low flow.
Detecting and clearing partial pipe blockages
When water pressure drops despite a clear showerhead, partial blockages inside supply pipes are a likely culprit and can be diagnosed through targeted observation and simple tests.
Check flow at nearby fixtures, note pressure differences and sputtering, and isolate hot versus cold.
Use a pressure gauge, flush lines by opening valves, and remove accessible debris.
Persistent obstruction requires professional descaling or pipe replacement.
Identifying faulty mixing valves and cartridges
If pipe blockages have been ruled out, attention should turn to the shower’s mixing valve and cartridge, components that regulate flow and blend hot and cold water.
Signs of failure include uneven temperature, sputtering, leaks, or reduced flow despite open supply.
Inspect for mineral buildup, worn seals, or damaged cartridges.
Replace or rebuild the valve per model specifications to restore proper performance.
Addressing corroded pipes and when replacement is needed
Many older homes show reduced shower flow due to pipe corrosion, which narrows passages and roughens interiors, restricting water movement and trapping mineral deposits.
Inspection via visible pipes, water testing, or camera scope detects pitting, rust, or sediment buildup.
Minor scaling may respond to descaling or spot repairs; widespread corrosion, frequent leaks, or thin-walled sections warrant full section replacement by a licensed plumber.
How shared-line issues (neighbors, municipal supply) affect shower flow
Although local plumbing behaves as an individual system, shared supply lines—whether connecting multiple units in an apartment building or feeding an entire municipal grid—can cause simultaneous pressure drops and fluctuating shower flow for several households.
Peak demand, mainline leaks, maintenance, or municipal valve adjustments reduce available pressure.
Coordinated diagnostics, contacting property managers or water authorities, and scheduling repairs or demand management restore stable, predictable shower performance.
Adjusting Flow for Specific Shower Types
Different shower valve types require distinct adjustment approaches. Single-handle mixers offer combined flow/temperature control, while dual-handle valves separate the functions.
Thermostatic and pressure-balancing valves need specific troubleshooting steps to address temperature drift or pressure-related fluctuations.
Electric tankless heaters can introduce instant hot-water flow issues that affect shower performance and may need flow-rate or pressure adjustments at the unit.
Single-handle mixers vs. dual-handle valves: adjustment differences
When comparing single-handle mixers to dual-handle valves, the key difference lies in how they regulate volume and temperature simultaneously versus separately:
Single-handle units adjust flow and temperature with one cartridge or ceramic disc; flow limits and debris often require cartridge cleaning or replacement.
Dual-handle systems separate hot and cold flow controls, making balancing and isolating one side for repair or adjustment simpler and more modular.
Thermostatic and pressure-balancing valves: troubleshooting steps
Start by identifying whether the shower uses a thermostatic or pressure‑balancing valve, since each type responds differently to common flow issues and requires distinct troubleshooting steps.
For thermostatic valves, check cartridge debris, inlet strainers, and temperature limit stops.
For pressure‑balancing valves, inspect the spool for wear, clean vents and check hot/cold supply balance.
Replace cartridges if cleaning fails.
Electric tankless water heaters and instant hot-water flow issues
After checking valve types and components, attention should turn to the water heater, since electric tankless units and instant hot systems have unique flow-sensitivity that affects shower performance.
These heaters require minimum flow rates and adequate electrical capacity; low demand reduces temperature or causes cycling.
Recommend verifying flow thresholds, cleaning inlet filters, confirming proper wiring and element function, and consulting manufacturer settings or a qualified technician.
Tools, Parts, and Materials You’ll Need
A concise set of tools and spare parts makes adjusting shower flow faster and less stressful. The following essentials cover common repairs and improvements without excess. Suggested items focus on practicality and durability:
- Basic DIY tool kit: adjustable wrench, screwdrivers, pliers, Allen keys, and a utility knife.
- Replacement parts to keep on hand: rubber washers, faucet cartridges, and a pressure-reducing valve (PRV).
- Recommended products and materials for longevity: silicone plumber’s grease, Teflon tape, and corrosion-resistant fittings.
Basic DIY tool kit for flow adjustments
An effective basic DIY kit for adjusting shower flow includes a few reliable tools and common replacement parts to handle most household issues:
an adjustable wrench and channel-lock pliers for loosening fittings, a set of screwdrivers (flathead and Phillips) for trim and faceplates, a basin or small bucket to catch water, and plumber’s tape for sealing threads.
Also include an LED flashlight, disposable gloves, a soft brush, and a rag.
Replacement parts to keep on hand (washers, cartridges, PRV)
Keep a small selection of common replacement parts on hand to address the most frequent causes of reduced or uneven shower flow: neoprene or rubber washers for older compression valves, manufacturer-specific ceramic cartridges for single- or double-handle mixers, and a pressure-reducing valve (PRV) or its adjustment kit for homes with high supply pressure.
Also include O-rings, inlet screens, and small retaining clips for quick swaps.
Recommended products and materials for longevity
Tools and parts for long-term shower performance should prioritize durability, compatibility, and corrosion resistance.
Recommended products include high-quality brass or stainless steel cartridges, silicone-sealed pressure-reducing valves, and reinforced braided supply lines.
Gaskets and O-rings should be EPDM or Viton for chemical resistance.
Use plumber’s tape and thread sealant rated for potable water to guarantee leak-free, long-lasting connections.
- Brass/stainless cartridges
- PRV with silicone seal
- Reinforced braided lines
Preventive Maintenance to Keep Shower Flow Optimal
A routine cleaning schedule and simple descaling methods help prevent mineral buildup that restricts shower flow.
Seasonal checks, including winterizing exposed pipes, reduce freeze-related damage and maintain consistent performance.
Regular monitoring of water pressure and attention to early warning signs—such as sputtering, reduced flow, or unusual noises—allows for prompt corrective action.
Regular cleaning schedule and methods
Regularly scheduled cleaning prevents mineral buildup and microbial growth that reduce shower flow; establishing a simple routine—monthly light cleanings with a vinegar soak and quarterly deep scrubs of the head and hoses—maintains peak performance and extends fixture life.
Use soft brushes, toothpicks for nozzle ports, and mild descalers; rinse thoroughly, reassemble securely, and log dates.
Replace worn washers or cartridges as needed.
Seasonal checks and winterizing tips
Seasonal checks and winterizing preserve shower flow by addressing temperature-driven risks like freezing, mineral deposition changes, and pressure fluctuations.
Inspect exposed pipes and insulate vulnerable sections, drain and winterize outdoor fixtures, and service mixing valves before cold snaps.
Flush the system seasonally to reduce mineral buildup, replace worn seals, and confirm shutoff valves operate smoothly to prevent winter damage and maintain consistent performance.
Monitoring water pressure and early warning signs
Following winterizing and seasonal inspections, attention shifts to monitoring water pressure and recognizing early warning signs that foreshadow flow problems.
Homeowners should note slow trickle starts, fluctuating heat, noisy pipes, and visible leaks.
Regularly check pressure with a gauge at fixtures, record readings, and compare over time.
Early detection enables simple fixes—clean aerators, replace cartridges, or call a plumber before major repairs.
Cost, Time, and Complexity Guide for Common Repairs
A concise overview compares quick fixes, medium repairs, and professional jobs by estimated cost, time, and required skill to help readers choose an appropriate approach. The table below summarizes typical examples with a DIY difficulty rating and brief time/cost ranges. This provides a practical starting point for planning repairs or deciding when to call a professional.
| Repair type | Typical estimate |
|---|---|
| Quick fixes (aerator/cleaning) | Low cost, low time, DIY-friendly |
| Medium repairs (valve cartridge replacement) | Moderate cost, moderate time, intermediate skill |
Quick fixes vs. medium repairs vs. professional jobs (cost and time estimates)
Different causes of weak or uneven shower flow call for different responses, and categorizing fixes by complexity helps homeowners choose an approach.
Quick fixes: clean aerators, adjust valves, replace washers — low cost, minutes to an hour.
Medium repairs: replace cartridges or showerheads, clear supply lines — moderate cost, one to a few hours.
Professional jobs: pipe replacement, pressure regulator work — higher cost, half-day to multiple days.
DIY difficulty rating and required skill level for each repair
Several common shower repairs can be grouped by DIY difficulty—easy, moderate, and advanced—so homeowners can match tasks to their skills and comfort level.
Easy tasks (cleaning aerators, replacing showerheads) require basic tools and minimal plumbing knowledge.
Moderate jobs (valve cartridge replacement, minor pipe repairs) need intermediate tools and familiarity with water shutoff.
Advanced work (re-piping, gas water heater adjustments) demands professional licensing and experience.
Troubleshooting Checklist for Persistent Flow Problems
A concise stepwise diagnostic checklist helps identify common causes of persistent low or fluctuating shower flow.
Before contacting a plumber, the homeowner should record observed symptoms, times, recent changes, water pressure readings if available, and any temporary fixes attempted.
Prepared questions for the plumber—such as recent work on supply lines, potential valve or cartridge issues, and estimated repair scope and cost—will make service visits more effective.
Stepwise diagnostic checklist to follow
Begin by isolating variables and following a clear, step-by-step diagnostic checklist that narrows possible causes of persistent low or uneven shower flow.
Verify other fixtures, check main shutoff and supply valves, inspect showerhead and aerator for debris, test hot and cold separately, review pressure regulator and meter reading, examine visible pipes for leaks or kinks, and document findings before repair or parts replacement.
Information to collect before calling a plumber
With those diagnostic steps completed, collect clear, specific information to give a plumber a fast, accurate picture of the problem.
Note exact symptoms (low, fluctuating, or high pressure), when they occur, frequency, and affected fixtures.
Record recent changes, any DIY attempts, visible leaks, water meter behavior, supply valve positions, and relevant appliance use.
Include building age and access points.
Questions to ask a professional plumber for effective service
Why ask specific, targeted questions when hiring a plumber for persistent flow problems? A homeowner should request credentials, insurance, and references; describe symptoms, previous fixes, and water pressure readings; ask about diagnostic steps, parts, estimated timeline, and costs; clarify warranty, permits, and potential causes like sediment, valves, or supply issues; and confirm communication preferences and follow-up procedures.
Tips to Improve Shower Experience Without Changing Plumbing
Readers can consider showerheads with adjustable flow settings to tailor spray patterns without altering plumbing.
Adopting water-saving habits, such as shorter rinses and selecting higher-pressure modes, helps preserve perceived pressure.
Simple add-ons like pressure-boosting aerators and upgraded shower valves can further improve the shower feel with minimal installation.
Choosing showerheads with adjustable flow settings
Many homeowners find that swapping to a showerhead with adjustable flow settings is the quickest way to tailor spray pattern and water usage without rewiring or repiping.
Select models offering multiple spray modes, pause or eco settings, and flow restrictor removal or adjustment.
Check compatibility with existing fittings, look for easy-clean nozzles to prevent clogging, and verify performance with consumer flow-rate ratings.
Water-saving habits that maintain perceived pressure
Several simple habits can preserve the feel of strong shower pressure while cutting water use: shorter rinse times, brief shut-offs during lathering, and intentional temperature and nozzle adjustments all help maintain a satisfying spray without changing plumbing.
Users can time showers, use a rinse-and-lather rhythm, focus flow on targeted rinsing, and stagger hot/cold tweaks to maximize perceived intensity while conserving water.
Small upgrades that enhance flow feel (pressure-boosting aerators, shower valves)
Often, small, noninvasive upgrades can noticeably improve the perceived strength and quality of a shower without altering plumbing: pressure-boosting aerators or flow-enhancing shower valves refine spray patterns and increase velocity by optimizing water delivery, while replacement showerheads and simple inline boosters adjust flow dynamics to feel more forceful.
- Install a pressure-boosting aerator.
- Replace with a flow-enhancing valve.
- Add an inline booster pump.
Conclusion
One in four households report inconsistent water pressure, underscoring how common shower flow issues are. A quick diagnosis often reveals a simple culprit—clogged heads, aerators, or shutoffs—fixable in minutes. When deeper fixes are needed, prioritizing source pressure, valves, and possible pipe work prevents repeat problems. Routine maintenance and small upgrades deliver reliable showers and avoid costly repairs, making modest effort now pay off through improved daily comfort and lower long‑term expenses.