How to Unfreeze a Tub Drain Fast: DIY Methods to Thaw and Prevent Freezing
To quickly unfreeze a tub drain, use controlled heat methods such as warm water, a hair dryer, or heating pads. First, ensure safety by cutting power to wet areas and clearing access to exposed pipes. If ice persists, a plumbing snake can help. Avoid using open flames or corrosive chemicals. Follow these step-by-step techniques for thawing, along with troubleshooting tips and prevention strategies to keep your drains clear in the future.
How to Quickly Unfreeze a Frozen Tub Drain
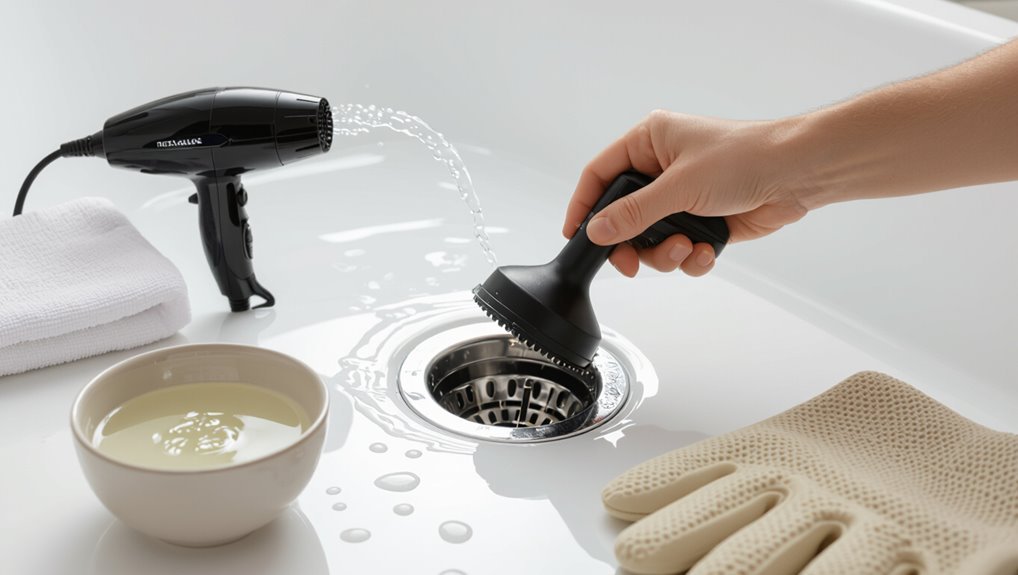
Before attempting to thaw a frozen tub drain, a quick safety checklist should be reviewed to avoid burns, electrical hazards, and further pipe damage.
The person should assemble immediate tools and materials—hot water source, towels, a hair dryer or heat gun on low, pliers, and protective gloves—within reach.
With safety confirmed and supplies ready, the thawing process can proceed efficiently.
Rapid safety checklist before you start
When preparing to unfreeze a tub drain, perform a quick safety sweep to identify hazards, conserve heat, and secure tools and help are available.
Evaluate electrical risks, shut off nearby power if water is present, check for frozen pipe bulges, ensure ventilation if using heat sources, confirm someone nearby for assistance, and verify clear access to the drain.
Note temperature limits to prevent damage.
Immediate tools and materials to have on hand
Several essential items should be gathered before attempting to unfreeze a tub drain: a pair of insulated work gloves, a hairdryer or heat gun (used cautiously at low settings), towels and a bucket for managing meltwater, a plumbing snake or drain auger, a pipe wrench or adjustable pliers, and a flashlight.
Additionally include thermal tape, plumber’s grease, a coil of thin copper wire, a bowl, and safety goggles.
Fast DIY Methods to Thaw a Frozen Tub Drain
This section outlines fast, practical DIY approaches for thawing a frozen tub drain.
It covers step-by-step hot water pouring, safe use of a hair dryer or heat gun, and application of electric heat tape or a heating pad.
Portable space heater placement and ventilation, plus safe chemical de-icers and plumbing-approved thawing agents, are also reviewed.
Hot water pouring technique step-by-step
Begin by gathering necessary supplies: a kettle or pot for boiling water, a heat-resistant measuring cup or ladle, thick gloves, and a towel to protect surrounding surfaces.
Boil water, cool briefly to avoid damaging pipes, then pour slowly in small increments directly down the drain.
Allow warm water to sit between pours, repeat until flow resumes.
Finish by flushing with warm tap water.
Using a hair dryer or heat gun safely
Position a hair dryer or heat gun several inches from the drain and direct warm air in short, steady passes to thaw ice without overheating plumbing or surrounding finishes.
Keep the device moving, use medium heat, and monitor metal fittings for excess warmth.
Protect nearby tile, caulk, and plastic with a damp cloth.
Unplug when finished and ventilate the area to disperse moisture.
Applying electric heat tape or heating pad
If a hair dryer or heat gun cannot reach pipe sections or prolonged warmth is needed, electric heat tape or a small heating pad offers a controlled, hands‑free alternative.
Install heat tape per manufacturer instructions, secure with approved tape, and plug into a GFCI outlet.
Use low settings, monitor temperature, and inspect for damage.
Turn off once thawed to avoid overheating and fire risk.
Using a portable space heater and ventilation tips
A portable space heater can provide steady, localized warmth to thaw a frozen tub drain when shorter bursts from a hair dryer are insufficient.
Position the heater several feet away, aiming toward the bathroom while avoiding direct contact with plumbing.
Make sure windows or doors are slightly open for airflow to prevent moisture buildup and carbon monoxide risk.
Monitor continuously and keep electrical sources dry.
Chemical options: safe de-icers and plumbing-approved thawers
After warming the area with a space heater or hair dryer, chemical de-icers and plumbing-approved thawers offer a faster option for stubborn frozen drains.
Choose non-corrosive, biodegradable products labeled safe for pipes and septic systems.
Follow manufacturer dilution and contact-time instructions, ventilate the room, wear gloves and eye protection, and flush with warm (not boiling) water after thawing to clear residue and prevent damage.
When to use a plumbing snake or auger
Consider a plumbing snake or auger when visible warming and chemical methods have failed, the freeze is localized in the trap or nearby pipe, and water cannot drain despite thawing attempts.
A snake can mechanically break or retrieve ice and debris; use a hand auger for short sections, a power auger cautiously for deeper blockages.
Wear gloves, protect fixtures, and stop if resistance feels unusual.
Diagnose Where the Freeze Is Located
The reader should first determine whether the blockage is in the visible drain, the P-trap, or further up the supply line.
Simple checks—like running warm water while observing flow, feeling exposed pipe sections for cold spots, and testing individual fixtures on the same supply—help pinpoint the frozen segment.
Identifying the exact location guides the appropriate thawing method and prevents unnecessary disassembly.
How to tell if the freeze is in the drain, trap, or supply line
How can one determine whether a blockage is in the drain, the P-trap, or the supply line? Observable signs include slow or absent drainage suggesting a drain or P-trap issue, foul odors indicating a trapped freeze in the P-trap, and cold or nonfunctional faucet handles pointing to supply line freezing.
Location of ice often correlates with symptom pattern and accessible pipe temperature.
Simple tests to pinpoint the frozen section
When diagnosing a frozen section, a few quick, objective tests can localize the problem by isolating flow, sound, and temperature cues.
Run cold then warm water briefly; observe where flow resumes.
Tap pipes gently to detect muffled versus solid sounds.
Feel accessible pipe sections and the trap for cold spots.
Use a noncontact thermometer or infrared gun to map temperature gradients precisely.
Tools and Materials: What Works Best
Recommended tools include a hair dryer, heat gun on low, plumbing snake, adjustable wrench, and towels, while safe heat sources such as warm water and electric heating pads are preferred.
Materials to avoid include open flames, boiling water, chemical drain cleaners, and abrasive tools that can crack pipes or damage tub finishes.
The following section lists specific items and explains why some options pose risks.
List of recommended tools and heat sources
A concise kit of hand tools and safe heat sources makes thawing a tub drain faster and reduces the risk of damage.
Recommended items focus on controlled, noncontact heat and basic plumbing tools:
- Heat gun on low setting or hair dryer (avoid direct high heat)
- Hot water bottles or heating pads wrapped in towels
- Plumber’s snake, channel-lock pliers, and pipe wrench for access and clearing
Materials to avoid that can damage pipes or finishes
Avoid solvents, open flames, and abrasive tools that risk corroding metal, softening seals, or scratching tub finishes.
Recommended avoidance list:
- Chemical drain cleaners — they can eat rubber gaskets and damage metal pipes.
- Propane torches or open flames — extreme heat warps fittings and finishes.
- Metal files or wire brushes — they scratch chrome, enamel, and thin pipe walls, promoting corrosion.
Step-by-Step Guide for Different Pipe Types
The following section outlines step-by-step procedures tailored to common pipe materials and installation types.
It covers methods for thawing PVC, approaches for metal pipes such as copper or galvanized, and distinctions between exposed and concealed plumbing.
Each set of steps emphasizes appropriate tools, temperature limits, and safety precautions for that pipe type.
Thawing PVC drains
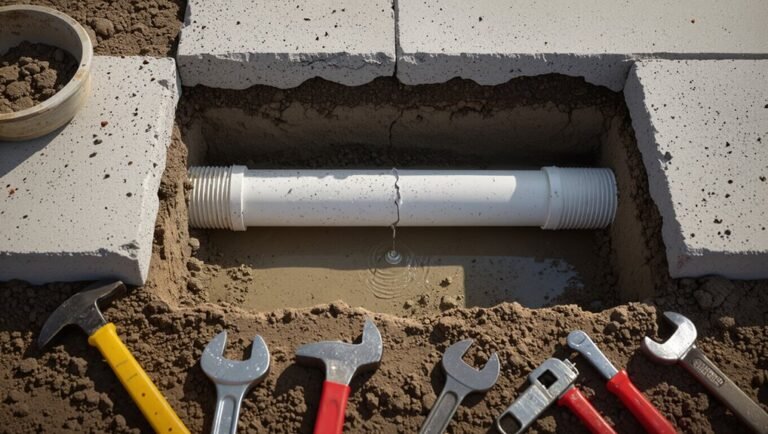
Begin by evaluating the frozen section and its accessibility: identify visible PVC runs, locate cleanouts or access points, and confirm that fittings and joints are intact to prevent damage during thawing.
Use controlled heat: hair dryer or heat gun on low, moving continuously. Wrap warm towels, pour warm (not boiling) water, and monitor for leaks.
Open faucets to relieve pressure and restore flow slowly.
Thawing metal (copper/galvanized) drains
Thaw metal drain lines by first evaluating pipe material, exposure, and nearby combustibles to choose a safe, effective method; copper and galvanized steel conduct heat differently and may require gentler, more evenly distributed warming to prevent damage.
Use warm towels, electric heat tape, or a hair dryer on low; avoid open flames and high heat.
Test flow gradually and inspect for leaks.
Thawing exposed vs. concealed plumbing
Different approaches are required for exposed versus concealed plumbing because access, insulation, and surrounding materials affect both method choice and safety.
Exposed pipes allow direct heat: use hair dryers, heat tape, or hot towels while monitoring joints.
Concealed pipes require indirect methods: warm the room, apply heat to nearby access points, or open wall/ceiling panels cautiously.
Always isolate water and check for leaks.
Troubleshooting Common Problems
If initial thawing yields no improvement, the writer outlines checks for remaining ice blockages and recommends escalating techniques or professional help.
The section also identifies signs of a burst or leaking pipe—such as sudden wet spots, hissing, or visible cracks—and lists immediate emergency steps to shut off water and contain damage.
Finally, it covers short-term measures to prevent water damage during thawing, including placing buckets, towels, and temporary barriers.
No improvement after initial thaw attempts
When initial efforts to clear a frozen tub drain produce no visible improvement, reassessment is necessary to identify why the blockage persists.
Check whether heat reached the frozen section, confirm access points, and inspect for ice beyond the trap or within adjacent pipes.
If mechanical probes, sustained gentle heat, or clearing agents fail, consider professional inspection to avoid damage or missed underlying causes.
Signs of a burst or leaking pipe and emergency steps
Several clear indicators point to a burst or leaking tub drain pipe: visible water pooling around the tub or on floors below, steadily draining water even with the drain stopper closed, damp or discolored ceiling or wall finishes under the bathroom, and a sudden drop in water pressure or loud pipe noises.
Turn off the main water supply, shut electrical power to affected areas, contain leaks with buckets, and call a plumber immediately.
Preventing water damage during thawing
After shutting off water and power and containing active leaks, attention shifts to preventing further water damage during thawing of a frozen tub drain.
The homeowner places towels and a waterproof tray under the work area, monitors for seepage, and directs meltwater to a bucket or floor drain.
Temporary barriers and prompt water removal limit staining, swelling, and mold while repairs proceed.
Preventing Future Freezes
Preventing future tub drain freezes begins with simple short-term steps like adding pipe insulation and applying heat tape during cold snaps.
More permanent solutions may include rerouting exposed lines, installing additional insulation, or commissioning professional upgrades to pipe location and materials.
Seasonal properties benefit from specific winterizing procedures—draining lines, maintaining low heat, or shutting off and draining water systems when vacant.
Short-term measures for cold weather (insulation, heat tape)
Apply targeted, temporary protections to vulnerable pipes when a cold snap approaches.
Wrap exposed drain and supply lines with foam pipe insulation or fiberglass sleeves, sealing joints with tape.
Use thermostatic, outdoor-rated heat tape along runs prone to freezing, following manufacturer instructions and electrical codes.
Monitor periodically and disconnect power when not needed.
These short-term measures reduce freeze risk without major renovations.
Long-term fixes (rerouting, adding insulation, professional upgrades)
Several durable solutions exist for permanently reducing the risk of a frozen tub drain: rerouting vulnerable plumbing to warmer areas, adding extensive insulation around pipes and access points, and commissioning professional upgrades such as relocating lines, installing drain heat systems, or improving crawlspace/wall thermal envelopes.
Permanent measures include upgrading to insulated or PEX piping, sealing drafts at access panels, and scheduling a licensed plumber to assess and implement code-compliant reroutes and heat controls.
Winterizing tips for seasonal homes and vacant properties
For seasonal homes and vacant properties, a concise winterizing plan reduces the chance of a tub drain freezing and causing costly damage. The owner should drain lines, shut off water, and add antifreeze in traps if vacant.
Recommended actions:
- Insulate pipes and access panels.
- Maintain a low constant heat or monitored thermostat.
- Periodically run water and inspect for leaks or ice buildup.
When to Call a Professional Plumber
If signs such as persistent ice, water backing up, strange noises, or visible pipe damage appear, a homeowner should stop DIY efforts and contact a professional.
A licensed plumber can assess the situation with specialized tools, safely thaw pipes, and repair any compromised fittings.
The service typically includes a diagnosis, targeted thawing, and recommendations to prevent future freezes.
Warning signs you should stop DIY and seek help
Recognize when a situation exceeds routine DIY: persistent leaks, water backing up despite cleared ice, burst or visibly cracked pipes, electrical issues near the tub, or repeated failures after attempted repairs all indicate professional intervention is needed.
Seek help if odors, mold, worsening structural dampness, inaccessible frozen sections, or loss of hot water occur—these signs suggest concealed damage or safety risks beyond homeowner tools and experience.
What to expect from professional thawing services
When a tub drain refuses to thaw with homeowner methods, a professional plumber evaluates the problem with specialized tools and diagnostics to determine the safest, most effective course of action. Technicians use thawing equipment, camera inspections, and repairs; expect clear estimates, safety protocols, and follow-up advice.
| Service | Typical Time | Cost Range |
|---|---|---|
| Inspection | 15–45 min | $50–$150 |
| Thawing | 30–90 min | $100–$300 |
| Repair | 1–3 hrs | $150–$600 |
Cost and Time Estimates
Typical DIY solutions such as hot water, chemical de-icers, or manual snaking usually cost under $50 in materials and can take from 30 minutes to a few hours depending on severity.
Hiring a professional often ranges from $100 to $400 for a service call and simple repair, with higher fees for emergency visits, complex clogs, or extensive repairing.
Time on a professional job varies by complexity, contractor availability, and whether additional parts or permits are required.
Typical DIY costs and time for common methods
Budget and schedule expectations for thawing a frozen tub drain vary by method and complexity.
Simple steps—hot towels, hair dryer, or boiling water—typically cost $0–$10 and take 15–60 minutes.
Heat tape or a basic plumbing snake costs $10–$40 and may require 30–90 minutes.
Chemical deicers or antifreeze additives run $5–$20 and act within 30–60 minutes.
Professional service cost ranges and factors that affect price
Hire a licensed plumber to thaw a frozen tub drain will generally cost more than DIY methods, with most service calls ranging from about $75 to $250 for straightforward thawing and up to $300–$600 or more for complex jobs that require pipe excavation, extensive repairs, or emergency after-hours service.
Travel fees, hourly rates, materials, accessibility, permit needs, and regional market demand influence final price.
Quick Reference: Do’s and Don’ts for Unfreezing a Tub Drain
A concise set of do’s and don’ts helps prevent damage and speeds thawing when a tub drain freezes; follow safe thawing methods, avoid open flames or high-heat tools, and protect surrounding finishes and plumbing.
- Do apply warm (not boiling) water, heat bags, or a hair dryer and clear vents.
- Don’t use open flames, torches, or excessive force.
- Do insulate exposed pipes and schedule inspections.
Conclusion
When the tub drain remains stubbornly iced, a homeowner poised with tools and knowledge faces a small, ticking mystery: will gentle heat, targeted thawing, or a pro’s intervention free the flow? Each cautious step—diagnosis, the right method for copper or PVC, prevention—builds toward release. Yet a final, held breath lingers: perhaps the unseen fracture or hidden blockage waits to be revealed, demanding swift repair before warmth returns and the quiet problem resurfaces.