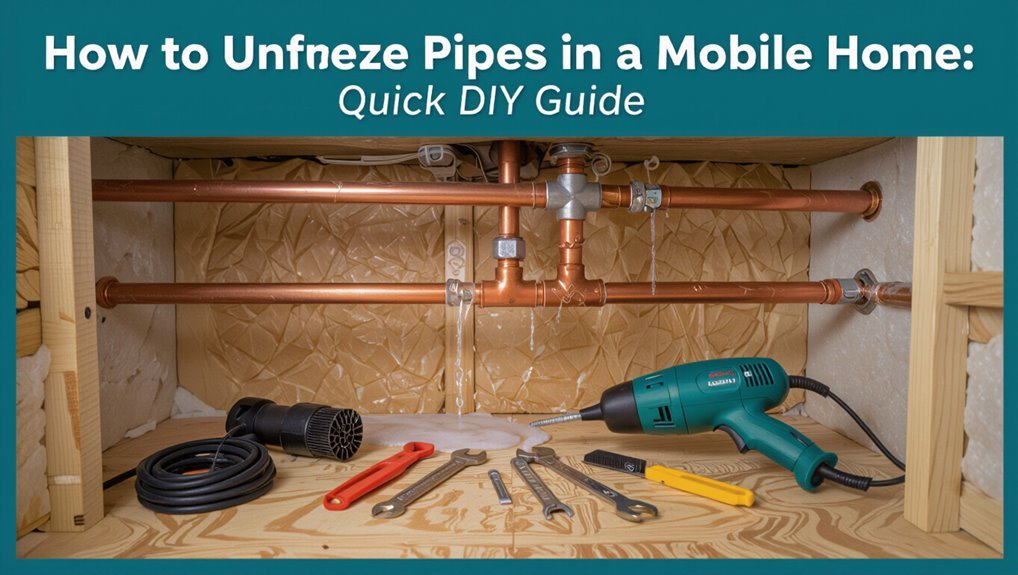
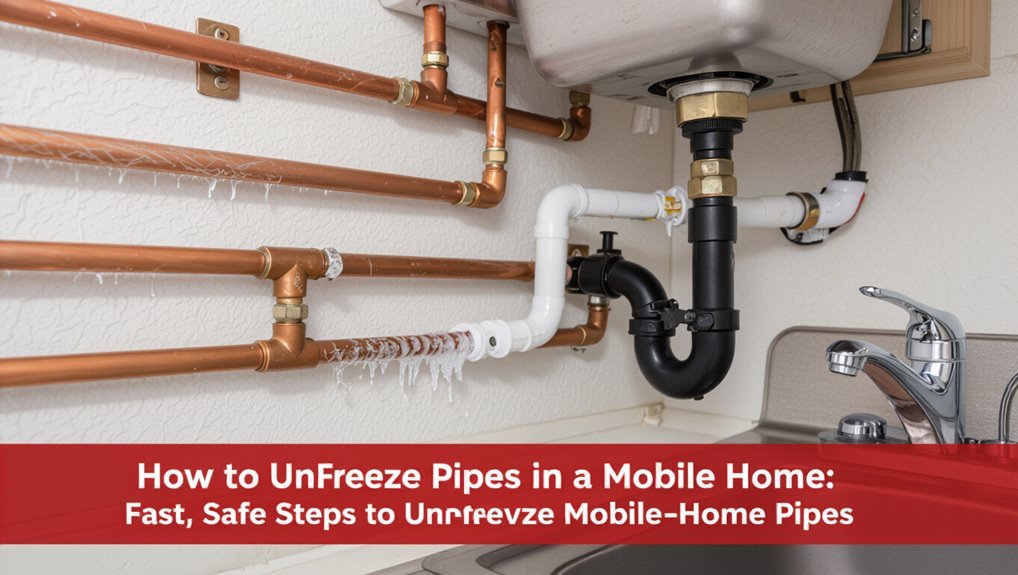
How to Unfreeze Pipes in a Mobile Home: Quick DIY Guide
To unfreeze pipes in a mobile home, first locate the frozen section by checking faucets, feeling pipe runs, and inspecting crawlspaces and cabinets. If a burst is suspected, turn off the main water supply and open nearby taps to relieve pressure. Then, apply controlled heat from the faucet back toward the frozen area using a hair dryer, warm towels, heat tape, or a space heater—never use open flames. Monitor for leaks, and after thawing, keep a slow drip to prevent future freezing. Follow the safety steps outlined below for more detailed guidance.
Fast, Safe Steps to Unfreeze Mobile‑Home Pipes
A few clear actions can quickly restore water flow and prevent pipe damage in a mobile home when freezing occurs.
The homeowner should open faucets to relieve pressure, then apply gentle heat starting at the faucet and moving toward the frozen section. Use a hair dryer, heat lamp, or electric space heater—never an open flame. Insulate exposed pipes with foam sleeves or towels once thawed and check for leaks.
Keep cabinet doors open to warm interior plumbing and maintain a trickle of water during severe cold.
If heat fails or pipes show damage, contact a professional plumber promptly to avoid further harm.
How to Tell If a Mobile‑Home Pipe Is Frozen
Signs that a mobile‑home pipe is frozen include visible frost or ice on its exterior.
Another indicator is a sudden lack of water flow or very low pressure at fixtures.
Touching the pipe (with caution) to detect an unusually cold temperature can confirm freezing.
Visible Frost Or Ice
How can one tell if a mobile‑home pipe is frozen? Visible frost or ice on exterior pipe surfaces signals freezing. Discoloration, white powdery frost, or clear ice patches often appear where insulation is missing or damaged. Metal pipes show frost at cold spots; PVC may look opaque or brittle. Frost may connect to nearby cold sources like exterior walls or vents.
| Observation | Meaning |
|---|---|
| White powdery frost | Surface freezing from prolonged exposure |
| Clear ice film | Water inside has frozen, expansion risk |
| Localized frost line | Freezing point location along pipe |
Act promptly to prevent rupture.
Lack Of Water Flow
Detecting a frozen mobile‑home pipe often begins at the tap: markedly reduced or completely stopped water flow from faucets and fixtures indicates ice blockage within the line.
Observers note sudden changes localized to one area or fixture, sputtering air discharge when flow resumes, and pressure variations at multiple valves.
Immediate verification helps prevent bursts.
- One faucet affected while others work suggests a localized freeze.
- Both hot and cold failure points to a joint or shared run.
- Intermittent trickle with air hints at partial thawing.
- Sharp pressure drop during use signals internal obstruction.
- No odor change rules out contamination.
Cold Pipe Temperature
A distinctly cold, often icy-to-the-touch pipe is a primary indicator that a section has frozen.
Observers should compare temperatures along runs; a localized cold spot suggests trapped ice.
Metal pipes conduct cold visibly; insulated or plastic lines may feel cooler but not icy.
Combine tactile checks with visual signs: frost, condensation that quickly freezes, or bulging fittings.
Use caution—applying heat without confirming a closed valve can cause rupture.
Verify by listening for solid muffled sounds when tapping or by feeling for abrupt temperature change toward a fixture.
Prompt, safe thawing prevents split pipes and minimizes repair needs.
Why Mobile‑Home Plumbing Freezes So Easily
Mobile‑home plumbing is especially vulnerable because wall cavities and undercarriages are often built with thin materials that offer little thermal mass.
Insulation coverage is frequently incomplete or too thin to prevent cold air from reaching pipes in exterior walls and skirting areas.
These construction and insulation shortcomings combine to make freeze events more likely in cold weather.
Thin Wall Construction
Thin-wall construction—characterized by minimal insulation, narrow wall cavities, and lightweight exterior panels—leaves plumbing exposed to cold far more readily than in site-built homes.
The thin envelope transmits outside temperatures inward, reducing thermal buffering and allowing pipes to reach freezing more quickly.
Contractors use less protective layering to save weight and cost, so heat loss paths multiply.
The consequences are rapid pipe chill and frequent freezes in marginal cold.
- Limited thermal mass increases temperature swings
- Narrow cavities restrict placement of protective sleeves
- Exterior panels conduct cold toward plumbing
- Reduced air barrier allows drafts
- Fewer opportunities for heat circulation
Poor Insulation Coverage
Because insulation is often incomplete or inconsistently applied in many factory-built units, plumbing frequently lacks the continuous thermal barrier needed to resist freezing temperatures. Gaps, compressed batts, and exposed lengths create cold spots where heat loss accelerates, especially near exterior walls and underfloor runs. Routine inspections reveal patchy coverage and neglected joints; remediation targets voids and vulnerable fittings. Simple fixes include adding foam sleeves, sealing gaps with caulk, and installing continuous vapor barriers to improve blanket performance. The table below summarizes common issues, effects, and quick remedies to guide focused repairs.
| Issue | Effect | Remedy |
|---|---|---|
| Gaps | Cold spots | Foam |
| Compressed | Reduced R-value | Replace |
| Exposed | Faster freeze | Wrap |
Which Mobile‑Home Pipes Freeze Most Often
Often the pipes that run through unheated or poorly insulated areas—such as underbelly runs, exterior wall cavities, and along exterior skirting—are the ones that freeze first in a mobile home.
Attention focuses on specific vulnerable runs and fittings. Common freeze points include:
- Exterior hose bibs and sillcock lines
- Water supply lines in exterior walls (bathrooms, kitchens)
- Pipes in closet or cabinet voids with little airflow
- P-traps and drain lines under sinks lacking insulation
- Long, exposed runs beneath the home or in crawl spaces
Identifying these locations helps prioritize insulation, heat tape, or temporary warming measures to restore flow quickly.
When to Shut Off Water and Power Immediately
Shut off the water and power immediately when a frozen pipe has burst, when water is visibly pooling inside the home, or when electrical outlets, switches, or appliances are wet or exposed to melting water; doing so prevents further flooding and reduces the risk of electrical shock or fire.
The homeowner should also cut water at the main valve if major leaks or rapid accumulation occur. Turn off electrical breakers if water reaches panels or wiring, and avoid using breakers with wet components.
If unsure, treat conditions as hazardous and shut both systems. Contact a plumber and electrician before restoring services.
Essential Tools to Thaw Frozen Pipes Quickly
In preparing to thaw frozen pipes quickly, a concise kit of reliable tools and safety gear lets a homeowner respond efficiently and reduce damage.
The homeowner should assemble items that enable controlled heat, access, containment, and personal protection while avoiding improvisation that risks fire or injury.
Prioritize portable, regulated equipment and basic plumbing tools to locate and relieve pressure before thawing begins.
Include clear labeling and a small flashlight or headlamp for inspections in tight spaces.
- Adjustable wrench and pliers
- Pipe insulation tape and rags
- Heating clamp or heat gun with thermostat
- Bucket and towels for leaks
- Protective gloves and safety glasses
Low‑Cost Heat Sources That Actually Work
Select inexpensive heat sources that provide steady, controllable warmth and pose minimal fire or moisture risk.
Space heaters with tip-over and overheat protection offer targeted heat for pipe runs when placed safely and kept away from combustibles.
Electric heating cables or tape designed for pipes deliver direct, low-voltage warmth along vulnerable sections; follow manufacturer instructions and thermostat settings.
Infrared lamps can warm localized areas but require distance and monitoring.
Hot water bottles or warmed towels provide temporary, low-cost contact heat for small sections during thawing.
Always prioritize thermostatic control, electrical safety, and ventilation to reduce hazards.
Thaw a Frozen Pipe With a Hair Dryer
When a section of pipe freezes, using a hair dryer offers a controlled, low-cost method to thaw the ice by applying steady warm airflow along the affected run.
The operator begins by turning off water at the main and opening nearby faucets to relieve pressure.
Gloves and eye protection are worn while inspecting for cracks.
The dryer is kept moving, starting near the faucet and progressing toward the coldest section, avoiding joints under insulation until warm.
Restore flow gradually and check for leaks.
If warming does not progress within an hour, professional help should be requested.
- Turn off water main
- Open nearby faucets
- Wear safety gear
- Move dryer continuously
- Check for leaks
Thaw a Frozen Pipe With a Heat Lamp or Space Heater
Using a heat lamp or space heater provides a higher-output, targeted way to thaw a frozen pipe inside a mobile home, suitable for larger or more stubborn ice blocks when a hair dryer is insufficient.
Position the heater or lamp several feet away, aiming heat toward the frozen section while keeping flammable materials distant.
Monitor temperature and pipe condition continuously to avoid overheating or damage.
Use a thermostat-controlled space heater if possible to maintain steady warmth.
Make sure electrical cords stay dry and on stable surfaces.
Ventilate the area minimally to prevent moisture buildup.
Stop and call a professional if thawing does not progress.
Using Hot Towels to Thaw a Pipe Section Safely
First, hot towels should be prepared by soaking clean cloths in hot (not scalding) water and wringing them out.
Next, the towels are wrapped snugly around the frozen section of pipe, with insulation or plastic sheeting used to retain heat.
The area must be monitored regularly for thaw progress and any signs of leaks or overheating.
Prepare Hot Towels
As an immediate, low-risk method for localized thawing, hot towels allow controlled heat application to a frozen pipe section without open flames or electrical heaters.
The person prepares: heat water to warm—not boiling—soaks clean towels, wrings to avoid drips, and folds them for contact.
Protective gloves are used to handle towels and avoid burns.
Towels are replaced frequently as they cool, maintaining steady warmth.
Care is taken to avoid electrical outlets and insulation saturation.
If no thaw occurs within a short time, professional help is considered to prevent pipe damage or flooding.
- Heat water to 120–140°F
- Use clean, thick towels
- Wring excess water thoroughly
- Wear heat-resistant gloves
- Replace towels every 2–3 minutes
Wrap And Monitor
After preparing warm towels and protective gloves, the person wraps the folded, wrung towels directly around the frozen section, ensuring full contact without creating stress points on joints or fittings.
They secure towels gently with tape or cloth straps, avoiding tight turns that could damage insulation.
Periodically they replace towels as they cool, reheating or swapping for fresh warm ones.
While progressing, the person monitors for leaks, condensation, or swelling, and listens for thawing sounds.
If any joint leaks or cracks appear, they stop and call a professional.
They document location and outcome to prevent recurrence and guide future inspections.
Applying a Heat Gun Without Damage
With the heat gun set to a low or medium temperature, the operator must maintain steady, sweeping motions and keep the nozzle at least 6–8 inches from the pipe to prevent scorching insulation, solder joints, or plastic fittings.
The technician watches for uniform thawing, pauses frequently to test warmth by hand, and never directs heat at valve seats or joints for prolonged periods.
Protective eyewear and gloves are worn. Power cords remain clear of wet surfaces.
If thawing stalls or fittings appear compromised, stop and reassess.
- Monitor surface temperature gradually
- Avoid focused heat on connections
- Keep movements continuous
- Use protective gear
- Stop if plastic softens
When (And How) to Use a Portable Propane Torch
If a heat gun cannot safely provide enough concentrated warmth to free a stubborn ice blockage, a portable propane torch may be considered as a more aggressive option—but only under strict precautions.
The torch should be used only on exposed metal pipes outdoors or in well-ventilated, non-combustible areas.
Keep flame moving; never apply direct flame to fittings or solder joints.
Maintain a safe distance from insulation, vapor barriers, and structural elements.
Have a fire extinguisher and water source ready.
Turn off nearby gas and pilot lights.
If any signs of damage, odor, or uncertainty appear, stop and call a professional immediately.
Thawing Pipes Inside Walls and Under Floors
The author identifies likely freeze points inside walls and under floors by tracing routes where pipes run near exterior walls, vents, and uninsulated crawlspaces.
They recommend safe thawing methods such as applying heat with a hair dryer, using a space heater placed safely in the area, or warming the room while keeping electrical panels and flammable materials clear.
Precautions include shutting off water when a thaw is complete and monitoring for leaks as ice melts.
Locate Likely Freeze Points
Beginning by mapping the home’s plumbing layout helps pinpoint sections most likely to freeze: exterior walls, uninsulated wall cavities, crawlspaces, under mobile home floors, and lines running to outside fixtures are highest risk.
The inspector checks temperature exposure, pipe material, proximity to vents, and visible drafts, then prioritizes likely trouble spots.
Signs include lack of water flow, frost on surfaces, colder wall sections, and sudden pressure loss.
A systematic approach reduces guesswork and limits invasive access.
- Exterior wall runs
- Underfloor cavities
- Near unsealed vents
- Long exterior service lines
- Areas with poor insulation
Safe Thawing Methods
Several careful steps are required when thawing pipes inside walls and under mobile home floors to prevent bursts and fire hazards. The technician assesses access points, locates the frozen section, and isolates water supply before applying heat.
Recommended methods include using a hair dryer, heat gun at low setting kept moving, or portable space heater placed safely outside the wall cavity. Avoid open flames, high-temperature torches, and electrical devices resting on insulation.
Monitor surrounding materials and smoke detectors, check joints for leaks as ice melts, and restore insulation or vapor barriers afterward. If unsure, contact a licensed plumber to mitigate risk.
Thawing Exposed Mobile‑Home Water Lines Fast
Begin by locating all exposed water lines under and around the mobile home, noting sections that run along skirting, through crawl spaces, or under steps, since these are the most vulnerable to freezing.
The operator should then assess accessibility, clear insulation and debris, and select a safe heat source.
Apply heat evenly, moving from warm areas toward the frozen section.
Monitor fittings and joints for signs of stress.
If thawing is slow, increase gradual heat rather than force.
- Use a hair dryer or portable electric heater at low setting.
- Wrap lines with warm towels.
- Use heat tape designed for pipes.
- Keep vents open for airflow.
- Maintain a safe distance from combustibles.
If a Pipe Leaks While Thawing: Immediate Steps
If a pipe begins to leak while being thawed, the first action is to shut off the water supply to prevent further flooding.
The leak area should be contained with towels or buckets to limit spread and protect nearby walls or systems.
Any standing water must be cleaned up promptly and dried to reduce damage and mold risk.
Turn Off Water
Shut off the water immediately when a thawing pipe begins to leak to limit flooding and pressure on the damaged section.
The resident locates the main shutoff or individual valve, turns it clockwise, and verifies flow has stopped at faucets.
If the leak is accessible, isolating that branch minimizes disruption.
After shutting off water, depressurize by opening nearby taps and draining remaining water.
Notify a plumber if pipe integrity is uncertain or if the leak persists.
- Find the main shutoff quickly
- Turn valves fully clockwise
- Open faucets to release pressure
- Isolate affected branch if possible
- Call a professional for persistent leaks
Contain And Clean Up
When a thawing pipe starts to leak, the priority is to limit water spread and protect belongings while ensuring safety; quickly place buckets or pans under drips, use towels or rags to absorb running water, and move furniture and valuables out of the affected area.
Next, shut off the main water supply if not already done and open nearby drains to relieve pressure.
Use a wet/dry vacuum or mop to remove pooled water promptly to prevent damage and mold.
Document damage with photos for insurance.
Ventilate the space and dry with fans or dehumidifiers.
Call a plumber for repairs once the area is contained.
Locating the Exact Frozen Spot in Hidden Plumbing
In a mobile home, locating the frozen section of hidden plumbing requires systematic observation and simple tests: gently feeling along accessible pipe runs for cold spots, checking for frost or bulging on exterior walls, and turning on faucets to identify which fixtures lack flow.
The person proceeds methodically, noting which supply lines correspond to dry fixtures, inspecting crawlspace or under-sink areas, and using a noncontact thermometer or hand to map temperature changes.
Visual cues and sound—silent pipes where water should move—help pinpoint the freeze. Recommended checks include:
- Trace fixture isolation to a common supply line
- Inspect exterior wall cavities
- Check behind appliances
- Listen for flow
- Use temperature gun
Temporary Fixes to Restore Water Flow
The article introduces practical temporary fixes to restore water flow after locating a frozen section.
It describes applying heat tape along the affected pipe to provide steady, controlled warming.
It notes using hot water bottles wrapped around the pipe as a quick, localized thawing aid while monitoring for leaks.
Thawing With Heat Tape
Applying heat tape offers a quick, targeted method to thaw frozen pipes in a mobile home and restore water flow temporarily. It adheres along the pipe, supplying controlled warmth until ice melts. Selection of UL-listed, thermostatic tape reduces overheating risk.
Installation follows manufacturer directions: clean pipe, unwrap tape, press sheath to metal, and plug into a GFCI outlet. Monitoring is essential; never leave tape unattended for extended periods.
After thawing, inspect for leaks and remove or leave tape as recommended.
- Choose appropriate tape type
- Use GFCI protection
- Follow manufacturer instructions
- Monitor temperature and condition
- Inspect for leaks
Using Hot Water Bottles
Hold a hot water bottle against the frozen section of pipe to deliver focused warmth and encourage melting without complex equipment. The bottle should be filled with hot — not boiling — water, sealed tightly, and wrapped in a towel to prevent moisture damage and insulation loss.
Apply steady contact along the length of the icy area, replacing the bottle as it cools. Monitor nearby fittings for leaks and check pipe temperature periodically.
This method is temporary; once flow resumes, inspect for damage and improve insulation or heating to prevent recurrence. Avoid open flames and electrical heating devices to reduce risk.
How to Stop Pipes From Refreezing After Thaw
After thawing, prompt steps reduce the risk of refreeze by maintaining consistent heat, eliminating drafts, and monitoring vulnerable sections of the plumbing; these measures include keeping faucets slightly open, insulating exposed pipes, sealing gaps where cold air enters, and using thermostatically controlled heat sources to sustain temperatures above freezing.
The homeowner should verify steady indoor temperatures, remove cold drafts, and keep flow through lines. Regular inspections detect re-chilling early. Recommended actions include:
- Keep a slow, steady drip at vulnerable taps
- Monitor temperatures with simple sensors
- Seal foundation and wall penetrations
- Use timed or thermostatic heaters
- Restore insulation where removed
Insulation Upgrades for Mobile‑Home Pipe Runs
The section outlines practical insulation upgrades for mobile‑home pipe runs, focusing on pipe sleeve insulation to reduce conductive heat loss.
It then addresses proper heat tape application for freeze protection where continuous warmth is needed.
Finally, it covers sealing exterior penetrations to stop drafts that undermine insulation and heat tape effectiveness.
Pipe Sleeve Insulation
For exposed water lines in mobile homes, installing closed‑cell foam pipe sleeves provides a simple, effective layer of thermal protection that reduces freeze risk and heat loss.
The sleeves slip over copper or PEX runs, sealing at seams with tape or adhesive to maintain insulating continuity.
Selection should match pipe diameter and seasonal temperature ranges; thicker sleeves yield greater R‑value.
Proper installation minimizes condensation and allows routine inspection without removal.
Consider exterior wall cavities and exposed undercarriage sections first.
- Measure pipe length and diameter before purchase
- Choose closed‑cell foam for moisture resistance
- Seal seams with compatible tape
- Avoid compressing insulation
- Inspect annually
Heat Tape Application
When applied along exposed runs, electric heat tape delivers targeted warmth that keeps mobile‑home water pipes above freezing and complements existing insulation.
Installers select self-regulating or constant‑wattage types matched to pipe material and ambient conditions.
Clean, dry pipes permit secure adhesive or tie attachments; avoid overlapping tape.
Route along the pipe length, cover joints and bends, and follow manufacturer spacing for thermostats or built‑in controls.
Protect connections and transformers from moisture; use outdoor‑rated models where exposed.
Combine heat tape with foam sleeve insulation for efficiency, and test operation before cold spells.
Regular inspections confirm integrity and safe, continuous operation.
Sealing Exterior Penetrations
In sealing exterior penetrations, attention to gaps where pipes pass through skirting, siding, or foundation walls prevents cold air infiltration that can freeze mobile‑home water lines.
Proper seals reduce heat loss and moisture entry, extending insulation effectiveness.
Recommended actions focus on durable, weatherproof materials and accessible maintenance access.
- Use closed‑cell spray foam for irregular voids and tight seals.
- Install foam pipe collars or preformed grommets at siding penetrations.
- Apply exterior‑grade caulk around small gaps and trim.
- Add removable insulation access panels for inspection.
- Wrap exposed pipe with weatherproof insulation and secure with stainless fasteners.
Periodic inspection guarantees longevity and winter reliability.
Best Heat Tape and Pipe Wrap Options
Heat tape and pipe wrap combine to prevent freezing by delivering targeted heat and insulation to vulnerable plumbing runs.
Self-regulating heat tape adjusts output with temperature, limiting burn risk and conserving energy; choose UL-listed brands and follow manufacturer length limits.
Silicone rubber heating cables offer durable, constant wattage for long runs but require thermostat control to avoid overheating.
Closed-cell foam pipe insulation resists moisture and adds R-value; use sizes matching pipe diameter and seal seams with foil tape.
For exterior or crawlspace use, select weather-resistant wraps and secure with zip ties or adhesive.
Always inspect for damage before installation.
Protecting the Mobile‑Home Water Heater & Lines
Having secured vulnerable pipe runs with heat tape and foam wrap, attention shifts to the water heater and its immediate supply and return lines, since a compromised tank or fittings can cause major service loss and damage in cold weather.
Inspect insulation, seals, and vents; tighten fittings and replace deteriorated hoses. Maintain a low pilot light or set thermostat to prevent freezing without wasting energy.
Drain a few gallons to remove sediment that promotes cold spots.
Consider a simple insulated jacket for the tank and add targeted heat near exposed valves.
- Insulate fittings and exposed piping
- Tighten and replace faulty connections
- Protect vents and flues
- Maintain minimal heat
- Flush sediment periodically
Winterizing Seasonal or Vacant Mobile Homes
Regularly, owners of seasonal or vacant mobile homes should complete a clear checklist to prevent freeze damage while the property is unoccupied.
Steps include draining water from plumbing, shutting off and winterizing the water supply, and opening faucets to clear residual water.
Add non-toxic antifreeze to traps and low points per manufacturer guidance.
Insulate exposed pipes, skirting, and exterior faucets; seal gaps allowing cold air intrusion.
Maintain a minimum interior temperature with a thermostat or low‑draw heat source if feasible.
Arrange periodic inspections or remote temperature monitoring, and document actions for future reference and liability protection.
How to Check for Freeze‑Related Pipe Damage
Inspect the plumbing system promptly after cold spells to identify signs of freeze-related damage before small problems become major leaks.
The homeowner should visually and tactilely assess accessible pipes, fittings, and fixtures for indicators that require attention.
Key areas include crawlspaces, exterior walls, and under sinks.
Use the following checklist to systematize inspection:
- Look for bulging, cracking, or white frost on pipe surfaces.
- Check joints and valves for dampness or mineral residue.
- Listen for dripping when water is turned on; note reduced flow.
- Smell for musty odors indicating hidden leaks.
- Examine ceilings and cabinet bottoms for water stains.
Repair Options for Cracked or Burst Pipes
After identifying signs of freeze-related damage, the homeowner should evaluate repair options for cracked or burst pipes based on pipe material, location, and extent of damage. Small external cracks on accessible copper or PEX can be patched temporarily with epoxy putty or wrap. Larger breaks or hidden sections require cutting out the damaged length and installing a new coupling or replacement pipe. Insulate repaired sections and test for leaks before restoring heat. Consider valve isolation to limit water during work. Document repairs and monitor performance, planning permanent replacement if repairs repeatedly fail.
| Situation | Repair option |
|---|---|
| Small external crack | Epoxy or wrap |
| Sectional burst | Cut and replace coupling |
When to Hire a Professional Plumber
Call a licensed plumber when freeze damage exceeds simple, temporary fixes or when the homeowner lacks the tools or confidence to perform safe, effective repairs.
A professional assesses structural risks, locates concealed leaks, and prevents further water damage or mold.
They have experience with mobile-home plumbing layouts and specialized equipment for thawing and pipe replacement.
Hire one promptly if signs indicate serious problems.
- Visible pipe fractures or steady dripping after thawing
- Multiple frozen sections or repeat freezes
- Loss of water pressure or contamination concerns
- Inaccessible pipes within walls or under floors
- Lack of proper permits or warranty needs
Cost Estimate: DIY Thawing vs Hiring a Pro
When comparing costs, homeowners should weigh the immediate expenses of DIY thawing—tools, materials, and time—against a professional’s service fees, potential diagnostic charges, and the reduced risk of missed damage or improper repairs.
DIY typically costs $20–$150 for heat guns, pipe sleeves, electric tape, and basic fittings but requires time and caution; mistakes can lead to higher future repair costs.
A plumber’s call-out and labor may range $150–$500 or more depending on urgency and region, yet includes expertise, warranty, and faster resolution.
Budget, skill level, and risk tolerance determine the most economical choice.
Filing Insurance for Frozen or Burst Pipes
In the event of frozen or burst pipes, homeowners should promptly review their insurance policy to determine coverage for water damage, emergency repairs, and related mitigation expenses.
The homeowner documents damage, photographs affected areas, and contacts the insurer immediately to report the claim. An adjuster evaluates losses; keep receipts for temporary repairs and lodging if displacement occurs. Note exclusions such as poor maintenance or negligence. Timely mitigation reduces denial risk.
- Document all damage with dates and photos
- Preserve receipts for emergency repairs and expenses
- Contact the insurer and obtain a claim number
- Cooperate with the adjuster’s inspection
- Note policy limits and exclusions
Seasonal Checklist to Prevent Frozen Pipes
Regularly performing a seasonal checklist helps prevent frozen pipes by addressing vulnerabilities before cold weather arrives.
Inspect exterior skirting, vents, and underbelly insulation for gaps or damage; seal openings and replace torn insulation.
Check pipe insulation on exposed and crawlspace lines, adding foam or heat tape where needed.
Test outdoor faucets and drain hoses; shut off and winterize as appropriate.
Verify sump pump and drainage paths function to avoid ice buildup.
Review visible pipe joints for corrosion or leaks and tighten or replace fittings.
Schedule professional inspection for HVAC or plumbing systems showing age-related wear.
Thermostat and Ventilation Tricks That Help
Adjusting thermostat settings and managing ventilation can markedly reduce the risk of frozen pipes in a mobile home by keeping temperatures steady in vulnerable areas. The homeowner can use simple controls and airflow adjustments to maintain safe warmth where pipes run.
- Set thermostat to a minimum safe temperature (around 55°F) when away.
- Use programmable schedules to avoid wide overnight drops.
- Keep interior doors open to promote even heat distribution.
- Use ceiling fans on low heat mode to circulate warm air.
- Seal drafts around ductwork, windows, and doors to prevent cold pockets.
These measures reduce freeze risk without major expense.
How to Vent Skirting and Crawl Spaces
A careful inspection of skirting and crawlspace airflow openings identifies blocked vents and areas with poor circulation.
Adding ventilation panels or adjustable vents can restore controlled air movement where needed.
Any unwanted drafts around seams or utility penetrations should be sealed to keep warm air in and cold air out.
Inspect Airflow Openings
How should airflow openings be evaluated to guarantee adequate ventilation under a mobile home? Inspectors assess size, placement, and condition of vents to ascertain cross‑flow and moisture control. Clear obstructions and note signs of rust or damage. Measure free area against manufacturer or code recommendations and compare opposing vents for balanced intake and exhaust.
- Check for blockages from debris or insulation
- Verify vent spacing along skirting for even distribution
- Confirm vents sit above potential snow/drift levels
- Look for rodent or insect entry points and seals
- Document vent free area and condition for remediation planning
Add Ventilation Panels
When installing ventilation panels in skirting and crawl spaces, assess existing vent locations and airflow needs to determine panel size, placement, and material that will provide continuous cross‑ventilation and resist moisture and pest intrusion.
Choose corrosion‑resistant panels sized to maintain free area recommended for the mobile home’s square footage, spacing them to promote through‑flow rather than pocketed stagnation.
Mount panels above typical snow or debris lines, keeping them level and unobstructed.
Use screening or louvers to block pests while allowing air exchange.
Periodically inspect and clear panels of debris, ice, or vegetation to guarantee persistent ventilation and pipe protection.
Seal Unwanted Drafts
Before sealing skirting and crawl space openings, inspect for airflow paths that bypass planned vents so repairs target actual drafts rather than choking cross‑ventilation.
The goal is to block cold infiltration while preserving needed ventilation; prioritize gaps near pipes, corners, and utility penetrations.
Recommended actions include:
- Seal gaps with exterior-grade caulk around pipe and cable entries.
- Install foam board or rigid insulation at perimeter voids.
- Use weatherstrip or adjustable vent covers at access doors.
- Patch holes in skirting with matching panels secured and sealed.
- Add insect- and rodent-proof mesh where vents remain open to maintain airflow.
Common Mistakes That Make Freezing Worse
Ignoring established precautions often makes frozen pipes worse; common mistakes include using open flames, applying ice-cold water, or turning off heat entirely.
Residents often wrap pipes with inadequate materials or rely solely on electrical space heaters placed too close, creating fire hazards.
Thawing from one end toward a blockage is neglected, increasing pressure and rupture risk.
Over-tightening valves and fittings during emergency adjustments causes leaks.
Removing insulation before daytime warmth exposes pipes to rapid temperature swings.
Misguided use of chemical deicers in confined spaces can corrode metal and emit fumes.
Careful, informed actions reduce damage and promote safe thawing.
How to Test Your Fixes So Pipes Stay Thawed
Regularly checking repairs guarantees thawed pipes remain functional and prevents repeat freezes; a simple, systematic test sequence reveals weak spots before temperatures drop again.
The homeowner follows steps to confirm heat, flow, and seals: visual inspection for frost, gradual warm-water flow, and pressure checks at fixtures. Record findings and retest after several hours and a cold night. If issues recur, revisit insulation and heat-source placement. Maintain logs to identify recurring locations and times.
- Inspect exposed runs for cold spots
- Run hot water at each fixture briefly
- Monitor pressure for drops or leaks
- Check joint temperatures with a noncontact thermometer
- Reassess after nightfall
Emergency Tools & Parts to Keep on Hand
After confirming repairs and logging problem areas, a homeowner should assemble a compact kit of emergency tools and spare parts to respond quickly if pipes begin to refreeze or a repair fails.
The kit should include a small propane or electric heat gun, an infrared thermometer, pipe insulation wrap, plumbing tape, and a roll of spare PEX or flexible tubing with crimp rings. Add hose clamps, a compact adjustable wrench, a basic plumbing tool set, and a flashlight with fresh batteries. Include temporary sealant putty, a rubber repair sleeve, and gloves. Store the kit in an accessible, labeled waterproof container.
First 60 Minutes : Step‑by‑Step Emergency Timeline
Within the first hour after detecting a refreeze or burst risk, the homeowner should follow a prioritized, time‑boxed sequence of actions to limit damage, restore safe water flow, and prepare for repairs.
The timeline assigns immediate tasks, safety checks, and communication steps to minimize loss and speed recovery.
- Shut off main water supply and electricity to affected area.
- Inspect visible pipes and fittings for cracks or leaks.
- Apply targeted heat (hair dryer, heat lamp) starting at faucet, moving toward colder sections.
- Collect water with buckets and towels; protect floors and belongings.
- Contact plumber and document damage for insurance and repairs.
Conclusion
When frost grips a mobile home’s plumbing, the homeowner should act swiftly but calmly: assess which pipes are frozen, shut off water or power if ruptures are likely, and apply steady heat from hair dryers or warm towels rather than open flames. Keep simple spares and test repairs for leaks. With foresight and a pocket watch’s patience, these quick, careful steps usually restore flow and prevent costly damage—leaving the system sound until spring returns.