
How to Tighten a Loose Shower Head Swivel: Quick Fixes and Long-Term Solutions
To tighten a loose shower head swivel, you can quickly fix it by using adjustable pliers, applying plumber’s tape to the threaded stem, or adding a rubber sleeve to the ball joint. For a more permanent solution, disassemble the shower head, inspect and replace any worn seals or washers, and then reassemble it snugly without overtightening. If the wobble persists or if you notice corrosion, consider replacing the shower head entirely. Further steps and parts are outlined below.
Why a Loose Shower Head Swivel Happens
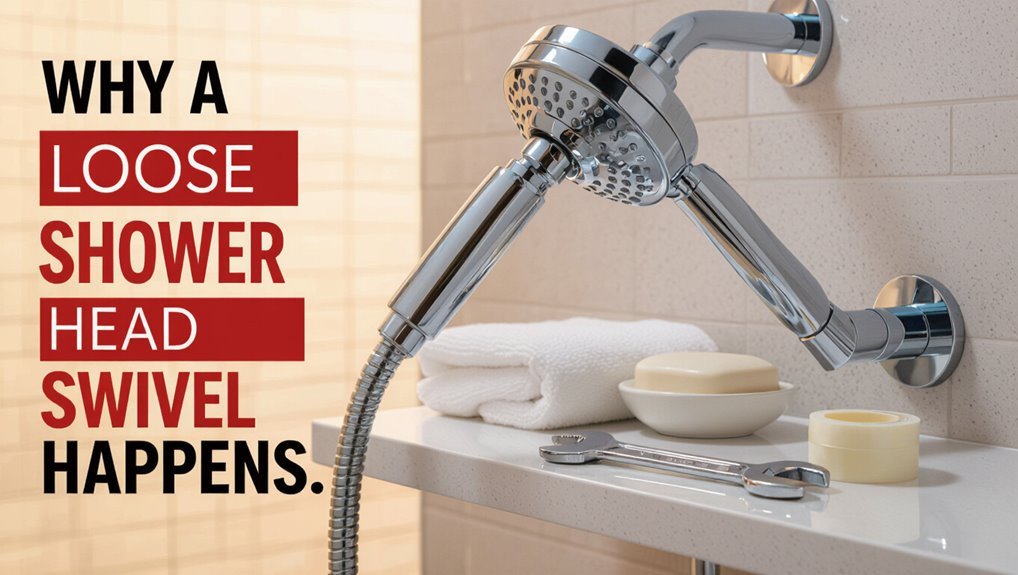
A loose shower head swivel usually results from worn bearings, stripped threads, or loose retaining nuts that allow play in the joint.
Distinguishing normal wear and tear from poor initial installation helps determine whether the problem is a simple tightening task or the sign of a faulty component.
Visible damage, persistent wobble after tightening, or water leakage indicate replacement rather than a quick fix.
Common mechanical causes of looseness
Loose shower head swivels usually result from wear, improper installation, or missing hardware that allow play between the head, swivel ball, and shower arm.
Common mechanical causes include stripped threads, worn O-rings or ball joints, loose retaining nuts, and debris preventing proper seating.
Understanding these faults helps guide how to tighten shower head swivel or replace specific parts for a secure connection.
Wear and tear vs. installation issues
Building on common mechanical causes like stripped threads and worn O-rings, distinguishing wear-and-tear from installation errors clarifies why a shower head swivel becomes loose.
Wear manifests as degraded seals, corroded fittings, or metal fatigue over time.
Installation faults include overtightening, misaligned mounts, or missing washers.
Identifying origin directs repair: replace aged components for longevity or correct assembly mistakes for immediate stability.
Signs it’s a simple fix vs. needing replacement
When does a swivel require a quick tweak versus a full replacement? Observable factors guide the decision: minor looseness, intact threads, and functioning seals suggest tightening, gasket replacement, or thread tape will suffice.
Visible cracks, stripped threads, persistent leaks after fixes, corrosion, or wobble within the mounting indicate replacement.
Age, part availability, and cost-effectiveness also influence whether to repair or replace.
Quick Tools and Materials You Need
A concise set of tools makes tightening a shower head quick and reliable.
Essential items include an adjustable wrench, pliers, plumber’s tape, and a rag to protect finishes.
It is also wise to have common replacement parts on hand, such as rubber washers and a spare shower arm gasket.
Basic toolkit for a fast fix
Preparation begins with a compact set of tools and supplies that handle most loose or dripping shower-head issues. A small, targeted kit speeds diagnosis and temporary tightening without full disassembly.
Include items for gripping, sealing, and minor adjustments to stop leaks and stabilize the swivel quickly.
- Adjustable wrench or slip-joint pliers
- Silicone tape or plumber’s tape
- Soft cloth or rubber pad
Replacement parts to have on hand
Several small replacement parts can make a quick repair permanent and save a service call: extra Teflon (plumber’s) tape, a few rubber O-rings in common sizes, a replacement swivel washer or gasket, and a spare threaded shower-arm nut.
Keeping these on hand speeds repairs, prevents leaks, and avoids repeated disassembly.
- O-ring assortment
- Swivel washer/gasket
- Plumber’s tape
Immediate Tightening Fixes (Fast, No-Disassembly)
The section outlines quick, no-disassembly methods for securing a loose shower head.
It explains using adjustable pliers to tighten a swivel, applying plumber’s tape to increase friction on fittings, and temporary remedies for threaded joints and ball mounts.
Each method is presented as a step-by-step action to restore stability immediately.
How to tighten a swivel with adjustable pliers step-by-step
Grip the swivel housing with adjustable pliers and apply steady, controlled turns to snug the joint without over-tightening.
Hold the opposite side of the shower head or arm to prevent twisting.
Test swivel movement after small adjustments. If resistance feels smooth and wobble is reduced, stop.
Repeat incremental turns until secure.
Wipe away debris and recheck for leaks or looseness.
Using plumber’s tape for added friction step-by-step
Wrap plumber’s (Teflon) tape clockwise around the swivel’s threaded stem in tight, overlapping layers to build friction without disassembling the joint.
Press layers smooth, adding enough to reduce play but not prevent threading. Re-seat the swivel, test movement and tighten by hand.
Add thin layers if looseness persists. This is a noninvasive, reversible method for immediate stabilization.
Temporary fixes for threaded joints and ball mounts
Begin by evaluating the joint to identify whether the issue stems from a loose threaded connection or a worn ball mount.
For threaded joints, wrap plumber’s tape or a thin rubber strip around threads, then hand-tighten and test.
For ball mounts, insert a rubber sleeve or cut a small O‑ring to increase friction around the ball; press assembly firmly and retest for reduced movement.
More Thorough Repairs (Disassembly and Reassembly)
For persistent leaks or looseness, the procedure moves on to disassembly of the shower head and arm to access internal parts.
The process includes safely removing the fittings, inspecting the swivel joint, washer, and O-rings, and replacing any worn seals with step‑by‑step guidance.
Reassembly should follow manufacturer torque recommendations and use plumber’s tape or compound as specified to restore a watertight connection.
How to safely remove the shower head and arm
To remove the shower head and arm safely, first shut off the water supply and protect surrounding finishes with a cloth or painter’s tape to prevent scratches.
Then hold the arm steady inside the wall with one hand or an inside wrench; use a strap or adjustable wrench on the exterior hex.
Turn counterclockwise, apply penetrating oil if seized, and retrieve fittings gently.
Inspecting the swivel joint, washer, and O-rings
Once the shower arm and head are removed, inspect the swivel joint, washer, and O-rings for wear, cracking, or mineral buildup that can cause leaks.
Check mating surfaces for corrosion, pitting, or deformation.
Note brittle or flattened rubber, embedded grit, and hardened mineral deposits.
Take clear photos or sketches to record orientation and condition before proceeding with cleaning or replacement steps.
Replacing worn washers or O-rings step-by-step
Begin by organizing a clean workspace and laying out the removed parts in order of disassembly to guarantee correct reassembly.
Identify the damaged washer or O-ring, note size and material, then obtain exact replacements.
Remove old components with appropriate tools, clean mating surfaces, and inspect for corrosion or burrs.
Lubricate new seals lightly with silicone grease and position them correctly before proceeding to reassembly.
Reassembling and torque recommendations
With the new washer or O-ring seated and mating surfaces clean, reassembly proceeds methodically to restore seal integrity and proper spray alignment.
Threads receive light plumber’s grease; hand-tighten components, then apply controlled torque with an adjustable wrench—typically 10–15 ft·lb for brass fittings, less for plastic.
Test for leaks and smooth swivel movement; tighten incrementally if necessary, avoiding overtightening that risks damage.
Replacing the Swivel or Shower Head
If tightening and basic repairs fail or the swivel shows corrosion, cracks, or persistent leaks, replacement becomes necessary.
The next section covers how to select a compatible swivel or complete shower head by matching thread size, finish, and connection type.
It then provides a concise, step‑by‑step procedure for removing the old part and installing the new swivel or head.
When to replace the swivel assembly
When does the swivel assembly warrant replacement rather than tightening or sealing?
Replacement is advised if corrosion, stripped threads, cracks, persistent leaks after sealant, or severe looseness recur.
Also replace when movement is gritty, binding, or internal ball/socket wear is evident.
If repairs are temporary or parts are unavailable for safe function, installing a new swivel or head guarantees reliable, long-term performance.
Choosing a compatible replacement swivel or shower head
Before purchasing a replacement, verify the shower arm thread size and connection type so the new swivel or head will mate securely. Most residential fixtures use 1/2-inch NPT (or BSP in some regions), but confirming the standard prevents mismatch.
Choice should consider finish, spray pattern, and swivel compatibility. Quality materials resist corrosion and wear.
- Match thread and seal type
- Confirm swivel diameter/range
- Prefer brass or stainless fittings
Installing a new swivel or head step-by-step
Begin the installation by shutting off the water at the fixture or main valve and draining residual water from the line.
Remove the old head or swivel with an adjustable wrench, protecting finishes with tape.
Clean threads and apply plumber’s tape.
Thread the new swivel or head by hand, then snug with a wrench—avoiding overtightening.
Restore water, check for leaks, and adjust alignment.
Long-Term Prevention and Maintenance
A regular inspection schedule helps catch wear, mineral buildup, and loose fittings before they cause leaks or damage.
Recommended lubricants and compatible materials should be noted to protect threads and seals without degrading plastics or rubber.
Clear tightening guidelines and torque-conscious techniques prevent overtightening and extend the life of the swivel and shower head.
Regular inspection schedule and what to look for
Although inspections can be brief, establishing a consistent quarterly schedule helps catch loosening, mineral buildup, and seal deterioration before they cause leaks or reduced flow.
The homeowner should note wobble, spray pattern changes, and visible corrosion. Tighten fittings, replace worn seals, and clear deposits promptly to prevent escalation.
- Check joint tightness and swivel play
- Inspect rubber seals and threads
- Observe spray distribution and drips
Lubricants and materials safe for shower fittings
Following routine inspections that identify loose joints, worn seals, or mineral buildup, attention turns to compatible lubricants and materials that prolong fitting life and prevent leaks.
Use plumber’s silicone grease for O-rings and PTFE tape on threaded connections; avoid petroleum-based lubricants that degrade rubber.
Choose corrosion-resistant metals (brass, stainless steel) and replace damaged neoprene or EPDM seals with manufacturer-specified parts to guarantee longevity.
Best practices to avoid overtightening and damage
When tightening shower fittings, apply steady, measured force and stop as soon as the connection is snug and leak-free to prevent stripped threads, cracked fittings, or compressed seals.
Use proper tools with padded jaws, wrap threads with PTFE tape rather than excessive torque, test gently, and avoid pipe wrenches on plastic.
Periodic inspections and light retightening prevent deterioration without risking damage.
Troubleshooting Persistent Problems
When tightening fails repeatedly, attention turns to stripped threads, corroded fittings, and seized swivel joints that may require replacement or repair.
Mineral buildup and debris can block swivel movement and limit adjustments, often necessitating disassembly and cleaning or replacement of internal parts.
If repairs require specialized tools, significant pipe work, or persistent leaks after attempted fixes, a licensed plumber should be contacted.
Addressing stripped threads and corroded fittings
Although stripped threads and corroded fittings can seem like minor annoyances, they quickly prevent a secure shower-head connection and cause leaks or wobble.
Inspect metal parts for thread damage and rust. Replace damaged nuts or adapters, or use a brass/nylon threaded insert for reinforcement.
Clean corrosion with a wire brush and penetrating oil before reinstalling with proper tape or sealant to restore a tight, lasting joint.
Dealing with blockages affecting swivel movement
Inspect the swivel joint for mineral buildup, debris, or compacted old sealant that can stiffen or lock movement; such blockages often originate inside the ball-and-socket or from mineral deposits carried in with the water.
Remove the head, soak components in vinegar or a descaling solution, gently scrub with a brush, clear trapped debris, rinse thoroughly, lubricate with plumber-approved grease, and reassemble for smooth operation.
When to call a plumber vs. DIY
How should one decide between a DIY fix and calling a plumber?
Assess severity: minor looseness, visible worn washers, or accessible threads suit DIY with basic tools.
Persistent leaks, corroded fittings, hidden pipe damage, or multi‑fixture issues require a licensed plumber to prevent water damage and guarantee code compliance.
When confidence or tools are lacking, opt for professional service.
Cost, Time, and Difficulty Comparison
A brief comparison of quick fixes, repairs, and full replacements frames expected time, cost, and difficulty for tightening a shower head. The table below summarizes typical estimates to guide decision-making. Readers can use these figures to choose the most efficient option for their situation.
| Task | Typical time / cost |
|---|---|
| Quick fix (tighten, tape) | 10–30 min / <$10 |
| Repair (replace parts) | 30–90 min / $10–$60 |
| Replacement (new head/fixture) | 30–120 min / $20–$200 |
Quick fix vs. repair vs. replacement estimated time and cost
Many homeowners face three practical options when a shower head leaks or sprays unevenly: a quick fix, a repair, or a full replacement.
Quick fixes (5–15 minutes) cost under $10–$20 for tape or sealant.
Repairs (30–90 minutes) run $20–$80 for parts.
Replacements (30–120 minutes) cost $30–$200+ including new fixtures; professional labor raises totals and complexity.
Tools, Parts, and Product Recommendations
A brief overview of tools and parts helps readers choose between budget-friendly fixes and longer-lasting upgrades.
Recommended affordable picks suit basic tightening and leak stops, while durable options provide corrosion resistance and better seals for years of use.
The list below highlights three practical product types to evaluate.
- Adjustable wrench or strap wrench for safe tightening
- Teflon (plumber’s) tape and replacement rubber gaskets for inexpensive repairs
- Brass or stainless-steel replacement shower arm and swivel fittings for durability
Affordable picks for DIYers
Several essential, budget-friendly tools and parts make tightening a shower head straightforward for DIYers. A small adjustable wrench, slip-joint pliers with jaw protectors, plumber’s tape (PTFE), silicone grease, and a soft cloth cover most jobs.
Replacement O-rings and a universal faucet/shower swivel repair kit provide quick fixes. Purchase basic sets from hardware stores or online for low cost and immediate use.
Durable options for long-term reliability
For long-term reliability, prioritize heavy-duty tools and corrosion-resistant parts that reduce repeat maintenance and water waste.
Recommend stainless steel swivel adapters, brass ball joints, and PTFE tape rated for plumbing.
Suggest adjustable wrench with protected jaws, basin wrench for tight spaces, and thread sealant for permanent seals.
Advise replacing worn gaskets with silicone or Viton O-rings and choosing fixtures with solid-metal construction.
Conclusion
Like a loose hinge on an old door, a wobbly shower head swivel mars the rhythm of a morning routine. With simple tools and steady hands, one can snug fittings, replace worn washers, or swap the swivel altogether, restoring a confident spray. Regular checks and a touch of plumber’s tape keep the joint singing. Small repairs become quiet victories, turning a dripping nuisance into a reliable stream that greets each day with purpose.

