How to Plumb a Pool Pump: Step-by-Step DIY Guide for Safe, Leak-Free Installation
To plumb a pool pump effectively and ensure a safe, leak-free installation, start by planning your plumbing layout and checking local codes and electrical bonding requirements. Gather necessary materials such as PVC pipes, unions, valves, primer, solvents, and safety gear. Prepare a level pad for the pump and secure it in place. Route the suction and return lines, minimizing bends and using the correct pipe diameters. Incorporate unions and pressure-rated fittings, prime the strainer, and test for leaks and air ingress. Lastly, verify that all wiring is grounded and equipped with GFCI protection. Follow these steps systematically to achieve a durable plumbing system for your pool pump.
What You Need to Know Before You Start Pluming a Pool Pump
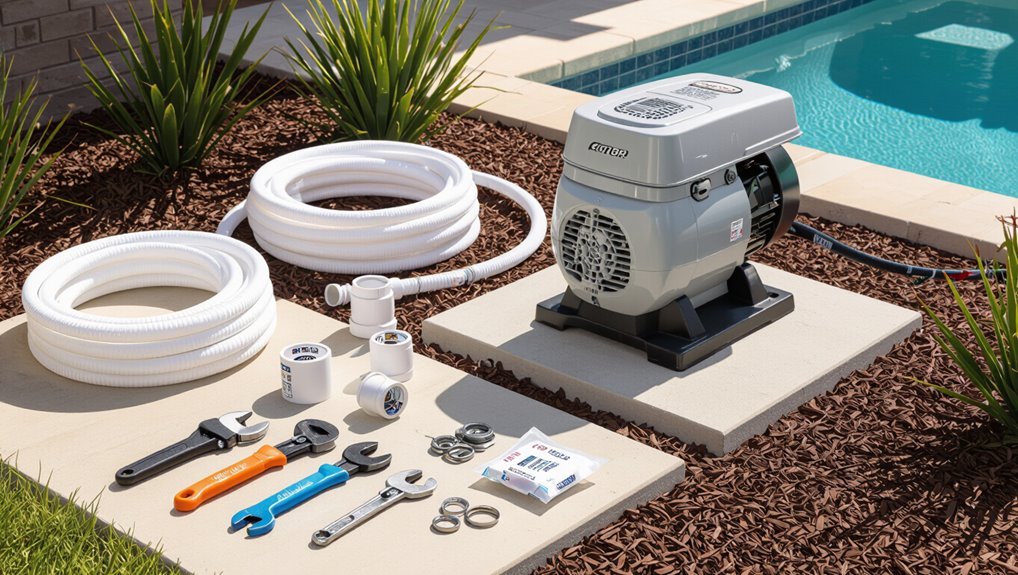
Before beginning pool pump plumbing, the reader should understand basic pool plumbing layout and how the pump moves water through skimmers, returns, and filtration.
They must also check local codes, permits, and safety regulations that affect pipe sizing, electrical work, and installation practices.
Finally, guidance on when to hire a licensed professional versus proceeding as a DIY project helps balance cost, complexity, and safety.
Overview of pool plumbing and pump function
A clear grasp of how pool plumbing and the pump work together is essential for a successful installation.
The system circulates water: skimmer and main drains feed the pump, which pressurizes water through the filter, heater, and returns.
Proper pipe sizing, valves, unions, and correct placement prevent cavitation, leaks, and flow loss.
This guide explains how to plumb pool pump for efficient, reliable operation.
Local codes, permits, and safety regulations
Having confirmed pipe sizes, valve placement, and pump orientation, attention turns to local codes, permits, and safety regulations that govern pool plumbing work.
Compliance with municipal plumbing codes, electrical grounding and bonding requirements, and backflow prevention is mandatory.
Verify permit needs, inspection schedules, and approved materials.
Failure to adhere can cause fines, unsafe installations, or voided insurance; document approvals before starting.
When to hire a professional vs. DIY
When should a homeowner tackle pool pump plumbing alone and when is a pro necessary?
A homeowner may DIY if the job involves straightforward PVC runs, basic unions, and familiarity with local codes and electrical shutoff.
Hire a professional for complex rewiring, gas or bonded electrical work, major excavation, persistent leaks, unclear permit requirements, or uncertain pressure testing to guarantee safety, compliance, and warranty protection.
Tools, Materials, and Parts Required
A concise checklist of essential tools—wrenches, pipe cutters, primer and cement, thread sealant, and safety gear—prepares the installer for the job.
Common parts and fittings, including pumps, filters, valves, unions, PVC pipe, and check valves, should be identified and matched to the system.
The discussion also covers pipe types and diameters and the trade-offs between solvent-welded (glue) joints and mechanical connections.
Essential tools checklist
Proper preparation guarantees the job proceeds safely and efficiently: assemble a concise set of tools, replacement parts, and consumables tailored to pool-pump plumbing—basic hand tools (screwdrivers, pliers, pipe cutters, wrenches), PVC fittings and solvent, appropriate pipe (PVC or flexible hose) plus adapters, thread sealant or Teflon tape, primer and PVC cement, replacement O-rings and gaskets, hose clamps, and any electrical supplies required by the pump’s installation.
- Pipe cutter and saw
- Adjustable wrenches
- Primer, cement, sealant
- O-rings, clamps, spare fittings
Common parts and fittings (pumps, filters, valves, unions, PVC, check valves)
Although pool systems vary, the core plumbing components remain consistent: a pump to circulate water, a filter to remove debris, valves to control flow, unions for serviceability, PVC or flexible hose for connections, and check valves to prevent backflow.
Other common parts include pressure gauges, sight glasses, trap baskets, threaded adapters, hose clamps, and mounting pads.
Select materials rated for pool chemicals and UV exposure.
Pipe types, diameters, and glue vs. mechanical connections
With the common components identified, attention shifts to the piping that links them: choices in pipe material and diameter determine flow capacity, pressure loss, and long-term durability.
Use schedule 40 PVC for most suction and return lines; consider CPVC or flexible hose for heat or tight runs.
Match diameters to pump and skimmer specs. Prefer solvent-welded joints for permanence, unions or threaded fittings for serviceability.
Planning Your Pool Pump Plumbing Layout
Before cutting pipe, the installer reviews or sketches a simple plumbing schematic showing lines, valves, and equipment in order to guarantee correct flow.
Pipe diameter and run length are chosen to balance flow, head loss, and pump efficiency, with components—pump, filter, heater, chlorinator—positioned for peak hydraulics.
The layout also allocates clearances and access points to simplify future maintenance and replacement.
Reading and creating a simple plumbing schematic
A simple plumbing schematic translates the physical layout of pipes, valves, and equipment into a clear diagram that guides installation and troubleshooting of a pool pump system.
It uses symbols for pump, filter, heater, skimmer, returns, and check valves; indicates flow direction and valve positions; labels connection points and measurements; and highlights isolation valves and service access to simplify assembly and future maintenance.
Determining pipe size and run length for flow and efficiency
Having a clear schematic in hand, the next step is to calculate pipe diameters and measure run lengths to match the pump’s flow rate while minimizing friction loss.
Use the pump curve and desired turnover rate to determine the required GPM.
Select pipe size to keep velocity within recommended limits, then sum straight lengths and fittings using equivalent length tables to check total head loss and adjust sizing accordingly.
Placement of pump, filter, heater, and chlorination equipment
Several factors dictate ideal placement of the pump, filter, heater, and chlorination equipment: minimizing suction and discharge pipe lengths, guaranteeing accessibility for maintenance, maintaining proper elevation relative to the pool water, and complying with local codes for electrical and chemical safety.
Position equipment close to the pool, provide level, stable pads, allow straight runs for valves and unions, isolate chemicals from electricals, and secure ventilation.
Designing for future maintenance and access
Once placement and clearances are settled, attention turns to routing and layout choices that make future maintenance straightforward and safe.
Paths should allow clear access to unions, valves, and electrical panels. Include serviceable unions, isolation valves, and a straight run for pump removal.
Provide space for tool use, label lines, slope piping for drainage, and document the layout for technicians and owners.
Preparing the Site and Existing Equipment
Before any plumbing work begins, the installer inspects electrical provisions and safety devices such as GFCI protection and service disconnects.
The work area is cleared, a level, stable pump pad is provided or adjusted, and mounts or supports are verified for the new equipment.
All pool lines are drained and isolated following safe shutoff procedures to prevent backflow and accidental flooding.
Power and electrical safety checks (GFCI, disconnects)
Because pool pumps draw significant current and operate near water, electrical safety must be prioritized with thorough checks of GFCI protection and disconnects.
Inspect GFCI functionality, test trip operation, verify correct amperage rating, and confirm local code compliance.
Make certain a readily accessible, labeled disconnect is installed, wiring and conduit are intact, and any damaged components are repaired by a qualified electrician before proceeding.
Clearing, supporting, and leveling the pump pad
After confirming electrical protections and disconnects are in proper order, attention shifts to the physical base for the pump.
Remove debris and vegetation, inspect pad integrity, and replace cracked concrete or unstable pavers.
Guarantee a level, vibration-absorbing surface using compacted sand, gravel, or a prefabricated pad.
Anchor pump feet to prevent movement and confirm alignment with plumbing connections before proceeding.
Draining and isolating the pool plumbing safely
Begin by relieving pressure and emptying water from the lines that will be worked on: shut off the pool pump and heater, close the skimmer and main drain valves, then open the nearest manual air reliefs and drain cocks to depressurize the system.
Cap or plug open fittings, isolate sections with ball valves, and use a wet vac or gravity drain for remaining water.
Verify zero pressure before cutting.
Step-by-Step Installation: Mounting and Connecting the Pump
The installer begins by positioning and securely anchoring the pump to the pad, fitting unions and primer connections for easy maintenance.
Suction and return plumbing is routed with attention to wet-side versus dry-side layouts while PVC is cut, deburred, dry-fitted and solvent-welded to guarantee leak-free joints.
Control hardware such as gate, ball and check valves is added in accessible locations to regulate flow and prevent backflow.
Positioning and securing the pump to the pad
Position the pump on the concrete pad so its base sits flat and the motor shaft aligns with any pre-installed mounting points; proper placement prevents vibration, guarantees efficient suction, and facilitates straightforward plumbing connections.
Secure the pump using stainless steel or galvanized anchors through isolating vibration pads. Verify level in both axes, torque fasteners to manufacturer specs, and confirm clearances for service and airflow.
Installing unions and primer fittings
Install unions and primer fittings carefully to create leak-resistant, serviceable connections between the pump and the pool plumbing.
Select compatible union sizes and thread types, apply approved thread sealant or gasket, and hand-tighten followed by a quarter-turn with a wrench.
Install primer fitting with proper O-ring, orient for access, and verify alignment.
Pressure-test joints before finalizing mounts.
Connecting pump suction and return lines (wet-side vs dry-side)
With unions and primer fittings secure and pressure-tested, attention turns to routing the pump’s suction and return lines and choosing wet-side or dry-side placement for the connections.
The installer evaluates shortest, gravity-assisted suction runs, minimizes bends, and keeps returns above waterline when choosing dry-side access.
Wet-side placement shortens plumbing but complicates servicing.
All fittings are oriented for accessible unions and leak inspection.
Proper PVC cutting, deburring, dry-fitting, and gluing techniques
Begin by measuring each PVC run precisely and mark cut lines straight across the pipe; accurate cuts prevent misalignment and reduce stress on joints.
Use a fine-tooth saw or PVC cutter for clean, square cuts. Deburr and chamfer edges, then dry-fit all pieces to confirm alignment.
Clean with primer, apply solvent cement evenly, assemble with a quarter-turn twist, and hold until set.
Installing gate valves, ball valves, and check valves for control
Positioning gate, ball, and check valves correctly guarantees reliable flow control and pump protection during the pool plumbing installation.
The installer mounts gate valves for gradual throttling, uses ball valves for positive shutoff and isolation, and fits spring check valves to prevent backflow.
All valves are solvent-welded or threaded with proper sealant, aligned for access, and tested under pressure for leaks and operation.
Integrating Filtration, Heater, and Other Equipment
The plumbing layout should follow the sequence pump → filter → heater → return to guarantee proper flow and equipment protection.
Include bypasses, properly routed backwash and waste lines, and accessible pressure gauges and multiport valve connections for operation and maintenance.
Attention to valve placement and clear routing minimizes service interruptions and prevents cross-flow during backwash.
Correct sequence: pump → filter → heater → return
Follow the route pump → filter → heater → return to confirm proper flow, pressure control, and equipment protection.
This sequence guarantees debris is removed before sensitive heat exchangers, maintains designed pressure across each component, and simplifies isolation for service.
Check fittings, correct diameters, and valve orientation for unobstructed flow.
Install unions or unions-adjacent isolation valves to allow safe, efficient maintenance without draining the system.
Bypasses, pressure gauges, and multiport valve connections
Several key components—bypasses, pressure gauges, and multiport valves—must be coordinated to guarantee accurate pressure monitoring, controlled flow routing, and safe isolation of the filter, heater, and ancillary equipment.
Install gauges before and after the filter for differential reading; place bypasses around heaters for maintenance; connect multiport valve ports per manufacturer diagrams, adding union fittings for service access and ball valves to isolate each branch.
Backwash and waste line routing
Route backwash and waste lines to guarantee efficient removal of debris while protecting filtration, heater, and downstream equipment.
Position valves to isolate backwash flow, size PVC to handle peak discharge, and slope lines toward safe drainage.
Include union connections and air gaps to prevent contamination.
Install check valves to avoid reverse flow into heater or pool plumbing and secure fittings to prevent leaks.
Electrical Hookup and Safety Testing
The section covers wiring basics for single‑speed, variable‑speed, and two‑speed pumps, emphasizing correct conductor sizing and control connections.
It also outlines grounding and bonding requirements to meet code and prevent stray currents.
Finally, an initial power‑up checklist is provided, including motor rotation verification and safety interlock tests.
Wiring basics for single-speed, variable-speed, and two-speed pumps
When dealing with pool pump wiring—whether for single-speed, two-speed, or variable-speed models—understanding the electrical requirements, conduit and cable specifications, and proper grounding practices is essential before any connection is made.
Single-speed units need straightforward line-voltage feed and fuse/breaker protection.
Two-speed units require separate hots or a switchable control.
Variable-speed pumps need compatible motor controllers, correct phase, and labeled low-voltage control wiring.
Grounding and bonding requirements
Although often overlooked, proper grounding and bonding are critical to electrical safety around pools and must meet local codes and the National Electrical Code (NEC).
Grounding provides a low-resistance path for fault currents while bonding equalizes potential between metal components to prevent dangerous voltage gradients.
Bond all metal parts, equipment, and rebar to a common grounding conductor.
Use properly sized copper conductors, listed clamps, and record inspections.
Initial power-up checklist and motor rotation verification
Before energizing the pump, a concise checklist must be completed to guarantee safe startup and accurate motor rotation verification.
Verify correct wiring, secure conduit connections, and proper grounding.
Confirm pump housing and union fittings are tight and valves positioned for priming.
Energize briefly, observe rotation direction relative to motor arrow. If reversed, de-energize and swap two motor leads; retest.
Monitor for abnormal noise or heat.
Leak Testing and First Start Procedures
The technician begins by confirming airtight seals and priming the pump to establish proper suction.
Next, a systematic inspection of fittings, unions, and glued joints is performed while the system is pressurized to locate any leaks.
Finally, flow is adjusted and valves are bled and balanced to achieve ideal suction and stable operation.
Air-tight checks and prime procedures
Several brief but critical checks confirm a pool pump system is airtight and ready to prime: inspect all unions, threaded fittings, lid O-rings, and valve seals for correct seating and lubrication; tighten connections to manufacturer torque specifications without overtightening; guarantee the strainer pot is free of debris and the lid is flawless; and verify that all drain plugs and pressure gauges are properly installed and sealed.
Close return and skimmer valves, fill pump strainer with water, open air reliefs, then power on briefly to draw remaining air.
Observe consistent suction, no cavitation, steady pressure rise on the filter gauge, and dry external fittings.
If prime fails, power off, recheck seals and trapped air points before retrying.
How to check for and locate leaks (fittings, unions, glued joints)
A systematic leak check isolates common failure points—unions, threaded fittings, glued joints, and valve connections—by visually inspecting, hand-testing for movement, and applying simple pressure or vacuum tests to confirm integrity.
- Tighten unions and fittings; recheck under pressure.
- Dye or soapy-water test glued joints and seams.
- Run brief vacuum/suction checks for air ingress.
- Monitor around valves and hose clamps for slow seepage.
Adjusting flow, bleeds, and valve balancing for optimal suction
Having verified joints, unions, and valves for leaks, attention turns to adjusting flow, bleed points, and valve balancing to achieve ideal suction during initial startup.
The technician slowly opens inlet valves, vents air via pump bleeds until steady water flows, then fine-tunes multiport and diverter valves to balance circulation.
Monitor pressure, listen for cavitation, and re-check seals before normal operation.
Common Problems During Installation and How to Fix Them
The section outlines frequent installation issues and clear corrective actions.
It covers causes and remedies for no prime or loss of prime, strategies for locating and repairing persistent leaks, and steps to identify and resolve cavitation, excessive noise, and vibration.
Each problem is paired with practical troubleshooting and repair guidance.
No prime or loss of prime causes and fixes
Diagnose no-prime or lost-prime situations quickly to prevent pump overheating and interrupted circulation.
Inspect lid O-ring, strainer basket, and pump lid seal for cracks or debris.
Verify water level, skimmer valves open, and suction line airtightness; tighten fittings and replace damaged O-rings.
Purge air by loosening pump drain or priming through skimmer.
Restart and monitor for steady flow.
Persistent leaks and repair strategies
Address persistent leaks promptly to prevent equipment damage and water loss.
Inspect unions, threaded joints, gaskets, and pump seal housing for deterioration.
Tighten fittings evenly; replace cracked PVC, worn O-rings, or compromised gaskets.
Use proper primer and solvent for PVC joins; apply Teflon tape or pipe dope on threaded connections.
Pressure-test the system and retest after repairs to confirm leak elimination.
Cavitation, excessive noise, and vibration troubleshooting
Listen for abnormal sounds and inspect for movement: cavitation, excessive noise, and vibration typically indicate issues with suction, impeller damage, or misalignment.
Check strainer basket, skimmer valves, and suction lines for air leaks or clogs.
Verify impeller condition and shaft play.
Confirm motor mounts and base are secure and level.
Adjust pipe support and replace damaged components to restore smooth operation.
Maintenance Tips to Prevent Future Plumbing Issues
A regular inspection schedule, combined with proper winterizing, helps catch wear and freeze risks before they become leaks.
Guidance on replacing seals, unions, and worn fittings reduces downtime and prevents costly damage.
Adjusting pump run times and applying energy-saving practices preserves equipment life while lowering operating costs.
Routine inspection schedule and seasonal winterizing
Regular inspections, scheduled monthly during the swim season and before shutdown, help catch wear, leaks, and pressure or flow anomalies in a pool’s plumbing system.
Inspect pumps, filters, valves, visible fittings, and hose connections; record readings and abnormalities.
Before winter, drain low points, relieve pressure, secure covers, and protect exposed equipment from freezing.
Retain documented findings for trend tracking and timely repairs.
How to replace seals, unions, and worn fittings
Begin by shutting off power to the pump and relieving system pressure to guarantee a safe working environment; then identify the damaged seal, union, or fitting by inspecting for leaks, cracks, stiffness, or visible wear.
Drain localized water, disassemble unions, remove old o-rings and seals, clean mating surfaces, fit correct replacement parts, lubricate o-rings with approved silicone, reassemble and torque to manufacturer specs.
Optimizing pump run times and energy-saving tips
With seals and fittings replaced and the system reassembled, attention shifts to optimizing pump run times and reducing energy use to prevent further plumbing wear.
Recommend running the pump during off-peak hours, using a timer or variable-speed drive, balancing circulation needs with filtration efficiency, and monitoring pressure and flow.
Regular inspections and cleaning reduce resistance, lowering energy consumption and prolonging component life.
Cost Estimates, Timeframes, and When to Call a Pro
A brief cost breakdown outlines typical DIY expenses for fittings, pipe, sealant, and tools versus contractor rates for labor and permits.
An estimated timeline notes that simple replacements can take a few hours while full replumbs may require a day or more and intermediate plumbing skills.
Clear signs that a job exceeds DIY ability—persistent leaks, complex piping runs, electrical work, or required permits—should prompt questions for a contractor about licensing, insurance, references, and warranty.
Typical DIY cost breakdown
Budgeting for a DIY pool pump plumbing project hinges on three clear elements: parts, time, and the complexity of existing plumbing. Typical material costs: pump, PVC, fittings, glue, and sealant; modest tools may be needed. Contingency for unexpected repairs is wise. When complexity or electrical work exceeds comfort, hire a licensed pro.
| Item | Typical Cost |
|---|---|
| Parts | $150–$600 |
| Tools/Extras | $30–$200 |
Estimated project duration and skill level required
After outlining typical costs, attention turns to how long the plumbing work will take and what skill level is needed to complete it safely and efficiently.
Most straightforward pump installations take 2–6 hours for someone comfortable with basic plumbing and electrical safety.
Complex layouts, retrofit jobs, or permit work extend time and require intermediate to advanced skills.
Allow extra time for troubleshooting and curing adhesives.
Signs the job is beyond DIY and questions to ask a contractor
When should a homeowner stop and call a professional? Complex wiring, damaged suction lines, persistent leaks, permit requirements, or unsure troubleshooting indicate hiring a pro.
Ask contractors for licensing, insurance, written estimates, scope and timeline, warranty details, reference contacts, and permit handling.
Compare bids, verify local code familiarity, and confirm clear communication before approving work to avoid cost overruns and safety risks.
Quick Reference: Step Checklist for a Safe, Leak-Free Installation
A concise step checklist helps guarantee a safe, leak-free pool pump installation by organizing key tasks into a logical sequence—from site preparation and electrical isolation to final pressure testing—so nothing critical is missed.
- Verify site, mount pump, secure plumbing.
- Shut power, install correct wiring and conduit.
- Glue fittings, test joints, prime pump.
- Perform pressure test, inspect for leaks, restore power and monitor operation.
Conclusion
After following the meticulous, supposedly foolproof steps, the reader will now possess a perfectly plumbed pump—unless reality intervenes. Leaks, stubborn fittings, and the occasional misplaced wrench remain loyal companions, ensuring humility and character. Yet with patience, proper parts, and routine checks, triumph over drips is inevitable. In short: the guide promises mastery; the universe supplies tests. Both outcomes are useful, and both keep poolside stories entertaining.